Kenmore 580.73093 Owner's manual

Category
Split-system air conditioners
Type
Owner's manual
Owner's Manual
Manual del Propietario
®
THROUGH-THE-WALLAIRCONDITIONER
ACONDICIONADODEAIREA TRAVESDEPARED
Model, Modelo 580.73093 ,580.73104 ,580.77128 580.73144
Sears, Roebuck and Co., Hoffman Estates, IL 60179 U.S.A.
www.sears.com
TABLE OF CONTENTS ........................ 2
WARRANTY .............................................. 2
SAFETY ..................................................... 3
Important Safety Instructions...................... 3
ELECTRICAL REQUIREMENTS .......4
INSTALLATION ........................................ 5
InstaLlationRequirements ......................... 5
Installation................................................ 6
Procedure A ............................................. 7
Procedure B ............................................. 9
Procedure C ........................................... 11
OPERATION ........................................... 12
How and Why ......................................... 12
Normal Sounds ...................................... 12
Capacity and Running Time ................... 12
Features ................................................. 13
Using the Air Conditioner ....................... 13
Air Conditioner Features ........................ 14
MAINTENANCE .....................................16
Air Filter Cleaning ................................... 16
Air Conditioner Cleaning ........................ 16
How to Remove the Front Grille............. 16
How to Replace the Front Grille ............. 16
TROUBLESHOOTING .........................17
Before Calling for Service ...................... 17
ESPAI_IOL ................................................18
MASTER PROTECTION
AGREEMENTS ......................................35
SERVICE NUMBERS ............BackCover
FULL ONE YEAR WARRANTY ON
THROUGH-THE-WALL AIR CONDITIONER
For one year from the date of purchase, when this
air conditioner is operated and maintained for
normal room cooling according to instructions in this
owner's manual, Sears will repair this air
conditioner, free of charge, if defective in material or
workmanship.
WARRANTY SERVICE IS AVAILABLE BY
CONTACTING SEARS SERVICE AT
1-800-4-MY-HOME ®.
This warranty applies only while this product is in
use in the United States.
This warranty gives you specific legal rights, and
you may also have other rights which vary from
state to state.
Sears, Roebuck and Co., D/817WA,
Hoffman Estates, IL 60179 U.S.A.
-2-
IMPORTANT SAFETY INSTRUCTIONS
The safety instructions below will tell you how to use your room air conditioner to avoid harm to yourself or
damage to your ROOM AIR CONDITIONER.
FOR YOUR SAFETY
Do not store or use gasoline or other flammable
vapors and liquids in the vicinity of this or any other
appliance. Read product labels for flammability and
other warnings.
PREVENT ACCIDENTS
To reduce the risk of fire, electrical shock, or injury
to persons when using your air conditioner, follow
basic precautions, including the following:
Be sure the electrical service is adequate for the
model you have chosen.
If the air conditioner is to be installed in a window,
you will probably want to clean both sides of the
glass first. If the window is a triple-track type with a
screen panel included, you may want to remove
the screen completely before installation.
Be sure the air conditioner has been securely and
correctly installed according to the instructions in
this manual.
Save this manual and installation instructions for
possible future use in removing or reinstalling this
unit.
Use gloves when handling the air conditioner.
Be careful to avoid cuts from sharp metal fins on
front and rear coils.
ELECTRICAL INFORMATION
The complete electrical rating of your new room air
conditioner isstated on the serial plate. Refer tothe
rating when checking the electrical requirements.
Be sure the air conditioner is properly grounded.
To minimize shock and fire hazards, proper
grounding is important. The power cord is
equipped with a three-prong grounding plug for
protection against shock hazards.
Your air conditioner must be plugged into a
properly grounded wall receptacle. If the wall
receptacle you intend to use is not adequately
grounded or protected by a time delay fuse or
circuit breaker, have a qualified electrician install
the proper receptacle.
Do not run air conditioner with packing sheet of
the back of the sleeve, and packing corner and
blue tape of the air conditioner. This could result in
mechanical damage within the air conditioner.
Do not use an extension cord or an adapter
plug.
_ Avoid fire hazard or electric shock.
Do not use an extension cord or an adapter plug.
Do not remove any prong from the power cord.
Grounding type
Do not under any
circumstances cut,
remove, or bypass
the grounding prong
,-: from this plug.
P°Wwe_S_-p_lYng°rd
grounding plug
/
ENERGY SAVING IDEAS
• The capacity of the room air conditioner must fit
the room size for efficient and satisfactory
operation.
Install the room air conditioner on the shady side
of your home. A window that faces noah is best
because it is shaded most of the day.
Do not block air flow inside with blinds, curtains, or
furniture; or outside with shrubs, enclosures, or
other buildings.
Close the floor and wall registers and the fireplace
damper so cool air does not escape up the
chimney and into the duct work.
Keep blinds and drapes in other windows closed
during the sunniest part of the day.
Clean the air filter as recommended in the
MAINTENANCE section of this manual.
Proper insulation and weather stripping in your
home will help keep warm air out and cool air in.
External house shading with trees, plants or
awnings will help reduce the air conditioner's work
load.
Operate heat producing appliances such as
ranges, washers, dryers, and dishwashers during
the coolest part of the day.
-3-
OBSERVE ALL LOCAL CODES AND
ORDINANCES.
DO NOT, UNDER ANY CIRCUMSTANCES,
REMOVE THE POWER SUPPLY CORD
GROUND PRONG.
ELECTRICAL GROUND IS REQUIRED ON
THIS APPLIANCE.
A 208/230-volt and 115-volt 60 Hz, AC only,
15A fused and properly grounded electrical
supply is required. A time delay fuse or time
delay circuit breaker is recommended. Use a
dedicated circuit, serving only this appliance.
DO NOT USE AN EXTENSION CORD.
RECOMMENDED GROUNDING METHOD
For your personal safety, this appliance must
be grounded. This appliance has a power
supply cord with a 3-prong grounding plug. To
minimize possible shock hazard, the cord must
be plugged into a mating grounding type wall
receptacle and grounded in accordance with
the National Electrical Code (ANSI/NFPA 70)
latest edition and all local codes and
ordinances. If a mating wall receptacle is not
available, it is the personal responsibility and
obligation of the customer to have a properly
grounded 3-prong wall receptacle installed by a
qualified electrician.
_WARNING
Electrical Shock Hazard
Plug intoa grounded 3 prong outlet.
Do not remove ground prong.
Do not use an adapter.
Do not use an extension cord.
Failure to follow these instructions can result
in death, fire, or electrical shock.
Ground
prong
grounding
3-prong type wall
grounding _
plug _ receptacle
Power_
supply
cord
-4-
INSTALLATION REQUIREMENTS
If you use an existing wall sleeve, you should
measure its dimensions.
Install the new air conditioner according to these
installation instructions to achieve the best
performance. All wall sleeves used to mount the
new air conditioner must be in good structural
condition and have a rear grille to securely attach
the new air conditioner. (FIG. 1)
With the Kenmore folding sleeve, you can
maintain the best performance ofthe new air
conditioner,
19_V32"
(499 mm) 24-21/32''
[626 mm)
14.13/32"
(366mm}
8"(458mm)
Air Conditioner FIG. 1
ELECTRICAL SERVICE
Check your available electrical service. The power
supply available must be the same as that shown
on the unit nameplate (found on left side of cabinet).
All models are equipped with a 3-prong service plug
to provide proper service and safe positive
grounding. Do not change plug in any way. Do not
use an adapter plug. If your present wall outlet does
not match your plug, call a qualified electrician to
make the necessary corrections. SAVE CARTON
for storage and this OWNER'S MANUAL for future
reference. The carton is the best way to store unit
during winter or when not in use.
INSTALLATION HARDWARE
2 Sizeoptions
ITEM NAMEOF PARTS QITy
PLASTIC GRILLE 1
_) HORIZONTAL INSULATION STRIPS 2
AROUND INSULATION STRIPS 2
SUPPORT BLOCK 2
_) BAFFLE I
(_) TRIM FRAME 2
(_ SHIM 2
_) PLASTICNUTSANDWASHERSCREWS 4
To avoid risk of personal injury, property damage,
or product damage due to the weightof this
device and sharp edgesthat may be exposed:
Air conditioners covered in this manual pose an
excessiveweight hazard.Two ormore people
are needed to move and installthe unit.
To prevent injury or strain, use proper lifting and
carrying techniques when moving unit.
Carefullyinspect location whereair conditioner
will be installed.Be sureit will support the weight
ofthe unitover an extendedpedod oftime.
Handle air conditioner with care. Wear
protective gloves whenever lifting or carrying the
unit. AVOID the sharp metal fins of front and
rear coils.
Make sure air conditioner does notfall during
installation.
REQUIRED TOOLS:
Tight Fitting gloves
Standard screwdriver
Phillips screwdriver
Pliers
Sharp knife
3/8-inch open end
wrench or adjustable
wrench
1/4-inch hex socket
and ratchet
• Tape measure
Electric drill
1/4-inch drill bit
-5-
INSTALLATION
We strongly recommend the removal of the
old wall sleeve and the installationof a new
Kenmore folding Wall Sleeve.
If you decide to keepthe existing wall sleeve,
you have to redirect the louvers at the back of the
wall sleeve illustration. The use of pliers is
recommended. If you DO NOT redirect, yourun
the risk of poor performance or product failure.
This is notcovered under the terms of the
Kenmore warranty.
Pick a location which will allow the conditioned air to
blow into the area you want. Good installation with
special attention to the proper position of the unit will
lessen the chance that service will be needed.
Assemble the folding sleeve for this unit according to
the instructions provided.
ITEMS IN INSTALLATION HARDWARE
Youmaynotneedallpartsin thekit,Discardunused
_arts
_e
Horizontal Insulation Strips
Around Insulation Strips
Support Block
Baffle
Shim
Trim Frame
Washer Screw
Nuts(Plastic)
ITEM (inches)
283/4 X 161/2
13/8X 5/8X 273/16
13/8 X 13/8 x 273/16
13/8x 3/4x 611/2
13/8 x 13/8X 611/2
13j4 x 13/8x 45/16
14 x 41/2 X %
13x 1 X3/4
Qty.
1
1
1
1
1
2
1
2
2
4
4
HOW TO INSTALL
a identify the existing wall sleeve before installing
the unit from the listed below.
Brand Wall Sleeve Dimensions (inches
Width Height Depth
White-WestinghousE
Frigidaire 25-1/2 15-1/4 16, 17-1/2
Carrier (52F series) or 22
General Electric
iHotpoint 26 15-5/8 16-7/8
Whirlpool 25-7/8 16-1/2 17-1/8
or 23
Fedders/Emerson 27 16-3/4 16-3/4
or 19-3/4
Sears/Kenmore 25-7/8 15-17/32 16-23/32
Emerson/Fedders 26-3/4 15-3/4 15
Carrier (51S Series) 25-3/4 16-7/8 18-5/8
Friedrich 27 16-3/4 16-3/4
NOTE: All wall sleeves used to mount the new Air
Conditioner must be in sound structural condition
and have a rear grille that securely attaches to
sleeve, or rear flange that serves as a stop for the
Air Conditioner,
I_'_ Remove old air conditioner from existing wall
sleeve.
i_ Clean the interiorof an existing sleeve.
(Do not disturb seals.)
L_Wall sleeve must be securely fastened in wall
before installing the air conditioner. Use the
nails or screws through sleeve into wall, if
needed. Repaint sleeve if needed.
I_ Prepare the wall sleeve for installation of the
unit. If you plan to use your existing wall sleeve,
and it is not Kenmore, use procedure B or C
below.
Procedure
A
B
Brand
Sears/Kenmore
White-Westinghouse
Frigidaire Carrier
(52F series)
General Electric
/Hotpoint
Whirlpool
Carrier (51S series)
Fedders/Emerson
Depth(inches
16-23/32
16, 17-1/2
or 22
16-7/8
C
Emerson/Fedders
Friedrich
r_ Install unit intowall sleeve.
new
CAUTION: When installation is completed,
replacement unit MUST have a rearward slope as
shown.
UNIT Wall Sleeve
17-1/8 or 23
18-6/8
16-3/4
or 19-3/4
15
16-3/4
FRONI_ T-.............
1/4't U] ............
FIG. 2
-6-
PROCEDURE A
n If you are using a new Kenmore folding sleeve
with your unit, skip to step 3, Otherwise, install
the plastic grille from the kit. Cut the plastic
grille to 25-1/2" wide and 15-1/4" high. Place
the plastic grille to the inside of the wall sleeve
at the rear flange.
FIG. 3
_'_ Fasten the 4 washer screws to secure the grille
to the wall sleeve. If you need plastic nuts to
mount plastic grille to the inside of the wall
sleeve, there are plastic nuts in the installation
kit. The nuts are installed from the inside of the
sleeve and are pressed intothe square holes of
the rear flanges.
or
FIG. 4
_]_ Install the new unit into the wall sleeve.
_---! To assemble trim, snap the tab of each piece
into the slot of the other piece as shown below.
Slide trim over the front of the air conditioner
until trim is flush with sleeve as shown below.
I
I
Trim(2 ea)
Wall
FIG. 6
_J Remove the backing from the Horizontal
Insulation strip 13/ex 3/8x 273_1sand attach that
to the inside bottom of the sJeeve as shown
below. Remove the backing from the Around
Insulation strip 13_8x 3_4x 611/2and attach that
to the inside front of the sleeve as shown
below.
FIG. 5
Airconditioners covered inthismanualpose
an excessive weighthazard. Two or more
peopleare neededtomoveand installthe unit.
To preventin uryorstrain,useproperlifting
and carryng technques when movng unt.
When handlingthe air conditioner,be careful
to avoidcutsfrom sharpmetalfinson front and
rear coils.
Make sureair conditionerdoesnotfall during
removal.
-7-
PROCEDURE B
L1 Redirect the louvers at the back of the wall
sleeve to60 ° angle as shown in the FIG 7. The
use of pliers is recommended.
7 5,16"
\\k\\\\\\\\\\\\\\\\_
Rear Louvers
(Top View)
/_0 _
FIG. 7
_lf the wall sleeve already has a rear grille, skip
to step 4. If the wall sleeve does not have a rear
grille or Iouvered panel, install the plastic grille
from the kit. Cut the plastic grille to 25-1/2" wide
and 15-1/4" high. Place the plastic grille to the
inside of the wall sleeve at the rear flange.
Place the plastic grille
FIG. 8
_J_ Fasten the 4 washer screws to secure the grille
to the wall sleeve. If you need plastic nuts to
mount plastic grille to the inside of the wall
sleeve, there are plastic nuts in the installation
kit. The nuts are installed from the inside of the
sleeve and are pressed into the square holes of
the rear flanges.
]
Fasten the screws
FIG. 9
L_I Remove the backing from the Horizontal
Insolation strip 13/8x 5s8x 273/16and attach that
to the inside bottom of the sleeve as shown
below. Remove the backing from the Around
Insulation strip 13/8x 3/4x 611/2and attach that to
the inside front ol the sleeve as shown below.
FIG. lC
_"_ If the depth of your existing wall sleeve is less
than or equal to 18", skip to step 7. Otherwise,
cut the baffles and the support blocks according
to length "A" in the table below.
Depth"D" ofthe existing Length"A"
wallsleeve (inches) (inches)
18 <D<_18-% 3/4
18-%<D<_19-3/4 1-3/4
19-_/4<D_<22 4
Baffle
_._ FIG. 11
r_ Remove the backing from the support blocks
and attach them to the inside of the wall sleeve
as shown FIG 8. Slide the baffle into slots of the
support blocks.
Wall
Wall
Sleeve
_'_ Install the new unit into the wall sleeve.
FIG. 12
-8-
PROCEDURE B
_lTo assembletrim,snapthetabofeachpiece
intotheslotoftheotherpieceas shownbelow.
Slide trimoverthefrontoftheairconditioner
until trim is flushwithsleeve as shown below.
Wall
FIG. 13
Airconditioners coveredin this manual pose
anexcessive weighthazard. Two or more
peopleare neededtomoveand installtheunit.
To preventinjuryor strain,use properlifting
and carryingtechniqueswhen movingunit.
Whenhandlingthe air conditioner,be careful
toavoidcutsfrom sharpmetalfins on front and
rear coils.
Make sureair conditionerdoesnotfall during
removal.
-9-
PROCEDURE C
_1 Redirect the louvers at the back of the wall
sleeve to 60° angle as shown in the FIG 14.
The use of pliers is recommended.
6o_z_
13/16"
\\\\\\\\\\\\\\\\\\\_
Rear Louvers
(Top View)
/_0 °
FIG. 14
_lf the wall sleeve already has a rear grille, skip
to step 4. If the wall sleeve does not have a rear
grille or Iouvered panel, install the plastic grille
from the kit. Cut the plastic grille to 26-1/2" wide
and 15-1/2" high. Place the plastic grille to the
inside of the wall sleeve at the rear flange.
Place the plastic grille
FIG. 15
_1 Fasten the 4 washer screws to secure the grille
to the wall sleeve. If you need plastic nuts to
mount plastic grille to the inside of the wall
sleeve, there are plastic nuts in the installation
kit. The nuts are installed from the inside of the
sleeve and are pressed into the square holes of
the rear flanges.
_.1._Remove the backing from the Horizontal
Insulation strip 13/8x 13/8x 273116and attach that
to the inside bottom of the sleeve as shown
below. Remove the backing from the Around
Insulation strip 13/8x 13/8x 61_/2and attach that
to the inside front of the sleeve as shown below.
FIG. 17
_-"_ If the depth of your existing sleeve is less than
or equal to 18", skip to step 7. Otherwise, cut
the baffles and the support blocks according to
Length "A" in the table below.
Depth"D" ofthe existing Length"A"
wallsleeve (inches) (inches)
18 <D_<18-% 3/4
t8-% <D_<19-3/4 1-3/4
19-3/4<D_<22 4
A_
- upport
Block
4 Baffle
A.i FIG. 18
r_ Remove the backing from the support blocks
and attach them to the inside of the wall sleeve
as shown FIG 19. Slide the baffle into slots of
the support blocks
Nail _ ;,._.
|, ,_.
Vail --
eve _ : ,
=
{
÷,
Support"4:
_"_i_ BLOCK
!N i:
' FIG. 19
Fasten the screws FIG. 16
-10-
PROCEDURE C
Remove the backing from the 13" shim strips
and attach them as shown below in Fig. 21,
The higher portion of shim is to be placed in
front of the rib on the base of wall sleeve.
,h,ghII--
lI 3/4" High
FIG. 20
FIG, 21
ir_ install the new unit into the wall sleeve
_To assemble trim, snap the tab of each piece
into the slot of the other piece as shown below.
Slide trim over the front of the air conditioner
until trim is flush with sleeve as shown below.
I
Trim (2 ea)
Wall
FIG. 22
Air conditioners coveredin this manualpose
an excessive weight hazard. Two ormore
people are needed to move and install the unit.
To prevent injury or strain, use proper lifting
and carrying techniques when moving unit.
When handling the air conditioner, be careful
to avoid cuts from sharp metal fins on front and
rear coils.
Make sure air conditioner does not fall during
removal.
-11 -
HOW AND WHY
Your room air conditioner provides the following
functions to make hot weather living more
comfortable:
Cools and circulates room air.
Lowers humidity by removing excess moisture.
Filters out summertime dust, dirt, and some
airborne impurities.
The air conditioner performs these functions by
drawing room air through a filter which traps dust
and dirt particles. The air then passes over a
cooling coil which refrigerates the air and removes
excess moisture. The same air is then returned to
the room- cooler, drier, and cleaner. Moisture
removed from the room air is carried to the outside
and evaporated.
Your air conditioner is designed to be easy to
operate and to provide plenty of cooling power.
NORMAL SOUNDS FIG.23
Aside from the regular fan motor and compressor
sounds coming from your air conditioner, you will
once in a while hear a pinging sound. This is the
result of moisture being picked up from the air in the
room and thrown against the air conditioner's fan.
This is normal and should not be cause for concern.
Also, do not be alarmed if you hear a slight hissing or
gurgling sound coming from your air conditioner after
it is off. These are normal coolant noises.
CAPACITY AND RUNNING TIME
Proper unitsize is important in deciding the desired
comfort for the area you want to cool. The proper
size isdetermined by the number of square feet in
the area to be cooled.
Whenever the heat or humidity load is above normal
the air conditioner must run longer and more often
to keep the desired temperature you have selected.
Under heavy heat load conditions the air conditioner
may need to run constantly to keep the temperature
you want.
At times using the MED FAN setting to circulate the
room air may make it comfortable even though you
do not have the air conditioner set to cool the air.
This will decrease your cost of use.
Fan
Unit Vibration
The unitmay vibrate
and make noise
because of poor wall
or window
construction.
You may hear air
movement from the
fan.
Compressor
The modern high
efficiency compressor
may have a high pitched
humor pulsating noise
that cycles on and off.
Con
You may hear
droplets of water
hitting the condenser,
causing a pinging or
clicking sound.
FIG. 23
-12-
FEATURES
THE UNIT
1 5 736284
1. CABINET
2. HORIZONTAL AIR DEFLECTOR
(Vertical Louver)
3. VERTICAL AIR DEFLECTOR
(Horizontal Louver)
4. AIR DISCHARGE
5. FRONT GRILLE
6. INLET GRILLE (Air Intake)
7. AIR FILTER
8. VENT CONTROL
FIG. 24
USING THE AIR CONDITIONER
_To reduce the risk of fire, electric
shock, or injury to persons, read the important
SAFETY instructions section before operating this
appliance.
To begin operating the air conditioner after
installation, follow these steps:
1. Plug in the air conditioner. (To prevent electrical
hazards, do not use an extension cord or an
adapter plug.)
2. Set the TEMP control to the coolest setting.
3. Set the MODE control at the highest COOL level.
4. Adjust the louvers for comfortable air flow.
5. Once the room has cooled, adjust the TEMP and
MODE control to the setting you find most
comfortable.
NOTE : If the air conditioner is turned off, wait 3
minutes before restarting. This allows pressure
inside the compressor to equalize. Failure to wait 3
minutes before restarting may cause inefficient
operation.
If you move the TEMP control to a warmer, then
immediately back to a cooler setting, the unit will
shut off. Wait 3 minutes before restarting.
Refer to the AIR CONDITIONER FEATURES
section for other settings.
VENT CONTROL
The Vent Control allows the air conditioner to either
recimulate inside air (CLOSE) or exhaust air to the
outside (OPEN). (FIG. 25)
The CLOSE position is used when maximum
cooling is desired. It may also be used for air
recimulation without cooling when the air
conditioner isset in the FAN position.
The OPEN position removes stale air from the
room and exhausts it to the outside. Fresh air is
drawn into the room through your home's normal
air passages.
The OPEN or CLOSE position can be used with
any fan selection.
PULL OPEN / PUSH CLOSE
FIG. 25
-13-
DISPLAY
Cool
Energy
Saver
Fan
Timer TEMP O
(-TIMER
- SHUT-OFFTIME
Youwillusuallyuseshut-offtimewhileyousleep.
Withunitrunning,useTLmertoset numberofhours
untilshut-off.
Foryoursleepingcomfort,onceTime isset,the
Temperaturesettingwillraise2°F after30 rain.,
and 2°F afteranother30 min.
EverytimeyoupushTimerbutton,itadvancesthe
Timersettingas follows:1 Hour_ 2 Hours.....
12 Hoursmaximum.
- START TIME
With unit notrunning, use Timer to set numberof
hours before until starts.
Everytime you pushTimer button, it advancesthe
Timer settingas follows: 1 Hour-, 2 Hours -, .....
12 Hours maximum.
REMOTE CONTROL SIGNAL
RECEIVER
JRE SETTING
Usethisbuttontoautomaticallycontrolthe
temperatureoftheroom.
Thetemperaturecanbesetwithina range
of60°F to86°F byincrementsofI°F.
POWER
To turntheairconditionerON, pushthis
button.
To rumtheairconditionerOFF, pushthe
buttonagain.
Thisbuttontakespriorityoveranyother
button.
Whenyoufirst turniton,the unitisin
coolmode,Highfanspeed,Temperature
settingat 72°F.
-- FAN SPEED
Everytimeyoupushthis button,it
advancesthesettingas follows:
{High-_Low-_Med-_High}
MODE
- Everytimeyou pushthisbutton,itwillshiftamongCOOL, ENERGY SAVER and FAN.
- ENERGY SAVER:
The fan stopswhenthe compressorstopscooling. Approximatelyevery3 minutesthefan willtumonand
theunitwillchecktheroomair todetermineifcoolingisneeded.
_d after an electrical power failure, theunit willbegin to runat its lastsetting. 1
-14-
HORIZONTAL AIR-DIRECTION
ADJUSTMENT
The horizontal air direction is adjusted by moving
vertical louver.
The vertical louver control levers are located in the
right and left side of the air discharge.
FIG. 26
VERTICAL AIR-DIRECTION ADJUSTMENT
• The vertical air direCtion is adjusted by moving the
horizontal louvers,
FIG. 27
-15-
AIR FILTER CLEANING
The Air Filter will become dirty as it removes dust
from the inside air. It should be washed at least
every 2 weeks. If the Air Filter remains full of dust,
the air flow will decrease and the cooling capacity
will be reduced, possibly damaging the unit.
Pull the inlet grille forward and pull out the air filter.
(FIG. 28)
Wash the Air Filter under the faucet with warm
water. Be sure to shake off all the water before
replacing the filter. (FIG. 29)
FIG. 28 FIG. 29
AIR CONDITIONER CLEANING
Clean the front grille and inlet grille by wiping with a
cloth dampened in a mild detergent solution.
The cabinet may be washed with mild soap or
detergent and lukewarm water, then polished with
liquid appliance wax.
To ensure continued peak efficiency, the condenser
coils (outdoor side of the unit) should be checked
periodically and cleaned if they become clogged
with soot or dirt from the atmosphere. Brush or
vacuum exterior coils to remove debris from fins.
_FIG. 30
HOW TO REMOVE THE FRONT
GRILLE
Open the inlet grille.
Remove the screw securing the Front Grille.
Push the grille up from the bottom and pull the top
of the grille away from the case to lift the top tabs
out of their slots.
FIG. 31
HOW TO REPLACE THE
FRONT GRILLE
Attach the front grille to the cabinet by inserting the
tabs on the grille into the slots on the front of the
cabinet. Push the grille in until it snaps into place.
FIG. 32
-16-
BEFORE CALLING FOR SERVICE
Check the following listto be sure a service call is really necessary. A quick reference to this manual may
help you avoid an unneeded service call.
THE AIR CONDITIONER WILL NOT OPERATE
Check if... Then...
Wall plug disconnected.
House fuse blown or circuit breaker tdpped.
Power is OFF.
Unitwasturnedoffandthenontooquickly.
TEMPControlsetwannerthanroomtemperature.
Push plug firmly into walloutlet.
Replace fuse withtime delay type or reset circuit breaker.
Push the powerbutton,
Set unit off and wait 3 minutes before restarting,
Set TEMP Control to a lower number,
AIR FROM UNIT DOES NOT FEEL COLD ENOUGH.
Check if... Then...
FANSPEEDsetatLOW.
TEMPControlsettoowarm.
Roomtemperaturebelow70°F(21°C).
Temperaturesensingtubetouchingevaporatorcoil,
locatedbehindfrontgrille.
PushFANSPEEDbuttontosetatHL
SetTEMPControlto alowertemperature.
Coolingmaynotoccuruntilroomtemperaturerisesabove70°F(21°C),
Straightentubeawayfromevaporatorcoil.
THEAIRCONDn'IONERCOOUNG,BUTROOMISTOOWARM-ICEFORMINGONCOOUNGCOILBEHINDINLETGRILLE.
Check if... Then...
Outdoortemperaturebelow70°F(21°C). Todefrostthe coil,settheMODEtoFAN,FANspeedtoHigh.
Airfiltermaybedi_. Cleanairfilter.RefertoMaintenancesectionofowner'smanual.
TEMPControlsettoolow. Todefrostthecoil,settheMODEtoCool,Fanspeedtohigh,andthe
Tempcontroltoa highertemperature.
THEAIRCONDITIONERCOOUNG,BUTROOMISTOOWARM
Check if...
Dirtyairfilter- airrestricted.
TEMPControlsettoowarm.
Frontofunitisblockedbydrapes,blinds,furniture,etc.
Afrdistributieais restricted.
Doors,windows,registers,etc.open.Coldairescapes.
Unitrecentlyturnedonin hotream.
Then.,.
Cleanairfiltar.RefertoMaintenancesectionofowner'smanual.
SetTEMPControltoalowertemperature.
Clearblockageinfrontofunit
Close doors, windows,recjistere,etc.
Allowadditionaltimetoremovestoredheatfromwalls,ceiling,floor,andfurniture.
THE AIR CONDITIONER TURNS ON AND OFF RAPIDLY,
Check if.., Then...
! Outsidetemperatureisextramalyhot I SetFANSPEEDonHItobringairpastcoolingcoilsfaster. I
NOISE WHEN UNIT IS COOLING.
Check If... Then,..
I Soundoffanhittingwater- fromthemoistureremovalsystem.ThisisnormalwhenhumidityishighClosedoom,windows,andregistera
Windowvibration-poornstallatJon. Referoinstalfaioninstructionsorcheckwithnstaler.
WATER DRIPPING INSIDE ROOM WHEN UNIT IS COOLING.
Check if,.. Then...
t Theairoonditiooerisimproperlyinstalled. I 331tairconditionerslightlytotheoutaidetoallowwaterdrainage.Referto
installationnstructionsor checkwithinstaller.
WATER DRIPPING OUTSIDE WHEN UNIT IS COOLING.
Check if... Then...
I Theunitisremovinglargequantitiesofmoisture
fromhumidroom. I Thisisoormaiduringexcessivelyhureiddays" t
-17-
|NDICE ......................................................18
GARANT[A ..............................................18
SEGURIDAD ...........................................19
Instruccionesimportantesde seguridad .-.19
REQUISITOS ELI_CTRICOS .............2o
INSTALAClON ........................................21
Requisitos de instalaci6n ....................... 21
Instalacibn .............................................. 22
Procedimiento A..................................... 23
Procedimiento B..................................... 24
Procedimiento C..................................... 26
FUNCIONAMIENTO ............................. 28
Cbmo y pot que...................................... 28
Sonidos normales .................................. 28
Capacidady tiempode funcionamiento ....28
Caracterfsticas ....................................... 29
Uso del aparato de aire acondicionado,,-,.29
Caracterfsticas del aparato de aire
acondicionado ........................................ 30
MANTENIMIENTO ................................ 32
Limpieza del filtro de aire ....................... 32
Limpieza del aparato de aire
acondicionado ........................................ 32
C6mo extraer la rejilta frontal ................. 32
C6mo volver a colocar la rejitlafrontal ...32
RESOLUCI(_N DE PROBLEMAS....33
Antes de Ilamar al servicio t_cnico .........33
ACUERDOS DE PROTECCION
ESPECIALIZADA ..................................35
NUMEROS DE SERVIClO
TECNICO .................................. Contraportada
GARANTIAC0MPLETA DE UN AN0 DEL
APARAT0DE AIREACONDICl0NADO DE
PARED
Duranteunafio,acontarapartirdela fechadecompra,cuando
esteaparatodeaireacondicionadofuncioneparael enfnamiento
normaldeunahabitaci6nyrecibamantenimiento,tedoello
seg0nlasinstruccionesde esteManualdelpropietario,Sears
reparar_esteaparatodeaireacondicionado,deformagratuita,si
tuvieraalg0ndefectodefabricaci6nomateriales,
EL SERVIClODEGARANT[APUEDE
CONTACTARSEENELSERVIClO DEATENCI6N
AL CLIENTEDESEARS EN EL1-800-4-MY-HOME®,
Estagarantfaseaplicas61oduranteelusodeestepreductoen
losEstadosUnidos.
Estagarantiale concedederechoslegalesespecificosy puede
queustedtengaotrosderechosadicionalesquevarianseg0nel
estado.
Sears,RoebuckandCo., D/817WA,Hoffman
Estates,IL 60179 EE.UU.
-18-
INSTRUCCIONES IMPORTANTES DE SEGURIDAD
Las instrucciones de seguriclad que se indican abajo le dir_.n come utilizar su aparato de aire acondicionado
para evitar dafios a si mismo y daSos a su APARATO DE AIRE ACONDIClONADO.
PARA SU SEGURIDAD
No almacone ni utilicegasolina ni otros liquidos ni gases
inflamables cerca de este uotro electredom6stieo. Lea
las etiquetas de los productos para oonocer su
inflamabilidad y otras advertencias.
EVITAR ACCIDENTES
Parareducirel riesgode inoendio,electrocuci6noheridasa
personasal utilizarsuaparatode aireacondicionado,siga
las precaucionesbasicas,incluyendolas siguientes:
• Aseg0resede queel servicioelectricoesadecuadopara el
modeloqueha escogido.
Si elaire acondicionadova a instalarseen unaventana,
serfaconvenientequelimpiara primeroamboslades del
oristal.Si la ventanatienetresguias de deslizamiento,con
un panelpantallaincluido, puedeque deseeextraer
comple'_mentela pantallaantesde la instalaci6n.
• AsegSresede queel aparatode aireacondicionadose ha
instalaclode modeseguroy correctosegSnlas
instruccionesen esteManual.Guardeestemanualy las
instruccionesde instalacionpara suposibleusefuturepara
extraero volvera instalarestauniclad.
Utiliceguantescuandomanejeel aparatode aire
acondicionado.Presteatenci6npara evitarcortesde las
afiladasaletasde metalen las bobinasfrontaly posterior.
_ INFORMACI6N ELI_CTRICA
Elvalornominalel_otricocompletede sunuevoaparatodeaire
acondicionadoseespecificaonsu etiquetaidentificativa.
Consulteel valornominalalcomprobarlosrequisiteselSctricos.
• Asegtiresedequeel aparatode aire acondicionadotiene
unatomacletierraadecuada.Parareduciral minimoel
riesgode electrocuci6ny de incendio,esimportantetener
unatomade tierraadecuada.Elcablede alimentacibnesta
equipadoconun enchufede tres clavijascontomaa tierra
para protegercontra electrocuci6n.
• Su aparatodeaireacondicionadodebeestarenchufadoa
unenchufedeparedcon unatomadetierra adecuada.Si
el enchule quequiereutilizarno tieoeunatomade tierra
adecuadao noest_ protegidoperunfusible temporizadoo
un interrupterdecorriente, hagaqueuneleotricista
cualificadoinstaleel enchufeapropiado.
No hagafuncionarelaparatode aireaconclicionadocon la
I_minade embalajeen la parleposteriordelalojamientoo
con laointaazuly las esquinerasdelaparatode aire
acondicionado.Esto podriatener comeconsecuenciala
produccionde daSosmecanicosal aparatodeaire
acondioionado.
• NOutilicean cableextensor niun enchufeadaptador.
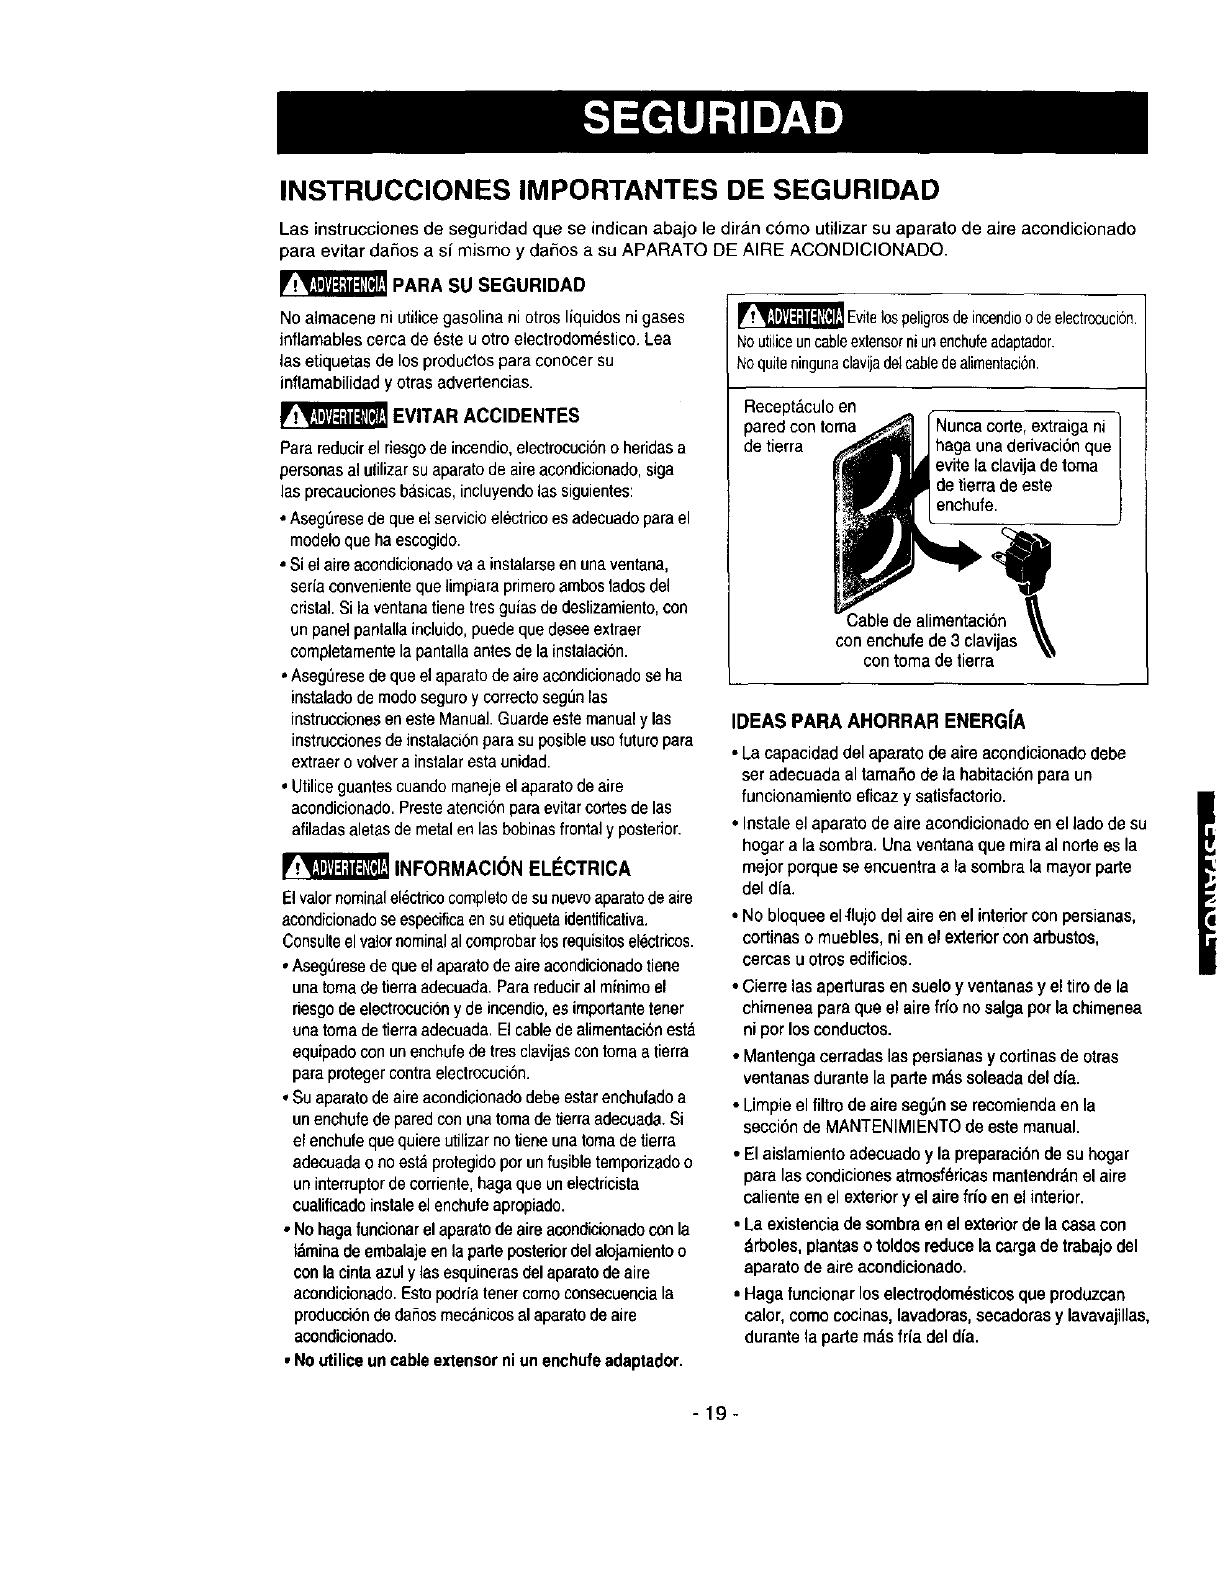
_ Evitelospeligrosdeincendioodeelectrocuci6n.
Noutilicauncableextensorniunenchufeadaptador.
Noquiteningunaclavijadelcabledealimentaci6n.
Recept&culoen
paredcon toma Nuncacorte, extraiga ni]
de tierra haga unaderivaci6n que /
evite laclavija de toma [
de tierrade este
enchufe, j
IDEAS PARAAHORRAR ENERG|A
La capacidad del aparatode aire acondicionadodebe
set adecuada al tamafio de la habitaci6n para un
funcionamiento eficaz y satisfaetorio.
• Instale el aparato de aireacondicionado en el lade de su
hogar a la sombra. Una ventana que miraal norte es la
mejor porque se encuentra a lasembra la mayor porte
del dfa.
No bloquee el#lujodel aire en el interior con persianas,
cortinas o muebles, ni en elexterior con arbustos,
cercas u otros edificios.
• Cierre las aperturas en sueloy ventanasy el tire de la
chimenea para que el aire frfo no salga per la ohimenea
ni per los conductos.
Mantenga eerradaslas persianasy cortinas de otras
ventanas durante la parte rodssoleada del dia.
Limpieel filtro de aire seg_n se recomienda en la
secci6n de MANTENIMIENTO de este manual.
El aislamiento aclecuado y lapreparaci6n de suhogar
para las condiciones atmosf_.rieasmantendr_n el aire
caliente en el exterior y el aire fifo en el interior.
• La existencia de sombra en el exteriorde la casa con
_rboles, plantas o toldos reduce la carga de trabajo del
aparato de aire acondicionado.
• Haga funcionar los electrodom_sticos que produzcan
calor, come cocinas, lavadoras, secadoras y lavavajillas,
durante la parte m_s fria del dfa.
-19-
CUMPLA TODAS LAS NORMAS Y CODIGOS
LOCALES
NUNCA ELIMINE LA CLAVIJA DE TOMA DE
TIERRA DEL CABLE DE ALIMENTACION.
LA TOMA DE TIERRA ELECTRICA EN ESTE
ELECTRODOMI_STICO ES NECESARIA.
Se necesita una alimentaci6n electrica de
208/230-volt y 115-volt 60 Hz, s6io de CA, con
fusible de 15A y con una toma de tierra
adecuada. Se recomienda tambi_n que haya
un fusible o interruptor temporizado. Utilice un
circuito electrico dedicado s61oa este aparato.
NO UTILICE UN CABLE EXTENSOR.
MI=TODO RECOMENDADO DE TOMA DE
TIERRA
Para su seguridad personal, este aparato debe
tener una toma de tierra. Este aparato tiene un
cable de alimentaci6n con un enchufe de 3
clavijas, una de elias para la toma de tierra.
Para reducir a[ m{nimo el riesgo de
electrocuci6n, el cable debe estar enchufado
en un recept&culo de pared con toma de tierra
de acuerdo con la 61tima edici6n del C6digo
nacional sobre electricidad (ANSI/NFPA 70) y
siguiendo todas las normas y directrices
locales. Si no estd disponible un recept&culo
de pared, es responsabilidad y obligaci6n
personal del cliente hacer que un electricista
cualificado instale un recept_.culo en la pared
de 3 clavijas con una toma de tierra adecuada.
A ADVERTENCIA
Riesgo de electrocuci6n
Enchufe en una toma de 3 clavijas con toma
de tierra. No elimine la clavija de toma de
tierra. No utilice un adaptador.
No utilice un cable extensor.
No seguir estas instrucciones puede tener
como consecuencia la muerte, un incendio o
electrocuci6n.
alimentaci6n con
clavija dotada de
conexi6n a tierra
de 3 terminales.
Toma de corriente
de pared con
conexi6n a tierra.
_rminal de
r conexi6n a tierra.
Bajo ninguna
circunstancia corte, quite o
evite el uso de la conexion
a tierra de esta clavija.
- 20 -
  • Page 1 1
  • Page 2 2
  • Page 3 3
  • Page 4 4
  • Page 5 5
  • Page 6 6
  • Page 7 7
  • Page 8 8
  • Page 9 9
  • Page 10 10
  • Page 11 11
  • Page 12 12
  • Page 13 13
  • Page 14 14
  • Page 15 15
  • Page 16 16
  • Page 17 17
  • Page 18 18
  • Page 19 19
  • Page 20 20
  • Page 21 21
  • Page 22 22
  • Page 23 23
  • Page 24 24
  • Page 25 25
  • Page 26 26
  • Page 27 27
  • Page 28 28
  • Page 29 29
  • Page 30 30
  • Page 31 31
  • Page 32 32
  • Page 33 33
  • Page 34 34
  • Page 35 35
  • Page 36 36

Kenmore 580.73093 Owner's manual

Category
Split-system air conditioners
Type
Owner's manual

Ask a question and I''ll find the answer in the document

Finding information in a document is now easier with AI

in other languages