SCOTT DRX 2002 User manual

Category
DVD players
Type
User manual

SCOTT DRX 2002 is a versatile RDS car radio with a motorized 7-inch touchscreen TFT LCD display capable of playing DVDs, VCDs, CDs, MP3s, and various files from USB devices, SD/MMC cards, and auxiliary inputs. It features AM/FM stereo, 30 station memory, and advanced playback functions, including music power of 160 watts and customizable system and DVD settings.

SCOTT DRX 2002 is a versatile RDS car radio with a motorized 7-inch touchscreen TFT LCD display capable of playing DVDs, VCDs, CDs, MP3s, and various files from USB devices, SD/MMC cards, and auxiliary inputs. It features AM/FM stereo, 30 station memory, and advanced playback functions, including music power of 160 watts and customizable system and DVD settings.

RDS CAR RADIO WITH DVD/MPEG4/VCD/CD/MP3/USB/SD PLAYER
AM/FM STEREO
RDS FUNCTION (AF/TP/TA/PTY)
30 STATION MEMORY
MOTORIZED 7” TOUCH PANEL TFT LCD
MUSIC POWER 160 WATTS
DRX 2002
USER MANUAL AND INSTALLATION INSTRUCTIONS
GB - 1
Contents ACCessoRIes
Mounting sleeve
(already mounted
on the unit)
Mounting bolt
Outer trim frame
Brackets (2x)
(already mounted
on the unit)
ISO wire connector
Bolt rubber
Screws: M5x6(4x)
M2,6x5 (4x)
(already mounted
on the unit)
Remote control User manual
ACCESSORIES .................................................................................... 1
SAFETY PRECAUTIONS ..................................................................... 2
INSTALLATION ..................................................................................3-5
MAINTENANCE .................................................................................... 6
PANEL CONTROL ................................................................................7
REMOTE CONTROL ............................................................................ 8
BASIC OPERATION ............................................................................. 9
TUNER ................................................................................................10
DVD/VCD PLAYBACK ........................................................................ 11
CD PLAYBACK ................................................................................... 12
MP3/MPEG4 FILES/JPEG FILES ON A DISC/USB
DEVICE OR SD/MMC CARD .........................................................12-13
ADVANCED PLAYBACK FUNCTIONS .............................................. 14
AUX IN FUNCTION ............................................................................. 14
SYSTEM SETUP ...........................................................................15-16
DVD SETUP ...................................................................................17-19
INFORMATION ON DISC COMPATIBILITY ....................................... 20
TROUBLESHOOTING GUIDE ............................................................ 21
TECHNICAL SPECIFICATIONS .........................................................22
GB - 2
sAfety PReCAUtIons
1. Be sure to connect the color-coded leads according to the diagram. Incorrect connections may cause the unit to malfunction or damage the vehicle’s
electrical system.
2. Be sure to observe the correct polarity when connecting the speaker leads to the speaker terminals. Never connect the left and right speaker cables
to each other or to a metal part of the vehicle.
3. Make sure all the connections are correct before turning on your unit.
4. Whenreplacingthefuse(s),thereplacementmustbeofthesameamperageindicatedinthetechnicalspecications.
5. Donotblockventilationopenings.Blockingthemwillcauseheattobuildupinsidetheunitandmayresultinre.
6. Donotusetheunitfortoolongafterthecarhasstoppedinordertopreventthecarbatteryfromgoingat.
7. Do not expose the unit to very high temperatures.
8. Do not use the unit in extreme temperatures, and avoid exposure to humidity and direct sunlight. Ensure that that the temperature inside the vehicle
is between –10°C and +60°C.
9. In order to avoid interference, stay away from the unit when using a mobile phone.
10. Do not expose the remote control to high temperatures or direct sunlight as this may cause it to malfunction.
If at any time in the future you should need to dispose of this product please note that waste electrical products should not be disposed of with
household waste. Please recycle where facilities exist. Check with your Local Authority or retailer for recycling advice (Waste Electrical and
Electronic Equipment Directive).
GB - 3
Wiring Diagram
USB SLOT
Fuse 15A
ISO Connector
Green
with
Black
Stripe
White
with
Black
Stripe
Gray
with
Black
Stripe
Purple
with
Black
Stripe
CAMERA IN (Yellow)
VIDEO IN (Yellow)
VIDEO OUT 2 (Yellow)
REAR AUDIO OUT-R (Red)
REAR AUDIO OUT-L (White)
AUDIO IN-L (White)
AUDIO IN-R (Red)
VIDEO OUT 1 (Yellow)
Antenna
WIRE TO ACTIVATE REVERSING
CAMERA (Pink)
+
PARKING BRAKE WIRE(Green) -
InstALLAtIon
GB - 4
Connections
ManyvehiclesarealreadyttedwithISOconnectorsbehindthedashboard,includingalltheelectricalcablingforinstallingacarradio.Insuchcases,
theconnectionsttedtothevehiclecanbedirectlypluggedintothecar radioconnectors.Ifyourcarisnotalreadyttedwith theseconnectors,we
strongly advise you to obtain an ISO connector from a specialist shop or from your car dealership. Once you have obtained the connector, you will only
need to connect your loudspeakers and the power supply to the ISO cable following the connection instructions below.
InstALLAtIon
Location
Function
Connector A Connector B
1 Rear Right (+) - Purple
2 Rear Right (-) - Purple with Black Stripe
3 Front Right (+) - Gray
4 Battery 12V(+)/yellow Front Right (-) - Gray with Black Stripe
5 Antenna/Amp control/blue Front Left(+) - White
6 Front Left(-) - White with Black Stripe
7 ACC+/red Rear Left (+) - Green
8 Ground/black Rear Left (-) - Green with Black Stripe
Note: Incorrect wiring or operation will void the warranty of this unit.
The manufacturer cannot be held responsible for any malfunctions
if the connections are not made properly.
GB - 5
Installation procedure
1. If relevant, remove any other audio system from the car.
2. After unscrewing the four car radio attachment screws, insert the mounting sleeve into the
dashboard.Fixitrmlyinplacebyfoldingdownthemetaltabs.
3. If this has not already been done, attach the brackets (2x) to the car radio.
Inordertodothis,usethesuppliedatheadscrews(M5x6mm).
4. Perform the required electrical connections:
- If necessary, connect the hand brake wire to your hand brake contact in order to activate the
video display when playing a DVD (when the car is parked).
- Connect the wire that activates the reversing camera to the reversing sensor or to a reversing
light. If necessary, connect your reversing camera to the car radio’s reversing camera input using
a video cable (not supplied).
- Ensure that you now place the USB cable located at the back of the unit in such a way that it
comes out of the dashboard or the glove box.
5. Then check that everything works before installing the main unit in the mounting sleeve.
Note: if necessary, use the mounting screws and bolt rubber to complete installation of the unit.
6. Installthecarradiointhedashboardusingthesuppliedatheadscrews(M2,6x5mm).
7. Turn on the unit and slide down the panel, then attach the outer trim frame.
Ifyouarenotsurehowtoinstallthisunitcorrectly,contactaqualiedtechnician.
InstALLAtIon
GB - 6
Replacing fuses
Makesuretheamperagematchesthespeciedvaluewhenreplacingthefuses.Ifthefuseisblown,checkthepowerconnectionandreplacewitha
new one. If the same problem occurs, there must be a malfunction. In such cases, please consult your retailer.
Warning:
Neveruseafusewitharatedamperageovertheonespecied,otherwiseyouriskdamagingtheunit.
Replacing the battery
When the operation range of the remote control becomes shorter or if it no longer works, replace the lithium
battery with a new button cell (CR2025). Make sure the battery polarities match.
1. Open the battery compartment in the remote control unit.
2. Insert a CR2025 button-type battery with the plus sign (+) facing upward. Close the battery compartment.
Warning:
Improperhandlingofthebatterymayleadtoexplosion.Donotchargethebattery,disassembleitorthrowitintoare.
Precautions when using lithium batteries
Always keep the lithium battery out of the reach of children. If a battery is swallowed, see a doctor immediately. In order to ensure optimum performance,
clean the battery with a dry cloth.
Make sure that the polarities are correct when loading the battery. To prevent short circuits, do not use a metal object to insert the battery.
MAIntenAnCe
Pull out
Push up
Replace
the battery
GB - 7
PAneL ContRoL
10 11 1312
Front Panel
1. Touch panel TFT LCD display
2. button: Turn the unit on/off
3. SRC (SOURCE) button: Select the following sources:
- Radio (“BAND”)
- “DISC” (when a disc is inserted)
- “USB” (when a USB device is connected)
- SD/MMC card (“SD”) (when an SD/MMC card is inserted)
- Aux in (“AUX”)
4. T/P(TA/PTY)button-PressbrieytoturntheRDSTA(trafcannouncement)on/off.
Press for more than 2 seconds to enter RDS PTY mode (select a program type).
5. MUTE ( )button-Pressbrieytoturnoffthesound.Pressformorethan2seconds
to switch off the LCD display.
6. Remote control sensor: Receive the infrared signal from the remote control.
7. VOL +/- button: Adjust the volume level.
8. button:-Pressbrieytoopen/closethepanel
- Press for more than 2 seconds to enter the panel menu.
> Open the panel
> Eject the disc.
> Close the panel
> Adjust the panel angle (“TILT+/-“)
9. Reset button: Use a pointed object such as a pen to press this button in order to reset
the unit.
Front view of car radio after sliding down the front panel
10. button: Eject disc.
11. Disc slot: Insert disc.
12. Panel status indicator: This indicator will light up when you slide the panel down.
13. SD/MMC card slot.
GB - 8
ReMote ContRoL
16
3
2
4
5
6
7
8
9
10
1
11
12
13
14
15
17
19
18
22
23
25
26
24
28
29
27
21
20
16. MODE: Enter source selection menu.
17. : Turn the unit on/off.
18. ANGLE (DVD mode).
19. SUBTITLE: select a subtitle language (DVD
mode).
20. REPT A-B: A-B repeat playback.
21. REPT: Repeat playback.
22. OSD: On Screen Display.
23. TIME: Time display.
24. / : In radio mode: Tuning.
InDVDmode:Pressbrieytochangechapter
or track, press and hold down to search
forward/backward.
25. PROG: Programmed playback.
26. VOL +/-: Adjust the volume.
27. : Play/Pause playback.
28. MUTE:-Pressbrieytoturnoffthesound
- Press for more than 2 seconds to
switch off the LCD display
29. AUDIO:
DVD mode: Select audio language
VCD mode: Select audio channel (MONO L/
MONO R/ STEREO).
1. SRC (SOURCE): Select one of the following
sources:
- Radio (“Band”)
- “DISC” (when a disc is inserted)
- “USB” (when a USB device is connected)
- SD/MMC card (“SD”) (when an SD/MMC card
is inserted).
- AUX (AV IN).
2. : Eject disc.
3. MENU (in DVD mode): Display the root menu.
PBC (in VCD mode): Playback control on/off.
4. TITLE (in DVD mode): Display the title menu.
5. GOTO: Search.
6. BAND: FM1->FM2->FM3->MW1->MW2.
P/N: TV color system PAL/NTSC/AUTO.
7. SEL: Enter the select menu to adjust the sound
effects and picture quality.
8. DVD SETUP
9. TILT : Close the panel.
10. TILT : Open the panel.
11. ZOOM (DVD/VCD mode): Increase/reduce the
picture size.
12. OK:Conrmselection.
13. / / / direction buttons.
14. : Stop playback/Return to list of files (in
MPEG4 mode).
15. 0 – 9, 10+ (number keys).
GB - 9
BAsIC oPeRAtIon
Source Select
Press the button to turn on
the unit. Then press the MODE
button on the remote control to
enter the source menu.
On the source menu:
Touch the corresponding icon to
access the desired source.
Touch th e EXIT button to
return to the previous menu.
On the unit panel:
Press the SRC button to select the desired source.
Panel Control
Hold down the button on the
panel to display the [OPEN/
TILT] menu.
Touch the panel to carry out the
desired operations.
Loading a disc or an SD/MMC card
Toopenthepanelrst,pressthe button on the panel. Insert a disc
with label side facing up or an SD/MMC card into the corresponding slot.
When a disc is inserted, the panel will close automatically.
Note: You can control the panel using the touch panel control, refer to
previous section: “Panel Control”.
Inserting a USB device
Connect your USB device to the USB cable which you placed in the
dashboard or glove box during installation of the car radio.
Notes:
1. When connecting a USB device or inserting an SD/MMC card, the
unitwillreadthelesautomatically.
2. If more than one source is available, refer to the previous section
“Source Select” to select the source of your choice.
3. To eject the disc, open the panel and press the button.
4. ToremovethecardorUSBdevice,youshouldrstselect another
source, in order to avoid damaging the card or USB device.
GB - 10
tUneR
RDS
Buttons on the car radio:
PresstheT/PbuttonbrieytoturnAF(alternativefrequencies)on/off.
Hold the T/P button more than 2 seconds to turn the PTY function
(selection of program type) on/off.
RADIO
On the source menu, touch the “BAND” button to enter radio mode.
Touch the icon to access the following functions:
1. SRC: Display the source selection menu.
2. / : Tune manually.
3. / :Touchbrieytotuneastationautomatically.
Touch for more than 2 seconds and hold to tune manually.
4. 1 – 6, ..MHz: Select a preset station.
5. SEL: Display the select menu to adjust the sound effects and picture
quality.
6. PS: Scan preset stations.
7. AS: Auto search and store stations.
8. BAND: FM1->FM2->FM3->MW1->MW2
In the PTY menu:
Touch the icon to access the following functions:
1. SRC: Display the source selection menu.
2. / : Move up/down within the program type list.
3. SEL: Display the select menu to adjust the sound effects and picture
quality
4. BAND: FM1->FM2->FM3->MW1->MW2
GB - 11
DVD/VCD PLAyBACK
DVD Playback
In the source menu, touch the “DISCbutton to enter the DISC mode
when a DVD disc is inserted.
Touch the icon to access the following functions:
1. SRC: Display the source selection menu.
2. : Stop playback.
3. / :Pressbrieytoskiptotheprevious/nextchapter.
Press and hold down to search forward/backward.
4. SEL: Display the select menu to adjust the sound effects and picture
quality.
5. AUDIO: Select audio language (if more than one language is
available on the DVD).
6. SUBTITLE: Select a subtitle language (if more than one language is
available on the DVD).
7. : Play/Pause playback, Enter.
Press the REPT button on the remote control to choose a repeat play
mode: “REP CHAPTER”, “REP TITLE”, “REP OFF”.
For playback operations, touch the center of the screen to display the
control icons.
VCD Playback
In the source menu, touch the “DISC” button to enter the disc mode
when a VCD is inserted.
1. SRC: Display the source selection menu.
2. INT:Playtherst15secondsofeachtrack.
3. L/R: Select the audio channel: MONO L/ MONO R/ STEREO
4. : Stop playback.
5. / :Pressbrieytoskiptotheprevious/nexttrack.
Press and hold down to search forward/backward.
6. SEL: Display the select menu to adjust the sound effects and picture
quality.
7. RPT: Repeat play: “REP ONE”, “REP ALL”, “REP OFF”.
8. RDM: Random play.
9. : Play/Pause playback
GB - 12
CD PLAyBACK
MP3/MPEG4/JPEG Menu
This menu is displayed in DISC, “SD and USB” mode when the
sourcecontainsMP3/MPEG4/JPEGles.
1. SRC: Display the source selection menu.
2. :Backtopreviousledirectory.
3. / :Searchup/downthelelist.
4. OSD: Display playback information.
5. : Stop playback.
6. Track name and ID3 display.
7. / :Pressbrieytoskiptoprevious/nextle.
Press and hold down to search forward/backward (for MP3/MPEG4
lesonly).
8. “MP3”/“PHOTO”/“MOVIE”:Selecttheletype.
9. File list.
10. SEL: Display the select menu to adjust the sound effects and picture
quality.
11. RPT: Repeat play: REP ONE, REP DIR, REP ALL, REP OFF.
12. RDM: Random play.
13. : Play/Pause playback
CD Playback
In the source menu, touch the “DISC” button to enter the disc mode
when a CD is inserted.
1. SRC: Display the source selection menu.
2. INT(intro):Playtherst15secondsofeachtrack.
3. : Stop playback.
4. / : Skip/ Seek previous/ next track.
5. SEL: Display the select menu to adjust the sound effects and picture
quality.
6. RPT: Repeat play – REP ONE, REP ALL, REP OFF.
7. RDM: Random play.
8. : Play/Pause playback
MP3/MPeG4/JPeG fILes on A DIsC,
UsB DeVICe oR sD/MMC CARD
GB - 13
PHOTO playback (JPEG les)
DuringJPEGleplayback,touchthecenterofthescreentodisplaythe
control icons.
1. SRC: Display the source selection menu.
2. / : Rotate the picture clockwise/counterclockwise.
3. : Stop playback.
4. / :Skiptotheprevious/nextle.
5. SEL: Display the select menu to adjust the sound effects and picture
quality.
6. : Play/Pause playback.
MPEG4 playback
DuringMPEG4leplayback, touch thecenterofthescreentodisplay
the control icons.
1. SRC: Display the source selection menu.
2. : Stop playback.
3. / :Pressbrieytoskiptotheprevious/nextle.
Press and hold down to search forward/backward.
4. SEL: Display the select menu to adjust the sound effects and picture
quality.
5. : Play/Pause playback.
MP3/MPeG4/JPeG fILes on A DIsC, UsB DeVICe oR sD/MMC CARD
GB - 14
ADVAnCeD PLAyBACK fUnCtIons AUX (AV In) fUnCtIon
GOTO
You can use the search feature to select a title/chapter/track number or
gotoaspecicpointinatitle,chapterortrack.First,pressthe GOTO
button on the remote control to display the search menu. Secondly,
press the arrow buttons / to highlight the title/chapter/ track (for
CD/VCD) number or the time option. Thirdly, use the number buttons
to enter the title/chapter/track you want to play or the elapsed time you
want to go to in that title, chapter or track. Finally, press the OK button to
start playback.
Repeat a specic segment
1. During normal playback, press the REPT A-B button once and
REPEAT A-" will appear on the screen. This indicates that the
segment to be repeated will start at this point.
2. Press REPT A-B again and “REPEAT A-B” will be displayed on the
screen. This indicates that the segment to be repeated will end at this
point.
3. The unit will play from set point A to set point B until you turn off the
repeat function.
4. Press REPT A-B again to cancel the repeat function.
PROGRAM
Press the PROG button to display the program menu. Move the cursor
to select the title/chapter number (DVD) or track number (for CD/VCD).
If you want to clear all entries, move the cursor to “CLEAR” and press
the OK button. To start the programmed playback, move the cursor to
“PLAY” and press OK. During this process, press or press PROG to
cancel the programmed playback.
1. Connect an external A/V device to the AUDIO IN-R, AUDIO IN-L and
VIDEO IN jacks (connected from extension cables) on the unit.
2. In the source menu, touch the “AUX” button to enter the AUX (AV IN)
mode.
Note: You can also use the SRC button on the remote control to
select the source.
3. OperatetheexternalA/Vdevicetoselectandplayale.
4. Adjust the volume controls on both the external A/V device and this
unit to the desired volume level.
GB - 15
systeM setUP
SELECT Menu
SEL: Display the select menu to adjust the sound
effects and picture quality.
Sound effects
EQ: “Rock”, ”Pop”,“Classic”, “Flat”, “OFF”
BAS: Bass
TRE: Treble
BAL: Balance.
FAD: Fader.
Picture quality
BRI: Brightness
CON: Contrast.
COL: Color.
SETUP Menu
In the source menu, touch the “SET” button to enter the setup menu.
1. SRC: Display the source menu.
2. / : Search up/ down the list.
3. / : Adjust the settings.
LOUD ON/OFF: Turn loudness on/off.
BEEP ON/OFF: Turn button beep sound on/off.
12/24 HOURS: Select 12 -hour or 24-hour display.
/AM/PM: Touch the < button to set the hours and touch the > button
to set the minutes.
PARKING ON/OFF: Turn parking warning on/off.
When this function is switched on, the screen will show DO NOT
WATCH VIDEO WHILE DRIVING”, during playback of a video if the
hand brake is not activated. The screen will be blank.
GB - 16
systeM setUP
CAMERA ON/OFF: Turn reversing camera on/off.
MIRROR ON/OFF: Turn mirror mode on/off. If this mode is on, the
camera image is a mirror image.
LCD CALIBRATE: Calibrate the touch screen.
TA SEEK/ALARM: Choose TA ALARM or TA SEEK mode.
(TA:trafcannouncements)
TAALARMmode:Abeepsoundwarnsyouwhenatrafcannouncement
is being broadcast.
TA SEEK mode: The car radio automatically searches for traffic
announcements.
RETUNE-L/S: (long/short retune) Select “RETUNE-S” or “RETUNE-L”.
“RETUNE-S” (Short retune): The car radio waits 45 seconds between
twosearchesfortrafcannouncements.
“RETUNE-L” (Long retune): The car radio waits 180 seconds between
twosearchesfortrafcannouncements.
Note: the setting for this function is only useful in “TA SEEK” mode.
AF ON/OFF: Turn the Alternative Frequency function on/off.
When reception is poor and the AF mode is activated, an RDS station
broadcasting the same program is tuned in automatically.
TA VOL: Adjust TA volume.
VOL LAST/ADJUST: Select “VOL LAST” so that the volume level when
the unit switches on is the same volume level before it was last switched
off. Select “VOL ADJUST” so that the unit always switches on at a pre-
denedvolumelevelusingthe“AVOL”function.
A VOL: Adjust the volume level when VOL ADJUST mode is active.
REG ON/OFF (region on/off): Turn RDS REG mode on/off.
Only regional versions of stations are received when the regional mode
is on.
RDS CT ON/OFF: Turn RDS CT mode on/off.
When receiving an RDS station, the CT (Clock Time) service
automatically adjusts the time when “RDS CT ON” is selected.
Safety Notes:
The DVD video display of the unit will not operate while the vehicle is
moving. This is a safety feature to prevent driver distraction. DVD video
functions will only operate when the vehicle is stopped and the parking
brake is engaged. It is illegal in most countries for the driver to view
videos while the vehicle is in motion.
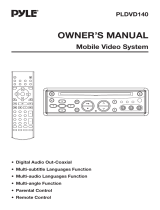
DVD SETUP menu
In DVD mode, press the DVD SETUP button on the remote control to
display the setup menu on the screen. (A disc must be inserted in the
unit).
Use the / buttons to select one of the following setup items:
“SYSTEM” – “LANGUAGE” – “AUDIO” – “VIDEO” – “DIGITAL”.
Use the / / / buttons to select the setting and press the OK
buttontoconrm.
SYSTEM LANGUAGE AUDIO VIDEO DIGITAL
GB - 17
SYSTEM SETUP
TV SYSTEM
Set the TV system: NTSC/PAL/AUTO.
DVD setUP
“TV TYPE” (display format)
Select the display format to watch widescreen
movies.
4:3 PS (Pan Scan): For 4:3 screens, the left
and right edges will be cut.
4:3 LB (Letter Box): For 4:3 screens, black
bars will appear at the top and bottom.
16:9: For a widescreen TV.
PASSWORD
The default password is “0000”. To change
the password, enter the old password, and
then enter the new one.
SCREENSAVER
S e l e c t O N ( d e f a u l t s e t t i n g ) f o r t h e
screensaver to appear when the unit has
stopped for more than 3 minutes.
RATING
The rating of the disc is from 1 to 8:
(1): with the maximum limit when playing.
(8): with the minimum limit when playing.
The default setting is “8”.
Note: The rating can only be selected in the
password unlocked status. The limit only
works when the password lock is activated ( ).
GB - 18
SYSTEM SETUP
DEFAULT
Restore the factory default settings.
LANGUAGE SETUP
OSD LANGUAGE
Select the On Screen Display language.
DVD setUP
AUDIO LANGUAGE
Select the default audio language (if several
languages are available on the DVD).
SUBTITLE LANGUAGE
Select the default subtitle language (if several
languages are available on the DVD).
MENU LANGUAGE
Select the default menu language (if several
languages are available on the DVD).
AUDIO SETUP
Use the / buttons to adjust the setting.
KEY
Use the / buttons to adjust the tone.
GB - 19
VIDEO SETUP
BRIGHTNESS
Adjust the brightness of the display.
DVD setUP
CONTRAST
Adjust the contrast of the display.
HUE
Adjust the hue of the display.
SATURATION
Adjust the saturation of the display.
SHARPNESS
Adjust the sharpness of the display.
DIGITAL SETUP
OP MODE
DYNAMIC RANGE
Select “LINE OUT” in OP MODE to adjust the
compression rate.
Select “FULL” to limit the volume variations as
much as possible. Select “OFF”, to switch off
the dynamic compression function.
DUAL MONO
Select the audio channel: STEREO, MONO L,
MONO R or MIX MONO.
This option allows the user to adjust the
dy na mi c compression in order to limit
variations in volume.
LINE OUT: Compress the signal. The
variation in volume is small.
“RF MOD”: The variation in volume is large.
  • Page 1 1
  • Page 2 2
  • Page 3 3
  • Page 4 4
  • Page 5 5
  • Page 6 6
  • Page 7 7
  • Page 8 8
  • Page 9 9
  • Page 10 10
  • Page 11 11
  • Page 12 12
  • Page 13 13
  • Page 14 14
  • Page 15 15
  • Page 16 16
  • Page 17 17
  • Page 18 18
  • Page 19 19
  • Page 20 20
  • Page 21 21
  • Page 22 22
  • Page 23 23

SCOTT DRX 2002 User manual

Category
DVD players
Type
User manual

SCOTT DRX 2002 is a versatile RDS car radio with a motorized 7-inch touchscreen TFT LCD display capable of playing DVDs, VCDs, CDs, MP3s, and various files from USB devices, SD/MMC cards, and auxiliary inputs. It features AM/FM stereo, 30 station memory, and advanced playback functions, including music power of 160 watts and customizable system and DVD settings.

Ask a question and I''ll find the answer in the document

Finding information in a document is now easier with AI