Page is loading ...

DE
Bedienungsanleitung ..............................4
EN
Operating Instructions ............................8
FR
Mode d’emploi ..................................... 12
NL
Handleiding ........................................16
IT
Istruzioni per l’uso ...............................20
ES
Instrucciones de uso ............................24
www.bresser.de/warranty_terms
SERVICE AND WARRANTY:
www.bresser.de/guide
MICROSCOPE GUIDE:
i
www.bresser.de/faq
MICROSCOPE FAQ:
www.bresser.de/downloads
EXPERIMENTS:
www.bresser.de/P8851301
MANUAL DOWNLOAD:
ACHTUNG!
Nicht für Kinder unter 3 Jahren geeignet. ERSTICKUNGSGEFAHR -
kleine Teile. VERLETZUNGSGEFAHR - Funktionsbedingte scharfe Kanten oder Spitzen.
Anleitung und Verpackung aufbewahren, da Sie wichtige Informationen enthalten.
WARNINGS! Not suitable for children under three years. CHOKING HARZARD
- small parts. PUNCTURING HAZARD - functional sharp points or sharp edges. Keep
instructions and packaging as they contain important information.
AVVERTENZE! Non adatto a bambini di età inferiore a tre anni. PERICOLO DI
SOFFOCAMENTO - Contiene piccole parti. RISCHIO D‘INFORTUNIO - Contiene spigoli
vivi e punte! Conservare le istruzioni e l‘imballaggio in quanto contengono informazioni
importanti.

8
EN
Operating Instructions
General Warnings
• Choking hazard — This product contains small parts that could be
swallowed by children. This poses a choking hazard.
• Risk of electric shock — This device contains electronic components
that operate via a power source (batteries). Only use the device as
described in the manual, otherwise you run the risk of an electric shock.
• Risk of re/explosion — Do not expose the device to high temperatures.
Use only the recommended batteries. Do not short-circuit the device or
batteries,orthrowthemintoare.Excessiveheatorimproperhandling
couldtriggerashort-circuit,areoranexplosion.
• Risk of chemical burn — Make sure you insert the batteries correctly.
Empty or damaged batteries could cause burns if they come into contact
with the skin. If necessary, wear adequate gloves for protection.
• Leaking battery acid can lead to chemical burns. Avoid contact of
battery acid with skin, eyes and mucous membranes. In the event of
contact, rinse the affected region immediately with a plenty of water
and seek medical attention.
• Use only the recommended batteries. Always replace weak or empty
batteries with a new, complete set of batteries at full capacity. Do not
use batteries from different brands, types or with different capacities.
Remove the batteries from the unit if it is not to be used for a long
period of time, or if the batteries are empty!
• Never recharge normal, non-rechargeable batteries. This could lead to
explosion during the charging process.
• Rechargeable batteries are only to be charged under adult supervision.
• Rechargeable batteries are to be removed from the toy before being
charged
• The terminals must not be short-circuited.
• Do not disassemble the device. In the event of a defect, please contact
Index
General Warnings ............................................................................ 8
Parts overview ................................................................................ 9
1. What is a microscope? ................................................................. 9
2. Assembly and location ................................................................. 9
3. Normal observation ..................................................................... 9
4. Observation (electronic light source) ............................................ 10
Remove and insert batteries ............................................................. 10
5. Condition and prepare viewed objects .......................................... 10
6. Experiments ................................................................................ 10
EC Declaration of Conformity ........................................................... 11
Disposal .......................................................................................... 11
Warranty & Service........................................................................... 11

9
DE
your dealer. The dealer will contact the Service Centre and can send the
device in to be repaired, if necessary.
• Tools with sharp edges are often used when working with this device.
Because there is a risk of injury from such tools, store this device
and all tools and accessories in a location that is out of the reach of
children.
• Keep instructions and packaging as they contain important information.
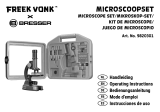
Parts overview
1. Zoom Eyepiece
2. Focus knob
3. Objective turret
4. Stage
5. On/off switch ( illumination)
6. Electronic light source
7. Base with battery compartment
8. Battery compartment (3x AA)
9. Wheel with pinhole apertures / Filter wheel
1. What is a microscope?
A microscope contains two lens systems: the eyepiece and the objec-
tive. We’re presenting these systems as one lens each so that the con-
cept is easier to understand. In reality, however, the eyepiece (1) and the
objective in the turret (3) are made up of multiple lenses.
The lower lens (objective) produces a magnified image of the prepared
specimen. The picture, which you can’t see, is magnified once more by
the second lens (eyepiece, 1), which you can see as the ‘microscope
picture’.
2. Assembly and location
Before you start, choose an ideal location for using your microscope. It’s
important that you choose a spot with enough light for normal observa-
tion. Furthermore, it is recommended that you place the microscope on
a stable surface, because a shaky surface will not lead to satisfactory
results.
3. Normal observation
For normal observation, place the microscope in a bright location (near
a window or desk lamp, for example).
Turn the focus knob (2) to the upper stop, and set the objective turret (3)
to the lowest magnification.
Now, turn on the light using the switch on the microscope base. You’ll find
further tips about the light source in the next section. Now, place a pre-
pared slide under the clips on the stage (4), directly under the objective
(1). When you take a look through the eyepiece, you can see the magni-
fied specimen. At this point, you still might see a slightly fuzzy picture.
Adjust the image sharpness by slowly turning the focus knob (2). You
can now select a higher magnification by turning the objective turret and
selecting a different objective.

10
When you do so, note that the sharpness of the picture must be adjusted
again for the higher magnification. Also, the higher the magnification,
the more light you will need for good illumination of the picture. The
wheel with pinhole apertures (9) below the microscope stage (4) will
help you in viewing very bright or clear-sighted preparations. Turn the
wheel (9) till the best contrast is achieved.
4. Observation (electronic light source)
Remove and insert batteries
For observation with the electronic light source (6) you need to insert
3 AA batteries 1.5 V, in the battery compartment (8) on the base of the
microscope (7). The battery compartment is opened using a Phillips
screwdriver. Insert the batteries with the correct polarity (+/- indication).
Putthebatterycoverrstintothesmallopeningsothatthelidtsper-
fectly. Now you can tighten the screw.
The lighting is switched on when you turn the switch on the microscope
base.
Now you can observe in the same way as described in the previous
section.
TIP: The higher the magnification you use the more light is required for
a good illumination of the picture. Therefore, always start your experi-
ments with a low magnification.
5. Condition and prepare viewed objects
This microscope features transmitted light, so that transparent speci-
mens can be examined.
If opaque specimens are being examined, the light from below goes
throughthespecimen,lensandeyepiecetotheeyeandismagnieden
route (direct light principle).
Some small water organisms, plant parts and animal components are
transparent by nature, but many others require pretreatment — that is,
you need to make a thinnest possible slice of the object by hand cutting
or using a microtome, and then examine this sample.
6. Experiments
Usethefollowingweblinktondinterestingexperimentsyoucantryout.
http://www.bresser.de/downloads
Microscope accessories can be found here:
http://www.bresser.de/P8859480

11
Notes on Cleaning
• Before cleaning the device, disconnect it from the power supply by
removing the batteries.
• Only use a dry cloth to clean the exterior of the device. To avoid
damagingtheelectronics,donotuseanycleaninguid.
• Protect the device from dust and moisture.
• The batteries should be removed from the unit if it has not been used
for a long time.
EC Declaration of Conformity
Bresser GmbH has issued a ‘Declaration of Conformity’ in
accordance with applicable guidelines and corresponding
standards. This can be viewed any time upon request.
Disposal
Dispose of the packaging materials properly, according to their
type, such as paper or cardboard. Contact your local waste-disposal
service or environmental authority for information on the proper disposal.
Do not dispose of electronic devices in the household garbage!
As per Directive 2002/96/EC of the European Parliament on waste
electrical and electronic equipment and its adaptation into German
law, used electronic devices must be collected separately and recycled
in an environmentally friendly manner. Empty, old batteries must be dis-
posed of at battery collection points by the consumer. You can find out
more information about the disposal of devices or batteries produced
after 6 January 2006 from your local waste-disposal service or environ-
mental authority.
In accordance with the regulations concerning batteries and re-
chargeable batteries, disposing of them in the normal household
waste is explicitly forbidden. Please make sure to dispose of your used
batteries as required by law — at a local collection point or in the retail
market. Disposal in domestic waste violates the Battery Directive.
Batteries that contain toxins are marked with a sign and a chemical sym-
bol.
Cd¹ Hg² Pb³
1
battery contains cadmium
2
battery contains mercury
3
battery contains lead
Warranty & Service
The regular guarantee period is 2 years and begins on the day of pur-
chase.Tobenetfromanextendedvoluntaryguaranteeperiodasstated
on the gift box, registration on our website is required.
You can consult the full guarantee terms as well as information
on extending the guarantee period and details of our services at
www.bresser.de/warranty_terms.
EN

Bresser GmbH
Gutenbergstr. 2
DE-46414 Rhede
Germany
www.bresser-junior.de
Irrtümer und technische Änderungen vorbehalten. · Errors and technical changes reserved. · Sous réserve d’erreurs et de
modications techniques. · Vergissingen en technische veranderingen voorbehouden. · Con riserva di errori e modiche
tecniche. · Queda reservada la posibilidad de incluir modicaciones o de que el texto contenga errores. · Ошибки и
технические изменения защищены · Omyly a technické změny vyhrazeny.
Manual_8851301_Microscope_de-en-fr-nl-it-es_BRESSER-JR_v032020a
/