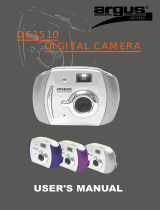
VuPoint DC-ST15-VP User manual

Type
User manual

This manual is also suitable for

Users Manual
DC-ST15R-VP / DC-ST15B-VP / DC-ST15O-VP
Specification
3 in 1 Digital Camera:
Digital Still Camera
Video Capturing
Conferencing (Web cam)
Image Sensor:
CMOS Sensor
Resolution:
CIF 352x288 Pixels
QCIF 176x144 Pixels
Color:
24 bits
Lens:
F2.8, f =6.2mm
Capture Range: 1.6 ft. ~ Infinity
Memory:
Built-in 16Mb SDRAM
Capacity:
40-80 pictures (Compressed CIF)
18 pictures (CIF 352x288)
120-200 pictures (compressed
QCIF)
70 pictures (QCIF 176X144)
POWER:
1 AAA Alkaline battery
Computer Interface:
USB
Note: The quantity of compressed picture varies and depends
on the scene complexity.
System Requirement
OS: Microsoft Win98SE/2000/ME/XP
Mac V9.x/X.x*
Hard Disk Space: 200MB or above
Memory: 32MB RAM or above
USB interface and CD-ROM
Color Monitor (at least 800x600 24 bits or above)
*Driver for Mac OS can be downloaded at:
http://www.vupointsolutions.com
Functional Parts of the Camera
Lens
Buzzer
Mode button
LCD
Viewfinder
Battery Door
USB
Shutter button
Shutter button
Get started
1. Load the battery according to the correct polarity indicated on
the battery door.
2. Turn the camera on by pressing the MODE button.
Precaution:
While the camera is connected to the USB cable, it is
unnecessary to use a battery. The camera uses the power
supplied from computers USB interface.
Before using the PC-Cam function, please download all photos
in the camera onto your computer to avoid any missing
photos.
Warning:
1. If you don’t use the camera for a period of time, please
remove the battery. Photos will be lost if the battery is
removed or if the battery has no power.
2. Please follow local regulations when disposing used batteries.
3. If the camera is not used in 30 seconds, it will enter standby
mode automatically to save the battery energy. You may press
the mode button to restart the camera operation again.
Software installation
Attention:
Make sure you install all the necessary software in your
computer before you connect the camera to a computer.
1. Close all opened software applications on your computer
before installing the software.
2. Insert the CD-ROM into the computer CD-ROM drive, it will
automatically install the camera driver. Please follow the
instructions on screen to finish the installation process.
Important:
For Windows98, Microsoft® DirectX 8.0 a higher version is
required to be installed before driver installation. If there is not
DirectX 8.0 in your PC, please install it first. The DirectX 8.0
is included in the CD supplied under the “DirectX” folder, you
can run the dxsetup.exe to install it.
If the XP warning dialogue box pops up during driver installation,
please click “Yes” button to continue.
Camera function operation
If the MODE button is pressed consecutively, the camera LCD
display will show the following symbols:
Lo
Change the
frequency to 50Hz
Del the last
picture
Change to non-
compression mode
Change to
compression mode
Change the
frequency to 60Hz
Ready to take Low-
Resolution pictures
Turn into standby
mode
Ready to take
Hi-
Resolution pictures
Hi
Del all pictures
Self timer
Continuous
capture
Capture 3 photos
Lo
Change to Low-
Resolution mode
Change to Hi-
Resolution mode
Hi
Take pictures
1. Press “mode” button to turn on the camera, the camera is set
to take high-resolution pictures. The number of images that
have been taken will be shown on the LCD screen.
2. Look through the viewfinder to find the subject you would
like to take.
3. Press the “Shutter” button to take a picture and a beeping
sound will occur. At the same time, the number on the LCD
display will be increased by one.
4. When choosing “CS” mode, you can capture 3 photos
continuously.
ATTENTION:
When the lighting is not bright enough when taking a photo,
the Auto exposure and Gain control need more time to
settle. You have to hold the camera steadily and wait a
little longer for the “beep” sound to occur. If the
environment is too dark to take a picture, you will hear
“beep” “beep” sound indicating shooting failure.
Download Picture
1. Connect the camera to the computer with an USB cable. The
computer will automatically update new information to
confirm the connection.
Download pictures PC Camera
2. Open the folder “My DSC2” on desktop and then double
click “My DSC” icon. The download interface will be ejected
out from the screen.
Download Transfer Save Select all Edit image
3. Click the download button; the pictures thumbnail you’ve
taken will be consecutively displayed on the interface.
4. Click any thumbnail with the right button on the mouse to
zoom in on it. Click a thumbnail to select it or click the
“select all” button to select all thumbnails.
5. After selecting the pictures you want to save, a red frame
will appear around the photo. Click on the “save photo”
button, select the path and name to save.
6. After saving all the pictures you want, you can clear the
memory of the camera and start taking pictures again.
PC Camera
1. Double click the PC Cam icon; you will open a PC-camera
frame.
2. If no image is shown, you may click “Preview” in the
“options” menu to activate the driver.
3. You can click the “video capture pin” in the “options” menu
to select the resolution; the default is QVGA (320x240).
VPS05-0908 DC-ST15 Series_ENG
  • Page 1 1
  • Page 2 2

VuPoint DC-ST15-VP User manual

Type
User manual
This manual is also suitable for

Ask a question and I''ll find the answer in the document

Finding information in a document is now easier with AI