Gigabyte GV-N560OC-1GI User manual

Category
Graphics cards
Type
User manual
GV-N56GOC-1GI /
GV-N56GUD-1GI
NVIDIA
®
GeForce
TM
GTX 560 Graphics Accelerator
User's Manual
Rev. 102
12MM-N560GI-102AR
Copyright
© 2011 GIGABYTE TECHNOLOGY CO., LTD
Copyright by GIGA-BYTE TECHNOLOGY CO., LTD. (“GBT”). No part of this manual may be reproduced or trans-
mitted in any form without the expressed, written permission of GBT.
Trademarks
Third-party brands and names are the properties of their respective owners.
Notice
Please do not remove any labels on this graphics card. Doing so may void the warranty of this card.
Due to rapid change in technology, some of the specications might be out of date before publication of this this
manual.The author assumes no responsibility for any errors or omissions that may appear in this document nor does
the author make a commitment to update the information contained herein.
Rovi Product Notice:
This product incorporates copyright protection technology that is protected by U.S. patents and other intellectual
property rights.Use of this copyright protection technology must be authorized by Rovi Corporation, and is intended
for home and other limited viewing uses only unless otherwise authorized by Rovi Corporation. Reverse engineering
or disassembly is prohibited.
VGA Card
GV-N56GOC-1GI
May. 11, 2011
May. 11, 2011
VGA Card
GV-N56GOC-1GI
VGA Card
GV-N56GUD-1GI
Aug.30,2011
Aug. 30, 2011
VGA Card
GV-N56GUD-1GI
- 4 -
Table of Contents
1. Introduction ..................................................................................................................5
1.1. Features ......................................................................................................................... 5
1.2. Minimum System Requirements .................................................................................... 5
2. Hardware Installation ...................................................................................................6
2.1. Board Layout .................................................................................................................. 6
2.2. Hardware Installation ..................................................................................................... 9
3. Software Installation ..................................................................................................11
3.1. Driver and Utility Installation ........................................................................................ 11
3.1.1. Driver Installation ............................................................................................................11
3.1.2. GIGABYTE Easy Boost on Driver Disk .........................................................................13
3.2. Display Properties Pages ........................................................................................ 16
3.3. Accessing NVIDIA Control Panel ............................................................................. 17
4. Troubleshooting Tips .................................................................................................25
5. Appendix ....................................................................................................................26
5.1. How to Reash the BIOS in MS-DOS Mode ................................................................ 26
5.2. Resolutions and Color Depth Tables ........................................................................... 27
5.3. Regulatory Statements ................................................................................................ 29
- 5 - Introduction
1. Introduction
1.1. Features
Powered by NVIDIA
®
GeForce
TM
GTX 560 Graphics Processing Unit (GPU)
Supports PCI Express 2.0
Integrated with 1GB GDDR5 memory
Supports DirectX
®
11
Supports NVIDIA
®
SLI
TM
(Scalable Link Interface) technology
(Note 1)
Supports 2 Dual-Link DVI-I connectors
Supports 1 mini HDMI connector
Supports HDCP (High-Bandwidth Digital Content Protection) technology
1.2. Minimum System Requirements
Hardware
- 500-watt system power supply specication or above is recommended
- Intel
®
Pentium
®
4 or AMD Athlon
TM
XP class
- 2GB system memory (4GB recommended)
- Optical drive for software installation (CD-ROM or DVD-ROM drive)
Operating System
- Windows
®
7
- Windows
®
Vista
- Windows
®
XP
SLI
TM
Conguration
If you are planning on using this graphics card as part of an SLI system, the following
are required:
-
An SLI certied motherboard with two PCIe x16 slots and correct chipset driver
- Two GV-N56GOC-1GI / GV-N56GUD-1GI for SLI conguration;
- A power supply with 650-watt or above is recommended
- An SLI bridge connector
(Note 1) SLI technology requires a PCI Express motherboard with two x16 physical connectors.
Graphics cards working in an SLI conguration must be with the same model name
(e.g. GV-N56GOC-1GI/GV-N56GUD-1GI ) and from the same vendor
(e.g. GIGABYTE TECHNOLOGY).
- 6 -
GV-N500 Series Graphics Accelerator
2. Hardware Installation
2.1. Board Layout
DVI-I connector 1
DVI-I Connector 2
SLI Connector
Power Connectors
Mini HDMI Connector
DVI-I
Connector 2
DVI-I
Connector 1
Mini HDMI
Connector
Digital LCD Monitor
Digital LCD Monitor
DVI Output
DVI Output
HDMI TV
GV-N56GOC-1GI / GV-N56GUD-1GI
- 7 - Hardware Installation
The GV-N56GOC-1GI / GV-N56GUD-1GI graphics card is a performance optimized high-end card. Power is
taken from the PCI Express host bus as well as the external power connectors.
NVIDIA power
Connect power from the system power supply to the GeForce card(s).Use the connection method
for your particular graphics card.
GV-N56GOC-1GI / GV-N56GUD-1GI:
Connect two 6-pin PCI Express auxiliary power connectors coming from the computer
power supply to the connectors on the top edge of the GeForce GTX 560 graphics card.
- 8 -
GV-N500 Series Graphics Accelerator
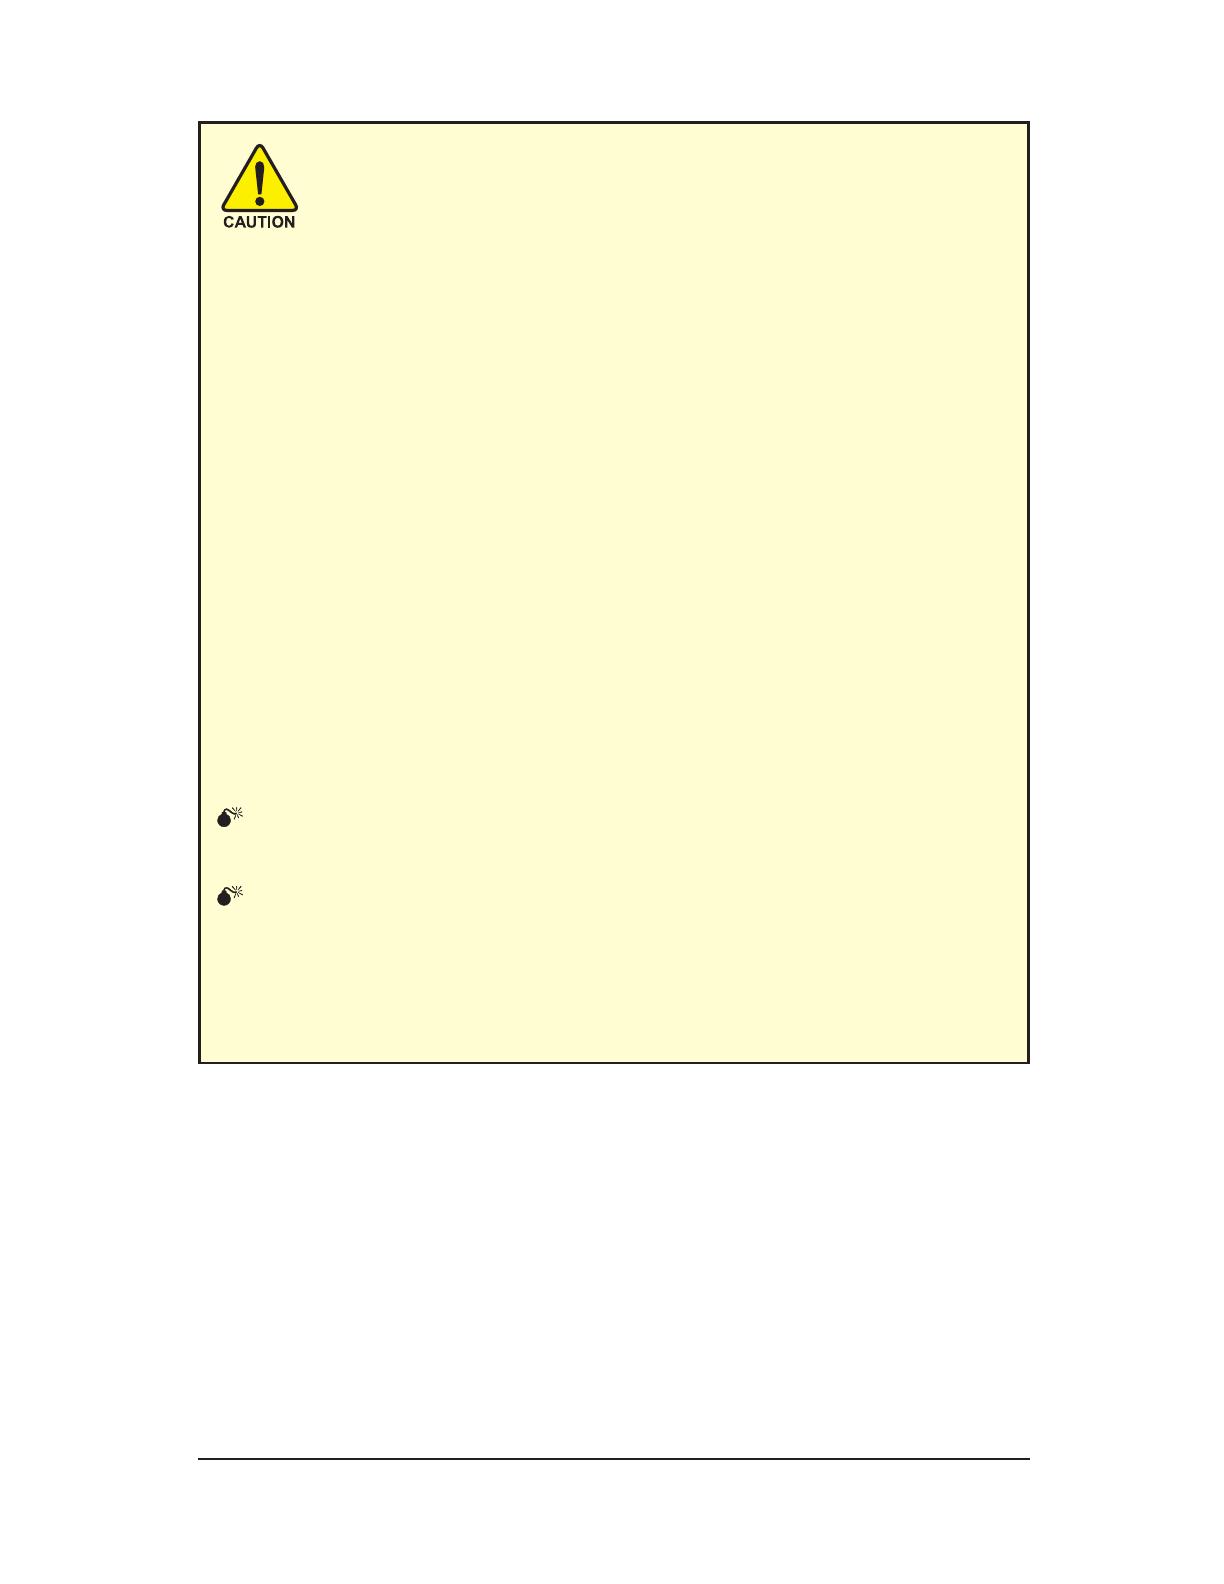
Expansion cards contain very delicate Integrated Circuit (IC) chips. To
protect them against damage from static electricity, you should follow
some precautions whenever you work on your computer.
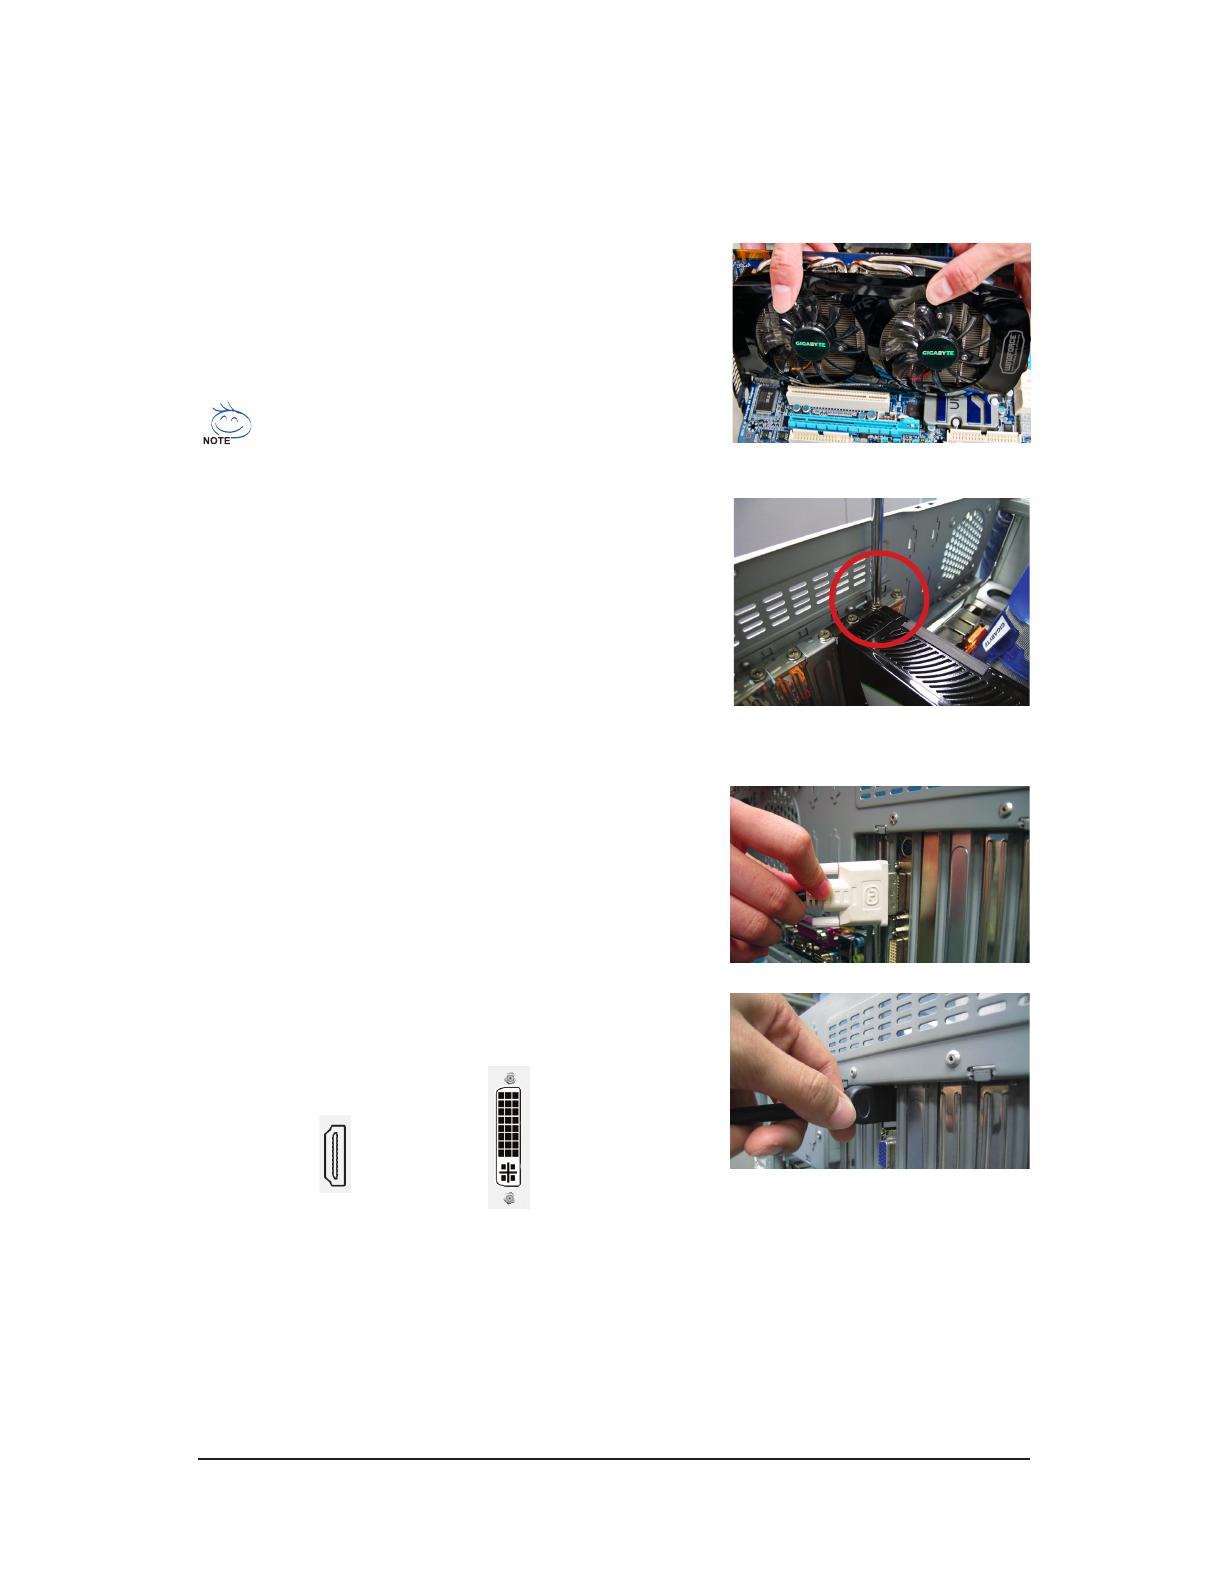
1. Turn off your computer and unplug power supply.
2. Use a grounded wrist strap before handling computer components. If you do not
have one, touch both of your hands to a safely grounded object or to a metal
object, such as the power supply case.
3. Place components on a grounded antistatic pad or on the bag that came with
the components whenever the components are separated from the system.
The card contains sensitive electric components, which can be easily damaged by
static electricity, so the card should be left in its original packing until it is installed.
Unpacking and installation should be done on a grounded anti-static mat. The op-
erator should be wearing an anti-static wristband, grounded at the same point as the
anti-static mat.
Inspect the card carton for obvious damage. Shipping and handling may cause dam-
age to your card. Be sure there are no shipping and handling damages on the card
before proceeding.
DO NOT APPLY POWER TO YOUR SYSTEM IF THE GRAPHICS CARD IS
DAMAGED.
In order to ensure that your graphics card can work correctly, please use
ofcial GIGABYTE BIOS only. Using non-ofcial GIGABYTE BIOS might
cause problem(s) on the graphics card.
- 9 - Hardware Installation
2.2. Hardware Installation
Now that you have prepared your computer, you are ready to install your graphics card.
Step 3.
This graphics card provides two DVI-I digital connectors and one
mini HDMI connector. You can connect a monitor that supports
DVI-I function. To connect a HDMI monitor,you need a cable or
adapter to connect from the mini-HDMI connector to a HDMI
monitor.
Connect a at panel
To Flat Panel DisplayTo HDMI Monitor
Step 1.
Locate the PCI Express x16 slot. If necessary, remove the metal
cover from this slot; then align your graphics card with the PCI
Express x16 slot, and press it in firmly until the card is fully
seated.
Step 2.
Replace the screw to fasten the card in place, and replace the
computer cover.
Make sure that the gold edge connector of the graphics card is
securely inserted.
Connect a HDMI monitor
- 10 -
GV-N500 Series Graphics Accelerator
How NVIDIA
®
SLI
TM
(Scalable Link Interface) technology works:
In an SLI conguration, two SLI-ready graphics cards of the same model and the same manufacturers are
connected together via SLI bridge connector in a system that provides two x16 PCI Express slots to scale
graphics performance. The picture below shows that two graphics cards are linked in parallel in an SLI
conguration.
SLI Conguration:
SLI bridge connector
(provided by motherboard manufacturer)
Two SLI-ready graphics cards
of the same type.
(Example: GV-N28-1GH-B)
- 11 - Software Installation
3. Software Installation
Notice the following guidelines before installing the drivers:
1. First make sure your system has installed DirectX 9 or later version.
2. Make sure your system has installed the appropriate motherboard drivers (for the motherboard
drivers, please contact the motherboard manufacturer.)
3.1. Driver and Utility Installation
3.1.1. Driver Installation
After installing the operating system, insert the driver disk into your optical drive. The driver Autorun screen
is automatically displayed which looks like that shown in the screen shot below. (If the driver Autorun screen
does not appear automatically, go to My Computer, double-click the optical drive and execute the setup.exe
program.)
For software MPEG support in Windows XP, you must install DirectX rst. Users who run Windows
XP with Service Pack 2 or above do not need to install DirectX separately.
Step 1:
Click the Install Display Driver item.
Step 2:
Click the Next button.
- 12 -
GV-N500 Series Graphics Accelerator
The system is installing the components.
Step 4:
Click the Finish button to restart the computer.
Then the driver installation is completed.
Step 3:
Click the Yes button.
- 13 - Software Installation
3.1.2. GIGABYTE Easy Boost on Driver Disk
Step 1:
Click the GIGABYTE Easy Boost item.
Step 2:
Choose the language for the installation and click the OK button.
Step 3:
Choose the Typical and click the Next button
Step 4:
Click the Finish button. Then the installation of the
GIGABYTE Easy Boost is completed.
The system is installing the components.
- 14 -
GV-N500 Series Graphics Accelerator
GIGABYTE Easy Boost
EasyBoost is combined with Over Clock, OSD Turning, BIOS Setting, Technical Support, Live Update.
Over Clock:
Adjust GPU clock, Memory clock, Shader clock and Fan speed. And monitor graphics card current value.
OSD Tunning: OSD-including OSD function, directory of screen shot, and recording video output.
“Color”-Adjust Gamma, Contrast and Brightness.
- 15 - Software Installation
Incorrectly doing overclock/overvoltage may result in damage to your system and reduce the useful
life of the system components.
BIOS Setting:
Back up current BIOS, ash BIOS from selected BIOS le and auto ash BIOS from server.
Technical Support: Show information of VGA, CPU, motherboard, system memory and monitor.
OSD Turning: “OSD”Set hotkey of OSD function and directory of screen shot and recording video output.
“Color” Adjust Gamma, Contrast and Brightness.
- 16 -
GV-N500 Series Graphics Accelerator
You can move the slider to change the resolution.
You can click the item to change the color quality.
Click the Advanced button for advanced settings.
3.2. Display Properties Pages
Display Settings (Resolutions and Color Quality for Windows)
To access Display Settings page, right-click on desktop and select Personalize, then the Personalization
windows will show up. Select Display Settings to adjust the screen resolution and color quality settings.
- 17 - Software Installation
Or you can right-click on the desktop and select Personalize, and then the Control Panel\Appearance Per-
sonalization\Personalization window will show up. Select Display Settings. When the Display Settings
dialog box appears, click Advanced Settings.
After clicking the Advanced Settings button in Display Settings, you'll see the Generic PnP Monitor and
NVIDIA GeForce GTX 560 Properties dialog box.Click the GeForce GTX 560 tab to access the NVIDIA
Control Panel.
3.3. Accessing NVIDIA Control Panel
After installation of the display driver, right-click on the desktop and select NVIDIA Control Panel.
The NVIDIA Control Panel is used to congure all your graphics card settings.
Right-click on the desktop and select NVIDIA Control Panel.
On the GeForce GTX 560 tab page, click Start the NVIDIA
Control Panel to launch the NVIDIA Control Panel.
- 18 -
GV-N500 Series Graphics Accelerator
Select the view of the NVIDIA Control Panel that is
most appropriate for you.
Standard Settings
Advanced Settings
The following pages provide details on configuring
advanced settings.
In the NVIDIA Control Panel, select a category to alter
specic NVIDIA display settings.
The categories are:
3D Settings
Display
Video
In the NVIDIA Control Panel, change a view if you
want.
The supported modes are:
Standard
Advanced
Custom
- 19 - Software Installation
Adjust Image Settings with Preview
If you are unfamiliar with 3D technology or not
an advanced graphics user, use the Adjust Im-
age Settings with Preview page to preview any
changes you make for improved image quality
and rendering.
Manage 3D Settings
(Note 1)
The Manage 3D Settings page enables you to
establish default 3D settings to use for all your
Direct3D or OpenGL applications and to estab-
lish a unique set of 3D settings for a particular
game or application.
Set PhysX conquration
NVIDIA
®
PhysX
®
is a powerful physics engine
that can utilize GPU acceleration to provide
amazing real-time physics effects.
(Note 1) This item is present only in Advanced view mode.
3D Settings
Tasks in the 3D Settings pages allow you to do the following:
Change the image and rendering settings of your 3D applications and games that utilize Direct3D and
OpenGL technology.
Override the shipped clocked frequencies of your GPU and GPU memory to increase your GPU perfor-
mance.
Assign specic 3D settings to a game so that these settings automatically load when a game is launched.
- 20 -
GV-N500 Series Graphics Accelerator
Display
A variety of display features enable you to further manipulate and congure your display settings to optimize
the use of your displays. Tasks in the Display pages allow you to do the following:
Move CRT screen position
Change resolution
Adjust desktop color settings
Rotate display
Manage custom resolutions
(Note)
Set up multiple displays
Change Resolution
Using the Change Resolution controls, you
can change the color setting, reduce screen
ickering, or adjust the amount of information
appearing on your display.
  • Page 1 1
  • Page 2 2
  • Page 3 3
  • Page 4 4
  • Page 5 5
  • Page 6 6
  • Page 7 7
  • Page 8 8
  • Page 9 9
  • Page 10 10
  • Page 11 11
  • Page 12 12
  • Page 13 13
  • Page 14 14
  • Page 15 15
  • Page 16 16
  • Page 17 17
  • Page 18 18
  • Page 19 19
  • Page 20 20
  • Page 21 21
  • Page 22 22
  • Page 23 23
  • Page 24 24
  • Page 25 25
  • Page 26 26
  • Page 27 27
  • Page 28 28
  • Page 29 29
  • Page 30 30
  • Page 31 31
  • Page 32 32

Gigabyte GV-N560OC-1GI User manual

Category
Graphics cards
Type
User manual

Ask a question and I''ll find the answer in the document

Finding information in a document is now easier with AI