Page is loading ...

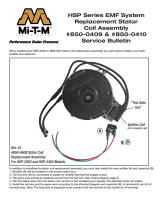
HSP Series EMF System
Ignition Coil Assembly
#850-0161 & #850-0191
Service Bulletin
“This Side
Out”
When ignition coil (A) is mounted correctly you can read “this side out”.
Coil to magnet gap = .010 inch.
Ref. #1
#850-0161 Ignition Coil
For HSP-2003 and HSP-2403 Models
A
Ignition Coil
When installing the 850-0161 ignition coil (Ref. #1) or 850-0191 ignition coil (Ref . #2) to the EMF System you will
need to make sure the coil is installed properly. If the mounting ange is rotated 180 degrees from what is shown
in the picture below no voltage will be present. Thus causing a lack of spark.
WARNING: This product can expose you to
chemicals including Lead, which is known to
the State of California to cause cancer and birth
defects or other reproductive harm. For more
information go to www.P65Warnings.ca.gov
WARNING

'CYL. SIDE'
facing out
When the ignition coil (A) is installed correctly, the wording “this side out” will actually be facing in, towards the
machine. The front side of the coil, which will be facing out towards you, will read 'CYL. SIDE'.
Coil to magnet gap = .010 inch.
When installing the coil remove the complete EMF and see additional instructions for drilling 2
1
⁄8" hole for coil wires
to exit the blower housing.
Ignition Coil
A
Ref. #3
#850-0191 Ignition Coil
For HSP-3003, HSP-3004
and HSP-3504 Models

EMF BRACKET RETROFIT FOR NEW STYLE MAGNETRON
REASON
The magnetron found on your machine (Figure 1) has been discontinued by the manufacturer. A new style (Figure 2) will
supersede the discontinued version. The physical differences in wire location may lead to excessive wear. This retrot
allows the wire to go through the EMF housing without interference.
Retrotting Instructions
1. Remove the fuel pump and EMF assemblies in
order to access the EMF housing (Item #5).
2. Place the drill hole pattern (Figure 5, back page) on
the inside of the EMF housing, and drill the three
holes indicated in Figure 3.
3. Insert the plastic bushings (Item # 1) into the large
holes on the cover plate adapter.
4. Install the cover plate adapter (Item #2) on the
outside of the EMF housing. Attach using two bolts
(Item #6), two lock washers (Item #3), and two nuts
(Item #4). Do not tighten. (Figure 4)
5. Feed the wires from the new magnetron through
the plastic bushings and reinstall the hub.
6. The plate has slots to allow vertical movement.
Position the plate so that the wires travel freely
through the plastic bushings. Tighten the nuts and
bolts, securing the plate in place.
7. Retrot is complete, reassemble as necessary.
Figure 1 (Old Style Magnetron)
Figure 4 (Assembly Drawing)
Figure 2 (New Style Magnetron)
Figure 3 (Hole Location Drawing)

EMF BRACKET RETROFIT FOR NEW STYLE MAGNETRON
Figure 5 (Drill Hole Pattern)
Mi-T-M Corporation
50 Mi-T-M Drive, P.O. Box 50
Peosta, IA 52068
800-553-9053 · 563-556-1235 fax
www.mitm.com · [email protected]
37-1287/Mi8011/072718
/