Page is loading ...

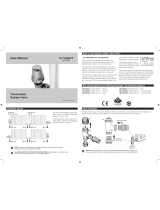
CHOICE RSTAT3 RF
Wireless Digital Room
Thermostat
(with Wall Mounted Receiver)
Introduction
The Choice Rstat3-RF is a non-programmable wireless
room thermostat designed to be simple to use whilst
bringing you comfort and energy economy. Comprising
of a battery powered thermostat (transmitter) and a
separate relay unit (receiver). The transmitter is intended
for wall mounting in the main living area in your house
with the receiver being mounted close to the boiler.
In addition to OFF/ON control the unit provides the option
to regulate your heating system at two temperature
levels; Comfort and Economy.
Features
• LCD display shows room temperature
• OFF/ON mode selectable
• Comfort/Economy mode selectable
• Frost protection
• Battery low indication
• Large easy to adjust dial
Receiver Installation
This product must be installed by a competent
person in line with the latest IEE regulations.
Isolate mains before commencing installation of the
product.
Pre-Check RF Address Code Setting
Both the transmitter and the receiver each have an 8 po-
sition DIL switch for address code setting. The product is
supplied with both DIL switches set to the same default
address code - already paired for operation. Check &
conrm they are set the same.
If there is another application or user nearby using the
product, then to avoid interference, you may need to
change the address code so both DIL switches are set to
an alternative address. You may also wish to do this just
to avoid potential interference in the future
Receiver Location
Before securing the supplied receiver backbox into
position ensure its location is in an open space away
from any metal objects including the boiler housing.
Consider also the building structure, i.e. walls and
ceilings when positioning the receiver relative to the
transmitter, as this may inuence the performance of the
RF system.
Example circuit diagrams for typical installations are
shown below. For reasons of space and clarity not every
system can be shown
Insert Batteries (Transmitter)
Loosen assembly screw at the base of the thermostat.
Gently pull the thermostat from its base.
Test Communication
With the receiver switch set to AUTO and the batteries
tted into the thermostat, set the temperature on the
thermostat to above & below room temperature several
times with the receiver and thermostat both in their
expected nal locations to conrm you have a reliable RF
communication.
Secure the receiver into the backbox with 2off M3.5
screws and t front bezel of the receiver.
Fit & forget...
DIL Switch locations
Receiver Wiring
Routes wires into the backbox and connect wiring in
accordance with information printed on the receiver.
Switch on the power to the receiver and set receiver
switch to ON to conrm wiring of the receiver is correct
and the connected boiler or system component is operat-
ing as expected. Once complete, set the receiver switch
to AUTO.
Fit two fresh AA alkaline batteries in the battery
compartment of the thermostat. Check LCD to conrm
batteries correctly tted.
In Wall Box
Receiver Base
Front Cover
Screw
Receiver Operation
Switch
OFF = Receiver is permanently off
ON = Receiver is permanently on
AUTO = Receiver accepting signals and operating
according to the thermostat
LED
RED = Power to receiver on
GREEN = Receiver output energised
YELLOW = Flashes when signals received from thermostat
Transmitter Mounting
1. Secure the base directly to the wall or pattress box.
2. The ideal location is for the thermostat to be situated
around 1.3m above the oor on an interior wall, away
from direct sunlight, heat sources and drafts.
3. Now check conguration of the thermostat is what you
want, see conguration.
4. Locate the thermostat back onto its base and secure
the assembly screw.
Receiver Mounting

Slide the smaller DIL switch to the
right of the battery compartment
on the transmitter to the setting
required.
Power Supply: 2xAA 1.5V batteries
Battery Lifespan: 1 year
Temperature Adjustment Range: 5-30°C
Temperature Display Range, Scale: 3-51°C, 1°C
Temperature Frost Protection: 5°C (non adjustable)
Specication
Switching Differential : +/-1°C
Dimensions : 86 x 86 x 32mm
Transmission Frequency : 433Mhz
Transmission Distance : 80m open, 30m indoors
Mounting Method : Wall/Surface
Approval Standards
EN60730-1
EN60730-2-7
EN60730-2-9
SERVICE AND WARRANTY
Your product is not user serviceable. PLEASE DO NOT TRY TO DISMANTLE THE UNIT.
This product is guaranteed by your supplier for 5 years from the date of manufacture. If it should become
defective please contact your installer or supplier for a replacement unit or visit www.sangamo.co.uk/returns
This product must meet Waste Electronic and Electrical Equipment Regulations (WEEE) for suitable environmental
recycling, recovery and/or disposal. End of life products should be handled in line with local regulations.
Alternatively return end of life product to Sangamo for correct disposal.
CUSTOMER CARE POLICY
As part of Sangamo’s continuous improvement program, the company operates a Customer Care policy. This
means we welcome your comments and complaints, as it can help us to improve our services to you, our
customer.
Due to our policy of continuous product improvement and development, the specications in this guide may be
subject to change without prior notice.
Sangamo Limited
Industrial Estate, Port Glasgow,
Renfrewshire, PA14 5XG
Tel 01475 745131
Fax: 01475 744567
Email: [email protected]
Web: www.sangamo.co.uk
WEE/JH0069TY143761 Issue A
If you have a problem or require
any further information please
contact our technical team on:
01475 745131
User Instructions
What is a room thermostat?
...an explanation for householders.
A room thermostat simply switches the heating system
on and off as necessary. It works by sensing the air tem-
perature, switching on the heating when the air temper-
ature falls below the thermostat setting, and switching it
off once this set temperature has been reached.
Turning a room thermostat to a higher setting will not
make the room heat up any faster. How quickly the room
heats up depends on the design of the heating system,
for example, the size of boiler and radiators.
Neither does the setting affect how quickly the room
cools down. Turning a room thermostat to a lower setting
will result in the room being controlled at a lower tem-
perature, and saves energy. The heating system will not
work if a time switch or programmer has switched it off.
The way to set and use your room thermostat is to nd
the lowest temperature setting that you are comfortable
with, and then leave it alone to do its job. The best way
to do this is to set the room thermostat to a low tem-
perature - say 18°C - and then turn it up by one degree
each day until you are comfortable with the temperature.
You won’t have to adjust the thermostat further. Any ad-
justment above this setting will waste energy and cost
you more money.
If your heating system is a boiler with radiators, there
will usually be only one room thermostat to control the
whole house. But you can have different temperatures
in individual rooms by installing thermostatic radiator
valves (TRVs) on individual radiators. If you don’t have
TRVs, you should choose a temperature that is reason-
able for the whole house. If you do have TRVs, you can
choose a slightly higher setting to make sure that even
the coldest room is comfortable, then prevent any over-
heating in other rooms by adjusting the TRVs.
Room thermostats need a free ow of air to sense the
temperature, so they must not be covered by curtains
or blocked by furniture. Nearby electric res, televisions,
wall or table lamps may prevent the thermostat from
working properly.
Transmitter
Power supply: 230Vac, 50Hz
Contact Rating: 16A, 250Vac (Volt Free contact)
Insulation class: 2
Flexible wire Size: 1.5mm
2
Rigid wire size: 1.5mm
2
Dimensions: 86 x 86 x 55, when mounted
Mounting: Wall using supplied backbox
Receiver
Operating Temperature: 0-50°C
Storage Temperature: 10-60°C
Protection Rating: IP21
Transmitter and Receiver
Select °C and °F readout (default °C)
Set the switch to °C temperature in the display will be
shown in Celsius.
Set the switch to °F temperature in the display will be
shown in Fahrenheit.
Select On/Off or Comfort/Economy switch function
(default On/Off)
When On/Off is selected the switch at the base of the
thermostat is used as an On/Off switch.
When the sun and moon icons are selected the switch
at the base of the thermostat is used to switch between
Comfort mode (sun icon) and Economy mode (moon
icon).
Display
The LCD displays actual room temperature until the
setting dial is moved.
Setting the temperature
Turn the setting dial to required temperature. The
selected temperature will ‘flash’ in the LCD to signify
it is showing the set temperature. After a short period
the display stops flashing and shows actual room
temperature.
Thermostat status
A flame symbol will be lit whenever the thermostat is
calling for heat.
Low battery indication
A battery symbol will flash in the display when batteries
require replacement.
Batteries should be replaced within 15 days, after which
the thermostat will turn off the load it is controlling.
When this happens “OF” will be displayed.
Switch function
The function of the switch at the
base of the thermostat has 2 mode
options. See ‘Configuration’ section for DIL switch
setting.
Comfort/Economy setting
When the switch is set to the sun icon, the thermostat
controls at the temperature set by the dial. When the
switch is set to the moon icon, the thermostat controls at
4degC below the temperature set by the dial.
Conguration
ON OFF
ON OFF
Setting
The switch is used as ON/OFF control. When the switch
is set to ‘ON’, the thermostat controls at the tempera-
ture set by the setting dial.
When set to ‘OFF’, the thermostat output and therefore
the heating system is turned off and ‘OF’ is displayed.
Error Code
E1 ashing in the display: Room sensor short circuit.
Thermostat shuts down its output.
E2 ashing in he display: Room sensor is broken. Ther-
mostat shuts down all its output.
Temperature Notes
If the room temperature is higher than 30°C the heat-
ing will stop working.
If the room temperature is lower than 5°C the heating
will start working (Frost Protection)
ON OFF
/