Page is loading ...


2
Introduction
Thank you for purchasing our Sea Eagle Sport Kayak! We
have been selling inflatable boats for over 40 years, and your
boat is the beneficiary of this experience.
It is rugged, safe and secure, and will serve you well.
Packing list
If you have ordered your boat directly from SeaEagle.com, your
packing list will be included with your order. Please verify everything
is correct and contact us right away at 1-800-748-8066 if you have
any questions. Our office is open 9-5 Monday- Friday, EST.
If you have ordered from one of our dealers or resellers, please call
them if there are any items missing from your order.
SE330 & SE370
Our Go Anywhere SE330 & SE370 are great for lake and
stream paddling as well as play in the ocean and up to class
3 whitewater. They feature three main air compartments,
inflatable bow and stern spray skirts and two seats.
Pipe Valve on Spray Skirts:
Sea Eagle pipe valves are simple,
reliable and compact. Insert the large
cone-shaped nozzle on your pump to
inflate.
To close, tightly pinch the pipe sec tion
of the valve with your forefinger and
thumb while you remove the pump
nozzle from the valve. Squeeze tightly,
and hold the valve at the very bottom
so little air seeps out while you plug
the valve.
Once the valve is plugged it can be
pushed down into the chamber and
out of the way. Getting this right might
take a few attempts, but it becomes
second nature quickly.
Deluxe One-Way Valve
This one-way valve makes inflation
easier. The outer cap of the one-way
valves makes the permanent seal, and
must be fastened firmly. Be sure the
threads are not crossed when
tightening the cap or screwing the
valve base. Also check to make sure
there is no sand or dirt that could break the seal.
To inflate your boat simply place the
large round nozzle into the valve.
To deflate, unscrew the inner valve
and remove. Most of the air will rush
out in a minute or two, and any
remaining air will be forced out when
the boat is rolled up for storage.
Pumps
A-41 Bellows Pump - This pump is
used for all our products and is one of
the best on the market today. Attach
the hose to the valve on the right side
of the pump (as shown in the picture)
to inflate. The nozzle adapters allow
you to either inflate our small pipe
valves on our SEC seats and spray
skirts or our deluxe one-way valves on our main chambers
and deluxe inflatable seats. We firmly recommend you always
carry your A-41 on board for safety.
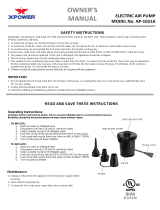
MB-50 Electric Pump - The MB-50
electric pump works with a 12-Volt
power outlet off your automobile to
inflate your Sea Eagle.
Make sure your pump is off, and insert
the adapter into your car’s 12-Volt
power outlet. If your battery is weak
you might want to keep your engine
running.

3
The MB-50 needs no extra nozzles to
inflate the main air chambers of your
SE330 & SE370. Just insert the pump
into the valve and switch it on. Use the
plastic extender tube and the large
nozzle to inflate the seats. Do not drop
your pump or move it suddenly while it
is on.
Self Bailing Drain Valves
The SE330 & SE370 have one drain
valve at the stern. It should be left
closed for dry paddling on open water
or opened for ocean surf or mild
whitewater (up to class 3).
Deluxe Inflatable Seat
Equipped with two one-way valves, this seat should be
inflated so it is rigid and reasonably hard. You should be able
to push your finger about 1/2” into a well inflated deluxe seat,
which will make it firm enough for good back support. If
overinflated the seat will bulge out in the center of both
pillows and will not be comfortable to sit on. Please also note
that you can change the center of gravity by the hardness or
lack of hardness in the bottom seat compartment - i.e. a
softer bottom compartment lowers your seating position.
For use in the SE330 &
SE370, attach the straps
to the D-rings on the
seat (as shown in the
picture to the left) and
place the seat in the
boat. The tubes of the
SE330 & SE370 will hold
the seat in place.
.
SEC Seat
This seat is equipped with
small pipe valves, and should
be inflated with the small
nozzle. (See Valves for
details).
For use in the SE330 &
SE370, place the seat in the
boat. The tubes of the SE330
& SE370 will hold the seat in
place.
Paddles
Our AB-30 7' 10” (4 Part)
Double End Asymmetric
Paddles feature anodized
aluminum shafts with
Fibrylon blades. It has a 65
degree feather capability. It
is durable and lightweight
(enough to float on water).
The blades of all our paddles can be either parallel or
feathered, in which case one blade is positioned 90 degrees
to the other. This can be a big help when paddling into a stiff
breeze because the blade not in the water will slice through
the wind with little resistance.
Feathering the blades complicates the motion of the stroke,
so it’s not recommended for new kayakers right away.
There are 6 parts to each AB30 Paddles:
2 straight middle sections, 2 blade sections & 2 drip guards.
To assemble, first join the 2
straight sections with the 3
holes (used for feathering)
in the center and slide a drip
guard over each open end
of the shaft.
Next, attach a blade section
to each end and complete
your AB30 Paddle.
SE330 & SE370 Inflation Monitor
The SE330 & SE370 feature
an inflation monitor diagram
to help you gauge the
correct pressure.
As you inflate your SE330 &
SE370, the hull material will
stretch so that the printed diagram will expand to match the
clear plastic strip included with your kayak.

4
Inflate the main chambers
so that the pattern on your
hull matches the pattern on
the clear plastic inflation
gauge.
Most customers become
familiar with the feel of a
properly inflated boat
quickly, and do not need to
check every time. It is a
good idea to use the inflation monitor for the first several
times you inflate your kayak.
Please note, the inflation monitor is on the inside of the
starboard (right, facing foward) compartment. Other air
compartments should be inflated so they are “tennis ball hard”
(firm) and you should be able to indent your thumb on the air
compartment about 1/2 to 3/4 of an inch.
Inflation
Hull material and working pressure: The Sea Eagle 330 &
370, as well as spray skirts and seats are designed to have a
moderate working pressure of approximately .75 PSI.
Using an air compressor designed for tires at 50 PSI can
harm a boat designed to work at a far lower working
pressure, so we recommend only using Sea Eagle pumps.
The 2 main pontoon compartments of Sea Eagle 330 & 370
should be inflated with inflation monitor. (please refer to the
Inflation Monitor section for details).
Before starting, locate a relatively flat, clean space to unpack
your boat. Unroll the kayak so it is laid out flat, and locate
your pump. You are now ready to inflate your kayak. It will be
helpful to use the photos displayed on page 2 showing the
different types of valves and fittings we use.
The three main valves are located at the stern of the kayak.
Screw the three valves into the three valve bases. Insert the
base plug fitting into the yellow hose. Then insert the plug
fitting on the hose into the deluxe valve as shown on page 2.
Inflate each main compartment until the plastic pressure
gauge matches with the printed pressure gauge on the hull.
Please note you can safely inflate up to 1 centimeter beyond
the printed gauge without damaging the boat. You can use
the same plug fitting to inflate the floor of the kayak.
Use the same plug fitting to inflate our deluxe inflatable seats.
Please note you do not need to use the pressure gauge.
Simply stop inflating when your seat is reasonably rigid.
Using the larger of the two nozzle fittings attached to the plug
fitting, insert the nozzle fitting into the pipe valve on the front
spray skirt and then you can inflate until reasonably rigid
(i.e. wrinkle free and “tennis ball hard”). Repeat process for
rear spray skirt.
Moderate Whitewater Kayaking
Our Sea Eagle 330
& 370 kayaks can
be used for running
rapids up to class 3
whitewater. Please
note, these are
recreational kayaks
and they are not
designed for heavy
white water rapids.
They are rough,
capable boats, but
the challenges of
powerful hydraulics
and sharp rocks
can be more than
they are designed for. We recommend that you carefully
research any river you wish to run and be sure it does not
have conditions that are too great for this kind of kayak.
Whitewater kayaking is extremely challenging and rewarding,
but can also be very dangerous to those that disrespect the
power of moving water and the danger that sharp objects can
present.
It is not possible to adequately discuss the topic of whitewater
kayaking in the context of this owner’s manual. Cecil Kuhne’s
“Inflatable Kayaking” (ISBN 0-8117-2810-2) is a great source
of background information on paddling technique.
Lake and stream paddling
The Sea Eagle 330 & 370
perform well in lakes and
streams. Remember to
close the drain valves when
paddling on open water.
This will allow you to have a
totally dry trip.
One thing you might notice
if you are accustomed to
hardhull kayaks or canoes is the natural yaw (side to side
motion) of an inflatable kayak. This is a huge benefit in
whitewater or ocean paddling, but it is not always appropriate
for flatwater kayaking.
The Sea Eagle 330 & 370 have 2 skegs under the rear of the
inflatable floor. This helps control the yaw and improves your
paddling speed.
Big Paddling Hint: When you begin to paddle, paddle slowly
at first, building speed with each stroke. This will control the
natural yaw further and allow you to paddle straight and fast.
When paddling with a partner, try to co-ordinate your strokes
and paddle in unison. If you start paddling out of unison,
simply stop and start again. With practice you will learn to
paddle straight, reasonably fast and comfortably for as long
as you wish. Happy paddling!

Ocean Kayaking
The Sea Eagle 330 & 370 kayaks are a great pleasure on the
ocean. Those not familiar with the ocean should take
appropriate care, and always kayak within range of a
lifeguard station.
You should never go into ocean waves rougher than you can
handle. Never lose sight of the oncoming waves, and never,
never exhaust yourself in the ocean. It’s always better to end
the day early and safe than push your luck when you are
tired.
Deflation and Rollup
If you plan on storing your
kayak for more than a few
days, it is best to towel it off
or let the kayak dry in the
sun to remove any excess
moisture which might cause
unsightly mildew.
1. First open all the valves
and let the kayak deflate for
a minute or two. (See
Valves for details)
2. Fold one side of the
kayak toward the center.
3. Next fold the other side
over the first. The kayak will
still have a bit of air as
shown at left.
4. Starting from the bow, roll
the kayak up like a sleeping
bag (towards the 3 deluxe
valves). For the most
compact storage it is
important to roll the boat
tightly in the beginning and
keep it tight.
5. Once the boat is rolled up
it is ready to be stored or
carried. For additional
security place the inflatable
skeg protectors over skegs.
Care and Maintenance
There is very little that you have to do to keep your kayak in almost
new condition for many years. You may store it inflated or deflated.
If you leave it outside, you should raise it up off the ground and cover
it with a tarp if it is going to be in direct sunlight or exposed to leaves,
berries or rain.
We do not recommend using your boat below 30 degrees fahrenheit.
PVC material can become brittle in extremely cold temperatures.
This will not harm a boat stored in cold conditions as long as it is not
dropped or subjected to a sudden impact in the extreme cold.
If you store it in a closet, basement or
garage, we rec om mend picking a cool, dry
spot, making sure the boat is clean and
dry before you pack it up - otherwise mold
can ac cu mu late while it is stored.
Periodic use of 303 Protectant, available
in the Accessories section of
SeaEagle.com, will improve the UV
resistance of your Sea Eagle.
For stain removal, we recommend the use
of 3M Vinyl Cleaner and Restorer, also
available at SeaEagle.com to remove the
toughest stains.
5

6
Life Jackets
Sea Eagle recommends the use of
Coast Guard approved Personal
Flotation Devices (PFD’s) when on
the water. The Sea Eagle Life Jacket
features adjustable closures & nylon
straps for a comfortable, secure fit.
Three sizes are available at
seaeagle.com.
Troubleshooting
Leakage of air: If your boat appears a bit soft, it might not be
because of a leak. If the boat was inflated late in the day with
90 degree air, that air might cool 20 degrees overnight. The
cooler air exerts less pressure on the hull, so it could appear
soft the next morning.
If there has been no temperature variation, you need to start
looking for a leak. Below are the three best methods.
1) Visual inspection. Get a good look at your boat from just a
few feet away. Flip it over and closely check over the outside.
Any large leaks should be clearly visible.
2) Listening. If you have a rough idea where your leak is, you
can sometimes hear it in a quiet room.
3) Soapy water. Use a mix of dishwashing liquid and water in
a bucket and spread the soapy water over the boat using a
wash cloth. A small leak will produce bubbles that will pinpoint
the location of the leak. For large punctures, listen for
sputtering or whistling.
Check your valves: Look, listen, and if necessary, spray
soapy water around your valve and the valve base. Leaky
valves have several causes:
1) Check the O-Ring at the base
of the valve opening for dents.
Denting can occur when the
valve body lies accross the O-
Ring during storage. Heat the O-
Ring with a hairdryer until the
dent eases itself out. This should
not take more than a few
minutes.
2) Crossed threads. Make sure that both the inner valve and
the outer cap are firmly screwed together. If threads are
crossed on either item a slow leak could result. A good way to
avoid this is to first turn the outer cap back 1/4 turn.
3) Grains in Diaphragm, threads, or O-ring. Check the black
diaphragm at the bottom of the inner valve for grains between
the diaphragm and the inner valve. Also check the threads on
the inner valve, boat hull, and outer cap for any dirt or sand
which might break the seal. Check the O-ring on the inside of
the outer cap for any sand or contaminants which might break
the seal.
Repairs
Through use you may occasionally puncture your boat. Most
leaks only take a few min utes to repair. Your boat comes with
a repair kit, and additional repair supplies can be ordered
from our website.
Small Repairs: Deflate your boat. Thoroughly clean and dry
area to be repaired. For a small puncture (less than 1/8th")
apply a small drop of glue. Let dry 12 hours. If you need to
get on the water sooner, let dry 30 minutes and then inflate
the boat, inflating the compartment with the repair only 3/4
full. Be sure to make a permanent repair later.
Patches: Leaks larger than a pinhole can be patched. Most
patches can be done in a few minutes, but we do offer a
repair service for more complex jobs out of warranty. Our
minimum repair fee is $75. and you will be responsible for
freight expenses to our facility in Port Jefferson and return
freight to your destination.
First locate the leak by the
methods above. Soapy water will
bubble out from the source of the
leak.
Thoroughly clean the area
surrounding the leak to remove
any dirt or grime.
Cut a piece of repair material
large enough to over lap the
damaged area by approximately
1/2". Round off the edges, and
place over the leaking area.
Using a ball point pen, trace the
outline of the patch. Angle the
pen inward a bit so that the ink
will be covered by the patch later.
Ap ply ad he sive to the dull side of
the patch and around the area to
be repaired. Coat the affected
area lightly but completely with
glue.
Let the glue sit for 2-4 minutes
until it appears tacky. If glue does
not hold, heat patch with a hair
dryer and press firmly until cool. Note: Do not use hair dryer
on an inflated boat.

7
Place the patch on the damaged
area and press down firmly. Use
a hair dryer to heat the patched
area. A temperature of
approximately 160 degrees will
activate the adhesive. The boat
must be deflated when using a
hair dryer or the material may
bulge as a result. Allow 24 hours
to cure before inflating your kayak after the repair.
Skeg Installation
Older Sport Kayak models did not have skegs equipped but
can easily be installed following these directions. The skeg kit
can be purchased online at SeaEagle.com.
If you are gluing your skegs to your old Sport Kayak we
suggest that you glue the skegs at a distance of about 24”
from the drain valve in the stern of the boat. The floor is
divided into 5 tubes. Skegs are glued on the second tube
from either side under the boat.
Before gluing the skegs, fully
inflate your kayak and turn it
upside down. Place the skegs
lengthwise on the tubes and then
trace the outline with a pencil on
the tubes. Please bear in mind
that the skeg should have the
lower curved section facing the
bow and the higher pointed end
facing the stern of the kayak.
Smear a thin layer of glue inside
of the traced outlines on the
pontoons and on the base of the
skegs. Allow the glue to get tacky
for about 2-5 minutes and then
place the skegs down on the
traced outlines.
Press the skegs hard against the
pontoons to make sure that the
two surfaces are joined properly.
It is helpful to use a small putty
knife to press down on the flat
flange area of the skeg against
the pontoon.
Allow it to try for at least 12 hours.Your skegs should now be
permanently attached to your kayak.
Skeg Straightening
. If a skeg does become bent (this
can happen from folding the boat
up without the skeg protectors
on them) there is a simple
solution.
First, make sure that the boat is
inflated & turn it upside down so
that the skegs are facing upward.
Then using a hair dryer, heat the
skegs up until they become soft.
It should only take a few minutes
for the skeg to become soft and
then the skeg can be
straightened by hand. Place skeg
protector over skeg until it cools. Store boat with skeg
protectors in place to prevent bending of the skeg.

8
Contact Us
Please feel free to check out SeaEagle.com for new accessories,
spare & replacement parts for your new (or older) Sea Eagle Sport Kayak!
Sea Eagle Boats. Inc.
19 N. Columbia St., Suite 1
Port Jefferson NY, 11777
1-800-748-8066 or e-mail us at [email protected]
/