Page is loading ...

Full product range & more information: www.lumenalights.com
INSTRUCTIONS
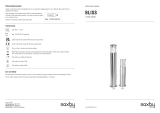
Pathos 316 Marine Grade Stainless Steel Path Light
With Photocell
600mm & 800mm
WARNINGS
PLEASE READ THESE INSTRUCTIONS CAREFULLY PRIOR TO INSTALLATION / MAINTENANCE
• If a fitting is found to be damaged, cease use immediately.
• This is a Class 1 product and must be earthed.
• This unit must be fitted by a competent and qualified electrician.
• Install in accordance with IEE wiring regulations and current Building Regulations.
• To prevent electrocution, switch off mains supply before installing or maintaining this fitting. Ensure
other persons cannot restore the electrical supply without your knowledge.
• This light fitting should be connected to a circuit with a 30Ma RCD fitted. Maximum 12-15 fittings on
each circuit recommended.
• If replacing an existing fitting, make a careful note of the connections.
• All connections should be made as watertight as possible to avoid electrical shortage.
• When changing the bulb, always switch off at the mains & allow to cool before handling.
• Always use the correct type & wattage bulb. Never exceed the wattage stated.
• The unit may get warm whilst on for a period of time.
CLEANING / CARE OF STAINLESS STEEL:
Occasional cleaning and care is recommended for this product. Contrary to popular belief, Stainless Steel needs looking after,
especially in exposed and coastal areas. If not cleaned on a regular basis, the acid that is ever present in the air and salt in coastal
areas, will affect the surface causing pitting and even rust like staining to appear. To keep your lights looking good, simply wipe
clean the outside with a damp cloth and then dry once a month, (more frequently in coastal areas). Specialist stainless steel
cleaning products can be used but never use an abrasive cleaner. In extreme conditions it may be advisable to apply a clear
lacquer or varnish to protect the surface. Lumena recommend and stock Kilrock stainless steel cleaner.
For further information please refer to our website.
WARNING - Ensure all surfaces are completely dry prior to switching on the fitting after cleaning.
RETURNS:
If purchased from a 3rd party, please contact your supplier. If purchased direct, contact us by phone or email:
Lumena Lights Ltd, Centre 33 Long March, Daventry, NN11 4NR Tel: +44 1327 871161 Email: sales@lumenalights.com
Our full returns policy is available on our website.
Waste Electrical Products should not be disposed of with household waste. Please check with your local authority or contact us
for more information. Please recycle packaging whenever possible.
Producer Registration Number: WEE/KC3440XY
Voltage: 220 - 240v
Max. Wattage: 20w
Bulb Holder: ES / E27
Recommended Bulb: 15w LED Corn Bulb or Candle Bulb
IP Rating: IP44
Cable: 1.5mm 3 Core (H07RN-F)
Cable Length: 0.5m (approx.)
Product Heights: 0.6m / 0.8m
Sensor: Photocell (Dusk to Dawn)
Materials: 316 Marine Grade Stainless Steel and Polycarbonate
Mount: Internal Mounting Base (adjustable)
Dimensions: Diameter = 100mm, Overall Height = 600mm or 800mm
INCLUDED: Bollard, 2 x Allen Keys, 3 x Mounting Screws & Plugs, 1 x Junction Box, Instructions
✔✔✔
3 YEAR
GUARANTEE
see website for
more details
Reduced warranty for
specific components
RoHS

Full product range & more information: www.lumenalights.com
INSTALLATION:
IMPORTANT: Cable should be laid inside armoured conduit or piping to protect from water-logging, chemicals
found in soil and damage. If buried, it should be buried to at least 0.5m below ground to reduce damage risk. If
this method is not used, cable warranty will be void.
This bollard should be securely fixed to a concrete base, brick, paving slab or quality wooden decking. It should not be installed
directly into soil.
1. Remove internal mounting base from the bollard body by removing the 3 x
socket screws.
2. Drill out the 3 mounting holes using a 6mm masonry drill bit and insert the
plastic wall plugs (supplied).
3. Locate and remove the connection block from inside the tube and insert the
cable into the waterproof junction box, as well as the mains cable.
4. Strip back the 3 inner wires of the mains power cable to reveal the Live
(brown), Earth (yellow & green) and Neutral (blue).
5. Insert the wires into the correct terminals of the terminal block, ensuring
the brown mains Live wire is connected to Live in of the Photocell (L),
the three blue Neutral wires (N) are connected to one another and the
two yellow and green Earth wires are connected to one another – See
diagram.
6. Fully tighten the terminal block screws to clamp the wires down,
ensuring they make a connection to the conductor, not the rubber
sheath.
7. Once the wiring is complete, ensure the junction box is sealed / fully
water right, and return back inside the post.
8. Insert the stainless steel bolts through the mounting plate and secure in
place (adjust base as required – see below).
9. Replace the tube over the base and fasten the 3 x socket screws
to secure.
ADJUSTABLE MOUNTING BASE:
The Pathos 316 incorporates a unique adjustable mounting base plate which enables
installation on uneven surfaces.
1. Loosen the socket screws on the mounting base with the allen key provided.
2. Loosely secure the base to the surface as per above.
3. Using a spirit level, adjust the socket screws accordingly to level off the base.
4. Fully tighten the mounting screws to complete installation.
LAMP INSTALLATION / REPLACEMENT: (Ensure power is turned off prior to changing the lamp)
1. Unscrew the head to reveal bulb holder.
2. Remove / Insert lamp (screw base – E27).
3. Replace head and turn until head becomes secure on the fitting.
IMPORTANT: Condensation can occur due to the warmth inside the fitting produced by the lamp and the cold air outside. If
this is noticed, on a dry day, turn off the power supply, safely remove the head, and wipe dry with a soft cloth. It is
recommended to change lamps / install on a warm, dry day.
CABLES:
Neutral (N) = Blue
Live (L) = Brown
Earth = Yellow & Green
Colours of wire sleeving may vary
slightly – Test prior to use.
/


