Page is loading ...

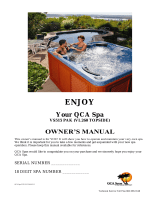
OWNER’S MANUAL
Pavilion (50HZ)

Model:
Serial Number:
Date Installed:
Dealer:
Address:
Telephone:
Note: The serial number/identification label is located within the equipment
compartment and skimmer housing.
Model Average Fill Weight Weight
Gallons Filled lbs. Empty lbs
#8000 - Pavilion 525 5084 800
Thank you for your recent Saratoga Spa Purchase.
This owners manual has been designed to acquaint you with your Saratoga
Spa’s operation and general maintenance.
Keep this manual available for future reference.
If you have any questions regarding your Saratoga Spa, contact your local
dealer.
Thank you.

1
T
Table of Contents
SARATOGA SPA SAFETY INSTRUCTIONS
Avoiding Risk to Children.................................. 2
Avoiding Risk of Electrical Shock ..................... 3
Avoiding Risk of Injury ....................................... 3
Unclean Water ..................................................... 4
Avoiding Risk of Hyperthermia ........................ 4
Avoiding Risk of Skin Burns .............................. 4
Important Spa Instructions ................................ 5
Pavilion Specifications ..................................... 5-6
INSTALLATION INSTRUCTIONS
Location Preparation .......................................... 7
Outdoor Installation ........................................... 7
Indoor Installation ............................................... 7
ELECTRICAL REQUIREMENTS AND
PRECAUTIONS
220 Volt Permanently Connect Models .......... 8
Electrical Installation Instructions
220 Volt Models .................................................... 8
Electrical Spa Wiring Connection Instructions
220 Volt Models .................................................... 9
INITIAL OPERATING INSTRUCTIONS
Start-up and Re-fill Procedures ...................... 10
Start-up Procedures .......................................... 11
JET SYSTEM
Saratoga Spa Jet Identifications ....................... 13
Saratoga Spa Jet Selectors ............................... 15
Jet Therapy Zones.............................................. 16
Pavilion ........................................................... 17-18
EQUIPMENT MAINTENANCE
Jet Selector Maintenance ................................. 19
Light Bulb Replacement.................................... 19
CONTROL PANEL OPERATION
Main Panel ........................................................... 20
Temperature Control ............................... 20
Setting the Time ......................................... 21
Operating the Hydro Pumps .................. 21
Invert ............................................................ 22
Freeze Protection ...................................... 22
Main Control Panel Locking Features ........... 22
Major Spa Panel Lock ............................... 22
Minor Temperature Lock ......................... 22
SPA CARE AND WATER MAINTENANCE
General Information ......................................... 23
Care of Pillows ................................................... 24
Care of Exterior ................................................ 24
Care of Spa Cover............................................. 25
Winterizing your spa ........................................ 26
Water Quality Maintenance ...................... 27-29
Troubleshooting Guides ............................. 30-31
Diagnostic Messages ................................... 32-33
System Connections and Fuses ...................... 34
Wiring Diagram ................................................. 35
Dip Switches and Jumpers ............................... 35
Replacement Parts ............................................ 36
Accessories ......................................................... 36
Spa Care and Maintenance Record ............... 37

2
S
Saratoga Spa Safety Instructions
READ AND FOLLOW ALL INSTRUCTIONS
AVOIDING THE RISK TO CHILDREN
SPA SAFETY REMINDERS
DANGER:
• RISK OF CHILD DROWNING. Extreme caution must be exercised to prevent unau-
thorized access by children. To avoid accidents, ensure that children cannot use a spa
unless they are supervised at all times.
WARNING:
• To reduce the risk of injury, do not permit children to use this spa unless they are
closely supervised at all times.
• To reduce the risk of injury, lower water temperatures are recommended for young
children. Children are especially sensitive to hot water.
DO:
• Make sure you always lock the child resistant locks after using the spa for your
children’s safety. Every Saratoga Spa is equipped with a locking cover that meets the
ASTM F1346-91 Standard for Safety Covers.
• Test the water temperature with your hand before allowing children to enter the spa to
be sure that it’s comfortable. Children are especially sensitive to hot water.
• Remind children that wet surfaces can be very slippery. Make sure that children are
careful when entering or exiting the spa.
DON’T:
• Allow children to climb onto the spa cover.
• Allow children to have unsupervised access to the spa.
AVOIDING THE RISK OF ELECTROCUTION
Risk of electrocution
• Connect only to a grounded source.
• Do not bury the power cord. A buried power cord may result in death, or serious
personal injury due to electrocution if direct burial-type cable is not used, or if improper
digging occurs.
• A ground terminal (pressure wire connector) is provided on the control box inside the
unit to permit connection of a minimum No. 8 AWG (8.4 mm) solid copper bonding
conductor between this point and any metal equipment, metal water pipe, metal enclo-
sures of electrical equipment, or conduit within five feet (1.5 m) of the unit as needed to
comply with local requirements.
WARNING:
• To reduce the risk of electrical shock, replace a damaged cord immediately. Failure to do
so may result in death or serious personal injury due to electrocution.

3
DANGER - Risk of electric shock. Do not permit any electrical appliance, such as a light,
telephone, radio or television within 5 feet (1.5m) of a spa. These units DO NOT have an
internal ground fault circuit interrupter. The installation of a ground fault circuit interrupter
MUST be done by a qualified Electrician and must meet all local and national codes.
DANGER: RISK OF ELECTRICAL SHOCK
• Install at least 5 feet (1.5 m) from all metal surfaces. A spa may be installed within 5 feet of
a metal surface if each metal surface is permanently connected by a minimum No. 8 AWG
(8.4 mm) solid copper conductor attached to the wire ground connector on the terminal
box that is provided for this purpose if in accordance with National Electrical Code ANSI/
NMFPA70-1993.
• Do not permit any electrical appliances, such as a light, telephone, radio, or television within
5 feet (1.5 m) of a spa. Failure to maintain a safe distance may result in death, or serious
personal injury due to electrocution, if the appliance should fall into the spa.
• Install your spa is such a way that drainage is away from the electrical compartment and
from all electrical components.
DO:
• Do test the water temperature with your hand before entering the spa to be sure the
water temperature is comfortable.
• Do keep the spa cover locked when the spa is not in use.
• Do check the equipment compartment monthly for any signs of tampering to the spa
equipment.
• Do follow the maintenance instructions of the spa found in this owner’s manual.
• Be sure your spa is connected to the power supply correctly - use a licensed electrical
contractor.
• Test the Ground Fault Circuit Interrupter(s) once a month.
DON’T:
• Use the spa with the equipment compartment door removed.
• Place electrical appliances within 5 feet (1.5m) of the spa.
• Don’t allow children to have unsupervised access to the spa.
• Don’t block the equipment compartment vents. This could cause damage to the spa
equipment and will void the warranty.
RISKS TO AVOID
DANGER: RISK OF INJURY
• To reduce the risk of injury to persons, DO NOT remove suction fittings located at the
bottom footwells of the spa.
• The suction fittings in the spa are sized to match the specific water flow created by the
pump. Never replace a suction fitting with one rated less than the flow rate marked on the
original suction fitting. Never operate the spa if the suction fittings are broken or missing.
• There is a danger of slipping and falling. Remember that wet surfaces can be very slippery.
Ta ke care when entering or exiting the spa.
• People with infectious diseases should not use the spa.
• Keep any loose articles of clothing or hanging jewelry away from rotating jets or other
moving components.
• The use of drugs, alcohol, or medication before or during spa use may lead to unconscious-
ness with the possibility of drowning.

4
• Persons using medications should consult a physician before using a spa; some medication may
cause a user to become drowsy, while other medication may affect heart rate, blood pressure,
and circulation.
• Persons taking medications which induce drowsiness, such as tranquilizers, antihistamines or
anticoagulants should not use the spa.
• Water temperature in excess of 38ºC (100.4ºF) may be injurious to your health.
• Pregnant women should consult a physician before using spa.
• Persons suffering from obesity, or with a medical history of heart disease, low or high blood
pressure, circulatory system problems, or diabetes should consult a physician before using spa.
UNCLEAN WATER
• Keep the water clean and sanitized with correct chemical care.
• Maintain water chemistry in accordance with manufacturer’s instructions.
IMPORTANT: Turn on Jet Pump #1, on high speed, for at least ten minutes after adding ANY
spa water chemicals into the spa.
• Clean the filter cartridges monthly to remove debris and mineral buildup which may affect the
performance of the jets, limit the flow, or trip the high limit thermostat.
AVOID THE RISK OF HYPERTHERMIA
The causes, symptoms and effects of hyperthermia may be described as follows: Hyperthermia
occurs when the internal temperature of the body reaches a level several degrees above the
normal body temperature of 98.6ºF. The symptoms of hyperthermia include an increase in the
internal temperature of the body, dizziness, lethargy, drowsiness and fainting. The effects of
hyperthermia include: 1. Failure to perceive heat. 2. Failure to recognize the need to exit the
spa or hot tub. 3. Unawareness of impending hazard. 4. Fetal damage in pregnant women. 5.
Physical inability to exit the spa or hot tub. 6. Unconsciousness resulting in drowning.
WARNING:
The use of alcohol, drugs, or medication can greatly increase the risk of fatal hyperthermia in
hot tubs and spas.
TO REDUCE THE RISK OF INJURY:
• The water in the spa should never exceed 104°F (40ºC). Water temperatures between 100°F
(37.7ºC) and 104°F (40ºC) are considered safe for a healthy adult.
Lower water temperatures are recommended for extended use (exceeding ten minutes) and
for young children. Extended use can cause hyperthermia.
• Pregnant or possibly pregnant women should limit spa water temperatures to 100°F. Failure to
do so may result in permanent injury to your baby.
• Do not use spa immediately following strenuous exercise.
AVOIDING THE RISK OF SKIN BURNS:
• To reduce the risk of injury, before entering a spa the user should measure the water tempera-
ture with an accurate thermometer, since the tolerance of temperature-regulating devices may
vary by as much as ±5°F.
• Test the water with your hand before entering the spa to be sure it’s comfortable.

5
S
IMPORTANT SPA INSTRUCTIONS
The following contains important spa information, and we strongly encourage you to read
and apply them.
DO:
• Use and lock the vinyl cover when the spa is not in use, whether it is empty or full.
• Follow the Spa Care and Maintenance recommendations stated in this manual.
• Use only approved accessories and recommended spa chemicals and cleaners.
DON’T:
• Leave the Saratoga spa exposed to the sun without water or the cover in place. Exposure
to direct sunlight can cause solar distress of the shell material.
• Lift or drag the vinyl cover by using the cover lock straps; always lift or carry the cover by
using the handles.
• Attempt to open the electrical control box. There are no user serviceable parts inside.
Opening of the control box by the spa owner will void the warranty. If you have an opera-
tional problem, carefully go through the steps outlined in the Troubleshooting section. If you
are not able to resolve the problem, contact your authorized Saratoga Spa dealer. Many
problems can easily be diagnosed over the telephone by an Authorized Service Technician.
• Block or sit on the filter compartment area.
• Allow excessive weight to be placed on the spa cover. Doing so could damage the spa
cover and void any warranty.
SAVE THESE INSTRUCTIONS
CAUTION: Saratoga Spa Company suggests a structural engineer or contractor be
consulted before the spa is placed on an elevated deck.
* NOTE: The “Average Full” weight of the spa includes only the spa and the water inside
the spa.
Spa Specifications
Width Height Length Average Dry Average Seating
Fill Weight Full Weight Locations
Pavilion 89” 38” 93” 525 gal 800 lbs. 5084 lbs. 6-8
2,26m 0,96m 2,36m 1987L 363 kg 2306 kg 6-8

6
Pavilion - Saratoga Spa
Operations Center
1. 3 Uni Speed Hydro Pumps
2. Heater 3kw
3. Purity® Circulation Pump
4. 220V Power Pak
5. Whisper Zone Ozonator
6. Drain Valve
7. Mood light
8. Bonding Terminal
Pavilion - Spa
Features
A. Versa-Flo™ Valves
B. Roto Stream™
Valves
C. Power Massage®
Jets
D. Power Stream® Jets
E. Cluster Jets
F. Mini Jets
G. Deluxe Jet
H. Storm Jets
I. Turbo Jets
J. Vortex™ Circulation
Jet
K. Relax Stream™
Waterfall
L. Bottom Spa Drain
M. Backlit Digital
Control Panel
N. Microban
®
Filtration
O. Toploading Skimmer
P. Pillows
Q. Mood Light

7
I
Installation Instructions
Location Preparation
Your Saratoga Spa is totally self-contained and portable. You can install the spa outside or
inside. Preferable places are on a patio, deck or indoors. The spa should always be placed on
a structurally strong, level surface. Other items you need to consider are the following:
• Verify that the location chosen can support the weight of the spa, the water of the spa and
its occupants.
• Always check the surface of the site to see if it is level before filling the spa with water.
• Allow access to the equipment compartment for routine maintenance.
• When positioning the spa, be sure to allow for drainage away from the electrical compart-
ment.
• Leave easy access to the RCI breaker.
WARNING: The Saratoga Spa is manufactured to be a portable unit. Any permanent
installation of this product is done at the risk of the owner. Permanent installation of this
unit violates warranty coverage.
Outdoor Installation
Always keep in mind what type of climate you live in. In a climate with cold, snowy winters
you may want to consider locating the spa close to the house for easy access. In climates
where it is normally warm or hot year-round, it would be recommended to place the spa in a
shaded or cool area.
With deck installations it is recommended that a qualified building contractor or structural
engineer review the weight the deck can support. The spa specification sheet (on page 6) can
assist you with the weights and dimensions of your spa.
Indoor Installation
Special requirements are needed for indoor installation. Spas normally produce moisture. A
ventilation system needs to be considered. Your spa area should contain moisture resistant
wall/floor coverings and building materials to avoid damage from moisture over time. Proper
drainage of the spas water also needs to be considered.
IMPORTANT: Your Saratoga Spa is equipped with air vents to allow for circulation of air
throughout the equipment compartment. These vents are found on the face of the equip-
ment compartment panel and under the corners of the spa at the equipment compartment
end. Do not allow vents to be blocked as to prevent the circulation of air in the equipment
compartment.
YOUR SARATOGA SPA DEALER CAN HELP YOU WITH INFORMATION SUCH AS
LOCAL ZONING REGULATIONS AND BUILDING CODES.

8
E
Electrical Requirements and Precautions:
Your Saratoga Spa has gone through numerous tests to verify that all the spas functions operate.
Beyond the tests, your Saratoga Spa has been designed to provide the maximum safety against
electrical shock. Read and follow the electrical installation requirements and instructions
completely. The next few pages will assist you in properly connecting the electrical input.
Follow the electrical instructions for your specific spa model. Serious risks or injuries may
occur if the spa is improperly wired.
220 Volt Permanently Connected Model:
-Pavilion
SARATOGA SPAS MUST BE WIRED IN ACCORDANCE WITH ALL APPLICABLE
LOCAL ELECTRICAL CODES. ALL ELECTRICAL WORK SHOULD BE DONE
BY AN EXPERIENCED, LICENSED ELECTRICIAN. WE RECOMMEND THE USE
OF APPROPRIATE ELECTRICAL CONDUIT, FITTINGS AND WIRE FOR ALL
CIRCUITS.
220 Volt installations require a 50Hz, single phase, two-wire electrical service plus ground (Line
1, Neutral and Ground) and must be connected using a minimum supply conductor ampacity of
32 AMPs and a minimum circuit breaker size of 32 AMPs. Note: Use copper wire only (2-wire
with ground. 8 gauge under 50’, 6 gauge over 50’)
220 Volt model spas must be connected to a “dedicated” 220 Volt 32 AMP grounded circuit. The
term “dedicated” means the electrical current is not being used for any other electrical items
(lights, appliances, etc.). If the spa is connected to a non-dedicated circuit, overloading will occur
and nuisance tripping of the RCI breaker switch at the house breaker panel will occur.
A ground lug connector is provided on the exterior surface of the spa pack (operations center)
inside the equipment compartment. This is to permit the connection of a bonding wire be-
tween this point and any metal equipment, enclosures, pipe or conduit within five feet of the spa.
This bonding wire must be at least 8AWG solid copper wire.
CAUTION: Use only approved pressure-type wire splicing lugs or connectors suitable for the
size and type of wiring used!
Electrical Installation Instructions for 220 Volt Models
1. To connect the electrical service, first remove the screws from the equipment compartment
door. Carefully remove the access panel.
2. Locate the GL2000 spa control box. Loosen the screws on the front of the control box.
Remove the screws and the control box cover.
3. Input the electrical service from the RCI breaker into the spa equipment compartment.

9
Electrical Spa Wiring Connection Instructions
WIRING CONNECTIONS
1. Identify the TB-1 terminal block located inside the GL2000 control box on the left side.
2. Connect the 8 AWG BLACK wire from the RCI 32AMP breaker , terminal L1 to TB-1, Line 1.
3. Connect the 8 AWG RED wire from the RCI 32AMP breaker, terminal N to TB-1, neutral.
4. Connect the 8 AWG GROUND wire from the RCI 32AMP breaker, terminal GND (ground) to
TB-1, ground.
5. At least two additional lugs marked “Bonding Lugs” are provided on the external surface of one
of the bonded components metal enclosures. To reduce the risk of electrical shock, connect the
local common bonding grid in the area of the hot tub or spa to these terminals with an insulated
or bare copper conductor not smaller than No. 6 AWG.
6. All field-installed metal components such as rail, ladders, drains or other similar hardware within
10 ft (3m) of the spa or hot tub shall be bonded to the equipment grounding bus with copper
conductors not smaller than No. 6 AWG.
7. Replace the control box cover and securely tighten the fastening screws. Close and secure the
equipment compartment panel.
Note: Always use copper wire only (3 wire with ground. 8 gauge under 50ft, 6 gauge over 50ft)
The electrical supply for this product must include a suitable rated switch or circuit breaker to
open all ungrounded supply conductors to comply with Section 422.20 of the National Electrical
Code ANSI/NEPA 70-1987. The disconnecting means must be readily accessible to the tub
occupant but installed at least 5 feet (1.5m) from tub water.
Note: The RCI breaker must be placed in sight of the spa at a minimum distance of
five feet (1.5m) away.
Note: As of January 1, 1996 the National Electric Code (NEC) requires RCI on all
spa installations.

10
I
Initial Operating Instructions:
Start-Up and Refill Procedures
Your Saratoga Spa has been tested at the manufacturing plant to ensure that all the spas
functions operate. During the test procedure, a small amount of water may have remained in
the spas plumbing. Through the shipping process water may have spotted the spas shell. You
may need to wipe down the shell with a soft cloth. Please read and follow the start-up
instructions to ensure a successful start-up or refill.
CAUTIONS
• Inspect and clean spa shell from any debris
• Do not turn power on to spa unless filled with water to appropriate level. The spa pack
must never be operated without water in the spa; serious damage to the heater and/or
pump(s) may result.
• Do not fill spa with water before checking the items below (below items may become loose
in transit):
a) Hand tighten unions at the pumps
b) Tighten drain valve
Note: Drain Valve is
left open for shipping -
drain valve must be closed
before filling spa.
c) Tighten unions on heater
• Do not fill spa with hot water. This may cause a false error code to the high limit sensor.
A
A
C
C

11
Start-up Procedures
1. For a successful start-up, fill the spa with water through the Whisper Clean
®
cartridge. The
Whisper Clean
®
cartridge is the cartridge with the coarse threaded ACME style adapter.
a. Locate the filter compartment area.
b. Pull up and remove filter cover.
c. Remove the filter cartridge and screen adapters by turning them counter clock
wise.
d. After removing the filter cartridge and screen adapter, place a garden hose
through the filter opening.
e. At this point, open the air bleeder valve(s) in your filter compartment by turning
counter clockwise.
f. Turn water on and run water until it reaches a minimum level of 2” above the top
of the filters.
NOTE: Besides filling the spa to 2” above the top of the filter, all models will need to be
filled to 2” above the highest jet(s) in the spa. This is the minimum level allowed to run the
Whisper Clean
®
circulation system.
NOTE: When using a mineral cartridge system, please refer to your dealer for specific
instructions on installation.
2. Check all plumbing (clamps, unions and drain valve) connections for leaks.
3. Re-install filter cartridges and screen adapters by turning them clockwise. Exit garden
hose from the spa.
4. At this point, turn power on to the spa control system by turning on the RCI breaker. The
GL2000 pack control system will being heating the spa to the factory set temperature of
100ºF (37.5ºC).
Note: When your spa is actuated, it will go into priming mode. Priming mode will last for 4

12
minutes then the spa will begin to heat. You may exit priming mode by pushing the Warm or
Cool button.
5. The next step is to check that the jet system(s) are operational. Press on the Jet(s) button
to turn on the pump(s). A strong force of water flowing through the jets indicates the
pump(s) are primed. Weak or surging jet(s) indicates the pump(s) still need to be primed
(see Troubleshooting section).
6. Once pump(s) are primed, close the air bleeder valve(s) in the filter compartment.
NOTE: Water will be exiting from the air bleeder valves.
7. Re-install filter cover and allow spa to heat to desired set temperature; this normally takes
24 hours.
*8. 24 hours after initial start-up the spa will go through its first power filtration cycle. Jet 1
(pump 1), Jets 2 (pump 2), Jets 3 (pump 3) will run on high speed for one (1) minute. This
power filtration cycle is repeated every 24 hours at the exact same time of day as initial
power-up.
NOTE: If water bubbles are not coming out of the bottom drain, the system is air bound.
Refer to the Trouble Shooting section.
NOTE: It is recommended to press and release the ground fault circuit interrupter (RCI)
RESET button monthly to verify RCI is working properly.
* NOTE: If power is interrupted, the filtration cycle will be reset
9. Water must be balanced and shocked upon start-up. See your dealer or pages 21-29 of
this manual for details. This procedure must be repeated each time the spa is drained and
refilled.
10. The Whisper Clean
®
jet
The Whisper Clean
®
jet is connected to the Whisper Clean
®
system. The jet induces
temperature controlled water and ozone into the spas footwell 24 hours a day.
Service Note: A slow or non-moving Whisper Clean
®
jet may indicate that the filter
cartridge pores are obstructed with dirt, body oils or calcification. Follow the filter cartridge
cleaning procedures in this manual.

13
V
Versa-Flo™ Jets and CFE Jet Descriptions
Power Massage Plus
®
Patented jet provides dual water massage to your neck or back from under the
built-in headrest. The jet is controlled by a small selector valve, giving the bather
total control.
Power Stream
®
Underwater jet patterned after the Power Massage
®
. This jet runs a ribbon of
water parallel to the surface of the spa body. Not found in all units.
Cluster Jet
The Cluster Jet provides a concentrated stream of water and air for precise
pressure point areas.
Mini Swirl Jet
The Mini Swirl Jet has an adjustable eyeball for directional or rotational use. To
change from directional to rotational, with finger, simply adjust inner nozzle to
the rotating position.
Cyclo Swirl Jet
A larger version of the Mini Swirl Jet, this jet gives a mid-size rotational massage
and pulsating massage. To change from directional to rotational, with finger,
simply adjust inner nozzle to the rotating position.
Cyclo Flo Jet
This jet provides a mix of water and air in a whirly pattern. To increase the
whirly pattern, move inner nozzle to the outer position.
Twin Rotational Jet
This jet provides multiple adjustment for varied rotational intensities.

14
Turbo Jet
Provides an intense lower body massage and whirlpool stimulation through a
large orifice.
Xt r eme Flo Jet
The Xtreme Flo jet provides a mix of water and air. To change from a straight
stream to directional, with finger, move inner nozzle to position desired.
Gatling Jet
A rotating dual nozzle, diffused by seven holes, creates a pulsating body
massage.
Veri Massage Jet
Multiple pressure point profiles, providing foot and large muscle relief.

15
S
Saratoga Spa Jet Selectors
The Jets in the Saratoga Spa Luxury Line have different ways to adjust the jet therapy systems.
While having the Hydro Jet pump(s) on the user has the ability to turn on and off each indi-
vidual Versa-Flo™ Jet(s). The Versa Flo™ Jet(s) can be turned on and off by turning the outer
scallop on the face of the jet. In addition to having the ability to control each individual jet, the
jets can be adjusted by zones. Saratoga Spa uses three different ways to adjust the jet therapy
zones. The Roto Stream™ Valves , Versa-Flo™ Selectors, and CFE Selectors give the user the
ability to control the different Jet Therapy Zones. The following pages will discuss the different
jet therapy zones found in the Pavilion Spa.
Versa-Flo™ Selector
CFE Selector
Roto Stream™ Selector
Roto Stream™ Selector
Versa-Flo™ or CFE Selector

16
Jet Therapy Zones
This example will help you to understand the following pages that discuss the jet system menus.
The navigational tool was read from standing outside of the spa and in front of the particular
selector. Keep this in mind when the following pages discuss 12,3,6 or 9 o’clock position
settings. The Versa-Flo™ selector, and CFE selector can only be rotated 180º. The Roto
Stream™ valve can be rotated 360º.
9
12
3
6

17
Pavilion Jet System Menu
1 - ROTO STREAM™ VALVE
• Controls jets in seat 1.
• By rotating the Roto Stream™ valve allows the user
to select the sequence best for them.
2 - ROTO STREAM™ VALVE
• Seat 2 is controlled in the same manner as seat 1, by
using the Roto Stream™ valve.
3 - CFE SELECTOR
• controls two of the Power Massage
®
jets.
1
2
3
4 - SECONDARY CFE SELECTOR
• Controls the third Power Massage
®
jet.
5 - THIRD CFE SELECTOR
• The third CFE selector allows you to control
one of the two Relax Streams™.
• By positioning the CFE selectors in the 3, 6,
or 9 o’clock positions it gives the user the
ability to turn on or off the jets discussed
above.
4
5
6 - CFE SELECTOR
• The small CFE selector allows for control of the
second Relax Stream™.
7 - SECOND CFE SELECTOR
• Controls one of the three Power Massage
®
jets.
6
7
9
12
3
6

18
Pavilion Jet System Menu
11 - VERSA-FLO™ SELECTOR
• The large Versa-Flo™ selector controls zone 3.
• Turning the selector to the 12 o’clock position
activates jets in zone the foot dome. Selector in 6
o’clock position turns on jets on side wall.
8 - THIRD CFE SELECTOR
• The third small CFE selector allows
for adjustment of the other two Power
Massage
®
jets.
9 - ROTO STREAM™ VALVE
• The Roto Stream™ valve controls the jets
in seat 9. Rotating the Roto Stream™ valve
allows the user to select the sequence best
for them.
10 - VERSA-FLO™ SELECTOR
• Pointing the large Versa-Flo™ selector in
the 9 o’clock position turns off the jets in
seat 10. Positioning the Versa-Flo™
selector in the 3 o’clock position turns on
the jets in seat 10.
8
9
10
11
9
12
3
6
/