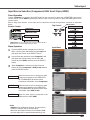
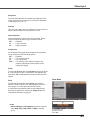
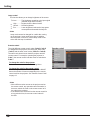
Sanyo PLC-WXU700A Owner's manual
- Category
- Data projectors
- Type
- Owner's manual
This manual is also suitable for

лчиттничюнльтцию.
глтчн.Бзвыдны
www.sotmarket.ru
дбняинфмциятв,
тзывы,бзыиы
Инструкция для
Sanyo PLC-WXU700A
Перейти в карточку товара
8 800 775 98 98

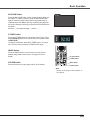
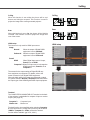
Multimedia Projector
MODEL PLC-WXU700
Owner’s Manual
Network Supported
WirelessLAN
IEEE802.11b/g/n
WiredLAN
100-Base-TX/10-Base-T
Memory Viewer
USBMemoryViewer
*
Refertotheowner’smanualsbelow
fordetailsaboutnetworkandmemory
viewerfunction.
NetworkSet-upandOperation
Memoryviewerfunction

2
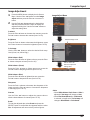
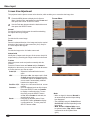
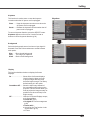
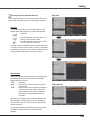
Features and Design
ThisMultimediaProjectorisdesignedwiththemostadvancedtechnologyforportability,durability,andeaseofuse.
Thisprojectorutilizesbuilt-inmultimediafeatures,apaletteof16.77millioncolors,andmatrixliquidcrystaldisplay
(LCD)technology.
Compact Design
Thisprojectorisdesignedcompactinsizeandweight.
Itiseasytocarryandinstalledanywhereyouwishto
use.
Capable of 360-degree Projection
Thisprojectoriscapableof360-degreeprojection.
*Somerestrictionrequired,seepage7.
Simple Computer System Setting
TheprojectorhastheMulti-scansystemtoconformto
almostallcomputeroutputsignalsquickly(p.32).Upto
WUXGAresolutioncanbeaccepted.
Power Management
The Power management function reduces power
consumptionandmaintainsthelamplife(p.56).
Quick Termination
TheAC power cord can be unplugged immediately
after turning off the projector without waiting for the
terminationofthecoolingfanrotation(p.23).
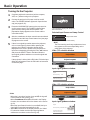
Logo Function
TheLogofunctionallowsyoutocustomizethescreen
logo(pp.50-52).Youcancaptureanimageforthe
screenlogoanduseitforthestarting-updisplayor
betweenpresentations.
Multilanguage Menu Display
Operationmenuisavailablein17languages;English,
German,French,Italian,Spanish,Portuguese,Dutch,
Swedish,Finnish,Polish,Hungarian,Romanian,
Russian,Chinese,Korean,JapaneseandThai(p.47).
Security Function
TheSecurityfunctionhelpsyoutoensuresecurityof
theprojector.WiththeKeylockfunction,youcanlock
theoperationonthetopcontrolortheremotecontrol
(p.59).PINcodelockfunctionpreventsunauthorized
useoftheprojector(pp.22,59-60).
Helpful Maintenance Functions
Lampandfiltermaintenancefunctionsprovidefor
betterandpropermaintenanceoftheprojector.
LAN Network Function
ThisprojectorisloadedwiththeWiredandWireless
LANnetworkfunctions.
Note:
•TheOn-ScreenMenuandfiguresinthismanualmaydifferslightlyfromtheproduct.
•Thecontentsofthismanualaresubjecttochangewithoutnotice.
-Youcanprojectanimageonacomputeraswellas
operateandmanagetheprojectorvianetwork.
-Thisprojectorcorrespondsto"ConnecttoaNetwork
Projector"functionthatisthestandardequipmentfor
WindowsVista.
-Theprojectorhasthemoviefilestransmission
functionthatcanplaymoviefilestransmittedfroma
computertotheprojector.Thisfunctionenablesto
playbackmoviesverysmoothly.Thisprojectoralso
correspondstoIEEE802.11n(Draft2.0).
-ThisprojectoriscapableofthewirelessLANsimple
settingfunctionbyattachingthesuppliedUSB
memorytoacomputer.
Fordetails,refertotheowner’smanualof“Network
Set-upandOperation.”
Memory Viewer Function
InsertthededicatedUSBmemoryintotheprojector
toprojectimagesormoviefilesstoredwithin.Youdo
nothavetocarrycomputersorotherequipmentfora
presentation.
Fordetails,refertotheowner’smanualof"Memory
viewerfunction".
Auto setup Function
ThisfunctionenablesInputsearch,AutoKeystone
correctionandAutoPCadjustmentbysimplepressing
theAUTOSETUPbutton(pp.26,48).
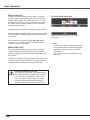
Colorboard Function
Atthetimeofsimpleprojectiononthecoloredwall,
youcangettheclosecolorimagetothecolorimage
projectedonawhitescreenbyselectingthesimilar
colortothewallcolorfromthepresetfourcolors.
Closed Caption
Thisisaprintedversionoftheprogramsoundorother
informationdisplayedonthescreen.Youcanturnon
thefeatureandswitchthechannels(p.57).
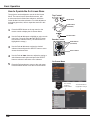
Picture in Picture Function
Thisprojectoriscapableofprojectingtwoimages
simultaneouslybyusingeitherbuilt-inPinPmodeorP
byPmode(p.55).

3
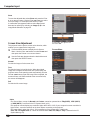
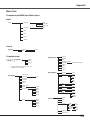
Table of Contents
Trademarks
Each name of corporations or products in this book is either a registered trademark or a trademark of its respective
corporation.
Features and Design . . . . . . . . . . . . . . . . . . .2
Table of Contents . . . . . . . . . . . . . . . . . . . . . .3
To the Owner. . . . . . . . . . . . . . . . . . . . . . . . . .4
Safety Instructions. . . . . . . . . . . . . . . . . . . . .5
AirCirculation 6
MovingtheProjector 6
InstallingtheProjectorinProperPosition7
Compliance. . . . . . . . . . . . . . . . . . . . . . . . . . .8
Part Names and Functions . . . . . . . . . . . . . .9
Front 9
Back 9
Bottom 9
RearTerminal 10
TopControl 11
RemoteControl 12
RemoteControlBatteryInstallation 13
RemoteControlOperatingRange 13
RemoteControlCode 13
LaserPointerFunction 14
PointerFunction 14
WirelessMouseOperation 15
AdjustableFeet 15
Installation. . . . . . . . . . . . . . . . . . . . . . . . . . .16
PositioningtheProjector 16
ConnectingtoaComputer 17
ConnectingtoVideoEquipment18
ConnectingtoComponentVideoEquipment 19
ConnectingtheACPowerCord 20
Basic Operation . . . . . . . . . . . . . . . . . . . . . .21
TurningOntheProjector 21
TurningOfftheProjector 23
HowtoOperatetheOn-ScreenMenu 24
MenuBar 25
ZoomandFocusAdjustment 26
AutoSetupFunction 26
KeystoneCorrection 26
SoundAdjustment 27
RemoteControlOperation 28
Computer Input . . . . . . . . . . . . . . . . . . . . . .30
InputSourceSelection
(Computer1:RGB/Component/RGB(Scart))30
InputSourceSelection
(Computer2:RGB) 31
ComputerSystemSelection 32
AutoPCadjustment 33
ManualPCadjustment 34
ImageModeSelection 36
ImageAdjustment 37
ScreenSizeAdjustment 38
Video Input . . . . . . . . . . . . . . . . . . . . . . . . . .40
InputSourceSelection(Video,S-video) 40
InputSourceSelection
(Component,RGBScart21-pin,HDMI) 41
VideoSystemSelection 42
ImageModeSelection 43
ImageAdjustment 44
ScreenSizeAdjustment 46
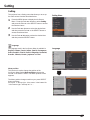
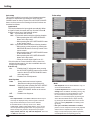
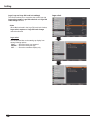
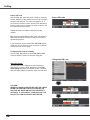
Setting . . . . . . . . . . . . . . . . . . . . . . . . . . . . . .47
Setting 47
Information . . . . . . . . . . . . . . . . . . . . . . . . . 63
InputSourceInformationDisplay 63
Maintenance and Cleaning . . . . . . . . . . . . .64
WARNINGindicator 64
CleaningtheFilters 65
ResettingtheFilterCounter 65
AttachingtheLensCap66
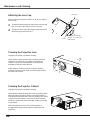
CleaningtheProjectionLens 66
CleaningtheProjectorCabinet 66
LampReplacement 67
ResettingtheLampCounter68
Appendix. . . . . . . . . . . . . . . . . . . . . . . . . . . .69
Troubleshooting 69
MenuTree 73
IndicatorsandProjectorCondition 75
CompatibleComputerSpecifications 76
ListofPictureinPicture 78
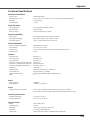
TechnicalSpecifications 79
OptionalParts 80
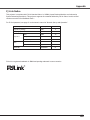
PJLinkNotice 81
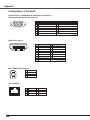
ConfigurationsofTerminals 82
PINCodeNumberMemo 83
USBThumbDriveCase 83
Dimensions84

4
To the Owner
CAUTION: TO REDUCE THE RISK OF ELECTRIC
SHOCK, DO NOT REMOVE COVER (OR
BACK). NO USER-SERVICEABLE PARTS
INSIDE EXCEPT LAMP REPLACEMENT.
REFER SERVICING TO QUALIFIED
SERVICE PERSONNEL.
THISSYMBOLINDICATESTHATDANGEROUS
VOLTAGECONSTITUTINGARISKOFELECTRIC
SHOCKISPRESENTWITHINTHISUNIT.
THISSYMBOLINDICATESTHATTHEREARE
IMPORTANTOPERATINGANDMAINTENANCE
INSTRUCTIONSINTHEOWNER'SMANUAL
WITHTHISUNIT.
CAUTION
RISK OF ELECTRIC SHOCK
DO NOT OPEN
Before installing and operating this projector, read this
manualthoroughly.
This projector provides many convenient features and
functions. Operating the projector properly enables
youtomanagethose featuresandmaintains it ingood
conditionformanyyearstocome.
Improperoperationmayresultinnotonlyshorteningthe
product-life, but also malfunctions, fire hazard, or other
accidents.
Ifyourprojectorseemstooperateimproperly,readthis
manualagain,checkoperationsandcableconnections
andtrythesolutionsinthe“Troubleshooting”sectionon
pages69-72ofthismanual.Iftheproblemstillpersists,
contactthedealerwhereyoupurchasedtheprojectoror
theservicecenter.
Safety Precaution
CAUTION
DO NOT SET THE PROJECTOR IN GREASY, WET, OR
SMOKY CONDITIONS SUCH AS IN A KITCHEN TO PREVENT
A BREAKDOWN OR A DISASTER. IF THE PROJECTOR
COMES IN CONTACT WITH OIL OR CHEMICALS, IT MAY
BECOME DETERIORATED.
READ AND KEEP THIS OWNER'S MANUAL FOR
LATER USE.
WARNING: THISAPPARATUSMUSTBEEARTHED.
TOREDUCETHERISKOFFIREOR
ELECTRIC SHOCK, DO NOT EXPOSE THIS
APPLIANCE TO RAIN OR MOISTURE.
–Thisprojectorproducesintenselightfromtheprojection
lens. Do not stare directly into the lens, otherwise eye
damagecouldresult.Beespeciallycarefulthatchildren
donotstaredirectlyintothebeam.
–Installtheprojectorinaproperposition.Otherwiseitmay
resultinfirehazard.
–Allowing the proper amount of space on the top, sides,
and rear of the projector cabinet is critical for proper
air circulation and cooling of the unit. The dimension
shown here indicate the minimum space required.
If the projector is to be built into a compartment or
similarly enclosed, these minimum distances must be
maintained.
–Do not cover the ventilation slot on the projector. Heat
build-up can reduce the service life of your projector,
andcanalsobedangerous.
–Iftheprojectorisunusedforanextendedtime,unplug
theprojectorfromthepoweroutlet.
–Donotprojectthesameimageforalongtime.The
afterimagemayremainontheLCDpanelsbythe
characteristicofpanel.
SIDEandTOP REAR
CAUTION
NotforuseinacomputerroomasdefinedintheStandard
fortheProtectionofElectronicComputer/DataProcessing
Equipment,ANSI/NFPA75.
Ne peut être utilisé dans une salle d’ordinateurs telle
que définie dans la norme ANSI/NFPA 75 Standard
for Protection of Electronic Computer/Data Processing
Equipment.
Thesymbolmarkandrecyclingsystemsdescribedbelow
applytoEUcountriesanddonotapplytocountriesinother
areasoftheworld.
Yourproductisdesignedandmanufacturedwithhighquality
materialsandcomponentswhichcanberecycledand/or
reused.
Thesymbolmarkmeansthatelectricalandelectronic
equipment,batteriesandaccumulators,attheirend-oflife,
shouldbedisposedofseparatelyfromyourhousehold
waste.
Note:
If a chemical symbol is printed beneath the symbol mark,
thischemicalsymbolmeansthatthebatteryoraccumulator
contains a heavy metal at a certain concentration. This will
beindicatedasfollows:Hg:mercury,Cd:cadmium,Pb:lead
IntheEuropeanUnionthereareseparatecollectionsystems
forusedelectricalandelectronicequipment,
batteriesandaccumulators.
Please,disposeofthemcorrectlyatyourlocal
communitywastecollection/recyclingcentre.
Please,helpustoconservetheenvironment
welivein!
0.7’(20cm)
1.5’(50cm) 3’(1m) 3’(1m)

5
Safety Instructions
All the safety and operating instructions should be read
beforetheproductisoperated.
Read all of the instructions given here and retain them
forlateruse.UnplugthisprojectorfromACpowersupply
before cleaning. Do not use liquid or aerosol cleaners.
Useadampclothforcleaning.
Follow all warnings and instructions marked on the
projector.
For added protection to the projector during a lightning
storm, or when it is left unattended and unused for long
periods of time, unplug it from the wall outlet. This will
preventdamageduetolightningandpowerlinesurges.
Do not expose this unit to rain or use near water... for
example,inawetbasement,nearaswimmingpool,etc...
Do not use attachments not recommended by the
manufacturerastheymaycausehazards.
Do not place this projector on an unstable cart, stand,
or table.The projector may fall, causing serious injury
to a child or adult, and serious damage to the projector.
Use only with a cart or stand recommended by the
manufacturer, or sold with the projector. Wall or shelf
mounting should follow the manufacturer’s instructions,
and s h oul d use a m o unt ing k i t app rov e d by th e
manufacturers.
An appliance and cart combination
should be moved with care. Quick
stops, excessive force, and uneven
surfaces may cause the appliance
andcartcombinationtooverturn.
Slotsandopeningsinthebackandbottomofthecabinet
areprovidedforventilation,toensurereliableoperationof
theequipmentandtoprotectitfromoverheating.
Theopeningsshouldneverbecoveredwithclothorother
materials,andthebottomopeningshouldnotbeblocked
by placing the projector on a bed, sofa, rug, or other
similar surface. This projector should never be placed
nearoroveraradiatororheatregister.
Thisprojectorshouldnotbeplacedinabuilt-ininstallation
suchasabookcaseunlessproperventilationisprovided.
Neverpushobjectsofanykindintothisprojectorthrough
cabinetslotsastheymaytouchdangerousvoltagepoints
or short out parts that could result in a fire or electric
shock.Neverspillliquidofanykindontheprojector.
Donotinstalltheprojectorneartheventilationductof
air-conditioningequipment.
This projector should be operated only from the type
of power source indicated on the marking label. If you
arenotsureofthetypeofpowersupplied,consultyour
authorizeddealerorlocalpowercompany.
Donotoverloadwalloutletsandextensioncordsasthis
canresultinfireorelectricshock.Donotallowanything
to rest on the power cord. Do not locate this projector
wherethecordmaybedamagedbypersonswalkingon
it.
Do not attempt to service this projector yourself as
opening or removing Covers may expose you to
dangerousvoltageorotherhazards.Referallservicing
toqualifiedservicepersonnel.
Unplugthisprojectorfromwalloutletandreferservicing
to qualified service personnel under the following
conditions:
a.Whenthepowercordorplugisdamagedorfrayed.
b.Ifliquidhasbeenspilledintotheprojector.
c.Iftheprojectorhasbeenexposedtorainorwater.
d.Iftheprojectordoesnotoperatenormallybyfollowing
the operating instructions.Adjust only those controls
that are covered by the operating instructions as
improper adjustment of other controls may result in
damage and will often require extensive work by a
qualifiedtechniciantorestoretheprojectortonormal
operation.
e.If the projector has beendroppedorthecabinethas
beendamaged.
f.Whentheprojectorexhibitsadistinctchangein
performance-thisindicatesaneedforservice.
When replacement parts are required, be sure the
servicetechnicianhasusedreplacementpartsspecified
bythemanufacturerthathavethesamecharacteristics
as the original part. Unauthorized substitutions may
resultinfire,electricshock,orinjurytopersons.
Upon completion of any service or repairs to this
projector, ask the service technician to perform routine
safety checks to determine that the projector is in safe
operatingcondition.
NOTE FOR CUSTOMERS IN THE US
HgLAMP(S)INSIDETHISPRODUCTCONTAIN
MERCURYANDMUSTBERECYCLEDORDISPOSED
OFACCORDINGTOLOCAL,STATEORFEDERAL
LAWS.

6
Safety Instructions
Openingsinthe cabinetareprovided forventilation.To
ensurereliableoperationoftheproductandtoprotectit
from overheating, these openings must not be blocked
orcovered.
CAUTION
Hotairisexhaustedfromtheexhaustvent.Whenusing
or installing the projector, the following precautions
shouldbetaken.
–Donotputanyflammableobjectorspraycannearthe
projector,hotairisexhaustedfromtheairvents.
–Keeptheexhaustventatleast3’(1m)awayfromany
objects.
–Do not touch a peripheral part of the exhaust vent,
especiallyscrewsandmetallicparts.Theseareaswill
becomehotwhiletheprojectorisbeingused.
–Donotputanythingonthecabinet.Objectsputonthe
cabinetwillnotonlygetdamagedbutalsomaycause
firehazardbyheat.
Cooling fans are provided to cool down the projector.
The fans’ running speed is changed according to the
temperatureinsidetheprojector.
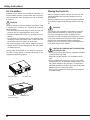
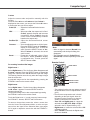
Air Circulation
AirIntakeVent
ExhaustVent
(Hotairexhaust)
AirIntakeVent
AirIntakeVent
CAUTION IN CARRYING OR TRANSPORTING
THE PROJECTOR
–Donotdroporbumptheprojector,otherwisedamages
ormalfunctionsmayresult.
–Whencarryingtheprojector,useasuitablecarrying
case.
–Donottransporttheprojectorbycourieroranyother
transportserviceinanunsuitabletransportcase.This
maycausedamagetotheprojector.Forinformation
abouttransportingtheprojectorbycourieroranyother
transportservice,consultyourdealer.
–Donotputtheprojectorinacasebeforetheprojector
iscooledenough.
Moving the Projector
Whenmovingtheprojector,replacetheLensCapand
retractadjustablefeettopreventdamagetothelens
andcabinet.
Whentheprojectorisnotinuseforanextendedperiod,
putitintothesuppliedcarryingcasewiththelensside
up.
CAUTION
Thecarryingcase(supplied)isintendedforprotection
againstdustandscratchesonsurfaceofthecabinet,
anditisnotdesignedtoprotectanappliancefrom
externalforces.Donottransporttheprojectorbycourier
oranyothertransportservicewiththiscase,otherwise
theprojectorcanbedamaged.Whenhandlingthe
projector,donotdrop,bump,subjectittostrongforces,
orputotherthingsonthecabinet.

7
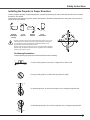
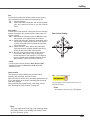
Safety Instructions
Usetheprojectorproperlyinspecifiedpositions.Improperpositioningmayreducethelamplifeandresultinsevere
accidentorfirehazard.
Thisprojectorcanprojectthepictureupward,downwardorbackward,perpendiculartotheplaneofthescreenas
showninthefigurebelow.
Bottom
Downward
(Usual)
Front
Downward
Bottom
Upward
Front
Upward
Installing the Projector in Proper Directions
Avoidpositioningtheprojectorasdescribedbelowwheninstalling.
Positioning Precautions
Donotrolltheprojectormorethan10degreesfromsidetoside.
Donotputtheprojectoroneithersidetoprojectanimage.
10˚
10˚
10˚ 10
˚
10˚
10
˚
Inupwardprojection,donottilttheprojectorover10degreesrightandleft.
Indownwardprojection,donottilttheprojectorover10degreesrightandleft.
0º
90º
180 º
40º
50º
140º
50º
40º
BesuretosettheLampcontrolinHighandtheFancontrolinOn3inthe
settingmenuwhenusingtheprojectorinclinedatbetween+40degrees
to+140degreestothehorizontalplaneataltitudesbetween0and
approximately1,600metersabovesealevel.
BesuretosettheFancontrolinOn2whenusingtheprojectorathigher
altitudesthanthealtitudesdescribedabove,regardlessoftheinstallation
positionoftheprojector.(p.61).

8
Compliance
Federal Communications Commission Notice
Note:ThisequipmenthasbeentestedandfoundtocomplywiththelimitsforaClassBdigitaldevice,pursuant
to Part 15 of the FCC Rules. These limits are designed to provide reasonable protection against harmful
interference in a residential installation. This equipment generates, uses, and can radiate radio frequency
energy, and if not installed and used in accordance with the instructions, may cause harmful interference
to radio communications. However, there is no guarantee that interference will not occur in a particular
installation.If this equipment does cause harmful interference toradio or television reception, which can be
determinedbyturningtheequipmentoffandon,theuser is encouragedtotrytocorrecttheinterferenceby
oneormoreofthefollowingmeasures:
–Reorientorrelocatethereceivingantenna.
–Increasetheseparationbetweentheequipmentandreceiver.
–Connecttheequipmentintoanoutletonacircuitdifferentfromthattowhichthereceiverisconnected.
–Consultthedealeroranexperiencedradio/TVtechnicianforhelp.
UseofshieldedcableisrequiredtocomplywithclassBlimitsinSubpartBofPart15ofFCCRules.
Donotmakeanychangesormodificationstotheequipmentunlessotherwisespecifiedintheinstructions.If
suchchangesormodificationsshouldbemade,youcouldberequiredtostopoperationoftheequipment.
ModelNumber:PLC-WXU700
TradeName:Sanyo
Responsibleparty:SANYOFISHERCOMPANY
Address :21605PlummerStreet,Chatsworth,California91311
TelephoneNo.:(818)998-7322
TheACPowerCordsuppliedwiththisprojectormeetstherequirementforuseinthecountryyoupurchasedit.
AC Power Cord for the United States and Canada:
AC Power Cord used in the United States and Canada is listed by the Underwriters
Laboratories(UL)andcertifiedbytheCanadianStandardAssociation(CSA).
ACPowerCordhasagrounding-typeAClineplug.Thisisasafetyfeaturetobesurethatthe
plugwillfitintothepoweroutlet.Donottrytodefeatthissafetyfeature.Shouldyoubeunable
toinserttheplugintotheoutlet,contactyourelectrician.
GROUND
AC Power Cord Requirement
AC Power Cord for the United Kingdom:
Thiscordisalreadyfittedwithamouldedplugincorporatingafuse,thevalueofwhichisindicatedonthepin
faceoftheplug.Shouldthefuseneedtobereplaced,anASTAapprovedBS1362fusemustbeusedofthe
samerating,markedthus
ASA
.Ifthefusecoverisdetachable,neverusetheplugwiththecoveromitted.Ifa
replacementfusecoverisrequired,ensureitisofthesamecolourasthatvisibleonthepinfaceoftheplug
(i.e.redororange).FusecoversareavailablefromthePartsDepartmentindicatedinyourUserInstructions.
Iftheplugsuppliedisnotsuitableforyoursocketoutlet,itshouldbecutoffanddestroyed.
Theendoftheflexiblecordshouldbesuitablypreparedandthecorrectplugfitted.
WARNING : A PLUG WITH BARED FLEXIBLE CORD IS HAZARDOUS IF ENGAGED IN A LIVE SOCKET
OUTLET.
TheWiresinthismainsleadarecolouredinaccordancewiththefollowingcode:
Green-and-yellowEarth
Blue . . . . . . . . . . . Neutral
Brown . . . . . . . . . Live
Asthecoloursofthewiresinthemainsleadofthisapparatusmaynotcorrespondwiththecolouredmarkings
identifyingtheterminalsinyourplugproceedasfollows:
Thewirewhichiscolouredgreen-and-yellowmustbeconnectedtotheterminalintheplugwhichismarkedby
theletterEorbythesafetyearthsymbol orcolouredgreenorgreen-and-yellow.
ThewirewhichiscolouredbluemustbeconnectedtotheterminalwhichismarkedwiththeletterNor
colouredblack.
ThewirewhichiscolouredbrownmustbeconnectedtotheterminalwhichismarkedwiththeletterLor
colouredred.
WARNING: THIS APPARATUS MUST BE EARTHED.
THE SOCKET-OUTLET SHOULD BE INSTALLED NEAR THE EQUIPMENT AND EASILY ACCESSIBLE.

9
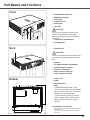
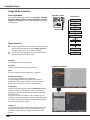
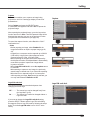
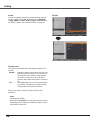
Part Names and Functions
Bottom
Back
Front
Kensington Security Slot
ThisslotisforaKensingtonlockusedtodetertheft
oftheprojector.
* KensingtonisaregisteredtrademarkofACCOBrands
Corporation.
Infrared Remote Receiver
WIRELESS Indicator
Focus Ring
Projection Lens
Zoom Lever
Lens Cap
Top Controls and Indicators
Air Intake Vent
Exhaust vent
Speaker
Air Intake Vent (back and bottom)
Terminals and Connectors
Power Cord Connector
USB Connector (Series A)
LAN Connection Terminal
Lamp Cover
Filters
Adjustable Feet
CAUTION
Hotairisexhaustedfromtheexhaustvents.
Donotputheat-sensitiveobjectsnearthis
side.
Note:
WIRELESSIndicatorand LAN
ConnectionTerminalarefortheNetwork
function.Refertotheowner’smanualof
“NetworkSet-upandOperation”.
USBConnector(SeriesA)isforthe
MemoryViewerfunction.Refertothe
owner'smanualof"MemoryViewer
function".
CAUTION
Donotturnonaprojectorwithlenscap
attached.Hightemperaturefromlight
beammaydamagelenscapandresultin
firehazard.

10
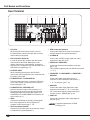
Part Names and Functions
Rear Terminal
S-VIDEO IN
ConnecttheS-VIDEOoutputsignalfromvideo
equipmenttothisjack(p.18).
AUDIO IN
Connecttheaudiooutputsignalfromvideo
equipmentconnectedtoortothisjack.
Foramonoaudiosignal(asingleaudiojack),
connectittotheL(MONO)jack(p.18).
COMPUTER 1 COMPONENT / COMPUTER 2
AUDIO IN
Connecttheaudiooutput(stereo)froma
computerorvideoequipmentconnectedto,
or tothisjack.(pp17,19)
VIDEO IN
Connectthecompositevideooutputsignalto
thisjack(p.18).
COMPUTER IN 1 / COMPONENT IN
Connectoutputsignalfromacomputer,RGBscart
21-pinvideooutputorcomponentvideooutputto
thisterminal(pp.17,19).
AUDIO OUT (VARIABLE)
Connectanexternalaudioamplifiertothisjack
(pp.17-19).
ThisterminaloutputssoundfromAUDIOINterminal
(or).
LAN Connection Terminal
ConnecttheLANcable(refertotheowner’smanual
of“NetworkSet-upandOperation”).
USB Connector (Series B)
Inordertooperatethecomputerwiththeremote
controlandusethePAGEbuttonsonthe
remotecontrolduringapresentation,connectthe
USBportofthecomputertotheUSBterminalwitha
USBcable(notsupplied)(p.17).
USB Connector (Series A)
ConnecttheUSBmenory(refertotheowner’s
manual“NetworkSet-upandOperation”).
CONTROL PORT
WhencontrollingtheprojectorwithRS-232C,
connectthecontrolequipmenttothisconnectorwith
theserialcontrolcable.
R/C JACK
Whenusingthewiredremotecontrol,connect
thewiredremotecontroltothisjackwitharemote
controlcable(notsupplied).
HDMI
ConnecttheHDMIsignal(includingsoundsignal)
fromvideoequipmentortheDVIsignalfrom
computertothisterminal(pp.17,19).
COMPUTER IN 2 / MONITOR OUT
–Connectcomputeroutputtothisterminal(p.17).
–Thisterminalcanbeusedtooutputtheincoming
analogRGBsignalandcomponentsignalsfrom
COMPUTERIN1/COMPONENTINterminaltothe
othermonitor(p.17).
*
isregisteredtrademarksofHDMI
Licensing,LLC.
*

11
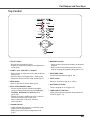
Part Names and Functions
Top Control
LAMP REPLACE indicator
Lightsyellowwhentheprojectionlampreachesits
endoflife(pp.67,75).
WARNING indicator
–Lightsredwhentheprojectordetectsanabnormal
condition.
–Blinksredwhentheinternaltemperatureofthe
projectorexceedstheoperatingrange(pp.64,75).
ON/STAND–BY button
Turntheprojectoronoroff(pp.21-23).
POWER indicator
–Lightsredwhentheprojectorisinstand-bymode.
–Lightsgreenduringoperations.
–BlinksgreeninthePowermanagementmode
(p.56).
INPUT button
Selectaninputsource(pp.30-31,40-41).
MENU button
OpenorclosetheOn-ScreenMenu(p.24).
POINT (VOLUME +/–) buttons
–SelectanitemoradjustthevalueintheOn-Screen
Menu(p.24).
–PantheimageintheDigitalzoom+mode(p.39).
–Adjustthevolumelevel(Pointbuttons)(p.27).
AUTO SETUP/CANCEL button
–Correctverticalkeystonedistortionandadjust
computerdisplayparameterssuchasFine sync,
Total dots,Horizontal andVerticalposition
(pp.26,48).
–DisplaytheimageinUSBthumbdriveorreturnto
themenubarinMemoryViewermenu.
Refertotheowner'smanualof"Memory
Viewerfunction".
SELECT button
–Executetheselecteditem(p.24).
–ExpandorcompresstheimageintheDigitalzoom
mode(p.39).
KEYSTONE button
Correctkeystonedistortion(pp.26,49).

12
Part Names and Functions
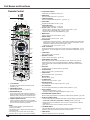
NETWORK button
SelecttheNetworkinput.Seetheowner'smanualof“NetworkSet-upand
Operation”andowner'smanualof"Memoryviewerfunction".
Note:
Toensuresafeoperation,pleaseobservethe
followingprecautions:
– Donotbend,drop,orexposetheremotecontrolto
moistureorheat.
– Forcleaning,useasoftdrycloth.Donotapply
benzene,thinner,spray,oranychemicalmaterial.
Remote Control
ON/STAND-BY button
Turntheprojectoronoroff.(pp.21-23)
HDMI button
SelecttheHDMIinputsource.(pp.28,41)
COMPUTER button
SelecttheCOMPUTERinputsource.(pp.30-31,41)
PAGE buttons
Scrollbackandforththepagesonthescreenwhengivingapresentation.Touse
thesebuttons,connecttheprojectorandyourcomputerwithaUSBcable.(pp.10,
17)
INFO. button
Operatetheinformationfunction.(p.63)
D.ZOOM +/-buttons
Zoominandouttheimages.(pp.28,39)
MENU button
OpenorclosetheOn-ScreenMenu.(p.24)
RESET/ON/ALL-OFF switch
Whenusingtheremotecontrol,setthisswitchto“ON.”Setitto“ALLOFF”for
powersavingwhenitisnotused.Slidethisswitchto“RESET”toinitializethe
remotecontrolcodeorswitchSpotlightandPointertotheLaserpointerfunction.
(pp.13-14)
IMAGE button
Selecttheimagemode.(pp.29,36,43)
MUTE button
Mutethesound.(p.27)
KEYSTONE button
Correctkeystonedistortion.(pp.26,49)
Point (VOLUME
+/–
)
buttons
–SelectanitemoradjustthevalueintheOn-ScreenMenu.(p.24)
–PantheimageintheDigitalzoom+mode.(p.39)
–Adjustthevolumelevel.(Point
buttons)(p.27)
NO SHOW button
Temporarilyturnofftheimageonthescreen.(p.29)
LASER button
–OperatetheLaserpointerfunction.Laserbeamisemittedwhilepressingthis
buttonwithin1minute.Whenusingthislaserpointerformorethan1minute,
releasetheLASERbuttonandpressitagain.(p.14)
–DisplaythePointeronthescreen.(p.14)
L-CLICK button
Actastheleftmousebuttonforwirelessmouse
operation.(p.15)
SIGNAL EMISSION indicator
Lightsredwhilethelaserbeamisbeingemitted
fromthelaserlightwindoworasignalisbeingsent
fromtheremotecontroltotheprojector.
FREEZE button
Freezethepictureonthescreen.(p.28)
LAMP button
Selectalampmode.(pp.28,58)
P-TIMER button
OperatetheP-timerfunction.(p.29)
R-CLICK button
Actastherightmousebuttonforwirelessmouseoperation.(p.15)
SELECT button
–Executetheselecteditem.(p.24)
– ExpandorcompresstheimageinDigitalzoommode.(p.39)
PRESENTATION POINTER button
Moveapointeroftheprojectororapointerforwirelessmouseoperation.(pp.14-15)
AUTO SET/CANCEL button
–Correctverticalkeystonedistortionandadjustcomputerdisplayparameterssuch
as
Fine sync,Total dots,Horizontal andVerticalposition.(pp.26,48)
–DisplaytheimageinUSBthumbdriveorreturntothemenubarinMemory
Viewermenu.
Refertotheowner'smanualof"Memoryviewerfunction".
LASER LIGHT window
Alaserbeamisemittedfromhere(p.14).
SCREEN button
Selectascreenmode.(pp.29,38-39,46)
VIDEO button
SelecttheVIDEOinputsource.(pp.28,40)
PIP button
OperatethePictureInPicturefunction.(pp.28,55)
WIRED REMOTE jack
Connecttheremotecontrolcable(notsupplied)
tothisjackwhenusingasawiredremotecontrol.
Wirelessremotecontroldoesnotworkwhenthe
remotecontrolcableisconnectedtotheprojector.

13
Part Names and Functions
Toensuresafeoperation,pleaseobservethefollowingprecautions:
Usetwo(2)AAAorLR03typealkalinebatteries.
Alwaysreplacebatteriesinsets.
Donotuseanewbatterywithausedbattery.
Avoidcontactwithwaterorliquid.
Donotexposetheremotecontroltomoistureorheat.
Donotdroptheremotecontrol.
Ifthebatteryhasleakedontheremotecontrol,carefullywipethecasecleanandinstallnewbatteries.
Riskofanexplosionifbatteryisreplacedbyanincorrecttype.
Disposeofusedbatteriesaccordingtotheinstructionsoryourlocaldisposalruleorguidelines.
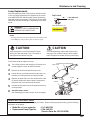
Pressthelid
downwardandslideit.
Openthebattery
compartmentlid.
Installnewbatteries
intothecompartment.
Replacethe
compartmentlid.
Two AAA size batteries
Forcorrectpolarity
(+and–),besure
batteryterminalsare
incontactwithpinsin
compartment.
1 2 3
Pointtheremotecontroltowardtheprojectorwhenpressing
thebuttons.Maximumoperatingrangefortheremote
controlisabout16.4'(5m)and60degreesinfrontofthe
projector.
Remote Control Operating Range
Remote Control Battery Installation
16.4'
(5m)
30°
Remotecontrol
30°
WhilepressingtheMENU
button,presstheIMAGE
buttonnumberoftimes
correspondingtotheremote
controlcode.
MENU button
IMAGE button
RESET/ON/ALL-
OFF switch
Remote Control Code
Remote Control Code
Number of Times
Pressing IMAGE
Button
Code 1 1
Code 2 2
Code 3 3
Code 4 4
Code 5 5
Code 6 6
Code 7 7
Code 8 8
Theeightdifferentremotecontrolcodes(Code1–Code8)areassignedtothisprojector.Switchingtheremote
controlcodespreventsinterferencefromotherremotecontrolswhenseveralprojectorsorvideoequipment
nexttoeachotherareoperatedatthesametime.Changetheremotecontrolcodefortheprojectorfirstbefore
changingthatfortheremotecontrol.See"Remotecontrol"intheSettingMenuonpage58.
WhilepressingtheMENUbutton,presstheIMAGE
buttonnumberoftimescorrespondingtotheremote
controlcode.Seethelistbelow.
1
Toinitializetheremotecontrolcode,slidetheRESET/
ON/ALL-OFFswitchtoRESET,andthentoON.The
initialcodeissettoCode 1.
2

14
Part Names and Functions
Spotlight
Pointer Function
Pointer
Laser Pointer Function
LASERbutton
PRESENTATIONPOINTER
button
Thisremotecontrolemitsalaserbeamfromthelaserlightwindow.PresstheLASERbuttontoactivatethe
laserpointer.Thesignalemissionindicatorlightsredandtheredlaserbeamisemitted.IftheLASERbuttonis
pressedformorethanoneminuteorifitisreleased,thelaserlightgoesoff.
ThelaseremittedisaClassIIlaser.Donotlookintothelaserlightwindoworpointthelaserbeamatyourselfor
otherpeople.Thefollowingisthecautionlabelforthelaserbeam.
CAUTION: Useofcontrols,adjustmentsorperformanceofproceduresotherthanthosespecifiedhereinmay
resultinhazardousradiationexposure.Neverlookdirectlyintothelaserlightwindowwhilealaser
isemitted,otherwiseeyedamagemayresult.
Thecautionlabelisputontheremotecontrol.
YoucanmovetheSpotlightorPointeroftheprojectorwiththeremotecontroltoemphasizeapartofthe
projectedimage.
PressandholdtheMENUandtheNOSHOWbuttons
formorethan5secondstoactivatethePointerfunction.
(TheLaserpointerhasswitchedtothePointerfunction.)
1
PresstheLASERbuttonontheremotecontrolpointing
towardtheprojector.TheSpotlightorPointeris
displayedonthescreenwiththeLASERbuttonlighting
green.ThenmovetheSpotlightorPointerwiththe
PRESENTATIONPOINTERbutton.IftheLASERbutton
doesnotlightgreenandcontinuestoemitalaserbeam,
trytheabovementionedprocedureuntiltheLASER
buttonlightsgreen.
2
TocleartheSpotlightorPointeroutthescreen,press
theLASERbuttonpointingtowardtheprojectorandsee
iftheLASERbuttonlightingisturnedoff.
ToswitchtotheLaserpointeragain,pressandholdthe
NOSHOWandMENUbuttonsformorethan5seconds
orslidetheRESET/ON/ALL-OFFswitchtoRESETand
thentoON.
WhenyouresetthePointerfunction,theremotecontrol
codewillbereset,aswell.
3
Note:
YoucanchoosethesizeofSpotlight(Large/Middle/
Small)andthepatternofPointer(Arrow/Finger/Dot)in
theSettingMenu.See“Pointer”onpage54.
AftertheLaserpointerhas
switchedtothePointer,use
theLASERbuttonasthe
PointerfunctionON-OFF
switch.PresstheLASER
buttonpointingtowardthe
projectorandseeifitlights
green.
LaserLightWindow
SignalEmissionIndicator
MENUbutton
NOSHOWbutton
PressandholdtheMENU
andNOSHOWbuttonsfor
morethan5seconds.
PRESENTATIONPOINTER
button

15
Part Names and Functions
Adjustable Feet
Projectionanglecanbeadjustedupto8.9degreeswiththe
adjustablefeet.
Liftthefrontoftheprojectorandpullthefeetlocklatcheson
bothsideoftheprojector.
Releasethefeetlocklatchestolocktheadjustablefeetand
rotatetheadjustablefeettoaproperheightandtilt.
Keystone distortion can be adjusted automatically with the
Autosetupfunctionormanuallybyusingtheremotecontrol
orthemenuoperation(seepages26,48-49).
AdjustableFeet FeetLockLatches
PRESENTATION POINTER
button
R-CLICK button
L-CLICK button
Wireless Mouse Operation
Theremotecontrolcanbeusedasawirelessmouseforyourcomputer.
Actasleft(click)mouse
buttonwhiletheprojector
andacomputerare
connectedwithaUSB
cable.
Movethepointeronthescreen
withthisbutton.
Actasright(click)mouse
buttonwhiletheprojectoranda
computerareconnectedwitha
USBcable.
Beforeoperatingthewirelessmouse,connect
yourcomputerandtheprojectorwithaUSB
cable(notsupplied).See“Connectingtoa
Computer”onpage17.WhenthePointer
functionisused,thewirelessmouseisnot
available.
1
WhenaUSBcableisconnectedtothe
computerandtheprojector,turnonthe
projectorfirst,thenthecomputer.Ifyouturn
onthecomputerfirst,thewirelessmouse
functionmaynotoperatecorrectly.
2
PAGE buttons
Scrollbackandforththepages
onthescreenwhengivinga
presentation.

16
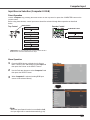
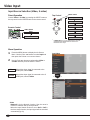
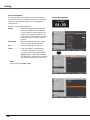
Positioning the Projector
Forprojectorpositioning,seethefiguresbelow.Theprojectorshouldbesetperpendicularlytotheplaneofthe
screen.
Installation
Note:
•Thebrightnessintheroomhasagreatinfluenceonpicturequality.Itisrecommendedtolimitambient
lightinginordertoobtainthebestimage.
•Allmeasurementsareapproximateandmayvaryfromtheactualsizes.
A
B
100"
150"
200"
189
127
95
63
300"(wide)
40"
300"(tele )
39.7'(12.1m)
25.2'(7.7m)
16.7'(5.1m)
12.5'(3.8m)
Max. Zoom Min. Zoom
A : B = 49 : 1
(Inch Diagonal)
8.2'(2.5m)
(Center)
3.3'(1.0m)
Screen Size
(W x H) mm
16 : 10 aspect ratio
40”
Zoom (max)
862 x 538
3.3'(1.0m)
100”
2154 x 1346
8.2'(2.5m)
150”
3231 x 2019
12.5'(3.8m)
200”
4308 x 2692
16.7'(5.1m)
300”
6462 x 4039
25.2'(7.7m)
Zoom (min)
5.2'(1.6m) 13.1'(4.0m) 19.7'(6.0m) 26.86(8.1m) 39.7'(12.1m)

17
Installation
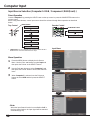
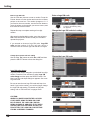
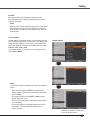
Connecting to a Computer
Cables used for connection
•VGAcables(MiniD-sub15pin)*
•USBcable
•Audiocables
•HDMI-DVIcable
(*Onecableissupplied;othercablesarenotsuppliedwiththeprojector.)
Note:
•InputsoundtotheCOMPUTER1COMPONENT/COMPUTER
2AUDIOINterminalwhenusingtheCOMPUTERIN1/
COMPONENTINandtheCOMPUTERIN2/MONITOROUT
terminalasinput.
•WhentheAUDIOOUTisplugged-in,theprojector'sbuilt-in
speakerisnotavailable.
•USBcableconnectionisneededwhenoperatingthecomputer
withtheremotecontrolorusingthePAGEbuttonsonthe
remotecontrol.
• Whenthecableisofthelongervariety,itisadvisableto
usetheCOMPUTERIN1/COMPONENTINandnotthe
COMPUTERIN2.
Unplugthepowercordsofboththe
projectorandexternalequipment
fromtheACoutletbeforeconnecting
cables.
ExternalAudioEquipment
Audiocable
(stereo)
Audiocable
(stereo)
AudioOutput
COMPUTER1COMPONENT/
COMPUTER2AUDIOIN
AUDIOOUT
(stereo)
AudioInput
Monitor
Output
COMPUTERIN2/
MONITOROUT
USBcable
VGA
cable
COMPUTERIN1
COMPONENT
VGA
cable
MonitorOutput/
MonitorInput
HDMI-DVI
cable
DVI
Output
HDMI
USB
Thisterminalis
switchable.Setup
theterminalas
COMPUTERIN2or
MONITOROUT.(See
Page53.)
Note:
•AnalogRGBandcomponentsignalscannotbe
outputfromtheCOMPUTERIN2/MONITOR
OUTterminalwhenusingtheCOMPUTERIN
2/MONITOROUTterminalasoutput.
•WhenDVIsignalisconnectedtoHDMIterminal
withHDMI-DVIcable,connectthesoundsignal
toCOMPUTER2AUDIOINandsetup
Soundof
"HDMIsetup"to"Computer2".(p.53)

18
Installation
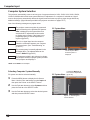
Connecting to Video Equipment
Cables used for connection
•VideoandAudiocable(RCAx3)
•S-videocable
•Audiocable
(Cablesarenotsuppliedwiththeprojector.)
Unplugthepowercordsof
boththeprojectorandexternal
equipmentfromtheACoutlet
beforeconnectingcables.
Note:
WhentheAUDIOOUTisplugged-in,theprojector'sbuilt-
inspeakerisnotavailable.
ExternalAudioEquipment
Audiocable
(stereo)
VIDEO
S-video
S-videocable
VideoandAudiocable
VideoandAudioOutput
S-videoOutput
AUDIOIN
AudioInput
AUDIOOUT(stereo)
(R)(L)(Video)

19
Installation
Connecting to Component Video Equipment
Note:
•WhentheAUDIOOUTisplugged-in,theprojector's
built-inspeakerisnotavailable.
•Seepage80fororderingoptionalcables.
Unplugthepowercordsof
boththeprojectorandexternal
equipmentfromtheACoutlet
beforeconnectingcables.
ExternalAudioEquipment
COMPUTER1
COMPONENT/
AUDIOIN
Audiocable
(stereo)
Audio
cable
(stereo)
AudioInput
ComponentVideoOutput
(Y,Pb/Cb,Pr/Cr)
RGBScart21-
pinOutput
Audio
Output
Scart-VGA
cable
Component-
VGAcable
AUDIOOUT(stereo)
Component
cable
COMPUTERIN1/COMPONENTIN
Cables used for connection
•Audiocables
•Scart-VGAcable
•Componentcable
•HDMIcable
•Component-VGAcable
(Cablesarenotsuppliedwiththisprojector.)
HDMI
HDMIOutput
HDMI
cable
Page is loading ...
Page is loading ...
Page is loading ...
Page is loading ...
Page is loading ...
Page is loading ...
Page is loading ...
Page is loading ...
Page is loading ...
Page is loading ...
Page is loading ...
Page is loading ...
Page is loading ...
Page is loading ...
Page is loading ...
Page is loading ...
Page is loading ...
Page is loading ...
Page is loading ...
Page is loading ...
Page is loading ...
Page is loading ...
Page is loading ...
Page is loading ...
Page is loading ...
Page is loading ...
Page is loading ...
Page is loading ...
Page is loading ...
Page is loading ...
Page is loading ...
Page is loading ...
Page is loading ...
Page is loading ...
Page is loading ...
Page is loading ...
Page is loading ...
Page is loading ...
Page is loading ...
Page is loading ...
Page is loading ...
Page is loading ...
Page is loading ...
Page is loading ...
Page is loading ...
Page is loading ...
Page is loading ...
Page is loading ...
Page is loading ...
Page is loading ...
Page is loading ...
Page is loading ...
Page is loading ...
Page is loading ...
Page is loading ...
Page is loading ...
Page is loading ...
Page is loading ...
Page is loading ...
Page is loading ...
Page is loading ...
Page is loading ...
Page is loading ...
Page is loading ...
Page is loading ...
Page is loading ...
Page is loading ...
-
 1
1
-
 2
2
-
 3
3
-
 4
4
-
 5
5
-
 6
6
-
 7
7
-
 8
8
-
 9
9
-
 10
10
-
 11
11
-
 12
12
-
 13
13
-
 14
14
-
 15
15
-
 16
16
-
 17
17
-
 18
18
-
 19
19
-
 20
20
-
 21
21
-
 22
22
-
 23
23
-
 24
24
-
 25
25
-
 26
26
-
 27
27
-
 28
28
-
 29
29
-
 30
30
-
 31
31
-
 32
32
-
 33
33
-
 34
34
-
 35
35
-
 36
36
-
 37
37
-
 38
38
-
 39
39
-
 40
40
-
 41
41
-
 42
42
-
 43
43
-
 44
44
-
 45
45
-
 46
46
-
 47
47
-
 48
48
-
 49
49
-
 50
50
-
 51
51
-
 52
52
-
 53
53
-
 54
54
-
 55
55
-
 56
56
-
 57
57
-
 58
58
-
 59
59
-
 60
60
-
 61
61
-
 62
62
-
 63
63
-
 64
64
-
 65
65
-
 66
66
-
 67
67
-
 68
68
-
 69
69
-
 70
70
-
 71
71
-
 72
72
-
 73
73
-
 74
74
-
 75
75
-
 76
76
-
 77
77
-
 78
78
-
 79
79
-
 80
80
-
 81
81
-
 82
82
-
 83
83
-
 84
84
-
 85
85
-
 86
86
-
 87
87


Sanyo PLC-WXU700A Owner's manual
- Category
- Data projectors
- Type
- Owner's manual
- This manual is also suitable for
Ask a question and I''ll find the answer in the document
Finding information in a document is now easier with AI
Related papers
-
Sanyo PLC-XR301 - XGA Projector With 3000 Lumens Owner's manual
-
-
Sanyo PLC-XR201 Owner's manual
-
-
Sanyo plc wxu700 User manual
-
Sanyo PLC-WXU700A User manual
-
Sanyo PDG-DXL2000 Owner's manual
-
Sanyo plc xu84 User manual
-
-