Page is loading ...

1
Owner’s
Manual

2
Please record the following information about your spa purchase here and store it in a
safe place so it is readily available in the event you need to le a warranty claim or need
to contact your dealer to service in the future. Most of this information can be found on
your original purchase receipt.
Spa Model
Spa Serial Number Date of Purchase
Dealer Name
Approximate Date of Spa Installation
Read, Save and Follow All Instructions !
Table Of Contents
Service and Support ........................................................................ 1
Understanding Symbols ...................................................................1
Warnings and Safety Information .................................................... 2
Site Preparation and Installation Recommendations ........................4
Electrical Requirements and Recommendations ............................. 6
240V Installation.................................................................................6
120V Installation................................................................................7
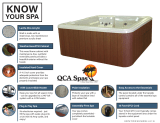
Getting to Know Your Spa
Electronic components ...................................................................8
Plumbing components ....................................................................9
Filling Your Spa with Water...............................................................10
Maintaining Water Quality
Basic fundamentals of water chemistry ....................................... 11
How to add chemicals to the water ............................................. 13
General Spa Care and Maintenance ...............................................15
Troubleshooting Guides ................................................................. 17
Water Chemistry............................................................................17
Spa................................................................................................18
Error Messages on Topside Controls.............................................19
Key To Symbols
Keys to Success - Details, tips and
tricks from industry professionals.
Danger! Proceed with extreme caution to
prevent the risk of severe injury and/or death
Warning! Proceed with care to prevent
avoidable accidents and potential risks.
Details - Step by step instructions
for important procedures.
16degeom02

3
DANGER!
Risk of Electrocution
ALL ELECTRICAL CONNECTIONS MUST BE MADE BY A LICENSED ELECTRICIAN.
Ground Fault Circuit Interrupter installed in compliance with section 680-42 of the National Electrical Code, ANSI/NFPA 70-1993 is
required for user safety and equipment protection. You should inspect the Ground Fault Circuit Interrupter before each use to be sure
it is functioning properly, in good condition and that the wiring is connected properly. To ensure the spa functions properly and that
your warranty is not compromised by improper installation, a licensed electrician must install all electrical components and make
electrical connections. Connect only to a grounded source a minimum of ve feet (1.5m ) from any metal surface. Solid copper bonding
conductors must be in compliance with local ordinances and located between the ground terminal inside the spa control box and any
metal equipment, including pipes, electrical equipment enclosures, and conduit within ve feet (1.5m) of the spa. To prevent death or
serious injury from electrocution that can occur if an appliance falls into the spa, do not permit any electrical appliances, such as lights,
telephones, mP3 players, radios or televisions to be within ve feet (1.5m) of the spa unless they were installed by the manufacturer.
• Disconnect the spa from the power supply before draining and servicing components.
• Test the Ground Fault Interrupter(s) before each use.
• Replace damaged wires and cords immediately to reduce the risk of electric shock. Failure to do so may result in death or
serious permanent injury by electrocution.
• Do not bury wire without electrical conduit approved for underground use.
• Equipment compartment doors must be properly installed before using the spa.
• Replace components with components identical to components supplied by the manufacturer.
• Do not operate the audio or television equipment while you are inside the spa.
• Unless it was installed and provided by the manufacturer, audio and video equipment and other electrical appliances
should not be used within 5 feet (1.5m) of the spa. Do not connect auxiliary components (i.e. headphones) to the system.
• Do not open the spa control box unless instructed to do so by your dealer.
DANGER!
Risk of Children Drowning
Extreme caution must be used to prevent unauthorized access by children. To avoid accidents, ensure that children cannot use the
spa unless they are supervised at all times. To reduce risk of injury, do not allow children to use this product unless they are closely
supervised at all times. To reduce the risk of injury, lower water temperature when spa is used by children. Lower water temperatures are
recommended since children are especially sensitive to hot water.
• Make sure child resistant locks on the spa cover are engaged after use. The spa cover that comes with your spa meets
the ATSM F1346-91 Standard for Safety Covers. However, use of the cover, locking clips or actual locks will not prevent
access to the spa, so children should not be left unattended.
• Children are especially sensitive to hot water. Lower water temperatures are recommended for children. Test the water
temperature with a thermometer or your hands to be sure it’s comfortable before allowing children to enter the spa.
• Remind children that wet surfaces are slippery. Make sure that children are careful when entering and exiting the spa.
• Check with local authorities regarding fencing requirements for spas in your area.
• Keep children and pets o the spa cover. Most spa covers have a maximum weight load of 20 lbs. They will not support
the weight of people or pets. Sitting on the cover may cause the foam inserts to break.
• Children should always be in the company of a responsible adult and should not have unattended access to the spa.
DANGER!
Risk of Drowning or Serious Injury from Suction Fittings, Filters and Skimmers
Keep clothing, hair or hanging jewelry away from suction ttings, rotating jets or other moving components. Never operate the spa if
the lter(s), lter lid(s), skimmer(s), or skimmer assembly(ies) are missing. Do not remove basket(s) or lter(s) while spa is running. The
suction ttings have a specic water ow rating. Replacement suctions tting must be compatible with the ow rate marked on the
original suction tting. Never operate the spa if the suction ttings are broken or missing. Please contact your local dealer for service and
replacements or repair.
DANGER!
Risk of Hyperthermia
Prolonged immersion in hot water can result in HYPERTHERMIA, a dangerous condition occurring when the internal temperature of
the body reaches a level above normal (98.6ºF). The symptoms of hyperthermia include unawareness of impending hazard, failure to
perceive heat, failure to recognize the need to exit the spa, physical inability to exit the spa, fetal damage in pregnant women, and
unconsciousness resulting in a danger of drowning. The use of alcohol, drugs or medication can greatly increase the risk of fatal
hyperthermia.
• The Consumer Products Safety Commission has stated that the water in the spa should never exceed 104ºF (40ºC). Water
temperatures between 100ºF (38ºC) and 104ºF (40ºC) are considered safe for a healthy adult.
• Lower water temperatures are recommended for extended use (exceeding 10 minutes) and for young children. Extended
use at higher temperatures can cause hyperthermia.
• Pregnant or possibly pregnant women should consult a physician before using a spa.
• Pregnant women should reduce the water temperatures to no more than 100ºF (38ºC). Failure to do so may result in
permanent injury to your baby.
Safety Information

4
WARNING!
Adverse Affects with Certain Medical Conditions
You should consult your physician if you are pregnant or possibly pregnant, obese, have a medical history of heart disease, low or
high blood pressure, circulatory problems, infectious diseases, immune deciencies, infectious diseases, infections skin irritations, or
diabetes.
WARNING!
Increased Side Effects of Medication
The use of drugs, alcohol, or medication before or during spa use may lead to unconsciousness with the possibility of drowning. Anyone
using medication should consult a physician before using a spa; some medication may cause a user to become drowsy, while other
medication may aect the heart rate, blood pressure or circulation. Anyone taking medications which induce drowsiness, such as
tranquilizers, antihistamines or anticoagulants should not use a spa.
WARNING!
Maintaining Well Balanced Water Chemistry
To reduce the possibility of contracting a waterborne illness, always maintain water chemistry within the parameters in this manual.
Keep the water clean and sanitized with correct chemical balance to help maintain safe water and prevent possible damage to spa
components and bathers. If other bathers are negatively aected, discontinue use and consult a physician. The recommended levels for
your spa are:
Free Available Chlorine (FAC): 3.0 to 4.0 ppm
Free Available Bromine (FAB): 2.0 to 4.0 ppm
Total Alkalinity 80 to 120 ppm
Water pH 7.2 to 7.6
Calcium Hardness 150 to 250 ppm
• Always shower before and after using a spa.
• Refer to Water Chemistry and Maintenance section for further information and complete instructions about water and spa
care.
• When adding chemicals, turn the primary pump on for at least ten minutes after adding any spa chemicals into the lter
compartment.
• Replace or clean the lter cartridge regularly to remove debris and mineral buildup which may aect the performance of
jets, limit the water ow, or trip the high limit thermostat which will automatically turn o the entire spa to prevent further
damage to the spa.
• Stay out of the spa if you have open wounds or an infections disease.
IMPORTANT SAFETY REMINDERS
• Wet surfaces can be slippery. To reduce the risk of injury, exercise care when entering and exiting the spa. Give children
instructions about how to safely enter and exit the spa.
• Remove all jewelry and put long hair in a bathing cap or hair tie before you enter the spa.
• Measure the water temperature with an accurate thermometer before entering the spa to verify the topside control displays
the correct temperature. The tolerance of regulating devices may vary as much as +/- 5ºF (2ºC).
• Test the water with your hand to be sure it’s comfortable before entering the spa.
• Remove debris from lter baskets and suction drains.
• Do not allow glass, sharp or other breakable objects in or near the spa area.
• Don not use alcohol or drugs before or during spa use. Stay well hydrated and drink plenty of water.
• If you are going to be in the spa for more than 10 minutes, you should reduce the temperature of the spa to 100ºF (40ºC) or
lower.
• Do not use the spa immediately after strenuous exercise.
• Never use your spa when you are alone.
• Stay out of the spa if you have open wounds or an infectious disease.
• Consult a physician if you are pregnant, have a medical condition or are taking medication before using a spa.
• Never leave the spa unattended if the cover is not locked securely in place whether it is empty or lled with water. Exposure
to sunlight, rain, snow and high temperatures may cause permanent damage to the spa.
• Leave the cover partially open for 20 minutes when adding chemicals to allow chemical vapor to escape.
• Do not leave the spa unattended when the cover is o.
• Brush heavy snow loads o the cover with a soft brush. Spa covers are not designed to hold weight loads of more than 20
pounds.
• Reinforce your cover with wind straps during periods of high wind. The tie downs sewn on the cover will not hold your
cover in place if wind speeds are excessive.
• Use only approved and recommended accessories, chemicals and cleaners.
• Never leave the spa unattended when the cover is o.
• Never allow children or pets to sit or stand on the spa cover.
• Always lift or carry the cover by using the handles, not the skirt or tie downs.
Safety Information

5
CHOOSING A LOCATION
Choosing the right location for your spa requires careful consideration of esthetics and convenience in addition to the care and
maintenance that is required over the life of your spa. Planning and preparation are critical, but following a few basic guidelines will
ensure a lifetime of enjoyment
• Make sure the installation meets your local codes, covenants and restrictions. Many communities require that spa
installations be done with the same security precautions, like fences with locking gates, as swimming pools.
• Make sure the location is free of obstacles that may interfere with delivery and Installation. The overall dimensions are an
important consideration when planning for delivery & installation. A clear pathway from the curb to the installation site
makes delivery a breeze. The pathway should be free of obstruction from things like walls, fences, tree limbs, heat pumps,
and power lines. Check to be sure gate openings are wide enough for the spa to pass through without damaging the spa.
• Normal use of your spa will mean lots of splashing. Choose a location that allows water to easily drain away from the base
of the spa rather than pooling around the spa. Close proximity to a water hose will allow you to easily top o the spa after
each use.
• Consider the proximity to the doors of the house, especially in cold weather. Be sure there is a pathway to the spa that can
be easily maintained in inclement weather.
• Keep your spa away from landscaping sprinklers, roof overhangs and guttering. Adequate drainage that prevents standing
water near the foundation of the spa is critical.
• But you should also consider the negative eects of wind, exposure to the sun and the location of trees to minimize the
eects of falling debris, excessive sunlight and shade.
• Choose a location that allows easy access for maintenance and repairs. You should leave 24” of clearance on the side
of the spa with the electronics and 18” of clearance on all other sides to allow easy access for maintenance and repairs.
Some periodic maintenance steps require access to the electrical equipment area.
MANUFACTURER’S RECOMMENDED GENERAL INSTALLATION INSTRUCTIONS
It’s very important to follow the manufacturer’s guidelines for site preparation, installation and leveling of your new spa. Failure to follow
these instructions may result in structural damage to the spa that is not covered under your warranty.
SITE PREPARATION FOR OUTDOOR SPAS
• The manufacturer recommends that you hire a qualied, licensed professional to install a level, concrete pad reinforced with
steel bars that will adequately support the weight of the spa when it’s lled with water and all of the bathers.
• Before you begin, contact your local gas, electric, water and cable companies to be sure there are no underground lines in
the site you have chosen. For best results, site preparation should begin with digging an area that is at least 8” wider and
longer than the overall dimension of the spa. The site should be level and 6” to 8” deeper than the nal desired elevation of
the spa. Depending on the depth of the site, the area should be lled with between 3” and 4” of crushed stone, followed by
3/8” steel reinforcement bars on a 16” grid, then 3” to 4” of poured concrete. Level the concrete and nish with a course
broom to ensure it is slip resistant.
• If you live in a climate with freeze/thaw zones or prone to ground shift because of the kind of dirt or low water tables, we
recommend installing poured concrete footings that extend below the freeze line or water table prevent the possibility of
shifting.
• Make sure the site is away from areas that are prone to ooding or standing water and there is adequate drainage away
from the spa. Never backll the sides of the spa with dirt. If necessary, you should incorporate a retaining wall into the site
design that will help ensure the cabinet and electrical components remain dry at all times.
• If your site plan includes decking to give the appearance the spa is recessed, you should choose slip resistant materials for
everyone’s safety. Water splashing onto the surrounding surface is a normal and should be taken into consideration when
choosing decking materials. You should also design the deck to include removable or locking, hinged panels to allow easy
access on all four sides for maintenance and service. Remember, making the spa accessible for service is not covered
under the warranty.
SITE PREPARATION FOR INDOOR SPAS
• If you are placing your spa indoors you should plan well in advance to prevent the delivery and installation issues that may
occur when attempting to get the spa indoors.
• A licensed contractor should conrm the load bearing capacity of the oor is adequate, make modications like widening the
entry point if necessary, installing a oor drain to eliminate standing water, and add a convenient water supply so the water
level can be properly maintained.
• Floor coverings should be slip resistant with some ability to grip when the oor is wet.
• The location and oor covering must be able to handle draining all of the water which is part of routine maintenance.
• You should consider installing a ventilation system. Humidity and moisture should be considered. If oor coverings trap water
or the drainage is inadequate, wood, paper, and drywall, may get damp creating mold and mildew.
• Some spa chemicals may have an adverse reaction to some household metals. Again, adequate load bearing capacity for the
weight of the spa when lled with water and bathers is vital.
Site Selection Considerations
Site Preparation, Delivery & Installation Recommendations

6
PREPARING FOR THE DELIVERY AND OFF LOADING YOUR SPA
• It is important to speak with your sales representative about what to expect at the time of delivery well in advance of the
delivery date so you can plan and be prepared on the day of delivery. Failing to adequately prepare in advance will result
in delayed delivery. Your spa leaves the manufacturing facility wrapped with protective materials, shrink wrapped with the
bottom of the spa banded to a wooden pallet.
• If you arranged for delivery at the time of purchase, you should discuss potential delivery obstacles like steps, fences and
small gate openings with your sales representative in advance so the delivery agent arrives properly equipped and prepared
to place your spa without delay.
• If your spa is shipping from the manufacturing facility, it will arrive in a 53’ common carrier closed box trailer. The carrier is
responsible only for curb side delivery to an address that is accessible not removal or placement of your spa. You will need
several people to help remove the spa from the truck on the day of delivery.
• If the prepared site is accessible, hiring a local towing service with a tilting at bed is a convenient and aordable way to
place your spa. You may want to consider meeting the towing service at the destination terminal to inspect the spa and allow
the carrier to move the spa onto the at bed. This is typically an ecient way to coordinate a convenient delivery schedule
for everyone and eliminates additional expenses other service providers may charge if the carrier is late for the delivery
appointment.
• If placing your spa requires a crane, choose a reputable crane service with spa experience. If the spa is not properly
stabilized or the straps are too tight or improperly placed, the spa components and structure may be compromised or
broken, even if there is no visible damage at the time. Crane services who are familiar with spa placement know how to
properly place spreaders and straps, ensuring the frame is adequately supported.
NEVER PUT THE SPA ON ITS TOP OR ITS SIDES.
NEVER FLIP THE SPA END OVER END.
When moving the spa on its side, the side that was against the pallet during transit must be facing down to prevent damage to the
structure, the acrylic and the components.
The manufacturer’s warranty does not cover damage that is the result of improper removal or installation of the spa.
LEVELING YOUR SPA
• You should verify the spa is completely level when it has been positioned into place.
• Do not use shims. Shims may create pressure points and damage the spa.
• Damage caused by improper installation is not covered under the warranty.
Site Preparation, Delivery & Installation Recommendations

7
DANGER!
Risk of Electrocution
All electrical connections must be performed by a qualied licensed electrician in accordance with the National Electric Code
(NEC) following state and local electrical codes in eect at the time of the installation.
• Connecting the spa to an improperly wired circuit will eliminate many of the spa’s built in safety features which may result
in re, electrocution, or other risk of injury. Damages to the spa which are the result of improper wiring are not covered
under the manufacturer’s warranty and will terminate all listings from independent listing agencies.
• The electrical supply for your spa must be housed in a weatherproof service box and include a suitably rated switch and
Ground Fault Circuit Interrupter between the main service entrance and the spa to open all ungrounded supply conductors
in compliance with Section 422-20 of the National Electrical Code/USA, ANSI/NFPA/70 and in compliance with independent
listing agencies. This might be used as a shut o switch, and must be installed so that it is accessible to the spa occupants,
but not within 5 feet (1.5m) of the spa.
• The wiring specications in this manual are for standard installations where the main power supply is within 40 feet of the
spa. If the main power supply is more than 40 feet away, the electrician must make appropriate modications.
• The electrical instructions and diagrams contained in this manual and inside the spa control box are included as a guideline
for the licensed electrician installing the electrical connections and vary by model. Please refer to the wiring diagram inside
the spa control box for model specic connection instructions. All wiring connections must be watertight.
• All connections must be made using copper conductors only. Do not use aluminum wire. Connection wires, circuit
breakers, and/or fuses, must all be sized to accommodate the Total Ampere load.
• Never turn power on to the spa when it is not lled with water. DO NOT connect power to the empty spa. When power
is supplied to the spa, it automatically activates critical components within the spa, such as the pumps, controls and
the heating. If power is supplied to the components before it is lled with water, the components may be damaged
instantly. Damage that occurs to the spa because power was supplied before it is lled with water is not covered by the
manufacturer’s warranty.
• Prior to performing any service, turn OFF all primary electrical equipment at the main circuit breaker or disconnect panel.
• Your spa must be permanently connected (hard wired) to a power supply that is protected by a Ground Fault Circuit
Interrupter (GFCI). Power supplied to your spa must be a dedicated circuit with no other appliances, lighting, or other
electronic components powered by the circuit.
• Do not permit any electrical appliances like lights, telephones, mP3 players, radios or televisions within ve feet (1.5m) of
the spa unless they were built in by the manufacturer. Failure to maintain a safe distance may result in death or serious
injury from electrocution if the appliance should fall into the spa.
• Do not use head phones while using the spa
• All metal components or accessories that are permanently installed, like handrails, ladders, drains and hardware that are
within 5 feet (1.5 m) of the spa must be bonded to the equipment grounding bus with copper conductors no smaller than
No. 6 AWG.
WIRING REQUIREMENTS FOR 240V SPAS
• The minimum wire size for 40 and 50 amp systems is # 6/3 c/w ground (6 gauge/4 conductor) if the main power supply
is within 40 feet of the spa. If the main power supply not within 40 feet, your electrician should make the appropriate
modications.
• The spa must have dedicated 240V service from the main power supply. Do not attempt to share service with other
appliances. Use only a class ‘A’ double-pole Ground Fault Circuit Interrupter (GFCI).
• To access the spa controls, remove the cabinet panel and store it safely. Do not replace the access panel until the spa is
lled with water and you are sure it is operating properly.
Number of
Pumps
Voltage Breaker Connection
1 120V 20 amp Plug In
1 240V 40 amp Hard Wired
2 240V 50 amp Hard Wired
3 240V 50 amp Hard Wired
Electrical Service Requirements
Electrical Requirements and Recommendations
240V ELECTRICAL INSTALLATION
Never turN the GFCI ON beFOre FIllING yOur spa wIth water!
always turN the GFCI OFF beFOre servICING Or draINING yOur spa!

8
120V ELECTRICAL REQUIREMENTS AND INSTALLATION
Outlet must be installed in accordance with the National Electric Code (NEC), state and local electrical codes in effect at the time of the installation.
ELECTRICAL REQUIREMENTS
Voltage 120
Breaker Dedicated 20 Amp
Poles 2
Wires 3
DANGER - Risk of Electric Shock
Connecting the spa to an improperly wired circuit will eliminate many of the spa’s built in safety features which may result in re,
electrocution, or other risk of injury. Damage to the spa that is the result of improper electrical installation is not covered under the
manufacturer’s warranty and will terminate all listings from independent listing agencies.
• An appropriately rated GFCI cord is attached and shipped from the manufacturer inside the cabinet panel under the top side
controls.
• Electrical appliances including audio and video equipment should not be used within 5 feet (1.5m) of the spa.
• Never touch or come into contact the electrical cord or any electrical accessory when your body is wet.
• Do not operate the audio or television equipment while you are inside the spa.
• Test the GFCI on the cord before each use.
• Never alter the plug.
• Do not bury the cord.
• Replace damaged cords immediately to reduce the risk of electric shock. Failure to do so may result in serious permanent injury
or death by electrocution.
• Keep the cord away from lawn mowers, weed eaters and other equipment that may damage the cord.
This spa musT be filled wiTh waTer before iT is plugged in.
Plugging in the spa automatically activates critical components such as the pumps, controls and the heating. Supplying power to the
components before the spa is lled with water damages the components instantly. Damage that occurs to the spa because it was
plugged in before it was lled with water is not covered by the manufacturer’s warranty.
• The power supplied to your spa must be a dedicated circuit with no other appliances, lighting, or other electronic components
shared by the circuit.
• This spa must be plugged directly into the outlet. Do not use an extension cord or surge protector. Low voltage may cause
damage that is not covered under the manufacturer’s warranty.
• Do not unplug this spa under normal conditions. Your spa is engineered for optimal energy eciency and is equipped to
automatically perform routine maintenance cycles that require a permanent connection to the power supply.
This spa musT be unplugged before draining, performing mainTenance or servicing.
• Do not open the spa control box without the assistance of your dealer.
• To access the spa controls, remove the cabinet panel and store it safely. Do not replace the access panel until the spa is lled
with water and you are sure it is operating properly.
• Never use the spa with the equipment compartment door removed. Equipment compartment doors and cabinet panels must
be properly installed before using the spa.
• Replace components with components identical to those supplied by the manufacturer.
240V ELECTRICAL CONNECTIONS
Installation of the GFCI and circuit breaker, including ampere sizing and selection of conductor size and type must be performed by a
qualied, licensed electrician in accordance with the National Electrical Code, and all Federal, State and Local codes and regulations in
eect at the time of installation. All wiring schematics are provided as a reference and are intended only for use only by qualied, licensed
electricians.
MODEL SPECIFIC HARD WIRING INSTRUCTIONS ARE LOCATED INSIDE THE SPA CONTROL BOX.
Correct wiring of the electrical service box, GFCI box and pack terminal block is required. Your spa requires a 4-wire, 40 or 50 amp
(depending on the spa model), 240 volt sub feed in non metallic pipe to the spa equipment compartment.
Installation instructions for your GFCI vary by manufacturer. It is imperative that your GFCI be installed in accordance with the installation
instructions provided by the manufacturer of the GFCI you purchased. The GFCI wiring diagrams included with this manual are included
as a reference only and illustrate installation variances between GFCI manufacturers.
Hard wire the spa controls following the model specic diagram inside spa control box lid. In most models, the spa controls are inside
the access panel underneath the spa’s top side control pad.
Electrical Requirements and Recommendations

9
The Electronic Components
The Spa Pack is the computer that controls the spa functions. Not only does the pack respond to user commands a button on the
topside control is pressed, it’s also programmed to automatically take care of many of the maintenance and safety features so you don’t
have to. For example, when it’s time for the ltration cycle to begin, the spa pack turns the pumps on automatically to circulate the water
and automatically turns them o when the cycle is complete.
Diagnostic Testing
The spa pack is programmed to run and retain the results of diagnostic testing, ensuring your spa is operating eciently. If
a problem is detected, an error message will be displayed on your topside control making you aware that your spa requires
attention. Error messages can often be resolved simply by turning the GFCI “OFF” for 30 minutes and turning it back “ON”,
known as a System Reset. If an error message is displayed after resetting the system, please refer to the troubleshooting
guide in this manual or call your local dealer for additional assistance. ALWAYS turn the GFCI “o” before performing service
or repairs.
The Topside Control is like the keyboard for a computer. Pressing a button on the topside control relays a command to the spa pack
to perform a specic function. Water temperature, ltration cycles, lighting, energy saving features and jet functions are all controlled
by pressing buttons on the topside control. In addition to controlling the functions, the topside control also relays diagnostic and error
messages to alert you if a problem is detected.
Primary and User Controlled Functions
During heating, ltration and other maintenance cycles some of the buttons on the topside control are disabled. For example,
if the water temperature falls below the programmed temperature allowance while you’re using the spa, a heating cycle will
begin automatically and the water will circulate on low speed until the correct temperature is reached. Pressing the “pump”
button will not turn the pump o or change the circulation speed when the heater is on. Because the pack is programmed to
prioritize safety and maintenance functions, any user controlled functions that interfere are disabled until they are completed.
The Spa Heater warms the water. Once your temperature settings have been programmed your water temperature will be maintained
automatically. When the water temperature falls below the temperature allowance, the spa pack will turn the heater and pump(s) on and
o automatically when the correct temperature is reached.
High Water Temperatures During Warm Weather
During warm summer months, it’s a good idea to reduce your water temperature settings. Spas are designed to retain
heat, and aren’t equipped to cool the water. When the ambient temperature is high and it doesn’t get cold enough for your
water temperature to fall, your water temperature may be higher than the temperature you programmed. Reducing your
programmed temperature not only resolves this, it also conserves energy and reduces operating costs. If you want to reduce
the water temperature quickly, remove the cover for a short time allowing some of the heat to escape or drain some of the
warm water from your spa and replace it with cool water. If you drain water from your spa, turn the GFCI “o” and follow the
instructions when relling it and balancing your water chemistry.
The Spa Pump(s) push the water through the plumbing lines and into the spa. The pump(s) are turned on and o by pressing the
button(s) on the topside controls. The number and speed of the pumps varies by spa model.
Air in the Plumbing Lines and Pumps
The pumps are designed to pump water, not air. Air trapped the pump or the plumbing lines prevents circulation of the water.
Letting your pumps run with an air lock will instantly destroy the pump(s). Following the manufacturer’s instructions to ll
your spa properly and soaking new lters for 30 minutes before powering the spa on will help prevent air locks. If you hear
a “humming” sound, if the jets don’t work or if the jets only work in part of the spa when you press the jets button, it is likely
you have an air lock and need to prime the pump. Never allow a pump that is not primed to run for more than 2 minutes.
Using the Air Release Screw to Bleed Air from the Pumps
1. Insert a screw driver into the air release screw located on the pump
2. Loosen the air release screw. Turn counter clockwise until water begins to trickle. DO NOT REMOVE SCREW!
3. When water is trickling steadily, turn the screw clockwise to tighten the screw and stop the ow of water.
Getting to Know Your Spa

10
The Plumbing Components
The Slice Valves (Gate Valves, “T” Stems) allow the spa to be serviced without draining the water. Slice valves or “T” stems
are installed in the plumbing lines near the electronic components. Pushing the “T” stem down creates a seal between the
“T” stems. When service is complete, the “T” stems are raised and locked in the up position allowing water to ow again.
Slice valves must be locked in the “up” position before power is applied to the spa. Applying power to the spa when the slice
valves are closed can damage the spa immediately. Each time you change the water in the spa, make sure the locks are in
good condition; replace the locks if they will not hold the “T”stem in the “up” position. Do not use the spa until they have been
replaced.
The Plumbing Unions connect the plumbing lines to the components. Unions can become loose in transit and when
seasons change. During the initial installation and each time you drain your spa, you should hand tighten all plumbing
unions. The main cause of leaks inside the spa cabinet is plumbing unions that need to be tightened or seals that
need to be re seated or replaced. Do not use tools or overtighten plumbing unions.
The Filter Assembly consists of the lter, the lter basket and the cover The lter basket catches large
debris, the lter catches ne particulates and oil. You should check the lter assembly on a regular basis
making sure the basket is free of debris and the lter is clean and in good condition. Flow will be restricted if the
lter assembly is obstructed or the lters are dirty which can damage the spa. Using the spa without the lter
assembly in place is a drowning hazard. If any part of the lter assembly is damaged, do not use the spa until it
has been replaced. Please call your local dealer for replacement parts. Before removing the lter assembly to ll
the spa or change the lter, manually power the GFCI “OFF”. Turn the lter cover counter clockwise until it stops.
Lift the cover, raise and remove the basket. Lift the lter from lter housing. Replace the lter, basket and cover.
Turn the cover clockwise until it stops and is locked in place. The manufacturer recommends that you replace the
lter every three months. Soak new lters in water for 30 minutes before installing to prevent air in the plumbing
lines.
The Suction Drain Covers are on the sides in the foot well of the spa. They are caps that cover the suction lines, reducing
the risk of drowning and debris entering the plumbing lines. If the suction drain covers are obstructed, ow is restricted
which can damage your spa. Keep hair, clothing and children away from the suction drains when using the spa. It is
important to check them on a regular basis making sure they are good condition Do not use the spa if they need to be
replaced. Replacement parts can be obtained by contacting your local dealer. You should avoid contact with the suction
drain covers when the GFCI is powered “on”.
Air, Diverter, and Waterfall Valves
The appearance of air, water and diverter will vary depending upon the model purchased.
The Air Valve is a small rotating dial on the acrylic surface that looks like a smaller diverter valve that increases or decreases air ow
through the jets. Increasing air ow creates “bubble action” in the spa. When the air valve is positioned in the center, there is moderate
air ow with moderate “bubble action”. When the air valve is turned to one direction, or closed, there is less air ow and fewer bubbles.
If the air valve is turned fully to the opposite direction, the air valve is fully open creating the most bubbles. The air valve rotates right and
left.
The Diverter Valve is a large rotating dial on top of the acrylic surface that controls the ow of water in seating areas serviced by the
same pump. When the diverter valve is positioned in the center, water ow will be spread evenly throughout each seat sharing that
pump. Turning the diverter valve all the way to one side will restrict the water ow from one section and force all of the ow into the other
section. Turning the diverter valve all the way to the other side will reverse the ow of water to the opposite side of the spa.
The Waterfall Valve is used to increase and decrease ow thru the waterfall. The waterfall valve rotates right and left. When the waterfall
valve is placed in the center, there is moderate ow through the waterfall. If the valve is turned all the way in one direction, there is no
ow through the waterfall. If the valve is turned all the way in the opposite direction, the ow is increased to allow maximum ow through
the waterfall.
Difculty Turning Waterfall & Diverter Valves
When the jets are turned on, excessive pressure in the plumbing lines can make rotating the air, waterfall and diverter valves
dicult. Turn the jets o and rotate the valves back and forth to the desired position and turn the jets back on. Do not force the
valves past the natural stopping point. Forcing them to rotate beyond the built in “stop” or when there is excessive pressure in
the lines will damage the spa.
The Drain Valve is used to remove the water from the spa. The drain valve is in the base of the spa near one of the
corners. When you ll your spa, make sure it’s completely closed and no water is draining from it.
Getting to Know Your Spa

11
Your spa has been tested during the manufacturing process and some water may remain in the plumbing lines after testing leaving spots
on the acrylic or cabinet. Wipe the spa and cabinet with a clean soft rag. Do not use household cleaners that contain bleach or ammonia
(including most glass cleaners) because they will have an adverse eect on the surfaces and do not mix with chemicals used to maintain
water chemistry. Never use abrasive cleaners on the cabinet, cover or acrylic surface. They may do permanent, irreversible damage. To
remove incidental dust, dirt and debris that may have accumulated in the plumbing lines during shipping and installation, open the drain
bib and remove the lters, and run water through the ltration canister and jet lines until the water coming from the drain bib runs clear.
Never attempt any kind of service or cleaning when power is applied to the spa. Each time you remove the spa cabinet for any reason,
manually turn the GFCI o. Never leave the spa unattended while the exterior panels or cover are o the spa.
Step by Step Instructions to Fill the Spa with Water
4. Remove all of the screws that attach the access panel to the spa frame. In most models, the access panel is on the same
side as the topside controls.
5. Check for obvious signs of damage inside the cabinet including loose wires or broken pipes. If you see damage inside the
spa cabinet, call your local dealer for assistance.
6. Hand tighten the plumbing unions and check to be sure the slice valves are locked and in the “up” position. If they aren’t,
pull the “T” stem all the way up until you hear a “click” and attach the clip locks. Never operate the spa when the slice valves
are closed. Damage that occurs because the spa was powered on when the slice valves were closed is not covered by the
manufacturer’s warranty.
7. Remove the lter cover and basket from the lter assembly and store in a safe place.
8. Place the lter(s) inside the foot well while the spa lls with water. Never install dry lters in your spa.
9. Place a garden hose in the empty lter canister. Turn the water on. Filling the spa through the lter canister lls the pumps
and internal plumbing lines with water, reducing the risk of an air lock in the pumps(s) when power is applied. When the lower
plumbing lines are lled, water will begin owing into the foot well, moving upward inside the spa. Continue lling the spa
until the water level is approximately one inch over the highest jets, excluding jets that are designed for neck and shoulder
massages. Failure to add enough water prevents adequate ow which will damage the pumps and heater. Damage that
occurs because the spa is not lled properly or from improper water levels is not covered under the manufacturer’s warranty.
10. Remove the garden hose and turn the water o.
11. Check the drain valve to be sure no water is leaking from it and that it’s properly sealed.
12. Replace the lter, skimmer basket and lter cover.
13. Check for leaks inside the spa cabinet, especially at the plumbing unions near pump(s),and pack. Hand tighten unions if
necessary. If the spa is leaking and the unions are tight DO NOT turn the GFCI on. Call your local dealer for assistance and
repair before applying power to the spa.
14. If there are no visible leaks inside the cabinet, turn the GFCI “on”
15. When power is applied to the spa, the spa controls will immediately begin a self check cycle, which can take up to 30
minutes.
Do not touch the buttons on your topside controls until “PR” appears on the topside display!
Make sure water is circulating through all jets, that the air controls, diverter and waterfall valves are functioning properly. If the spa is
functioning properly and there are no leaks inside the spa cabinet, reinstall the cabinet access panel.
There’s a ne line between too much water and not enough. If the water level is too low, air is sucked into the plumbing lines
which causes serious damage to the spa. If the water level is too high, lighting and audio components become submerged
causing them to fail prematurely. So how do you know when enough is actually enough?
It’s important to pay attention to the water level as bathers enter and exit the spa. The number of gallons displaced by one
person is lower than the number of gallons displaced by six people and the number of gallons displaced by six children
who weigh 50 pounds is lower than the number of gallons displaced by six adults who weigh 150 pounds. What may be the
perfect water level for six children may cause the spa to overow with six adults, but six children might splash out more water
than six adults displace. You should expect to add or remove water depending upon use. Every time you exit the spa, check
the water level and add water if necessary. The water level will vary depending upon the spa model you purchased. As a general
rule, when the spa is empty the water level should be at least 4 inches over the lter basket and below the perimeter lighting and audio
components.
Follow State, Local and Community requirements when disposing of the water in your spa. Because heavily treated water
may be harmful to the environment and some areas are prone to ooding some communities regulate or restrict the disposal
of the water from your spa. Typically, if the pH & chemical levels are correct, you can drain the water on your own lawn
provided it does not enter storm drains and there is no potential of erosion or ooding to surrounding properties.
Re-Filling your Spa with Water
Follow these step by step instructions every time you re-ll the spa to ensure successful start up. If you need to replace the screws on
the cabinet, use stainless steel screws which do not rust.
The Water Level
Filling your Spa with Water
Disposing of Water

12
THE IMPORTANCE OF GOOD WATER CHEMISTRY
For your health and safety, it is imperative to have clean, clear, water. Water maintenance will vary depending on many things like the
base water quality, how often the spa is used and how many people use the spa. Remember, when it comes to water chemistry, ltration
is not the same as sanitation. Following a regular schedule will help you achieve and maintain good water chemistry. Bacteria and
viruses grow quickly in water when it is not properly maintained. Maintaining your water is necessary not only for proper sanitation, but
preventing buildup and deposits that will harm your spa.
A leading preventable cause of spa malfunction is poor water chemistry. Too many chemicals will cause the components, acrylic
surface and the spa cover to deteriorate. Not enough sanitation allows impurities to accumulate, which will hinder performance and can
permanently damage the spa. Water can become unsanitary very quickly if chemicals are not used to adequately sanitize. Incorrect pH
or calcium levels can lead to corrosion and scale build up on integral spa components.
The following guidelines have been established for spas by the Association of Pool and Spa Professionals:
pH 7.2 to 7.6
Free Chlorine 3.0 to 4.0 ppm
Free Bromine 2.0 to 4.0 ppm
Total Alkalinity 80 to 120 ppm
Calcium Hardness 150 to 250 ppm
COMMON SENSE WATER CHEMISTRY
Without chemicals, the warm water in your spa is the perfect environment for germs, bacteria and other living organisms. Chemicals
added to your spa water are utilized as they destroy the bacteria from dead skin cells, sweat and other bodily uids. Routine addition
of sanitizers kept at constant levels keep your water clean and safe to use. Maintaining water chemistry is dierent in every spa and for
every spa user. Your water chemistry changes constantly. When the water in your spa evaporates, dissolved solids like calcium, salt and
metal remain, they do not evaporate with the water. Adding more water adds more dissolved solids which may leave deposits on the
acrylic surface and inside the spa components. When the cover is o, pollen, dust and dirt change the water chemistry. A spa once a
day will require more chemicals than the same spa lled with water from the same source that’s only used once a week. What it takes to
balance your water chemistry in January will be dierent in July.
The major considerations in water chemistry are:
• The base water quality
• The number of gallons of water in the spa
• The number of people using the spa
• The number of hours the spa is being used
•
In short, more water used by more people for longer periods will require more chemicals.
What’s in your water? The answer is dierent for just about everyone. Water provided by public utility systems
must meet strict standards requiring chemical treatment before it ows through your faucets. Even though quality
standards are similar regardless of where you live, the treatment required to meet that standard, and the residual
chemicals that remain in your water after treatment can vary greatly. Water owing from faucets in Washington State
is dierent than the water owing from faucets in Oregon, Texas and Florida. Water delivered directly from a well is
untreated and water that passes through a softening system receives an additional treatment. Whether your water is
treated or untreated, ltered or unltered, all water delivers trace amounts of something that can negatively aect the
performance of your spa.
Do not use hot water when you ll your spa.
Do not use water that has passed through a water softener system.
Using well water is not recommended. Well water often has higher mineral, metal and bacterial content that will
damage the spa components and makes water chemistry maintenance dicult. If you must use well water to ll your
spa, you should get professional assistance.
If you are having diculty with your water chemistry, you should consider having your water tested locally to
determine the appropriate treatment.
Base Water Quality
Maintaining Water Quality

13
TESTING AND TREATING YOUR WATER
Whether you have used your spa or not, you should test your water twice a week. Regular testing lets you to make adjustments before
your water chemistry is out of control. When it comes to chemicals, more is not better. Adding chemicals changes the pH. Fluctuations
in the pH change the way chemicals react. The addition of too many chemicals may mean your only option is to drain the spa and start
over. Depending on how many people use the spa and how often the spa is used, you should replace the water every four to six months
to ensure your comfort and safety. Replacing the water will also help protect the spa components from damage caused by dissolved
solids that build up over time.
Ozone Generators
Your spa may have come with an ozone generator which will help reduce dissolved solids and increase oxygen in the water, but it will
not sanitize the water without chemicals. You must use a sanitizer in tandem with the ozone generator. The ozone generator is designed
to make chemicals more ecient and maintaining good water chemistry easier.
Chlorine Generators
Your spa may have come with an optional salt system, also known as a chlorine generator. This system is designed to maintain water
chemistry by converting salt into sanitizer without using any chemicals. Since the system does not create any residual chlorine, testing
water with strips will not provide an accurate assessment of sanitation levels. Test strips can only used to test and maintain adequate
levels of alkalinity, pH and water hardness when you have a chlorine generator.
BREAKING DOWN THE BASICS
Each step of a water maintenance program is dependent upon the previous steps. Omission of any step or failing to reach the
recommended ranges may cause an imbalance in water chemistry. Unbalanced water may cause damage to the spa components
and create discomfort for bathers. To measure the quality of your water, immerse a test strip in water following the instructions on the
container. Do not touch the test strips as it may aect the results. Compare the test strip and the label to determine the condition of the
spa water.
Step 1.) Balancing Total Alkalinity (TA)
The recommended total alkalinity levels are between 80 and 120 ppm. The Total Alkalinity is the measurement of carbonates,
bicarbonates, hydroxides and other alkaline substances in the water. TA is referred to as the water’s “pH buer”. It is a measure of the
water’s ability to resist changes in the pH level. If the TA is too low, the pH level will uctuate quickly, easily and greatly. Changes in pH
can cause corrosion or scaling on the spa components. You can correct low Total Alkalinity by adding sodium hydrogen carbonate (pH/
Alkalinity Up).
Step 2.) Balancing Calcium Hardness (CH)
The recommended calcium hardness (CH) level for your spa is 150-250 ppm. Calcium Hardness is a measurement of the total amount
of dissolved calcium in the water. Calcium helps control the corrosive nature of the spa’s water. Calcium-low water (commonly known
as “soft” water) is not recommended. It is highly corrosive to the components and can stain the acrylic surface. If the CH is too
high (commonly known as “hard”water), formation of scale on the spa and the components can result. CH can be decreased by using a
mixture of 75% “hard” water and 25% “soft” water; this will usually yield a reading of the correct range. If “soft” water is not available or
practical for you, a stain and scale inhibitor should be added to the water according to the label instructions.
If CH is too low, add a CH increaser. Once the CH is balanced, it normally remains stable. Adding small quantities of water should not
change the CH level. When the Calcium Hardness is within recommended range, proceed to the next step.
Step 3.) Balancing the pH
The pH level is the measure of the acidity and the alkalinity. It is imperative to have a slightly alkaline pH level between 7.2 and 7.6.
Problems become proportionately more severe the further outside this range the water gets. Values above 7 are alkaline; those below
7 are acidic Maintaining proper pH level is extremely important for optimizing the eectiveness of sanitizer, maintaining water comfort
for the users, and prevention of equipment deterioration. If the pH level in the water is too low, the sanitizer will dissipate rapidly, the
water may become irritating to users, and the spa equipment may corrode. If the pH is too low, it can be increased by adding sodium
hydrogen carbonate (pH/Alkalinity Up) to the spa water. If the pH level is too high, the sanitizer is less eective, scale may form on the
spa and the spa components, the water may become cloudy and pores in the lter cartridge will become clogged and obstructed. If
the pH is too high, it can be decreased by adding sodium bisulfate (pH/Alkalinity Down) to the spa water. Wait two hours after adding
sodium hydrogen carbonate or sodium bisulfate before testing the pH levels again. It is important to check the pH level on a weekly
basis. The pH will be aected by the bather load, the addition of new water, the addition of chemicals and the type of sanitizer used.
When the pH is within the recommended range, proceed to the nal step.
Step 4.) Maintaining the Sanitizer Levels
Sanitizer is extremely important. It kills algae, bacteria and viruses while preventing unwanted organisms from growing in the spa. At the
same time, if the sanitizer levels are too high it may cause irritation to the skin, lungs and eyes. Always maintain the sanitizer level in your
spa at the recommended levels specied for each type of sanitizer. You should check the your sanitizer and pH levels before each use
and at least twice each week even if the spa is not in use.
Maintaining Water Quality

14
WARNING!
Risk of Chemical Reaction and Noxious Fumes
• Handle Spa Chemicals with Care
• Never pre mix dry chemicals
• Always follow instructions on the label
• Always wear safety goggles and gloves to prevent injury.
• High levels of sanitizer can cause discomfort to eyes, lungs and skin.
• Never enter the spa if chemical levels exceed the recommendations.
Do not use tri-chlor chlorine, bromo-chlor-dimethyl-hydantoin (BCDMH) or any type of compressed bromine or chlorine, acid or any
sanitizer not recommended by your dealer.
Step by Step Instructions to Add Chemicals to Your Spa
1. The water temperature must be at least 80ºF before adding chemicals to prevent damage to the acrylic surface.
2. Remove the cover.
3. Fill a large bucket (minimum 2 gallon capacity )with warm water from the spa. Use care not to splash chemicals
onto the spa cabinet, or the acrylic surface of the spa.
4. Carefully measure the recommended amount of each chemical, one at a time, following the instructions on the
label. Replace the lid on the chemical container.
5. Thoroughly mix the chemical with the bucket of warm water from the spa. Remove the lter basket assembly and
lter.
6. Press the Primary Pump button to turn the pump on high speed.
7. With the pump running on high speed, being careful not to get too close, add warm water and chemical mixture
into the ltration canister.
8. Repeat this procedure with each chemical you add.
9. When all chemicals have been added and with the cover o the spa, run the pumps on high speed for ten minutes.
10. After 10 minutes, reduce the pump speed to low for one full cycle.
11. When the jet cycle is complete, replace the lter and the lter assembly.
12. Replace and lock the cover. Never leave the spa unattended when the cover is o.
HEAVY CLEANING OR DECONTAMINATION
On occasion, it may be necessary to “Super Sanitize” your spa. If algae develops, simply replacing the lter, draining and relling the
spa will not kill the algae. It will be necessary for you to decontaminate the spa before it can be used safely.
Warning!
Risk of Chemical Reaction and Noxious Fumes
• During the decontamination process, excessive chemical vapors are produced.
• Wear gloves and a protective mask during the decontamination process.
• Keep children and pets away from the spa.
• Remove the spa cover, all pillows and cover the plastic valves to protect them.
• If your spa is indoors, open the windows and doors. Use a fan to circulate the air and force the vapors out of the room.
Step by Step Instructions to Decontaminate your Spa
1. Remove the lter basket assembly, lter and spa pillows. Before adding chemicals, make sure all pumps are
operable. Check to be sure all jets and air valves are open. Cover the diverter, air and waterfall valves are covered
to protect them from splashes.
2. Rotate the waterfall valve for maximum ow and the diverter valves to the center position for even circulation
throughout the entire spa.
3. Turn all pumps on low speed. Fill a large bucket (at least 2 gallon capacity) with warm water. Carefully add 2.5
ounces of sodium dichlor for every 100 gallons of water in the spa and mix thoroughly. For example, if there are 400
gallons of water in your spa, add 10 ounces of sodium dichlor to the large bucket lled with warm water. Turn all of
the pumps on low speed. Gently pour the warm water and chemical mixture into the lter housing. After all of the
sodium dichlor mixture has been added, turn all pumps on their highest speed and allow the water to circulate for
one hour. Do not replace the cover over the spa during decontamination. Never leave the spa unattended while it is
uncovered.
4. After the spa has been allowed to run for one hour, turn o all of the pumps and manually turn the GFCI “o”. Drain
the spa. Follow the instructions to ll the spa. Remember to put a new lter in the foot well of the spa allowing it to
saturate as the spa lls with water.
5. Add chemicals as needed to maintain proper water chemistry.
Maintaining Water Quality

15
Filter Care and Replacement
The lter catches debris that is too small for the lter basket, like hair, lotion and body oil. A dirty lter means dirty water. Filters are
made of compressed bers that decompress over time. After the bers break down and become saturated with dirt and oil allowing
contaminants and debris to enter the spa, causing unnecessary strain on the pumps and damaging the components. You should have
to have a supply of replacement lters on hand, in addition to chemicals used to maintain your water. Extra lters are aordable, can be
purchased from your local delaer. Your lter needs to be cleaned or replaced when:
• You notice reduced ow from the jets
• The water is hazy, cloudy or discolored
• The heater is running more frequently but the water is not heating evenly or normally
Cleaning your lter
Your lters should be cleaned every two to four weeks, depending on use. Manually turn the GFCI “o”. Following the steps to remove
the lter assembly, remove the lter. With a garden hose equipped with a high pressure spray nozzle, rinse the lter making sure to spray
between each pleat.
Deep Cleaning your Filter
Filter cleaners may help remove some collected dirt, lotion and body oils that rinsing won’t remove. Following the instructions on the
bottle of lter cleaner, carefully place the lter in the cleaning solution. Let the lter soak in the solution following the instructions on the
cleaner label. Remove the lter and thoroughly rinse making sure to spray between each pleat. Allow the lter to dry completely. When
the lter is dry, brush between each pleat with a ne hair brush. After brushing between the pleats, place the lter in a bucket lled with
water or in the spa until the lter is saturated. Replace the lter and reassemble the lter assembly.
• Never use a wire brush on the lter.
• Never put your lter in the dishwasher.
• Never put a dry lter in the lter housing.
Replacement Filter Cartridges
Deep cleaning dirty lters is time consuming, requires the use of additional chemicals and may not remove all residual dirt, body oil and
bacteria if not done properly. Depending on use and bather load, the manufacturer recommends that you replace your lters every 3
months.
IMPORTANT SAFETY REMINDERS
• Wash your hands after handling chemicals In case of accidental contact, follow the emergency advice on the product label.
If a doctor is needed, take chemical containers with you to the hospital so the substances can be identied.
• Clean up spilled chemicals immediately using water from a water hose. Saturate the surrounding area thoroughly, especially
areas used by children and pets to ensure safety.
• Keep chemicals in their original container with the lid replaced properly after using. Keep containers closed when not in use.
• Keep chemicals away from children and pets. Allow a responsible person to handle spa chemicals; use care when handling
chemicals.
• Store chemicals in a cool, dry, well ventilated place.
• Follow local laws when disposing of the water in your spa.
• Never allow the water drained from your spa to run into public water sources.
• Add chemicals when the water temperature is 80ºF or higher
• Never smoke when handling chemicals. Some of the chemicals are highly ammable and smoking can lead to serious injury.
• Do not store chemicals in the spa cabinet
• Never expose spa chemicals to extreme temperatures or bright light.
• Do not allow anyone in the spa while adding chemicals. Inhaling fumes or contact with your eyes, nose or mouth is very
dangerous.
• Never use swimming pool chemicals, muriatic acid or household bleach, or chlorine tablets (tri-chlor) in your spa. It can be
extremely corrosive. Damage caused by use of tri-chlor is not covered under the manufacturer’s warranty.
• Never use a vacuum cleaner to clean up chemical spills
• Immediately remove chemical spills from surrounding surfaces and landscaping.
Maintaining Water Quality

16
Your spa was manufactured with the highest quality materials and care available in the spa industry,making sure you spend more time
enjoying your spa than you do taking care of it. Just as a healthy body requires an occasional check up, a healthy spa requires some
maintenance and attention. Developing a regular routine of care ensures your spa’s health and your peace of mind.
Caring for the Acrylic Surface
Your spa was cast from Lucite® Acrylic making it durable and resilient. It is dirt and stain resistant. Using household cleaners and
detergent may leave a dulling residue. When needed, wipe the surface with warm water and a soft cloth. Never use abrasive, ammonia
or citrus based cleaners because they will damage the acrylic. Chemicals in some cleaners may have react negatively with the chemicals
used to maintain water chemistry.
Caring for the Cabinet Panels
Your spa cabinet is water and weather resistant. It is virtually maintenance free. You will never need to wax, paint or seal the cabinet.
When necessary, rinse the cabinet with water from a water hose equipped with a moderate pressure nozzle. More stubborn dirt can be
removed by rubbing with a damp, soft cloth. Never use abrasive cleaners or a high pressure hose which may scar the cabinet.
Caring for the Pillows
The pillows in your spa are covered in water resistant vinyl. To prevent discoloration, they should be wiped o periodically to remove
chemical residue and treated with a non-alcohol based vinyl protector. Many vinyl protectors are oil based and should be avoided. Using
oil based products will adversely aect water clarity and chemistry which can be dicult to correct. If you are not using your spa for a
prolonged period, pillows should be removed from the spa, dried o and stored. If the vinyl is punctured and the foam is exposed they
should be replaced. Replacement pillows are available from your local dealer.
Caring for the Jets
Many of the jets are interchangeable with other jets that are the same size and can be turned on and o when the jet is rotated. To
prevent damage that can occur when excessive pressure builds up in the plumbing lines, it’s a good idea to leave all of the jets open.
When jets become dicult to rotate, they should be cleaned. With the GFCI in the “o” position, rotate each jet counter clockwise until it
reaches its built in “stop” and gently pull the jet outward, removing it from the jet housing. Place all of the jets in a bucket lled with white
vinegar overnight. Rinse with warm water. Stubborn dirt on the white part of the jet body can be removed with a soft bristle brush. Do
not use steel wool or a wire brush. You should clean your jets each time you drain your spa. If the white jet body on the back of the jet is
damaged it should be replaced. Replacement jets are available from your local dealer.
Caring for the Lights
The lense cover over the underwater light is permanently installed. Do no attempt to remove the lense cover. When the spa has been
drained, wipe the light lense with a cloth designed for cleaning eye wear to prevent scratching the lense cover. If the other side of the
large underwater light is also dirty, remove the cabinet panel, remove the bulb from the lamp holder and wipe with a cleaner and cloth
designed for cleaning eye wear. Replace the bulb. Make sure the bulb was properly replaced and the light works before reinstalling the
cabinet panel. If you need a replacement bulb, please call your local dealer.
Do not attempt to clean the back sides of the perimeter lighting lense covers.
Caring for Audio/Video Systems
If your spa is equipped with an audio or video system,you will hear your selection from the built in speakers. You should wipe chemical
residue from the speaker covers with a soft cloth to prevent discoloration. The sub-woofer is enclosed in the spa cabinet and does not
require routine maintenance. The built in audio/video components and docking station compartment should be cleaned with a soft, dry
cloth. While you are outside the spa, place your selection in the player, push play, and select the volume from the device. Before you
enter the spa, plug in your mP3 player and place it in the docking station. Close the docking station door for your safety and to protect
your device.
Never place your MP3 player or other electronic devices on the side of the spa.
Never handle audio/video devices while inside the spa.
Never use headphones in the spa.
Caring for the Spa Cover
The foam cores in your spa cover are designed to protect your spa from the elements, reduce heat loss, keep unwanted debris out of
the spa, and to prevent evaporation. You should clean the vinyl with a small amount of mild dish soap diluted in warm water and a soft
sponge 3 or 4 times a year. Allow to dry and wipe with an oil free, non-alcohol based vinyl protector. Many vinyl protectors are oil based
and should be avoided. Using oil based products will adversely aect water clarity and chemistry which can be dicult to correct. Using
alcohol or chlorine based cleaning products will cause the stitching to deteriorate and damage the UV inhibitors built into the vinyl. The
locking tie downs are not designed to keep the cover in place in heavy winds. You should consider using wind straps to stabilize the
cover and protect the spa. Use the handles to remove and replace the cover. The cover is sturdy but should never be dragged and is not
designed to hold heavy weight loads. Heavy snow loads should be brushed o with a clean soft bristle broom. Never stand on or allow
children or pets on the spa cover. When the spa is not in use, the cover should be in place with the tie downs.
Caring for Your Spa

17
Caring for the spa in cold weather
Your spa is well insulated to make it economical to operate even in the coldest climate. As long as it is lled with water and power is
supplied, the spa will function in January just as it did in July. Keeping your spa fully operational at all times is the best way to protect
it from damage that can occur during cold weather. The manufacturer does not recommend draining your spa and disconnecting the
power supply in the winter. If you choose to shut your spa down for winter because you live in an extremely cold climate or an area
where power outages are common and the spa is subjected to freezing temperatures, you are encouraged to hire a professional to
winterize your spa safely. ALL of the water must be removed from the lter housing, pumps, heater, jets and plumbing lines. Simply
draining the water as you would for normal maintenance will not provide adequate protection from freezing. Damage that occurs if the
spa freezes is not covered under the warranty.
Step by Step Instructions to Safely Winterize your Spa
1. Unplug the spa from the electrical outlet. 115V SPA: Unplug from the electrical outlet. 240V SPAS: Turn the GFCI o.
2. Follow the instructions on page 21 to drain all of the water from the spa being careful to properly dispose of the water.
3. When the spa is empty, drain the water from the heater, each pump by loosening the plumbing unions on both sides.
4. Remove the lter cover, basket and lter from the spa. With the wet dry vacuum set to blow, not vacuum, put the hose inside
the lter canister and blow all of the water out of the lter canister. DO NOT REINSTALL WET FILTER!
5. Place the hose over each suction tting for 30 seconds to blow out water in the suction lines.
6. Open all of the jets. Moving in a clockwise direction and starting at the top of each seat working down, blow each jet until all of
the water is removed. Repeat this process at least twice, moving all the way around the spa from the top to the bottom of each
seat until all of the water is removed.
7. Vacuum all standing water in the seats, foot well, and inside the spa cabinet.
8. Clean the surface thoroughly with a soft cloth and wipe down until completely dry,
9. Replace the drain cap, close the drain, and tighten the plumbing unions on both sides of each component.
10. Allow the cabinet to air dry before replacing the cabinet panel.
11. Replace and lock the cover, securing it in place. Cover the spa to protect it from harsh weather and debris.
* The manufacturer does not recommend using antifreeze which may damage your spa. Even with thorough ushing, residual antifreeze may
irritate skin and eyes and make water chemistry dicult to balance when the spa is relled.
** When the spa is empty, o-rings and seals dry out. When the spa is relled, inspect plumbing unions for leaks. Re seat and/or replace damaged
seals.
System Failure During Freezing Temperatures
If you experience system failure and the spa is exposed to freezing temperatures, your spa may function normally after you manually
turn the GFCI “o” for 30 minutes before turning it back on again. If that fails, call your local dealer. If the system failure occurs after
normal business hours and your pumps will not circulate the water, you should place a low wattage space heater inside the cabinet
near the spa equipment to help prevent freezing. To avoid the risk of re or injury, do not leave the spa unattended when the heater is
inside the cabinet. If you leave home, turn the heater o.
Caring for Your Spa

18
Problem Could be Caused By Could be Solved By
Water Will Not Balance
Well, Untreated Municipal or Softened
Water
Seek LocaL ProfeSSionaL aSSiStance. The manufacturer
does not recommend lling the spa with well, untreated
or softened water.
Cloudy Water Dirty Filter Replace Filter
Excessive Organic Matter Add Shock
Bacteria on Cover Dripping into Spa Clean Cover with Approved Cleaner
Improper Sanitization Add Sanitizer
Suspended Organic Matter Clean or Replace Filter, Add Shock, Run Jets
End of Water Life Drain & Rell Spa, Replace Filter
Green or Brown Water Excessive Metal Add Metal Sequestering Agent
Excessive Foam
Accumulation of oil, cosmetics and
detergent
Add Defoamer
Clean or replace lter
Run extra rinse cycle when washing swim wear
Water has Bad Smell
Excessive Organic Matter - Bacteria
Growth
Add Shock
Improperly Sanitized Add Sanitizer
Low pH Adjust pH
Smells Musty Bacteria Growth
Add Shock. If the problem persists, perform Spa
Decontamination
Ring Around Spa Build Up of Oil & Dirt Wipe surface with cloth, drain and rell spa.
Algae High pH Add pH Reducer
Low Sanitizer Level Add Shock & Sanitizer
Eye or Skin Irritation and/or
Rash
Improper Sanitation Test Water. Add Shock & Sanitizer as Needed
Free Chlorine too High
Add Water Causing Sanitizer Levels to Drop
Dirty Filter Clean or Replace Filter
Stains on Acrylic Surface High Alkalinity or Low pH Adjust Alkalinity and pH Accordingly
High Mineral Content Use Stain & Scale Reducer
High Metal Content Use Metal Sequestering Agent
Scale Build Up High Calcium Levels Adjust Alkalinity; Use Stain & Scale Reducer
Troubleshooting Water Chemistry

19
Spa Troubleshooting Guide
THE FIRST STEP IN THE TROUBLESHOOTING PROCESS IS TO CHECK THE TOPSIDE CONTROLS FOR DIAGNOSTIC MESSAGES.
If you do not see the solution to your problem , please call your local dealer for assistance.
Always turn the GFCI “o” before servicing or draining your spa.
Problem May be Caused By Might Be Solved By
LED Display is blank Power is o or fuse is blown Reset GFCI and Main Service. Replace blown fuses
Spa Will Not Power O Spa is heating Lower temperature settings
Spa is ltering Normal function of spa
Spa Leaking Loose unions Hand tighten unions
GFCI Tripping Improper wiring Get Electrician to check neutral wiring connections at GFCI
Pump(s) Not Working Air Lock Bleed the pump(s)
Pump Cycle has ended Press button to turn pump on
Slice Valves Closed Open Slice Valves
No Power Check pump connection in spa control box
Blockage in line Clear obstructions in lter assemblies
Pump(s) run hot Pump running dry Call your local dealer.
Flow restricted Remove debris from lter basket and suction valves.
Pump Surges Water level too low Add water
Blockage or restriction Empty lter basket and clean suction drain covers
No or Low Heat Spa is at correct temperature Normal function of spa
Operating Mode Check to be sure the spa is not in Economy Mode
Temperature Setting Check LED display to see if Heater Icon is illuminated
Breaker(s) o Reset GFCI and Main Breaker
Dirty Filter Change lter
Air Lock or Closed Slice Valve Make sure slice valves are open and pumps are not air locked
Improper Line Voltage Have an electrician check voltage
Heats, but not High Enough Thermostat turned down Increase temperature setting
Dirty lter Change lter
Slice valve closed Open slice valves
Spa cover shifted Reposition spa cover
Over Heat Message on LED Filtration settings Reduce number and duration of ltration cycles
Outside temperature high to allow
cooling
Temporarily remove cover and/or add cold water
Lights Don’t Work Bulb or fuse burned out Replace bulb or fuse
Loose, dirty connection Check light connections
Jets Don’t Work Air lock in pump(s) Bleed pump(s)
Slice valve(s) closed Open slice valves
Diverter valve closed Rotate diverter until desired pressure is achieved
Jet Closed Rotate outer rim of jet clockwise to open
Dirty Filter Change lter
Low Water Flow Spa heating or ltering Normal spa function
Diverter valve position Rotate diverter valve to increase ow
Air valve closed Rotate air valve to open
Dirty lter Clean or replace lter
Slice valve(s) closed Open slice valves
Improper Line Voltage Have an electrician check voltage

20
Spa Warranty Policies and Procedures
Important Notice: The following are not actual warranties, but detailed descriptions of our warranty policies and procedures. Certain exclusions and
disclaimers may apply to these descriptions. Be sure you read and understand the spa warranty. These policies and procedures are subject to change at
any time and without notice. Throughout this document, Hudson Bay Spas shall be referred to as the “MANUFACTURER”. Each spa warranty is given to the
original consumer only and terminates upon transfer of ownership. Any commercial applications are excluded from all warranties.
Labor Warranty
Labor is described as the work completed by a technician. Labor charges associated with PRE-APPROVED warranty repairs are covered for a period of:
• a.) 90 days from the original date of purchase if it was purchased directly from the manufacturer and the manufacturer is responsible for dispatching
the technician
OR
• b.) one (1) year from the original date of purchase if it was purchased from an authorized dealer who is responsible for dispatching the technician.
THIS WARRANTY IS GIVEN TO THE ORIGINAL CONSUMER AND TERMINATES UPON TRANSFER OF OWNERSHIP. COMMERCIAL APPLICATIONS
ARE EXCLUDED FROM THIS WARRANTY. It is the responsibility of the spa owner to ensure that the spa is accessible for repairs. MANUFACTURER is not
responsible for any cost associated with making spa accessible for repairs. If parts are required for repair, MANUFACTURER is not responsible for the cost of
shipping of parts under the terms of this warranty agreement.
Warranty Procedures
THE HUDSON BAY SPAS WILL WORK TO RESOLVE YOUR WARRANTY REQUEST AS QUICKLY AS POSSIBLE. TO ENSURE THE EFFICIENT
PROCESSING OF YOUR WARRANTY CLAIM, PLEASE FOLLOW THESE STEPS:
1. The MANUFACTURER relies upon the consumer and service technician to assist in warranty claims and how best to work toward the consumer’s
satisfaction. If you have any questions concerning a claim, you should call your local dealer for assistance.
2. If the claim is determined to be valid you will need to submit to Hudson Bay Spas the proof of purchase, photographs of the spa, wiring congurations,
components and the surrounding area where the spa is supported. Hudson Bay Spas will determine the proper solution for repairing the spa. Warranty
requests must include the following information:
* Spa Model * Name & Address * Spa Serial Number * Phone number of Customer * Date of Delivery
* Dealer Name * Date of Installation * Date of Purchase * Photographs of the area of concern * Thorough Description Problem
MOST OF THIS INFORMATION IS ON THE ORIGINAL PURCHASE INVOICE.
3. Upon receipt of all of the requested information, Hudson Bay Spas will evaluate it and decide how the claim will be resolved. Repair or replacement is
at the MANUFACTURER’S discretion. In all situations, a repair is considered the appropriate course of action. If the spa cannot be repaired in the eld and
must be returned to the factory, approval must be obtained from Hudson Bay Spas. Cost for removal of the defective spa, delivery and installation of the
replacement spa are the responsibility of the consumer and will not under any circumstances be covered by the MANUFACTURER. It is the responsibility of
the spa owner to ensure that the spa is accessible for repairs. MANUFACTURER is not responsible for any cost associated with making spa accessible for
repairs. If parts are required for repair, MANUFACTURER is not responsible for the cost of shipping of parts under the terms of this warranty agreement.
4. Partial documentation submissions will not be considered and do not constitute ling a warranty claim. MANUFACTURER is not responsible for delays
caused by failure to submit all of the information in a timely manner.
Surface Warranty
The spa surface is dened as the exposed material nish. The MANUFACTURER warrants the spa surface to be free from defects in material and
workmanship, such as blistering, cracking, or delamination, under normal use and maintenance for a period of ten (10) years from the original date of
purchase.
The spa must be placed on a level concrete slab suciently engineered to support the entire length and width of the spa when lled to capacity. Standard
building practices must be followed. Damage caused by failure to have a properly leveled and supported foundation under the spa is not covered under
warranty. The MANUFACTURER does not warrant against problems associated with prolonged standing water, prolonged exposure to sunlight and/or
use of any sanitation or ozone system not approved by the MANUFACTURER. Damage to the spa surface caused by leaving the spa uncovered and/or
empty of water with direct exposure to sunlight will terminate this warranty. Any alteration to any system, including but not limited to electrical, plumbing, or
mechanical, improper water chemistry, or any other problems caused by any external source are not covered under warranty. Other exclusions may apply.
Normally, problems associated with material and workmanship can and will be repaired. If the spa surface is repaired, the repair is limited to the aected area
only, and there is no guarantee against discoloration or fading. The decision to repair will be made by the MANUFACTURER and its eld representative after
review of the facts, pictures, or any other data presented by the dealer or the customer. In all cases, pictures of the aected area and foundation of the spa
must be provided before any decisions to repair or replace will be made. In the unlikely event a spa is replaced, all warranties (including but not limited to
shell, acrylic, equipment and plumbing) date back to the original date of purchase. If it is determined that the shell is to be replaced, the same conditions and
terms as outlined in the shell warranty section apply. It is the responsibility of the spa owner to ensure that the spa is accessible for repairs. MANUFACTURER
is not responsible for any cost associated with making spa accessible for repairs. If parts are required for repair, MANUFACTURER is not responsible for the
cost of shipping of parts under the terms of this warranty agreement.
Structural Frame Support Warranty
The spa structure and frame are dened as the exposed material nish. The MANUFACTURER warrants the framing structural support to be free from defects
in material and workmanship under normal use and maintenance for ve (5) years from the original date of purchase.
Damages to the spa structure and frame, including but not limited to dry rot that occurs as the result of failure to reinstall or replace damaged cabinet, wet
rot that is occurs as the result of prolonged exposure to standing water, damage that occurs as the result of relocation after initial installation, insect or
rodent damage, neglect, misuse, abuse, improper care or maintenance, or Act of God will not be covered under this warranty. This is not an all inclusive list.
The spa must be placed on a level concrete slab suciently engineered to support the entire length and width of the spa when lled to capacity. Standard
building practices must be followed. Damage caused by failure to have a properly leveled and supported foundation under the spa is not covered under
warranty. Any alteration or any other problems caused by any external source are not covered under warranty. Normally, problems associated with material
and workmanship can and will be repaired. If the spa structure and frame are repaired, the repair is limited to the aected area only. The decision to repair will
be made by the MANUFACTURER and its eld representative after review of the facts, pictures, or any other data presented by the dealer or the customer.
In all cases, pictures of the aected area and foundation of the spa must be provided before any decisions to repair or replace will be made. In the unlikely
event a spa is replaced, all warranties (including but not limited to shell, acrylic, equipment and plumbing) date back to the original date of purchase. If it
is determined that the structural frame is to be replaced, the same conditions and terms as outlined in the structural frame warranty section apply. It is the
responsibility of the spa owner to ensure that the spa is accessible for repairs. MANUFACTURER is not responsible for any cost associated with making spa
accessible for repairs. If parts are required for repair, MANUFACTURER is not responsible for the cost of shipping of parts under the terms of this warranty
agreement.
Manufacturer’s Limited Warranty for Hudson Bay Spas
16mlwamhbs11
/