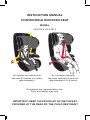
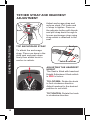
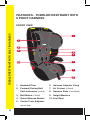
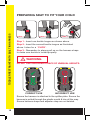
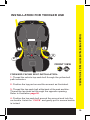
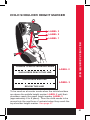
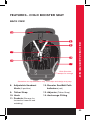
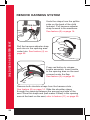
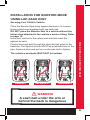
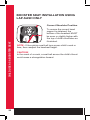
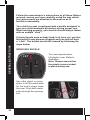
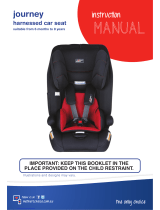
Dorel V9 A 2010 is a convertible booster seat designed to provide a safe and comfortable ride for your child from toddler to approximately 8 years old. It features a built-in harness for toddlers and can be converted to a booster seat for older children. The seat is equipped with a tether strap and headrest adjustments for added safety and comfort.
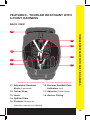
Dorel V9 A 2010 is a convertible booster seat designed to provide a safe and comfortable ride for your child from toddler to approximately 8 years old. It features a built-in harness for toddlers and can be converted to a booster seat for older children. The seat is equipped with a tether strap and headrest adjustments for added safety and comfort.


-
 1
1
-
 2
2
-
 3
3
-
 4
4
-
 5
5
-
 6
6
-
 7
7
-
 8
8
-
 9
9
-
 10
10
-
 11
11
-
 12
12
-
 13
13
-
 14
14
-
 15
15
-
 16
16
-
 17
17
-
 18
18
-
 19
19
-
 20
20
-
 21
21
-
 22
22
-
 23
23
-
 24
24
-
 25
25
-
 26
26
-
 27
27
-
 28
28
-
 29
29
-
 30
30
-
 31
31
-
 32
32


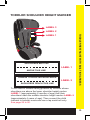
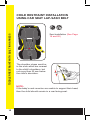
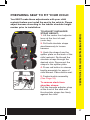
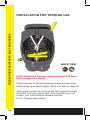
Dorel V9 A 2010 is a convertible booster seat designed to provide a safe and comfortable ride for your child from toddler to approximately 8 years old. It features a built-in harness for toddlers and can be converted to a booster seat for older children. The seat is equipped with a tether strap and headrest adjustments for added safety and comfort.
Ask a question and I''ll find the answer in the document
Finding information in a document is now easier with AI
Related papers
Other documents
-
 Maxsa 20057 Operating instructions
-
Graintex SS2281 Operating instructions
-
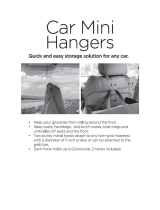
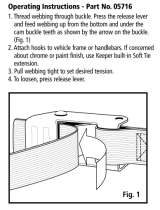 Keeper 05716 Operating instructions
-
Britax Maxi AHR Instructions For Installation Manual
-
-
 Kids Embrace COMBINATION HARNESS TO BOOSTER CAR SEAT User manual
-
Chipolino Car seat Booster Operating instructions
-
 Mothers choice Journey User manual
-
-


