Page is loading ...

User Information
Technical information: see the label on the device
1. Electrical devices should only be connected by qualied persons.
2. Important! Before you begin to install the device you should switch o the power supply -
either remove the fuse breaker or set this to the zero position. You should connect the device
using an appropriate socket as shown in the diagram.
3. Keep these instructions in a safe place.
4. The lighting device should be installed according to the national standards in force for protected
zones (see gure 1). The electrical connection should be made to an electrical circuit that is protected
with a mains circuit-breaker of up to 30 mA (or a lower value if required).
5. This lighting device is only suitable for installation in houseboats (not in areas that are continually
exposed to high humidity) and should only be used in accordance with the specic purpose for
which it was designed. The maximum permitted ambient temperature is 25°C.
The voltage is 220~240V - 50/60Hz COS F=1.
6. Do not attach lighting devices to surfaces that are damp, recently painted or electrically conductive.
7. Respect the colour codes when connecting the wiring.
8. You should use xtures that are able to support the weight of the lighting device.
9. Ensure that the cables and the connections are not exposed to sources of heat.
10. In order to avoid damage to embedded pipes, you should conrm the path followed by any
pipes before you start drilling holes.
11. The LED light sources are not replaceable.
12. Use the cable sleeve to protect the conductors from the electricity supply.
13. Only the external surfaces, glass protective plates, reectors and covering caps of the device
should be cleaned. You should only use a soft cloth (do not use cleaning agents) to clean chrome
surfaces. It is important that moisture does not penetrate the housing of the mounting or is able to
make contact with any live parts.
14. Since our products are subject to technical modications, we are not able to guarantee that
all information is always up-to-date. Please contact us if you have any questions.
15. If the connecting cable is damaged in any way, it should only be replaced by the manufacturer
or by an appointed technician.
16. The mounting should not be covered.
17. Do not use mountings that are damaged or which have cracked or broken protective glass.
18. Do not use the mounting to hang or support things.
19. Class II: These mountings are doubly insulated from all of their components and connections.
20. Replace broken glass protectors. Contact your supplier.
21. When connecting class II mountings, the earthing lead should be grounded or isolated.
22. For LED mountings, please contact your supplier if the lamp does not function.
Information pour l’usager
Benutzerinformation
Informations techniques : voir l’étiquette sur l’appareil
1. Les appareils électriques peuvent uniquement être raccordés par des personnes compétentes.
2. Important ! Avant de commencer l’installation, vous devez couper l’alimentation électrique :
retirez le fusible ou placez-le sur la position 0. Le raccordement doit être eectué à l’aide d’un
boîtier de raccordement adapté, comme indiqué sur les illustrations.
3. Conservez ces instructions en lieu sûr.
4. L’appareil d’éclairage doit être installé conformément aux normes nationales en vigueur
concernant les volumes de protection (cf. illustration 1). Le raccordement électrique doit être
eectué sur un circuit protégé à l’aide d’un disjoncteur de fuite de terre de 30 mA maximum
(ou d’une valeur moindre, si nécessaire).
5. Cet appareil d’éclairage est réservé à l’installation dans des salles de séjour (pas dans des lieux
exposés en permanence à une humidité de l’air élevée) et doit uniquement être utilisé
conformément au but spécique dans lequel il a été conçu. La température ambiante maximale
autorisée est de 25 °C. L’alimentation électrique doit être de 220~240 V - 50/60 Hz COS F=1.
6. Ne xez pas les appareils d’éclairage sur des surfaces humides, non protégées ou
conductrices en électricité.
7. Respectez les codes de couleurs lors du raccordement du câblage.
8. Utilisez des xations conformes au poids de l’appareil d’éclairage.
9. Veillez à ce que les câbles et les raccords ne soient pas exposés à une source de chaleur.
10. Pour éviter d’endommager les conduites intégrées, vous devez vérier leur trajet avant de
percer des trous.
11. Les sources d’éclairage à diodes électroluminescentes ne peuvent être remplacées.
12. Utilisez la gaine coulissante pour protéger les conducteurs de l’alimentation électrique.
13. Le nettoyage de l’appareil est limité aux surfaces extérieures, aux plaques de protection en
verre, aux réecteurs et aux caches. Les surfaces chromées doivent uniquement être nettoyées
à l’aide d’un chion doux (n’utilisez pas de produits nettoyants). Il est important que l’humidité
ne puisse pas pénétrer dans le logement de l’armature ou se déposer sur les pièces sous tension.
14. Nos produits sont soumis à des modications techniques, nous ne pouvons donc pas garantir
l’actualité des informations. Si vous avez des questions, n’hésitez pas à nous contacter.
15. Si le câble de raccordement est endommagé de quelque manière que ce soit, il doit être
remplacé par le fabricant ou des techniciens désignés par le fabricant.
16. L’armature ne doit pas être couverte.
17. N’utilisez pas d’armatures endommagées ou dont le verre de protection est fendu ou cassé.
18. N’utilisez pas l’armature pour suspendre ou soutenir des objets.
19. Catégorie II : tous les composants et raccordements de ces armatures disposent d’une double
isolation.
20. Remplacez les protections en verre cassées. Contactez votre fournisseur.
21. Lors du raccordement d’armatures de catégorie II, le conducteur de mise à la terre doit être
neutralisé ou isolé.
22. Pour les armatures à diodes électroluminescentes, veuillez contacter le fournisseur si la lampe
ne fonctionne pas.
Gebruiksinformatie
Technische informatie : zie het label op het toestel
1. Elektrische toestellen mogen alleen aangesloten worden door bekwame personen.
2. Belangrijk ! Vooraleer u de installatie aanvat dient u de stroomvoorziening te onderbreken -
verwijder de zekering of zet deze op de 0 - positie. De aansluiting dient te gebeuren door middel
van een aangepaste aansluitdoos, zoals getoond op de afbeeldingen.
3. Bewaar deze instructies op een veilige plaats.
4. Het verlichtingstoestel moet volgens de geldende nationale normen inzake beschermingsvolumes
geïnstalleerd worden (zie guur 1). De elektrische aansluiting moet gebeuren op een stroomkring
die beveiligd is met een aardlekschakelaar van max 30ma (of een lagere waarde, indien vereist).
5. Dit verlichtingstoestel is enkel geschikt om in woonvertrekken geïnstalleerd te worden
(niet in ruimtes die continu blootstaan aan hoge luchtvochtigheid) en mag enkel gebruikt
worden in overeenstemming met het specieke doel waarvoor ze ontworpen is. De maximum toe-
gestane omgevingstemperatuur is 25°C. De stroomvoorziening is 220~240V - 50/60Hz COS F=1.
6. Bevestig geen verlichtingstoestellen op oppervlakken die vochtig, net geschilderd of elektrisch
geleidend zijn.
7. Respecteer de kleurcodes bij het aansluiten van de bedrading.
8. Gebruik bevestigingen die in overeenstemming zijn met het gewicht van het verlichtingstoestel.
9. Zorg dat de kabels en verbindingen niet blootstaan aan een warmtebron.
10. Om schade aan ingewerkte leidingen te voorkomen dient u zich te vergewissen van het
traject dat deze volgen vooraleer u gaten boort.
11. De led lichtbronnen zijn niet vervangbaar.
12. Gebruik de overschuifgaine om de geleiders van de stroom voorziening te beschermen.
13. Het reinigen van het toestel is beperkt tot de buitenste oppervlakken, glazen beschermplaatjes,
reectors en afdekkapjes. Verchroomde oppervlakken mogen enkel met een zachte doek gereinigd
worden (gebruik geen reinigingsmiddelen). Het is belangrijk dat er geen vocht in de
rmatuurbehuizing terecht kan komen of op spanning staande delen kan bereiken.
14. Doordat onze producten onderhevig zijn aan technische wijzigingen kunnen we niet
garanderen dat alle informatie altijd UP-DATE is. Mocht u vragen hebben kunt u ons gerust
contacteren.
15. Mocht de aansluitkabel op enigerlei wijze beschadigd zijn, mogen enkel de fabrikant of
door hem aangestelde servicemonteurs deze vervangen.
16. De armatuur mag niet afgedekt worden.
17. Gebruik geen armaturen die beschadigd zijn of waarvan het beschermingsglas gebarsten
of gebroken is.
18. Gebruik de armatuur niet om dingen aan te hangen om of op te steunen.
19. Klasse II : Deze armaturen hebben een dubbele isolatie van al hun onderdelen en aansluitingen.
20. Vervang gebroken glazen beschermingen. Contacteer uw leverancier.
21. Bij het aansluiten van Klasse II armaturen dient de aardingsgeleider geneutraliseerd of
geïsoleerd te worden.
22. In het geval van led - armaturen, gelieve uw leverancier te contacteren mocht de lamp niet
functioneren.
Technische Informationen: Siehe Etikett am Gerät
1. Elektrogeräte dürfen nur von Fachpersonal angeschlossen werden.
2. Wichtig! Bevor Sie die Installation berühren, muss die Stromversorgung abgeschaltet werden
- entfernen Sie die Sicherung oder schalten Sie sie auf die 0-Position. Der Anschluss muss an einem
geeigneten Verteilerkasten erfolgen (siehe Abbildung).
3. Bewahren Sie diese Anweisungen an einem sicheren Ort auf.
4. Das Beleuchtungsgerät muss gemäß der geltenden nationalen Bestimmungen zum Volumen 2
installiert werden (siehe Abbildung 1). Der Elektroanschluss muss an einen Stromkreis erfolgen,
der durch einen Leistungsschutzschalter mit max. 30 mA (oder einen größeren Wert, falls
erforderlich) geschützt ist.
5. Dieses Beleuchtungsgerät eignet sich ausschließlich für Wohnzwecke (nicht für Räume, die
dauerhaft hoher Luftfeuchtigkeit ausgesetzt sind). Sie dürfen nur für ihren vorgesehenen Zweck
verwendet werden. Die maximal erlaubte Umgebungstemperatur liegt bei 25°C.
Die Stromversorgung beträgt 220 ~ 240 V - 50/60 Hz COS F=1.
6. Beleuchtungsgerät nicht an Oberächen befestigen, die feucht, nicht gestrichen oder
stromleitend sind.
7. Farbcodierungen beim Anschließen der Drähte beachten.
8. Für die Befestigung des Beleuchtungsgeräts für das Gewicht entsprechende Halter verwenden.
9. Kabel und Verbindungen keiner Wärmequelle aussetzen.
10. Um keine in der Wand verlaufenden Leitungen zu beschädigen, vorher den Verlauf dieser
Leitungen in Erfahrung bringen, bevor gebohrt wird.
11. Die LED-Leuchtmittel können nicht ausgetauscht werden.
12. Stromleiter durch Überschieben der Kappen schützen.
13. Das Gerät darf nur an den äußeren Oberächen, den Glasschutzplatten, Reektoren und
Abdeckkappen gereinigt werden. Verchromte Oberächen dürfen nur mit einem weichen Tuch
gereinigt werden (kein Reinigungsmittel verwenden). Es ist wichtig, dass keine Feuchtigkeit in das
Armaturgehäuse oder an stromleitende Teile gelangt.
14. Da wir uns technische Änderungen an unseren Produkten vorbehalten, können wir nicht die
Aktualität dieser Informationen garantieren. Bitte sprechen Sie uns bei Fragen an.
15. Sollte das Stromkabel in irgendeiner Weise beschädigt sein, darf es nur durch den Hersteller
oder seinen angestellten Technikern ausgetauscht werden.
16. Die Armatur darf nicht abgedeckt werden.
17. Es darf keine Armatur verwendet werden, die beschädigt ist oder an der ein Schutzglas
zerborsten oder gebrochen ist.
18. Es dürfen an die Armatur keine Dinge angehängt werden, noch darf sich auf ihr abgestützt
werden.
19. Klasse II : Bei diesen Armaturen sind alle Unterteile und Anschlüsse mit einer doppelten
Isolierung ausgestattet.
20. Zerbrochenen Glasschutz austauschen. Wenden Sie sich an Ihren Händler.
21. Beim Anschließen von Klasse II-Armaturen muss die Erdleitung neutralisiert oder isoliert werden.
22. Bei LED-Armaturen wenden Sie sich bitte an Ihren Händler, falls die Lampe nicht funktioniert.
IP44
SAFETY INSTRUCTIONS
CONSIGNES DE SECURITESICHERHEITSHINWEISE
VEILIGHEIDSINSTRUCTIES
1 1
1 1
34851_INSTALL_INT_ver2016.1.3

max 8 cm
A
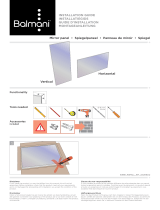
Mirrorcabinet / Spiegelkast
Armoire de toilette
Spiegelschrank
13 mm
2
1
AREAS / BESCHERMINGSVOLUMES / VOLUMES DE PROTECTION / VOLUMEN3
Hors volumes
Outside of volumes
EN The protected zones indicated meet the IEC 60364-7-701:09
and NFC15-100 standards. The dimensions and types of protected
zones may vary according to national legislation.
NL De aangeduide volumes zijn in overeenstemming met de norm
IEC 60364-7-701:09 en NFC15-100. De afmetingen en type van de
volumes kunnen verschillen naargelang de nationale wetgeving.
FR FR Les volumes indiqués sont conformes aux normes
IEC 60364-7-701:09 et NFC15-100. Les dimensions et le type de
volumes peuvent varier en fonction de la législation nationale.
DU Das angezeigte Volumen erfüllt den Standard
IEC 60364-7-701:09 und NFC15-100. Die Maße und der Typ des
Volumens können je nach nationaler Gesetzgebung unterschiedlich
ausfallen.
INSTALLATION - INSTALLATIE - INSTALLATION - MONTAGE
4
2,40 m 0,60 m
IMPORTANT / BELANGRIJK / IMPORTANT / WICHTIG2
EN To ensure compliance with section 5.2.10 of EN 60598-1:08 standard, the bathroom xture or mirror where this luminaire is to be
xedmust be tted with the necessary means to prevent mechanical stresses on the terminals to which the external wiring is attached.
NL Om in regel te zijn met de norm EN 60598-1:08, sectie 5.2.10 dient het meubel of spiegel waarop deze verlichtingsarmatuur geïnstalleerd
zal worden voorzien te zijn van noodzakelijke middelen om mechanische spanning op de aansluitklemmen of stroomkabel te voorkomen.
FR Pour garantir le respect des instructions gurant au point 5.2.10 de la norme EN 60598-1:08, le meuble ou miroir de bain devant être
équipé de cette lampe, doit disposer des moyens nécessaires pour éviter les eorts mécaniques aux bornes où le câblage externe est xé.
DU Um die Einhaltung des Absatzes 5.2.10 der Vorschrift EN 60598-1:08 zu gewährleisten, muss das Möbelstück oder der Spiegel im Bad, an
welchem die Leuchte angebracht werden soll, über die notwendigen Mittel verfügen, um die mechanische Beanspruchung an den
Klemmen, an denen die oene Verkabelung angebracht ist, zu vermeiden.
EN Place your switch in the correct zone!
NL Plaats uw schakelaar in de correcte zone!
FR Placez votre interrupteur dans la zone correcte!
DU Montieren Sie den Schalter in der richtigen Zone!
Switch
Schakelaar
Interrupteur
Schalter

B
Wood panel / Houten paneel
Panneau en bois / Holzplatte
Wood panel / Houten paneel
Panneau en bois / Holzplatte
18 mm
Backside
Topside
18 mm
5 Electrical connection
C
OFF
max 8 cm
max 8 cm
D
Attachment to wall
Muurbevestiging
accrochage au mur
Verankerungssystem für di Wand
2
12
3 4
1
1
2
2
12
3 4 5

CONDITIONS DE GARANTIE
5
FR
WARANTY CONDITIONS GARANTIE VOORWAARDEN
6 6
EN NL
GARANTIEBEDINGUNGEN
6DU
etcerroc nee roov fatstaam sla tneid ruutamra ezed nav sdigeitallatsni eD )A
.gnitiulsnaa ne eitallatsni
ezed eveileG .sjiwebeitnarag sla nedleg ruutcafpooknaa fo/ne nobassak wU )B
documenten zorgvuldig te bewaren.
nee po ruutamra ed po guret u tdniv remmuneires ne edoctcudorp eD )C
zilverkleurige etiket.
.gnirevel nav gad ed fanav neneker et ,raaj 2 tgaardeb edoirepeitnarag eD )D
gnikkaprev ed nav nenepo teh jib nenotrev uoz )ne(tcefed tcudorp teh neidnI )E
dient u de dealer/verkooppunt onmiddellijk te raadplegen, zonder over te gaan
tot installatie.
reicnarevel/relaed ed laz nedraawrooveitnarag ed redno tlav tcefed teh neidnI )F
deze armatuur herstellen of vervangen door een nieuw product, conform de
geldende garantiebepalingen in het land van aanschaf.
givehredno eid neledrednotcudorp fo/ne netcudorp neeg tked eitnarag eD )G
zijn aan slijtage en vanwege hun aard als verbruiksgoederen kunnen worden
beschouwd, zoals lampen, drivers, ballasten, transformators, glazen onderdelen.
fo/ne netolsegnaa drew tein ruutamra ed neidni tlavrev eitnarag eD )H
.gnidieldnah edreelliatedeg ezed ni neverhcseb slaoz dreellatsnïeg
,retaw ,galsnimeskilb ,gnitsalebrevomoorts rood edahcs ,nedred rood edahcS )I
vuur, natuurramp vallen niet onder de geldende garantievoorwaarden.
Onrechtmatig openen van de armatuur met een defect tot gevolg valt eveneens
niet onder de garantie.
ON
9
8
67
A) The installation guide for this fitting should be used to ensure correct
installation and connection.
B) Your receipt and/or sales note are your proof of purchase for guarantee
purposes. Please keep these documents in a safe place.
C) The product code and serial number can be found on the fitting on a silver
label.
D) This fitting is guaranteed for 2 years from the date of delivery.
dluohs uoy gnigakcap eht nepo uoy nehw evitcefed si tcudorp siht fI )E
immediately contact your dealer/place of purchase, and should not install the
fitting.
lliw reilppus/relaed eht ,eetnaraug eht fo smret eht nihtiw sllaf tcefed eht fI )F
repair or replace this fitting for a new product, in accordance with the applicable
guarantee terms in the country of purchase.
G) The guarantee does not cover any products and/or product components
which are subject to wear and tear and can be considered as consumables
due to their nature, such as lamps, drivers, ballasts, transformers and glass
components.
sa dellatsni ro/dna detcennoc ton si gnittif eht fi dilavni eb lliw eetnaraug ehT )H
described in this detailed manual.
,gninethgil ,segrus rewop yb desuac egamad ,seitrap driht yb dereffus yrujnI )I
water, fire and natural disasters do not fall under the applicable guarantee
conditions. Unauthorised opening of a defective fitting will similarly not be
covered by the guarantee.
enu ruop emron al eutitsnoc erutamra ettec ed noitallatsni’d eciton aL )A
.stcerroc tnemehcnarb nu te noitallatsni
ed evuerp ed eciffo tnof tahca’d erutcaf ertov uo/te essiac ed tekcit ertoV )B
garantie. Conservez soigneusement ces documents.
eétnegra etteuqité enu rus tnevuort es eirés ed orémun el te tiudorp edoc eL )C
.erutamra’l rus eésoppa
.nosiarvil al ed ruoj ud ritrap à ,sna 2 ed tse eitnarag ed edoirép aL )D
,egallabme’l ed erutrevuo’l à stuaféd sed retnesérp tiaved tiudorp el iS )E
contactez immédiatement votre revendeur/point de vente sans procéder à
l’installation.
ruessinruof/ruetubirtsid el ,eitnarag ed snoitidnoc sed evèler tuaféd el iS )F
réparera ou remplacera cette armature par un nouveau produit, conformément
aux dispositions de garantie en vigueur dans le pays d’achat.
tnos iuq stiudorp ed secèip uo/te stiudorp sel sap ervuoc en eitnarag aL )G
exposés à l’usure et, de par leur nature, peuvent être considérés comme des
biens de consommation, tels que les lampes, les conducteurs, les ballasts, les
transformateurs et les pièces en verre.
ne eéllatsni uo/te eéhcnarb été sap a’n erutamra’l is elunna’s eitnarag aL )H
respectant les instructions de ce manuel détaillé.
,erduof al ,tnaruoc ed egrahcrus enu ,sreit sed rap sésuac segammod seL )I
l’eau, le feu ou une catastrophe naturelle n’entrent pas dans le cadre des
conditions de garantie applicables. L’ouverture illégitime de l’armature ayant
entraîné un défaut n’est pas non plus couverte par la garantie.
6
esiewsnehegroV egithcir eid tsi rutamrA eid rüf gnutielnasgnuneideB reseid nI )A
.tlletsegrad sessulhcsnA sed dnu noitallatsnI red
ettiB .siewhcaneitnaraG sla netleg gnunhceR erhI redo/dnu gelebfuaK rhI )B
bewahren Sie sie sorgfältig auf.
red etieskcüR red fua eiS nednif remmunneireS eid dnu edoctkudorP neD )C
Armatur auf einem silbernen Etikett.
.mutadrefeiL ba erhaJ 2 tgärteb tiezeitnaraG eiD )D
,nelletstsef legnäM/legnaM nenie stkudorP sed nekcapsuA mieb eiS netlloS )E
eid eiS roveb ,refuäkreV/reldnäH nerhI na dnehegmu ettib hcis eiS nednew
Armatur installieren.
/reldnäH red driw ,tsi tkcedeg ehcürpsnaeitnaraG eid hcrud legnaM red sllaF )F
Verkäufer die Armatur je nach den gesetzlichen Bestimmungen des Landes, in
dem das Produkt gekauft wurde, reparieren oder durch ein neues Produkt
.neztesre
-ßielhcsreV redo/dnu etkudorpßielhcsreV fua thcin hcis tkcertsre eitnaraG eiD )G
teile, die als Verbrauchsgüter gelten, unter anderem Lampen, Treiber,
.salG sua elieT dnu nerotamrofsnarT ,etäregtlahcsroV
gnubierhcseB reseid ni eiw thcin rutamrA eid nnew ,tlläfrev eitnaraG eiD )H
dargestellt angeschlossen und/oder installiert wird.
dnu reueF ,ressaW ,egälhcsnieztilB ,gnutsalrebümortS ,ettirD hcrud nedähcS )I
Naturkatastrophen sind nicht durch die geltenden Garantieansprüche gedeckt.
Auch bei einem unrechtmäßigen Öffnen der Armatur verfallen die
Garantieansprüche.
/