RTDSN56-OF-WHGL

Barclay Products RTDSN56-OF-WHGL Installation guide

  • Hello! I am an AI chatbot trained to assist you with the Barclay Products RTDSN56-OF-WHGL Installation guide. I’ve already reviewed the document and can help you find the information you need or explain it in simple terms. Just ask your questions, and providing more details will help me assist you more effectively!
Anchoring Tub
P 847•244•1234 www.barclayproducts.com
04/17/2019
FREESTANDING TUB INSTALLATION INSTRUCTIONS
Tools Needed
Screws or Liquid Nails Wooden Blocks Pencil
Stabilize Tub to Prevent Sliding
1. Place tub in intended position on floor.
2. Use pencil to trace around tub on floor.
3. Move tub to the side to allow work space.
4. Place wooden blocks on floor inside traced pattern of tub. Blocks can be secured to floor using
screws or liquid nails.
5. Put tub back into position over wooden blocks. Wooden blocks will not be visible and will
prevent tub from sliding across floor.
6 .Once the tub is position and secure, apply small bead of sealent around the base.
7. For ease installation: We recommend use of 5598-ITD (Easy Install Tub drain Rough In Kit).
This reccomendation is for Resin, Acrylic, and Copper tubs only.
Be sure to re-inforce the floor before securing tub. We recommend 2- 2”x12”‘s securely
fastened to floor beams where you plan to secure your tub.
Tools Needed
Wrench or socket Drill & Bits
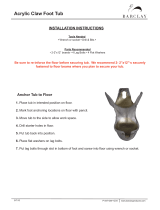
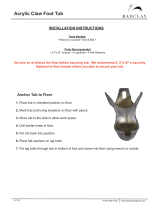
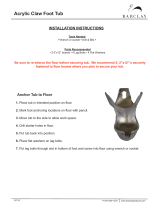
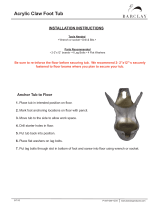
Anchor Tub to Floor
1. Place tub in intended position on floor.
2. Mark foot anchoring locations on floor with pencil.
3. Move tub to the side to allow work space.
4. Drill starter holes in floor.
5. Put tub back into position.
6. Place flat washers on lag bolts.
7. Put lag bolts through slot in bottom of foot and screw into floor using wrench or socket.
Be sure to re-inforce the floor before securing tub. We recommend 2- 2”x12” securely
fastened to floor beams where you plan to secure your tub.
Parts Recommended
• 2-2”x12” boards • 4 Lag Bolts • 4 Flat Washers
CLAW FOOT TUB INSTALLATION INSTRUCTIONS
Page 1
Feet Installation
P 847•244•1234 www.barclayproducts.com
9/19/17
TUB FEET INSTALLATION WITH BAR
1. Place tub upside down onto a soft cloth/blanket to prevent from damage.
(Note: For roll top tub slide under rim 2X4 wooden block to elevate the tub from one side. This will
help turn the tub over when finished)
2. Once the tub is turned upside down remove washers and nuts from the
threaded studs.
3. Position mounting bars over the threaded studs on both ends.
4. After bars are in place thread a washer and nut onto each stud by hand. Do
not tighten until foot is attached. (Shown in image 1)
5. Attach feet onto the bars using flat washer, locking washer and bolt.
(Shown in Image 2)
6 . Finish tightening the bars once the feet are attached securely
(DO NOT OVER TIGHTEN MAY CRACK THE TUB)
7 . Lift tub by the rim and turn onto its feet. If tub is not level use built-in
adjuster under the foot. DO NOT LIFT TUB BY FEET
Tools Needed
11/16 Wrench 3/4” Wrench
Parts Included
• 2 Bars • 4 Mounting Bolts • 4 Flat Washers 6 Locking Washers 6 Nuts
A. Roll top tubs have the drain located at the end of the tub and tilt toward the drain so
the two tallest feet must be attached on the end without the drain. The two shortest
feet must be attached on the drain end.
B. Double roll top and double slipper tubs have the drain located in the center of the
tub so no tilt is necessary as the bottom is slanted toward the drain. All four feet
should be the same.
Page 2
Feet Installation
P 847•244•1234 www.barclayproducts.com
1/8/18
TUB FEET INSTALLATION WITHOUT BAR
1.
Place tub upside down onto a soft cloth/blanket to prevent damage.
(Note: For roll
top tub slide under rim 2X4 wooden block to elevate the tub from one side. This will help turn the tub over when
finished)
2. Once the tub is turned upside down slide a dovetail bolt into each mounting pod.
(Shown in image 1)
3. Put foot onto the dovetail bolt. Secure foot by using locking washer and nut. (It is
normal to have small gaps between foot and tub wall).
4 . Lift tub by the rim and turn onto its feet.
5. Loosen the bolts and let the tub settle into place on the feet. Tighten the bolts.
6. Barclay tubs are leveled before shipment. Your tub may need further leveling to
adjust to your floor. Some models have built-in adjusters under each foot that can be
used for leveling. For models without adjusters in the feet, shims can be used to level.
DO NOT LIFT TUB BY FEET
Note: Barclay installs tub feet and levels tubs before shipping. Some tubs have 2
short feet and 2 tall feet to provide the correct slant for drainage. If you remove
the feet for any reason be sure to return them to the same position from which
you removed them.
Tools Needed
11/16 Wrench
Parts Included
• Rubber Shims(If Included) • 4 Dovetail Bolts • 4 Flat Washers 4 Locking Washers • 4 Nuts •
For some tubs you wil find letters inside your tub foot to correspond with letters on the
bottom of your tub as a guide to foot placement. If these are not present on your tub
use following as a general guide.
A. Roll top tubs have the drain located at the end of the tub and tilt toward the drain so
the two tallest feet must be attached on the end without the drain. The two shortest
feet must be attached on the drain end.
B. Double roll top and double slipper tubs have the drain located in the center of the
tub so no tilt is necessary as the bottom is slanted toward the drain. All four feet
should be the same.
Page 3
Page 4
Tub Base Installation-Pg.1
INSTALLATION INSTRUCTIONS
P 847•244•1234 www.barclayproducts.com
9/17/14
Tub Base Installation-Pg.2
INSTALLATION INSTRUCTIONS
P 847•244•1234 www.barclayproducts.com
9/17/14
Page 5
/