Page is loading ...

ITEM #1292415
MODEL #82313
9-LIGHT CHANDELIER
1
ATTACH YOUR RECEIPT HERE
Serial Number
Purchase Date
Questions, problems, missing parts? Before returning to your retailer, call our customer
service department at 1-800-554-6504, 8 a.m. - 4:30 p.m, EST, Monday - Friday.
Distributed by Kichler® LLC. All Rights Reserved.

PACKAGE CONTENTS
2
A
C
H
D
I
K
A
Canopy
Mounting Bracket
Threaded Nipple
Hex Nut
Socket
Coupling
Shade
Screw Collar Ring
Screw Collar Loop
Spacer
Chain
B
C
D
E
F
G
H
I
J
K
1
1
3
1
9
1
1
9
9
1
1
PART DESCRIPTION QTY.
Fixture Loop
Socket Ring
Threaded Pipe
Arm
Thumbscrew
Mounting Surface
Small Hex Nut
Lock Washer
Coupling Cover
Pipe Coupling
Fixture Top
L
M
O
P
N
R
S
T
U
V
Q
1
9
1
3
6
1
3
3
1
1
1
PART DESCRIPTION QTY.
E
G
J
M
P
N
O
R
U
T
V
S
Q
L
B
F

3
HARDWARE CONTENTS
Wire
Connector
AA
Short
Machine
Screw
BB
Qty: 3
Qty: 2
SAFETY INFORMATION
Please read and understand this entire manual before attempting to assemble, operate or install the
product.
WARNING
• IMPORTANT: NEVER attempt any work without shutting off the electricity.
• Place the main power switch in the “OFF” position and unscrew the fuse(s), or switch “OFF” the
circuit breaker switch(es), that control the power to the fixture or room you are working in.
• Place the wall switch in the "OFF" position. If the fixture to be replaced has a switch or pull chain,
place it in the "OFF" position.
• Do not use bulbs with wattage greater than specified on this fixture.
• California Proposition 65
WARNING: This product can expose you to lead, which is known to the State of
California to cause cancer, birth defects or other reproductive harm. For more
information go to www.p65warnings.ca.gov
CAUTION
• If you have any doubts about how to install this lighting fixture, or if the fixture fails to operate
completely, please contact a licensed electrical contractor.
• All parts must be used as indicated in these instructions. Do not substitute any parts, leave parts
out, or use any parts that are worn out or broken. Failure to obey this instruction could invalidate
ETL listing and/or C.S.A. certification of this fixture.
PREPARATION
Before beginning assembly of product, make sure all parts are present. Compare parts with package
contents list and hardware contents list. If any part is missing or damaged, do not attempt to
assemble the product.
Estimated assembly time: 30 minutes to 1 hour
Tools Required for Assembly (not included): Phillips screwdriver, flathead screwdriver, wire strippers,
electrical tape, ladder, safety glasses.

4
ASSEMBLY INSTRUCTIONS
1. Bring arm (O) to fixture top (V) and secure with
lock washers (S) and small hex nuts (R).
2. Raise Mounting surface (Q) to arms (O) and
secure with thumbscrews (P).
2
P
Q
O
3. Lower coupling cover (V) over coupling (F) and
secure with pipe coupling (U).
1
V
S
R
O
3
U
T
F
Note: The electrical cable will need to get pulled
through the individual parts as they are installed
on this and later steps.

5
ASSEMBLY INSTRUCTIONS
5. Position threaded nipple (C) in mounting bracket
(B) so that, when mounted:
• The threaded nipple (C) will protrude a
minimum of ¼ inch beyond the raised center
portion of the bracket (B).
• The threaded nipple (C) height should be
positioned so that ½ the exterior threads of
the screw collar loop (I) will extend past the
canopy (A), when it is mounted.
6. Once the proper position of the threaded nipple
(C) and bracket (B) has been determined,
secure with 3 hex nuts (D) as follows:
• Screw 1st hex nut (D) onto the threaded
nipple (C) and tighten against the raised
portion of the bracket (B).
• Screw 2nd hex nut (D) onto the threaded
nipple (C) and tighten against the flat portion
of the mounting bracket (B).
• Screw the third hex nut (D) onto threaded
nipple (C) and tighten against the screw
collar loop (I).
5
B
A
C
1/4 Inch
6
1/4 Inch
D
C
I
B
I
4. Screw fixture loop (L) onto threaded pipe (N)
before screwing threaded pipe onto pipe
coupling (U).
4
N
L
U

ASSEMBLY INSTRUCTIONS
6
Hardware Used
Short Machine
Screw
x 2
BB
7. Connect mounting bracket (B) to the outlet box
with short machine screws (BB).
8. Using the open chain links on chain (K), attach one
end to screw collar loop (I) and the other end to
fixture loop (L). Weave the fixture electrical and
ground wires through every other chain link and
pass through threaded nipple (C) into outlet box.
Lower the screw collar ring (H) and canopy (A) over
the chain (K).
7
Outlet Box
C
B
L
H
A
K
I
C
8
Outlet
Box
BB

ASSEMBLY INSTRUCTIONS
7
Hardware Used
x 3Wire Connector
AA
9. Wire connection guide:
Ground wire:
• For installation in the United States: Wrap
ground wire from outlet box around ground
screw on mounting bracket (B) no less than 2
in. from wire end. Tighten ground screw. If
fixture is supplied with a ground wire,
connect to outlet ground wire with a wire
connector (AA).
• For installation in Canada: If fixture is
supplied with ground wire, wrap ground wire
around ground screw on mounting bracket
(B). Tighten ground screw.
Supply wires:
• Connect the Neutral (White) supply wire from
the outlet box to the Neutral fixture wire
(White or Parallel Cord “D” shaped and
ribbed).
• Connect the Hot (Black) supply wire from the
outlet box to the Hot fixture wire (Black or
Parallel Cord round and smooth).
NOTE:
Fixture wires will either be:
• Black and White.
• Parallel Cord SPT-1 lamp wire with one
round smooth wire and one “D” shaped
ribbed wire.
9
BARE COPPER,
OR GREEN
GROUND
SUPPLY WIRE
BARE COPPER,
OR GREEN
GROUND
FIXTURE
WIRE
BLACK FIXTURE
WIRE
OR
WHITE FIXTURE
WIRE
BLACK SUPPLY
WIRE
BLACK SUPPLY
WIRE
PARALLEL
FIXTURE CORD
(ROUND AND
SMOOTH)
PARALLEL FIXTURE
CORD(“D” SHAPED
AND RIDGED
)
WHITE SUPPLY
WIRE
WHITE SUPPLY
WIRE
10. Pass canopy (A) over the screw collar loop (I).
Attach screw collar ring (H) to screw collar loop
(I) to secure canopy (A).
H
I
A
10
AA

ASSEMBLY INSTRUCTIONS
8
12
E
12. Insert 60-watt max. Edison bulb (included) into
socket (E).
Repeat for remaining sockets (E).
11. Lower shade (G) over socket (E). Next screw
spacer (J) then socket ring (M) onto socket (E)
using wrench (provided).
Repeat for remaining sockets (E).
Wrench
J
M
G
E
11

CARE AND MAINTENANCE
9
TROUBLESHOOTING
Fixture does not light. 1. Fixture may be wired incorrectly.
1. Check wiring.
2. Worn or broken bulb. 2. Replace bulb.
1. Check wiring.
PROBLEM POSSIBLE CAUSE CORRECTIVE ACTION
• Always be certain that electric current is turned off before cleaning this item.
• Use a soft, moist cloth with mild non-abrasive soap to clean fixture. Never use glass cleaner on
fixture, as it will damage the metal finish.
• All glass shades may be washed in a towel-lined sink with warm water and mild soap. Do not
wash shades in an automatic dishwasher.
LIMITED WARRANTY ON KICHLER® LIGHT FIXTURES
Kichler Lighting LLC warrants its light fixtures to the original consumer purchaser to be free from defects in
material and workmanship for the applicable period specified below:
Kichler® Light Fixtures
One (1) year from the date of purchase by the original consumer purchaser.
What We Will Do
Kichler Lighting LLC will repair or replace, free of charge, during the applicable warranty period (as described
above), any light fixture that proves defective in material and/or workmanship under normal installation, use
and service. If repair or replacement is not practical, Kichler Lighting LLC may elect to refund the purchase
price in exchange for the return of the product. These are your exclusive remedies.
What Is Not Covered
Polished brass product finishes and non-LED light bulbs carry no warranty. Any labor charges incurred by the
original consumer purchaser to repair or replace this product are not covered by this warranty. Kichler Lighting
LLC shall not be liable for any damage to the product resulting from reasonable wear and tear, voltage
overload, outdoor use (where the annual average ambient temperature is below 27° or above 95° Fahrenheit),
misuse (including use of the product for an unintended application), abuse, neglect or improper or incorrectly
performed installation, maintenance or repair, including failure to follow the applicable care and cleaning
instructions. Kichler Lighting LLC recommends using a professional electrician for all installation and repair of
light fixtures. We also recommend that you use only genuine Kichler® replacement parts.
What You Must Do to Obtain Warranty Service or Replacement Parts
A warranty claim may be made, and replacement parts may be obtained by contacting the distributor from
whom you purchased the light fixture. If the distributor is not available, please call (800) 554-6504 or contact
us by mail as follows (please include your model number and date of purchase):

10
WARRANTY (continued)
Kichler Lighting LLC
88 Long Hill Street
East Hartford, CT 06108
Proof of purchase (original sales receipt) from the original purchaser must be made available to Kichler
Lighting LLC for all warranty claims.
Limitation on Duration of Implied Warranties
TO THE EXTENT PERMITTED BY LAW, ANY IMPLIED WARRANTY, INCLUDING THE IMPLIED
WARRANTIES OF MERCHANTABILITY AND OF FITNESS FOR A PARTICULAR PURPOSE, IS LIMITED TO
THE STATUTORY PERIOD OR THE DURATION OF THIS WARRANTY, WHICHEVER IS SHORTER. Some
states/provinces do not allow limitations on how long an implied warranty lasts, so the above limitation may not
apply to you.
Limitation of Special, Incidental or Consequential Damages
KICHLER LIGHTING LLC SHALL NOT BE LIABLE FOR ANY SPECIAL, INCIDENTAL OR CONSEQUENTIAL
DAMAGES (INCLUDING LABOR CHARGES TO REPAIR, REPLACE, INSTALL OR REMOVE THIS
PRODUCT), WHETHER ARISING OUT OF BREACH OF ANY EXPRESS OR IMPLIED WARRANTY,
BREACH OF CONTRACT, TORT, OR OTHERWISE. KICHLER LIGHTING LLC SHALL NOT BE LIABLE FOR
ANY DAMAGE TO THE PRODUCT RESULTING FROM REASONABLE WEAR AND TEAR, OVERLOAD,
OUTDOOR USE (WHERE THE ANNUAL AMBIENT TERMPERATURE IS BELOW 27° OR ABOVE 95°
FAHRENHEIT), MISUSE (INCLUDING USE OF THE PRODUCT FOR AN UNINTENDED APPLICATION),
ABUSE, NEGLECT OR IMPROPER OR INCORRECTLY PERFORMED INSTALLATION, MAINTENANCE OR
REPAIR, INCLUDING FAILURE TO FOLLOW THE APPLICABLE INSTALLATION, CARE AND CLEANING
INSTRUCTIONS. Some states/provinces do not allow the exclusion or limitation of special, incidental or
consequential damages, so the above limitations and exclusions may not apply to you. Notice to residents of
the State of New Jersey: The provisions of this warranty, including its limitations, are intended to apply to the
fullest extent permitted by the laws of the State of New Jersey.
Additional Rights
This warranty gives you specific legal rights, and you may also have other rights which vary from
state/province to state/province.

11
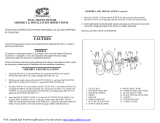
REPLACEMENT PARTS LIST
A
B
C
D
G
H
I
J
K
L
M
N
AA
BB
Canopy C82313
Mounting Bracket XBAR82313
Threaded Nipple TN82313
Hex Nut NUT82313
Shade G34686
Screw Collar Ring SCG82313
Screw Collar Loop SCL82313
Spacer SP34686
Chain CHAIN82313
Fixture Loop TLOOP82313
Socket Ring LR013W090-DBK
Threaded Pipe PIPE82313
Wire Connector WC001
Short Machine Screw SCR832X050
PART DESCRIPTION PART #
For replacement parts, call our customer service department at 1-800-554-6504, 8 a.m. - 4:30 p.m.,
EST, Monday - Friday.
H IA
B
C
D G
Rev. 01-30-19
Printed in China
Distributed by:
Kichler Lighting LLC
88 Long Hill St.
East Hartford, CT 06108
AA
J K
L M N
BB
/