Page is loading ...

1
INSTR
UCTIONS
LIFEGARD UNO, DUO, TRIO FILTER KITS
INSTRUCTIONS
Page 7 - 12
R440021-UNO Filter Kit Up To 1000 Gallons
R440022-DUO Filter Kit For Up To 1500 Gallons
R440023-TRIO Filter Kit For Up To 2000 Gallons
Instructional Videos Available on our web site:
www.lifegardaquatics.com
LIFEGARD UNO, DUO, TRIO FILTER
KITS INSTRUCTIONS
Page 12 - 17
R440011-UNO Filter For Up To 1000 Gallons
R440012-DUO Filter For Up To 1500 Gallons
R440013-TRIO Filter For Up To 2000 Gallons
LIFEGARD ALL-IN-ONE FILTER SYSTEM
INSTRUCTIONS
Page 2 - 6
R442001 All-In-One Single Up To 1000 Gallons
R442002 All-In-One Double Up To 1500 Gallons
R442003 All-In-One Triple Up To 2000 Gallons

2
Item Part No. Description Item Part No. Description
1 R440024
Add-on Cartridge (complete layer includes
sponges) 14 R442014 13 Watt UV Ballast Assembly
2 R440026 Replacement Sponges Only 15 R442015 UV Quartz Sleeve
3 R442004 Fountain Kit Complete 16 R442016 Gasket for UV Quartz Sleeve
4 R442005 Diverter Valve 17 R442017 “O” Ring for internal UV Housing
5 R442006 Leveling Fitting for Fountain Kit 18 R442018 1" MPT x 90 Degree Insert Fitting
6 R270484 1" MPT x Close Threaded Nipple 19 R442019 UV Light Cover with Nut
7 R442007 Single Layer Locking Assembly 20 R442020 Rubber Cord Grommet
8 R442008 Double Layer Locking Assembly 21 R442021 Rubber Solid Grommet
9 R442009 Triple Layer Locking Assembly 22 R442022
Pump to UV Chamber Adapter with “O”
Ring
10 R442010 Biological Media Bag 23 R442023 Pump Replacement Base
11 R442011 UV Chamber 24 R442024
Q1-2200 Pump for All-in-One with 20'
Cord
12 R442012 UV Chamber Screws 24 R442025
Q1-3000 Pump for All-in-One with 20'
Cord
13 R442013 13 Watt UV Bulb 24 R442026
Q1-4000 Pump for All-in-One with 20'
Cord
Please Read Instructions before Installing
The advanced features of this compact filter system allow efficient operation and if installed according to instructions, will
keep the water in your pond, water garden or fountain crystal clear.
All In One Setup Positions for
Single, Double and Triple
LIFEGARD ALL
-
IN
-
ONE FILTER SYSTEM INSTRUCTIONS
R442001 All-In-One Single Up To 1000 Gallons
R442002 All-In-One Double Up To 1500 Gallons
R442003 All-In-One Triple Up To 2000 Gallons
24
Instructional Videos Available on our web site:
www.lifegardaquatics.com

3
The ALL IN ONE FILTER SYSTEM is a compact filter for ponds, water gardens and fountains easy to install and designed
for easy maintenance. Besides offering 2 different fountain spray patterns, it performs three different filtering functions:
1. Multi Layer MECHANICAL Filtration to remove solids.
2. BIOLOGICAL Filtration to promote beneficial bacterial growth.
3. ULTRAVIOLET STERILIZATION puts out 13 Watts of intense UV light to kill free floating algae. The ultraviolet sterilizer
has a separate plug so that you can operate it only when needed.
Setup and Maintenance: Please refer to the parts guide for individual part’s explanation.
Initial Setup:
Step – 1: Remove the Layer Locking Assembly (Item # 7,8,9) that is holding down the Housing Cover Top. Take off the
layer (s) (Item # 1) by gently sliding out the locking Notches (as see in Fig. 1)
Inspect the Pump (Item # 24)and UV Chamber (Item # 11). Both should be locked in place. The Biological Media bag
(Item # 10) should be placed by the UV Chamber Opening and the pump base should be locked in place. The O-Ring on
the Pump to UV Chamber Adapter (Item # 22) should be in position on the grey pump volute and properly inserted into
with UV Chamber Housing (as seen in Fig. 2).
Locking Notches
Notch Holder
Fig. 1
Fig. 2
Rubber Cord Grommet
Fig. 2A

4
Step – 2: Once all the parts are inspected for correct positioning make sure that the pump cable is running through the
locks and is locked in place with the Rubber Cord Grommet (Item # 20) (as seen in Fig. 2A).
Step – 3: Correctly place the layer (s) back on the base by sliding the Locking notches into the Notch Holders. Similarly
place the Top Housing Cover and Lock it in with the Locking Assembly. Now you are ready to put the 1” Nipple, Leveling
Fitting for Fountain Kit, Diverter Valve and the Fountain Kit Complete (in the same order) (Item # 3,4,5,6).
UV Installation:
Put the UV bulb (Item # 13) in the 2-Pin Ballast connector (Item # 14). Slide the black rubber Gasket of Quartz Sleeve
(Item # 16) onto the open rim of the Quartz Sleeve (Item # 15) so that the flat end of the gasket faces out to the Clear UV
Cover. Slide the Quartz Sleeve (Item # 16) into the round notch of the Clear UV Cover (Item # 19). Now hold the Clear UV
Cover and slide the quartz sleeve into the UV Chamber. Align the two Guide Notches with the opening on the Clear UV
Cover. Close the Nut and hand tighten only.
Pump Installation:
It is recommended that you service the Quiet One Pump (Item # 24) every three month to enhance its efficiency and the
life of the moving parts. Before you start to service the pump – first “REMOVE” the UV bulb (Item # 13) and Sleeve (Item #
15) from the unit. Not doing this first you risk cracking the Quartz Sleeve and UV Bulb. To service the pump follow Step –
1 to remove the top cover, Filter layers and the Biological media bag. With the Quartz Sleeve and UV Bulb out of the
chamber remove the UV housing Cover by removing the screws that hold it in place (as seen in Fig. 4).
Step – 4: Gently slide the UV Housing Cover (Item # 11) by first sliding it out from the pump and then the base UV seal.
The pump is locked onto the base with horizontal notches (as seen in Fig. 5). NOTE the position of the pump when it is
locked onto the base. Once this process is complete you will have to lock the pump back into the same position. With the
pump fully exposed push it out horizontally along the notches. NOTE – You may have to place the filter base sideways
Clear
–
UV Cover
Fig. 3
Guide Notches
Fig. 4

5
and push the pump into the grove until you hear a locking clock sound. Similarly push in the opposite direction to take the
pump out of the grove.
Vertical pull may result in damaging the base or the pump. With the pump out remove the grey pump volute by twisting it
counter clockwise. This will expose the impeller and shaft of the pump. Inspect all parts for any debris. Use a brush to
remove any debris.
Recommendation: It is recommended to use Lifegard Silicon Lubricant (Item # R172036) on all rubber O-rings and the
impeller and shaft of the pump. After servicing the pump replace the pump back onto the base by following Step – 4 in
reverse. Make sure to slide the pump back onto the base until it is locked and you hear a locking click. If the pump is not
all the way locked the UV chamber will not fit properly. Reinstall the Pump to UV Chamber Adapter (as shown in Fig – 6).
Step – 5: Run the pump cord along the cord holders on the base and reinstall the Rubber Cord Grommet (as shown in Fig
– 7) (Item # 20)
Step – 6: Start to reinstall the UV Housing Chamber (Item # 11) by first installing the open end of the Housing that goes
over the “O” ring for the Internal UV Housing (Item # 17). Slide it gently and press the end that connects to the pump by
sliding it onto the “O” ring of the Pump to UV Chamber Adapter (as shown in Fig – 8) (Item # 22).
Fig. 5
Fig. 6
Fig. 7

6
Step – 7: Adjust the UV Chamber housing and Align the holes for the locking screws. You may need to adjust the Pump to
UV Chamber Adapter (Item # 22) so the screws align properly while the “O” ring for the Internal UV Housing and the “O”
ring of the Pump to UV Chamber Adapter to make a proper seal (as shown in Fig – 9) (Item # 17).
Place the Biological Media Bag and follow Step – 1, Step – 2, and Step – 3 to install the layers and Fountain Assembly.
Fig. 8
Fig. 9
R442001 All
-
In
-
One Single Up To 1000 Gallons
R442002 All-In-One Double Up To 1500 Gallons
R442003 All-In-One Triple Up To 2000 Gallons

7
Item Part No. Description Item Part No. Description
1 R440024 Add-on Cartridge (complete layer includes sponges) 14 R442014 13 Watt UV Ballast Assembly (Optional)
2 R440026 Replacement Sponges Only 15 R442015 UV Quartz Sleeve (Optional)
3 R442004 Fountain Kit Complete 16 R442016 Gasket for UV Quartz Sleeve (Optional)
4 R442005 Diverter Valve 17 R442017 “O” Ring for internal UV Housing (Optional)
5 R442006 Leveling Fitting for Fountain Kit 18 R442018 1" MPT x 90 Degree Insert Fitting
6 R270484 1" MPT x Close Threaded Nipple 19 R442019 UV Light Cover with Nut (Optional)
7 R442007 Single Layer Locking Assembly 20 R442020 Rubber Cord Grommet
8 R442008 Double Layer Locking Assembly 21 R442021 Rubber Solid Grommet
9 R442009 Triple Layer Locking Assembly 22 R442022 Pump to UV Chamber Adapter with “O” Ring
10 R442010 Biological Media Bag 23 R442023 Pump Replacement Base
11 R442011 UV Chamber (Optional) 24 R442024
Quiet One -2200 Pump for R440021 Uno Filter *
12 R442012 UV Chamber Screws (Optional) 24 R442025
Quiet One -3000 Pump for R440022 Duo Filter *
13 R442013 13 Watt UV Bulb (Optional) 24 R442026
Quiet One -4000 Pump for R440023 Trio Filter *
The UNO, DUO, TRIO Filter Kit comes out of the box ‘Ready to Install’. Attach the Fountain Kit (Item # 3, 4, 5, 6) to the
top of the Layer Locking Assembly (Item # 7, 8 or 9). Place the filter kit fully submersed under water. Turn on the Pump
and see your fountain or pond getting cleared of debris. You may need to adjust the flow on the diverter (Item # 4) valve to
adjust the flow on the fountain spray.
Please Read Instructions before Installing
The advanced features of this UNO, DUO, TRIO filter system allows efficient operation and if installed according to
instructions, will keep the water in your pond or water garden crystal clear.
UNO, DUO, TRIO Filter Kits Setup
Positions for Single, Double or Triple
24
R440021-UNO Filter Kit Up To 1000 Gallons
R440022-DUO Filter Kit For Up To 1500 Gallons
R44
0023
-
TRIO Filter Kit For
Up To 2000 Gallons
LIFEGARD
UNO, DUO TRIO
FILTER
KIT INSTR
UCTIONS
–
Includes Quiet One Pump
*
All Quiet One Pumps come with 20’ Cord
Instructional Videos Available on our web site:
www.lifegardaquatics.com

8
The UNO, DUO, TRIO FILTER SYSTEM is a compact filter for ponds and water gardens, easy to install and designed for
easy maintenance. Besides offering 2 different fountain spray patterns, it performs three different filtering functions:
1. Multi Layer MECHANICAL Filtration to remove solids.
2. BIOLOGICAL Filtration to promote beneficial bacteria growth.
3. QUIET ONE PUMP for optimal performance and compact setup: Quiet One -2200 for UNO (594 GPH), Quiet One -
3000 for DUO (758 GPH) and Quiet One -4000 for TRIO (1022 GPH)
4. (OPTIONAL) ULTRAVIOLET STERILIZATION puts out 13 Watts of intense UV light to kill free floating algae. The
ultraviolet sterilizer has a separate plug so that you can operate it only when needed.
Maintenance: Please refer to the parts guide for individual part’s explanation.
Maintenance:
Step – 1: Remove the Layer Locking Assembly (Item # 7, 8, or 9) that is holding down the Housing Cover Top. Take off
the layer (Item # 1) by gently sliding the locking Notches (see Fig – 1)
Inspect the Pump (Item # 11) it should be locked in place (see Fig – 2). The Biological Media bag (Item # 10) should be
opposite to the pump suction (see Fig – 2A). Note that the Pump both slides forward to unlock and slide back to lock. If
pump are not slid all the way back to the Pump Base Wall as see in Fig – 2A - they will not lock into the UV Chamber.
Locking Notches
Notch Holder
Fig
–
1
Fig
–
2
Rubber Cord Grommet
Fig
–
2A
Fig
–
2B
Optional - UV Chamber shown here
Pump Base Wall

9
Step – 2: Once all the parts are inspected for correct positioning make sure that the pump cable is running through the
locks and is locked in place with the Rubber Cord Grommet (as seen in Fig. 2B).
Step – 3: Correctly place the layer (Item # 1) back on the base by sliding the Locking notches in to the Notch Holders (see
Fig – 3 and 3A). Similarly place the Housing Cover Top and Lock it in with the Locking Assembly (Fig – 3B and 3C). Now
you are ready to put the 1” Nipple, Leveling Fitting for Fountain Kit, Diverter Valve and the Fountain Kit Complete in the
same order (Item #6, 5, 4, 3).
Pump Installation:
NOTE: THE INSTRUCTIONS/IMAGES BELOW SHOW THE OPTIONAL UV STERILIZER RECOMMENDED FOR THE
FILTER. If you don’t have a UV Sterilizer just disregard the instructions on UV.
It is recommended that you service the pump every three months to enhance its efficiency and the life of the moving parts.
Before you start to service the pump – Note – If you have upgraded your UNO, DUO or TRIO Filter kit with an Optional
UV – You will first need to remove the UV bulb and Sleeve from the unit (see UV Installation below). By not doing this first
you risk cracking the Quartz Sleeve and UV Bulb.
To service the pump follow Step – 1 to remove the top cover, Filter layers and the Biological media bag. Now remove the
UV housing Cover by removing the screws that hold it in place (as seen in Fig – 4A).
Step – 4: Gently slide the UV Housing Cover (Item # 11) by first sliding it out from the pump and then the base UV seal
(as seen in Fig – 4B). The pump is locked onto the base with horizontal notches (as seen in Fig – 5A and 5B).
Fig
–
3
Fig
–
3A
Fig
–
3B
Fig
–
3C
Fig
–
4A
Fig
–
4B
Fig
–
4C
Fig
–
3D
Fig
–
3E
Fig
–
3F

10
Pulling the pump Vertically will result in damaging the filter base and the pump. With the pump out now you can remove
the grey volute by twisting it counter clockwise. This will expose the impeller and shaft of the pump. Inspect all parts for
any debris. Use a brush to remove any debris. NOTE the position of the pump when it is locked onto the base. The pump
is properly locked once it slides over the Locking Notch (as seen in Fig – 4C). Note – If the pump is not installed properly
the UV Housing Cover will not align properly. Once this process is complete you will have to lock the pump back into the
same position. With the pump fully exposed push it out horizontally along the notches.
Recommendation: It is recommended to use Lifegard Silicone Lubricant (Part # R172036) on all rubber O-rings and the
impeller and shaft of the pump. After servicing the pump replace the pump back onto the base by following Step – 4 in
reverse. Make sure to slide the pump back onto the base until it is locked and you hear a locking click. If the pump is not
locked all the way the UV chamber will not fit properly. Reinstall the Pump to UV Chamber Adapter (as shown in Fig – 6).
Step – 5: Run the pump cord along the cord holders on the base and reinstall the Rubber Cord Grommet (Item # 20) (as
shown in Fig – 7)
Step – 6: Start to reinstall the UV Housing Chamber by first installing the open end of the Housing that goes over the “O”
ring for the Internal UV Housing. Slide it gently and press the end that connects to the pump by sliding it onto the “O” ring
of the Pump to UV Chamber Adapter (as shown in Fig – 8).
Fig
–
5A
Fig
–
6
Fig
–
7
Fig
–
8
Fig
–
5B
Fig
–
5C

11
Step – 7: Adjust the UV Chamber housing and Align the holes for the locking screws. You may need to adjust the Pump to
UV Chamber Adapter so the screws align properly (see Fig – 9C) while the “O” ring for the Internal UV Housing and the
“O” ring of the Pump to UV Chamber Adapter make a proper seal (as shown in Fig – 9A). Once the pump and the UV
Chamber Housing are aligned correctly the screw holes will fall in place (see Fig – 9B). Install the screws.
Step – 8: Replace the Biological Media Bag. The Biological Media bag (Item # 10) should be by the UV Chamber Opening
opposite the Pump Replacement Base. Follow Step – 1, Step – 2, and Step – 3 to install the layers and Fountain
Assembly.
R440028 13 WATT UV STERILIZER KIT
Upgrade your Uno, Duo, Trio Filters with a 13 Watt UV to control Algae and Disease Control. Complete easy-to-install unit
shipped direct from factory.
To Add a UV Sterilize or for any replacement parts – Please call the manufacturer at:
Lifegard Aquatics
16301 Carmenita Road
Cerritos, CA 90703
Tel (562)404-4129
Fax (562)404-4159
Item Part No. Description
11 R442011 UV Chamber
12 R442012 UV Chamber Screws
13 R442013 13 Watt UV Bulb
14 R442014 13 Watt UV Ballast Assembly
15 R442015 UV Quartz Sleeve
16 R442016 Gasket for UV Quartz Sleeve
17 R442017 “O” Ring for Internal UV Housing
19 R442019 UV Light Cover with Nut
Fig
–
9A
Fig
–
9B
Fig
–
9C

12
UV Installation: UV is an OPTIONAL add-on feature for UNO, DUO and TRIO Filter Kits. You can purchase it directly from the
manufacturer (contact information listed below). Adding UV helps control Algae and Disease in your system. Fig – 10A shows the
components of your UV Kit. Install the UV Bulb (Item # 13) into the Ballast Connecter Item # 14) (see Fig – 10B). Install the O-Ring
(Item # 16) onto the Quartz Sleeve (Item # 15) as seen in Fig – 10C. The tapered end of the O-Ring slides onto the Quartz Sleeve first
as seen in Fig – 10C and 10D. Slide the Quartz Sleeve with the O-Ring onto the UV Bulb as shown in Fig – 10E. The Quartz Sleeve
should slide into the groove of the Clear View Cover (Fig – 11A). Slide the complete assembly into the filter base (Fig – 10F). Align the
Guide Notch (Fig – 11B and 10G) on the Filter base with the Clear View Cover and push it all the way in (Fig – 10G). Lock the
assembly in place with the UV Light Cover Nut (Item #19). Make sure the Ballast (Item # 14) is not exposed to moisture and the wiring
is laid out safely. Connect the Ballast cable to power. You should see the Blue Glow of the UV Light. NOTE – In case of any water
contact with the electrical components the circuit breaker will trip.
Clear
–
UV Cover
Fig
–
11A
Guide Notches
Fig
–
10A
Fig
–
10B
Fig
–
10C
Fig
–
10D
Fig
–
10E
Fig
–
10F
Fig
–
10G
Fig
–
10H
Fig
–
11B

13
Item Part No. Description Item Part No. Description
1 R440024 Add-on Cartridge (complete layer includes sponges) 14 R442014 13 Watt UV Ballast Assembly (Optional)
2 R440026 Replacement Sponges Only 15 R442015 UV Quartz Sleeve (Optional)
3 R442004 Fountain Kit Complete 16 R442016 Gasket for UV Quartz Sleeve (Optional)
4 R442005 Diverter Valve 17 R442017 “O” Ring for internal UV Housing (Optional)
5 R442006 Leveling Fitting for Fountain Kit 18 R442018 1" MPT x 90 Degree Insert Fitting
6 R270484 1" MPT x Close Threaded Nipple 19 R442019 UV Light Cover with Nut (Optional)
7 R442007 Single Layer Locking Assembly 20 R442020 Rubber Cord Grommet
8 R442008 Double Layer Locking Assembly 21 R442021 Rubber Solid Grommet
9 R442009 Triple Layer Locking Assembly 22 R442022 Pump to UV Chamber Adapter with “O” Ring
10 R442010 Biological Media Bag 23 R442023 Pump Replacement Base
11 R442011 UV Chamber 24 R442024 Quiet One -2200 Pump (Optional)
12 R442012 UV Chamber Screws 24 R442025 Quiet One -3000 Pump (Optional)
13 R442013 13 Watt UV Bulb (Optional) 24 R442026 Quiet One -4000 Pump (Optional)
The UNO, DUO, TRIO filter comes out of the box ‘Ready to Install’. Attach the Elbow (Item # 18) to the top of the Layer Locking
Assembly (Item # 7, 8 or 9) Insert one end of the hose into the Elbow and the other to the suction side of your submersible pump. Make
sure that the filter is fully submersed in the water and the pump hose is primed. Turn on the Pump and see your pond getting cleared of
debris.
UNO, DUO, TRIO Filter Kits Setup
Positions for Single, Double or Triple
*
All Quiet One Pumps come with 20’ Cord
LIFEGARD
UNO, DUO TRIO FILTER
R440011-UNO Filter For Up To 1000 Gallons
R440012-DUO Filter For Up To 1500 Gallons
R44
0013
-
TRIO Filter For
Up To 2000 Gallons
24
Instructional
Videos Available on our
web site:
www.lifegardaquatics.com

14
Please Read Instructions before Installing
The advanced features of this UNO, DUO, TRIO filter system allows efficient operation and if installed according to instructions, will
keep the water in your pond or water garden crystal clear.
The UNO, DUO, TRIO FILTER SYSTEM is a compact filter for ponds and water gardens, easy to install and designed for easy
maintenance. Besides offering 2 different fountain spray patterns, it performs three different filtering functions:
1. Multi Layer MECHANICAL Filtration to remove solids.
2. BIOLOGICAL plus Filtration to promote beneficial bacteria growth.
3. (OPTIONAL) QUIET ONE PUMP for optimal performance and compact setup: Quiet One -2200 for UNO (594 GPH), Quiet One -
3000 for DUO (758 GPH) and Quiet One -4000 for TRIO (1022 GPH)
4. (OPTIONAL) ULTRAVIOLET STERILIZER puts out 13 Watts of intense light to kill free floating algae. The ultraviolet sterilizer has a
separate plug so that you can operate it only when needed.
Maintenance and Setup:
NOTE: THE INSTRUCTIONS/IMAGES BELOW SHOW THE OPTIONAL UV STERILIZER RECOMMENDED FOR THE FILTER. If you
don’t have a UV Sterilizer just disregard the instructions on UV.
Step – 1: Remove the Layer Locking Assembly (Item # 7,8 or 9) that is holding down the Housing Cover Top. Take off the layer (Item #
1) by gently sliding the locking Notches (see Fig – 1)
Step – 2 Inspection and Replacement of parts: Inspect the Pump Replacement Base (Item # 23). it should be locked in place (see Fig –
2E). The Biological Media bag (Item # 10) should be opposite to the pump suction (see Fig – 2B). Note that the Pump Replacement
Base slides forward to unlock and slides back to lock. If it is not slid all the way back to the Pump Base Wall as see in Fig – 3E - it not
lock into the UV Chamber.
Locking Notches
Notch Holder
Fig
–
1

15
Step – 3 Removal of Optional UV Chamber Housing (Item # 11) and Pump Replacement Base (Item # 23). After removing the layers
you will see the Biological Media Bag (Item # 10), UV Chamber Housing (Item # 11) and Pump Replacement Base (Item # 23). Take
out the Biological Media Bag (Item # 10). Gently push the UV Chamber Housing (Item # 11) off of the Pump to UV Chamber Adapter
(Item # 22) as seen in Fig – 3. Than slide it off of the UV Housing Chamber holder on the base (Fig – 3A).
Now push out the Pump Replacement Base (Item # 23). It should slide along the guides. You may need to use some force to unhinge it
off of the Pump Lock Notch as seen in Fig – 3.
To Install the UV Chamber (Item # 11) first slide it into the UV Chamber opening as see in Fig. 4A and then gently push it into the Pump
to UV Chamber Adapter (Item # 22). The O-Ring on the Pump to UV Chamber Adapter (Item # 22) should be properly inserted into the
UV Chamber Housing (Item # 11). Once both parts – Pump Replacement Base and UV Chamber are locked in place correctly the
screw openings on the UV Chamber will align and you can lock it with Screws (See Fig – 4B). The Biological Media bag (Item # 10)
should be by the UV Chamber Opening opposite the Pump Replacement Base (see Fig – 4C).
Step – 2: Once all the parts are inspected for correct positioning make sure that the Solid Rubber Cord Grommet (Item # 21) is correctly
locked in its slot (see Fig – 2C).
Rubber Cord Grommet
Fig
–
4A
Fig
–
4B
Fig
–
4
Fig
–
3
Fig
–
3A
UV Housing Chamber holder
Fig
–
4C
Fig
–
3C
Pump Base Wall
Pump Lock Notch
Correct Installation – No Gap
Fig
–
3D
Fig
–
3E
Fig
–
3
Fig
–
3A
Fig
–
3B

16
Step – 3: Correctly place the layer (Item # 1) back on the base by sliding the Locking notches into the Notch Holders see Fig – 5 and
5A. Similarly place the Housing Cover Top and make sure to align the notches for correct assembly as seen in Fig – 5B. Lock the Layer
and Top Cover with the Locking Assembly (Item # 7,8 or 9) as seen in Fig – 5C. Now you are ready to put the 1" MPT x 90 Degree
Elbow (Item #18) on the Locking Nut.
Step – 4: Place the UV Light Solid Cover. Align the two notched and slide in the cover. Lock it in place using the nut. See Fig – 5A, 5B
and 5C
R440028 13 WATT UV STERILIZER KIT
Upgrade your Uno, Duo, Trio Filters with a 13 Watt UV to control Algae and Disease Control. Complete easy-to-install unit shipped
direct from factory.
To Add a UV Sterilize, a Pump or for any replacement parts – Please call the manufacturer at:
Lifegard Aquatics
16301 Carmenita Road
Cerritos, CA 90703
Tel (562)404-4129
Fax (562)404-4159
Email: info@lifegardaquatics.com Web Site: www.lifegardaquatics.com
Item Part No. Description
11 R442011 UV Chamber
12 R442012 UV Chamber Screws
13 R442013 13 Watt UV Bulb
14 R442014 13 Watt UV Ballast Assembly
15 R442015 UV Quartz Sleeve
16 R442016 Gasket for UV Quartz Sleeve
17 R442017 “O” Ring for Internal UV Housing
19 R442019 UV Light Cover with Nut
Fig
–
5
Fig
–
5A
Fig
–
5B
Fig
–
5C
Fig
–
5A
Fig
–
5B
Fig
–
5C

17
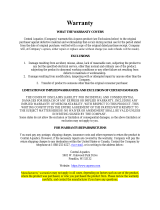
WARRANTY: Lifegard Aquatics warrants the original purchaser of the product against defective material and workmanship under
normal use, for a period of 1 year from the date of purchase. Replacement liability in all events is limited to the replacing or repairing at
Lifegard Aquatics sole discretion of any part or parts, which are defective in material or workmanship. Proof of purchase is required on
all claims in the form of invoice copy, sales ticket, etc.
APPLICATION: Warranty covers only properly installed and maintained units.
INSTALLATION and/or REMOVAL CHARGES: Warranty does not cover any costs associated with the installation or removal of
products subject to warranty claims.
DISPOSITION: Lifegard will make a good-faith effort for prompt disposition regarding any item in warranty, which proves to be
defective. If products were damaged in transit, please file a claim with the carrier.
DISCLAIMER: Lifegard Aquatics will not be liable for any labor cost of removing or replacing component parts. This shall be the
responsibility of the original purchaser, as will be the shipping charge to Lifegard Aquatics facility. Any oral statements about the
product made by the seller, the manufacturer, the representatives or any other parties, do not constitute warranties, should not be relied
upon by the user, and are not part of the contract for sale. Seller's and manufacturer's only obligation and buyer's and user's only
remedy, shall be for the manufacturer to either replace and/or repair at the manufacturer's sole discretion the Lifegard product as
described above. Neither seller nor the manufacturer shall be liable for any injury, loss or damage, direct, incidental or consequential
(including, but not limited to, incidental or consequential damages for lost profits, lost sales, injury to person or property, or any other
incidental or consequential loss), arising from any cause whatsoever, no matter whether based upon warranty, contract, negligence or
other misuse, and the buyer and user agree that no other remedy shall be available to them. Damage or failure of any part of a unit
covered by this warranty, which results from causes directly, or indirectly connected with the installation, operation, environment, use or
willful abuse, including without limitations, improper repackaging and damage incurred in shipping is not covered by this warranty.
Unless state law provides otherwise, the manufacturer will only be responsible for repair or replacement of any of its products or parts
that are found to be defective, and will not bear any cost of any incidental or consequential damages arising out of the occurrence of
such defect. Before using, the buyer and user shall determine the suitability of the product for the intended use, and assumes all risk
and liability whatsoever in connection herewith. The warranty and remedy described in this limited warranty is an EXCLUSIVE warranty
and remedy. IN LIEU of any other warranty or remedy, expressed or implied, which other warranties and remedies are hereby
expressly EXCLUDED, including but not limited to any implied warranty of MERCHANTABILITY OR FITNESS FOR A PARTICULAR
PURPOSE. This Warranty gives buyer and user specific legal rights, and buyer and user may also have other rights that vary from state
to state. Some states do not allow the exclusion or limitations of incidental or consequential damages, so the above limitation or
exclusion may not apply to you.
Warranty period starts from date of purchase and must be validated with copy of original purchase receipt.
Warranty requests by phone will not be honored.
Warranty items returned without copy of original purchase receipt will not be honored.
Products purchased from eBay, craigslist, etc cannot be honored for warranty unless returned through original purchaser with proof
of purchase.
All items must first be returned to Lifegard Aquatics for inspection, evaluation, and processing to determine if product qualifies for
warranty replacement or repair. No warranty (repair, replacement, or credit) will be issued prior to inspection of product. Please
contact us first for warranty assistance. Many times the product can be repaired without the cost and time involved in
sending it back to us. If absolutely necessary, return product freight prepaid to the following address for warranty evaluation and
processing.
Lifegard Aquatics
16301 Carmenita Road
Cerritos, CA 90703
Tel (562)404-4129
Fax (562)404-4159
Email: info@lifegardaquatics.com
Web Site: www.lifegardaquatics.com
3 year warranty from date of purchase on Quiet One Pump Motors Only.
60 day warranty from date of purchase on Shafts and Impellers for All Types of Pumps.
60 day warranty from date of purchase on all Ultraviolet Bulbs.
1 year warranty from date of purchase on All
WARNING - Risk of electric shock. To reduce the risk of electric shock, be certain that it is connected only to a properly grounded,
grounding - type receptacle.
/