LG LDF900UR User guide

Category
Car video systems
Type
User guide

LG LDF900UR is a versatile CAR DVD Receiver that offers a wide range of features for your in-car entertainment needs. With its ability to play DVDs, Audio CDs, and various file formats from USB devices, you can enjoy your favorite media on the go. It also includes a built-in FM/AM radio tuner for listening to your preferred radio stations.

LG LDF900UR is a versatile CAR DVD Receiver that offers a wide range of features for your in-car entertainment needs. With its ability to play DVDs, Audio CDs, and various file formats from USB devices, you can enjoy your favorite media on the go. It also includes a built-in FM/AM radio tuner for listening to your preferred radio stations.

OWNER’S MANUAL
CAR DVD Receiver
Please read this manual carefully before operating
your set and retain it for future reference.
MODEL
LDF900UR
P/NO : MFL63284949
ENGLISH DEUTSCH
FRANÇAIS
ESPAÑOL ITALIANO
NEDERLANDS SLOVENŠČINA
2 Safety Information
Safety Information
1
CAUTION
RISK OF ELECTRIC SHOCK
DO NOT OPEN
CAUTION: TO REDUCE THE RISK OF ELECTRIC
SHOCK DO NOT REMOVE COVER (OR BACK) NO
USER-SERVICEABLE PARTS INSIDE REFER SERVICING
TO QUALIFIED SERVICE PERSONNEL.
This lightning  ash with arrowhead
symbol within an equilateral
triangle is intended to alert the
user to the presence of uninsulated
dangerous voltage within the
product’s enclosure that may be of
su cient magnitude to constitute
a risk of electric shock to persons.
The exclamation point within an
equilateral triangle is intended
to alert the user to the presence
of important operating and
maintenance (servicing)
instructions in the literature
accompanying the product.
Always operate the vehicle in a safe
manner. Do not become distracted by
the vehicle while driving, and always
be fully aware of all driving condition.
Do not change settings, or any functions. Pull over
in a safe and legal manner before attempting such
operations.
Do not use for many hours at
extremely low or high temperature.
(-10 °C to 60 °C)
To reduce the risk of electric shock, do
not remove the cover or back of this
product. There are no user-serviceable
parts inside. Refer servicing to quali ed
service personnel.
To reduce the risk of  re or electric
shock, do not expose this product to
dripping or splashing water, rain, or
moisture.
The temperature of unit’s outside can
be extremely high, please use the unit
after proper installation in your vehicle.
This unit cannot play 8cm disc (use
12cm disc only).
While driving, keep the sound volume
at a proper level.
Do not drop it and avoid heavy
impacts at anytime.
The driver must not watch the monitor
while driving. If the driver watches the
monitor while driving, it may lead to
carelessness and cause an accident.
This unit is for vehicles with a 12-
volt battery and negative grounding.
Before installing it in a recreational
vehicle, lorry or bus, check the battery
voltage. To avoid shorts in the electrical system,
be sure to disconnect the E battery cable before
beginning the installation.
1
Safety Information
8 cm
Safety Information
3Safety Information
1
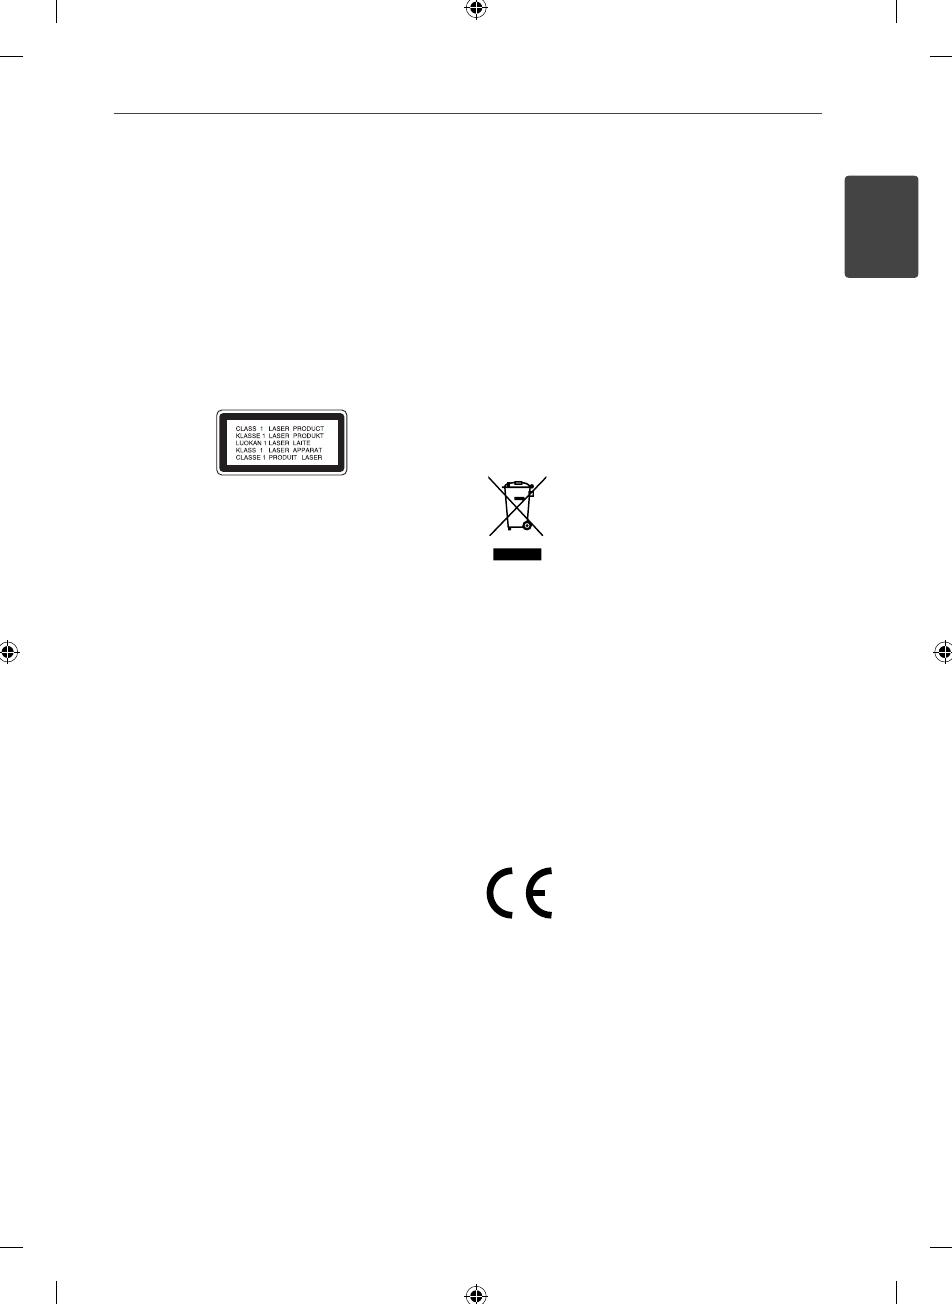
CAUTION: This product employs a Laser System.
To ensure proper use of this product, please read
this owners manual carefully and retain it for future
reference. Shall the unit require maintenance,
contact an authorized service centre.
Use of controls, adjustments or the performance of
procedures other than those speci ed herein may
result in hazardous radiation exposure.
To prevent direct exposure to laser beam, do not try
to open the enclosure. Visible laser radiation when
open. DO NOT STARE INTO BEAM.
This device is equipped with a portable battery or
accumulator.
Safe way to remove the battery or the battery
from the equipment:
Remove the old battery or battery pack, follow the
steps in reverse order than the assembly. To prevent
contamination of the environment and bring on
possible threat to human and animal health, the
old battery or the battery put it in the appropriate
container at designated collection points. Do not
dispose of batteries or battery together with other
waste. It is recommended that you use local, free
reimbursement systems batteries and accumulators.
The battery shall not be exposed to excessive heat
such as sunshine,  re or the like.
You have to set the disc format option to [Mastered]
in order to make the discs compatible with the LG
players when formatting rewritable discs. When
setting the option to Live File System, you cannot
use it on LG players.
(Mastered/Live File System : Disc format system for
Windows Vista)
For ensuring safe driving
To avoid the risk of accident and the potential
violation of applicable laws, this unit is not for use
with a video screen that is visible to the driver.
This unit detects whether your cars parking
brake is engaged or not, and prevents you from
watching a DVD,VCD, PHOTO or movie  le on the
display connected to FRONT VIDEO OUTPUT while
driving. When you attempt to watch a DVD,VCD,
PHOTO or movie  le the screen will turn black.
When you park your car in a safe place and apply
the parking brake, the picture appears on the
screen.
Disposal of your old appliance
1. When this crossed-out wheeled bin
symbol is attached to a product it means
the product is covered by the European
Directive 2002/96/EC.
2. All electrical and electronic products
shall be disposed of separately from the
municipal waste stream via designated
collection facilities appointed by the
government or the local authorities.
3. The correct disposal of your old
appliance will help prevent potential
negative consequences for the
environment and human health.
4. For more detailed information about
disposal of your old appliance, please
contact your city o ce, waste disposal
service or the shop where you
purchased the product.
LG Electronics hereby declares that this/
these product(s) is/are in compliance
with the essential requirements and
other relevant provisions of Directive
2006/28/EC (ANNEX I , 3.2.9), 72/245/EEC,
and 2006/95/EC.
European representative :
LG Electronics Service Europe B.V.
Veluwezoom 15, 1327 AE Almere, The
Netherlands
(Tel : +31-(0)36-547-8888)
4 Contents
Contents
1
Safety Information
2 Safety Information
2
Preparation
6 Introduction
9 Front panel
10 Remote control
3
Installation
11 About detachable control panel
11 Attaching the control panel
12 Detaching the control panel
13 Basic Installation
13 Removing the existing
receiver unit
14 ISO-DIN Installation
14 Remote Control Battery Installation
15 Connection
15 Connecting to a car
16 Connecting to optional
equipment
17 Adjusting the general settings
17 The buttons for setting
MENU
17 MENU item overview
18 XDSS+/EQ
18 Sound
19 Display
19 Light
20 Setup
5Contents
1
2
3
4
5
6
7
4
Operation
21 Basic Operations
22 Other Operations
22 To display le information
22 To slow down the playing
speed
22 To play frame-by-frame
23 Quick search
23 Using the Func menu
24 Using the time search bar
24 Resume playback
25 Viewing a photo
25 Listening to the radio
26 Storing desired frequencies
manually
26 Listening to a preset station
26 Adjusting Tuner settings
27 Enjoying music or movie by
connecting an external device
27 Preventing radical changes
in volume as switching
sources
28
Recording to USB from Disc or FM
tuner
5
Maintenance
29 Notes on Discs
29 Handling the Unit
6
Troubleshooting
30 Troubleshooting
7
Appendix
31 Area Code List
32 Specifi cations
33 Trademarks and Licences
6 Preparation
Preparation
2
2
Preparation
Introduction
About the
Symbol Display
may appear on your monitor display
during operation and indicates that the
function explained in this owners manual is
not available on that disc.
Symbol Used in this Manual
DVD
DVD-Video, DVD±R/RW in
Video mode or VR mode
and  nalized
ACD
Audio CDs
MOVIE
Video  les
MUSIC
Audio  les
PHOTO
Photo  les
Reseting the unit
You can reset the unit when it does not
operate properly.
1. Press
to open the control panel.
Refer to the page 12 for detaching the
control panel.
2. Prick the reset hole with a sharp object.
7Preparation
2
Preparation
Playable USB device
Requirement
Do not extract the USB device during
operation (play, etc.).
An USB device which requires additional
programme installation when you
have connected it to a computer, is not
supported.
USB device: USB device that support USB
1.1 and USB 2.0 Full Speed.
Movie, music and photo  les can be played.
For details of operations on each  le, refer
to relevant pages.
Regular back up is recommended to
prevent data loss.
If you use a USB extension cable, USB HUB,
USB Multi-reader, or external HDD, the USB
device may not be recognized.
When you connect a partitioned USB
device into the unit, only the  rst partition
is recognized on it.
Some USB device may not work with this
unit.
Digital camera and mobile phone are not
supported.
USB Port of the unit cannot be connected
to PC. The unit cannot be used as a storage
device.
File compatibility
Audio fi les
Sampling frequency : within 8 kHz to 48 kHz
(MP3), below 48 kHz (WMA)
Bit rate : within 8 kbps to 320 kbps (MP3),
below 320 kbps (WMA)
File extensions: .mp3”, .wma, “.wav, “.ogg”,
.aac(less than 16 kHz)”
Maximum  les : Under 3000.
CD-ROM  le format : ISO9660/ JOLIET.
We recommend that you use Easy-CD
Creator, which creates an ISO 9660  le
system.
Photo fi les
Max pixel in width : 4000 x 4000 pixel.
Maximum  les : Under 3000.
Some discs may not operate due to a
di erent recording format or the condition
of disc.
File extensions: “.jpg”, “.jpeg, “.png”, “.gif, “.ti,
.bmp
CD-ROM  le format : ISO9660/ JOLIET.
Video fi les
Available resolution size: 720 x 576 (W x H)
pixels
Frame rate: 30 FPS
Playable codec format: “MPEG1”, “MPEG2”,
“MPEG4”, “MP4V3S”, “3IVX” “MSVC, “3IV0”,
“3IV1”, “3IV2”.
This player supports only 1 warp point of Global
Motion Compensation (GMC).
8 Preparation
Preparation
2
Playable Discs
DVD-VIDEO (12 cm disc)
Discs such as movies that can be
purchased or rented.
DVD-R (12 cm disc)
DVD-RW (12 cm disc)
DVD+R
(12 cm disc)
.
Supports the double layer disc
also.
DVD+RW (12 cm disc)
Audio CD: Music CDs or CD-R/CD-
RW in music CD format that can
be purchased.
Some DVD±RW/DVD±R or CD-RW/CD-R cannot
be played on this unit due to the recording
quality or physical condition of the disc, or the
characteristics of the recording device and
authoring software.
Regional Codes
This unit has a regional code printed on the top
of the unit. This unit can play only DVD discs
labeled same as the top of the unit or ALL.
Copyrights
It is forbidden by law to copy, broadcast, show,
broadcast via cable, play in public, or rent copyrighted
material without permission. This product features the
copy protection function developed by Rovi. Copy
protection signals are recorded on some discs. When
recording and playing the pictures of these discs
picture noise will appear. This product incorporates
copyright protection technology that is protected
by U.S. patents and other intellectual property
rights. Use of this copyright protection technology
must be authorized by Rovi, and is intended for
home and other limited viewing uses only unless
otherwise authorized by Rovi. Reverse engineering or
disassembly is prohibited.
CONSUMERS SHOULD NOTE THAT NOT ALL HIGH
DEFINITION TELEVISION SETS ARE FULLY COMPATIBLE
WITH THIS PRODUCT AND MAY CAUSE ARTIFACTS
TO BE DISPLAYED IN THE PICTURE. IN CASE OF 525
OR 625 PROGRESSIVE SCAN PICTURE PROBLEMS,
IT IS RECOMMENDED THAT THE USER SWITCH THE
CONNECTION TO THE ‘STANDARD DEFINITION’
OUTPUT. IF THERE ARE QUESTIONS REGARDING
OUR TV SET COMPATIBILITY WITH THIS MODEL 525p
AND 625p UNIT, PLEASE CONTACT OUR CUSTOMER
SERVICE CENTER.
The making of unauthorized copies of
copy-protected material, including computer
programmes,  les, broadcasts and sound
recordings, may be an infringement of copyrights
and constitute a criminal o ense.
This equipment should not be used
for such purposes.
Be responsible
Respect copyrights
9Preparation
2
Preparation
a
SRC/ • OFF
When pressed, selects function sources.
When pressed and held, powers unit on or
o .
b
Returns to the previous step.
c
Volume knob
• Adjusts volume level.
• Con rms the settings.
• Checks tracks or  les.
d
NX
Plays and pauses playback.
e
REC Recording to USB
f
BAND/• TA
Selects a band in Tuner mode.
Selects a category menu during playback of
a disc or USB containing with music, movie,
and photo  les together.
Searches stations that have TA/TP
information, when it is pressed and held.
g
Display window
h
Opens the front panel.
i
USB port
j
Displays  le or disc information.
k
MENU
Activates or deactivates a setting menu.
l
b[
-/+
[B
Skip / Search / Seek / Tune
m
Remote Sensor
n
AUX
If connected to other portable player, you
can enjoy music or movie on the unit.
NOTE
For video playback from an external device, you
should connect it with a 3.5 mm (4-pole) jack as
below.
a
Audio L
b
Audio R
c
GND
d
Video
Front panel
10 Preparation
Preparation
2
• • • • • • • • • a • • • • • • • •
OFF: Powers o the unit.
SRC: Selects function sources.
MUTE: Temporarily stops the sound.
BAND/• TA :
Selects a band in Tuner mode.
Selects a category menu during playback of
a disc or USB containing with music, movie,
and photo  les together.
Searches stations that have TA/TP
information, when it is pressed and held.
• • • • • • • • • b • • • • • • • • •
m
/
M
SCAN: Searches backward or
forward.
.
/
>
SKIP: Goes to the next or previous
chapter / track /  le.
X
: Pauses playback.
N
: Starts playback or recording.
x
: Stops playback.
• • • • • • • • • c • • • • • • • • •
MENU: Activates or deactivates setting menu.
RETURN: Returns to the previous step.
Direction buttons: Selects an option in the
menu.
LIST/ ENTER :
Checks tracks or  les in Disc mode or preset
stations in Tuner mode.
Con rms the settings.
DISPLAY: Displays or exits On-Screen Display.
DISC MENU/TITLE:
When pressed, it accesses menus on a disc.
When pressed and held, it displays the DVD
title menu, if available.
• • • • • • • • • d • • • • • • • •
Numeric buttons (1 - 6)
Selects a numbered preset station in Tuner or a
chapter when a DVD disc is inserted.
VOL. +/- :
Adjusts volume level.
REPEAT : Repeat playback
SHUFFLE : Random playback
INTRO: Intro scan
AUDIO: Selects audio language or channel.
SUBTITLE: Selects a desired subtitle language.
ANGLE
:
Selects a DVD camera angle if
available.
Remote control
11Installation
3
Installation
About detachable
control panel
You should attach the control panel after
unpacking the box to use the receiver unit.
And you can detach it according to your needs
and keep it in the protective case.
Attaching the control panel
1. Attach part
A
of the control panel to part
B
of the unit.
2. Attach part
C
of the control panel to part
D
of the unit while pushing the control
panel to left.
3. Close the control panel.
Attaching the control panel
A
B
C
D
CAUTION
The control buttons may not work properly if
the control panel is not attached properly. If this
occurs, gently press the display.
Do not leave the control panel in any area
exposed to high temperatures or direct sunlight.
Do not drop the control panel or otherwise
subject it to strong impact.
Do not allow such volatile agents as benzine,
thinner, or insecticides to come into contact
with the surface of the control panel.
3
Installation
12 Installation
Installation
3
Detaching the control panel
1. Press to open the control panel.
2. Push the control panel to left.
3. Pull the control panel out of the unit.
4. Put the detached control panel into the
protective case.
NOTE
Periodically wipe the contacts on the back of the
control panel with a cotton swap moistened with
alcohol. For safety, turn o the ignition before
cleaning, and remove the key from the ignition
switch.
13Installation
3
Installation
Basic Installation
Basic Installation
Before installing, make sure that the ignition-
switch is set to OFF and remove the terminal of
the car battery to avoid short-circuiting.
Basic Installation
1. Remove the existing receiver unit.
2. Make the necessary connections.
3. Install the installation sleeve.
4. Install the unit into the installation sleeve.
Removing the existing receiver
unit
If there is already an installation sleeve for
the receiver unit in the dashboard, it must be
removed.
Removing the existing receiver unit
1. Remove the rear support from the unit.
2. Remove the control panel and trim ring
from the unit.
3. Insert the lever into the hole on one side
of the unit. Perform the same operation on
the other side and pull the unit out from
the mounting sleeve.
Bend the
claws
according to
the thickness
of the
dashboard.
14 Installation
Installation
3
ISO-DIN Installation
5
4
3
1
2
1. Slide the unit into the ISO-DIN frame.
2. Fit screws removed from the old unit.
3. Slide the unit and frame into the dash
opening.
4. Install the dash panel or adapter plate.
(According to models, this step may not be
needed.)
5. Install the control panel to the unit.
Remote Control
Battery Installation
1. Pull out the battery holder with a sharp
product like a ball point pen.
2. Put the battery with
and correctly on
the battery holder.
3. Push the battery holder back into its original
position.
NOTE
Use only one CR2025 (3 V) lithium battery.
Remove the battery if the remote control is not
used for a long period of time.
Do not leave the product in a hot or humid
place.
Do not handle the battery with metallic tools.
Do not store the battery with metallic materials.
15Installation
3
Installation
Connection
Connecting to a car
Before installing, make sure that the ignition-switch is set to OFF and remove the terminal of the
car battery to avoid short-circuiting.
Connection 1
A
8
Hand Brake (Sky blue)
A
7
Phone Mute (Orange)
A
6
Remote On (Blue/White)
A
5
Ground(-) (Black)
A
4
To Battery (+) (Yellow)
A
3
To Ignition (Red)
A
2
Dimmer (Pink)
A
1
Power Antenna (Blue)
Power
Antenna
Control Relay
B
1
Violet/ Black Stripe: Rear Right -
B
2
Violet: Rear Right +
B
3
Gray/ Black Stripe: Front Right -
B
4
Gray: Front Right +
B
5
Green/ Black Stripe: Rear Left -
B
6
Green: Rear Left +
B
7
White/ Black Stripe: Front Left -
B
8
White: Front Left +
16 Installation
Installation
3
Connecting to optional equipment
You can connect optional equipment to the corresponding terminals of the unit.
Connection 2
Auxiliary devices
(Car TV, monitor, etc.)
Rear view camara
Ampli er (Optional)
Rear signal from rear view camera
Wired remote input (Optional)
No. Terminal Position
1 Video IN Rear view cameras
2 Audio out Rear left speaker or
Subwoofer left (Optional)
3 Audio out Rear right speaker or
Subwoofer right (Optional)
4 Video out Auxiliary devices (Car TV, monitor, etc.)
5 Audio out Front left speaker
6 Audio out Front right speaker
7 Wired remote input Hard-wired control adapter (Not supplied)
8 Rear signal from rear
view camera
Rear view camera
17Installation
3
Installation
Adjusting the general
settings
You can change the settings of the unit by
pressing MENU.
The buttons for setting MENU
Main
unit
Remote
control
Operation
Press
MENU
MENU
Activates or deactivates
a setting menu.
Rotate
volume
knob
U/u
I/i
Moves to other menu
items.
Adjusts the setting
level.
Press
volume
knob
LIST/
ENTER
Con rms the selected
menu or the set level.
Selects or sets the
menu option, only
when just 3 menu
options exist.
RETURN
When it is pressed,
you can move to the
previous step.
When it is pressed and
held, you can return
to the playback status.
MENU item overview
XDSS+
/EQ
OFF
XDSS+
Pop
Classic
Rock
Jazz
Vocal
Salsa
Samba
Reggae
Russy
User EQ 1
User EQ 2
Sound
Balance/Fader
Subwoofer
User EQ 1/2
Auto-EQ
DRC
Display
Language
TV Aspect
B.L.E
Album Art
TV System
Code Page
Light
Brightness
Contrast
Setup
DVD Audio Lang
DVD Subtitle Lang
DVD Menu Lang
Lock
REC Bit Rate
Beep
Clock
18 Installation
Installation
3
XDSS+/EQ
The function helps you to enjoy sound more
plentifully. The indicator lights up in the
following order.
OFF
t
XDSS+
t
Pop
t
Classic
t
Rock
t
Jazz
t
Vocal
t
Salsa
t
Samba
t
Reggae
t
Russy
t
User EQ 1
t
User EQ 2
t
..
Sound
Balance/ Fader
You can adjust left/right/ front/rear speaker
output.
1.
Press MENU.
2.
Select
[
Sound] and press the volume knob
(LIST/ENTER on the remote control).
3.
Select
[
Balance/Fader] and press the
volume knob (LIST/ENTER on the remote
control).
4.
Adjust the balance (left/ right speaker) level
by using the volume knob (
U
or
u
on the
remote control).
And press the volume knob (LIST/ENTER
on the remote control).
5. Adjust the fader (front/ rear speaker) level
by using the volume knob (
U
or
u
on the
remote control).
And press the volume knob (LIST/ENTER
on the remote control).
Subwoofer
Subwoofer level
Adjusts the subwoofer output.
Subwoofer Frequency
Adjusts the subwoofer frequency .
User EQ 1/2
You can adjust Bass, Middle, or Treble levels
by rotating the volume knob on the unit or
pressing
I
or
i
on the remote control.
Auto-EQ
It realizes the sound equalizer that is the most
similar to the genre of which is included in the
ID3 tag of song  les. Auto-EQ operates only
in the music  le supported with genre in the
device.
DRC(Dynamic Range Control)
Makes the sound clear when the volume is
turned down (Dolby Digital only). Set to [ON]
for this e ect.
19Installation
3
Installation
Display
Language
Selects a language for the Setup menu and
on- screen display.
TV Aspect
Select a TV aspect ratio option according to
your monitor type.
[16:9]
Select when a 16:9 wide monitor is
connected. The 4:3 picture is adjusted
horizontally (in a linear proportion) to  ll
the entire screen.
[4:3 Letter Box]
Select when a standard 4:3 monitor is
connected. Displays theatrical images with
masking bars above and below the picture.
[4:3 Pan Scan]
Select when a standard 4:3 monitor is
connected. Displays pictures cropped to
ll your monitor screen. Both sides of the
picture are cut o .
B.L.E (Black Level Enhancement)
Enhances the black level only when you set
your monitor to NTSC.
Album Art
When listening to music  les, you can select
the display view by pressing DISPLAY. Then,
if you set Album Art view, you can adjust the
view to your reference.
[Text]
Displays only the texts of ID3 tag or CD text.
[Thumbnail]
Displays both texts and album art images of
ID3 tag.
[Full Screen]
Displays both title texts and album art
images of ID3 tag in full screen.
TV System
You should select an appropriate system mode
for your monitor system among NTSC, PAL, or
Auto.
Code Page
If the CD TEXT, ID3 TAG, or movie  les subtitle
is not displayed properly, you can change the
code page to view it properly.
1. Select an appropriate code page by using
the volume knob (
U
or
u
on the remote
control).
2. Press the volume knob (LIST/ENTER on the
remote control) repeatedly until the text is
displayed properly and then press it.
Light
Brightness
Adjusts the brightness level of the display
window for Daylight or Nighttime.
Contrast
Adjusts the contrast level of the display
window for Daylight or Nighttime.
NOTE
According to the dimmer status of a car, the unit
recognizes Daylight or Nighttime.
20 Installation
Installation
3
Setup
DVD Audio / DVD Subtitle / DVD
Menu Language
Select the language you prefer for the audio
track (disc audio), subtitles, and the disc menu
during DVD playback.
Original
Refers to the original language in which the
disc was recorded.
Lock
Password
You can change password. When you use
the unit  rst, input the default password of
0000.
1. Input a current password and press the
volume knob (LIST/ENTER on the remote
control).
2. Input a new password and press the
volume knob (LIST/ENTER on the remote
control).
3. Enter the password again and press the
volume knob (LIST/ENTER on the remote
control) to verify.
Area Code
Enter the code of the area whose standards
were used to rate the DVD video disc, based
on the list on page 31.
Rating
Blocks playback of rated DVD based on their
content. (Not all discs are rated.)
[Rating 1-8]
Rating one (1) has the most restrictions and
rating eight (8) is the least restrictive.
REC Bit Rate
You can set the quality of the recorded  le
among 96 Kbps, 128 Kbps, or 192 Kbps.
Beep
2nd
The beep is generated when a key is pressed
for longer than 2 seconds.
All
The beep is generated when any key is
pressed.
OFF
The beep is deactivated.
Clock
Only when you set CT to OFF on the Func
menu of Tuner mode, you can adjust it.
Time format
You can adjust the time system between 12
Hours and 24 Hours systems.
Clock Setting
Set the hour and then the minute by using
the volume knob (
U
or
u
on the remote
control). After setting each one, press the
volume knob (
U
or
u
on the remote control)
to con rm it.
NOTE
If you set the Time Format to 12 Hours , you should
set one between AM and PM  rst.
1 / 1

LG LDF900UR User guide

Category
Car video systems
Type
User guide

LG LDF900UR is a versatile CAR DVD Receiver that offers a wide range of features for your in-car entertainment needs. With its ability to play DVDs, Audio CDs, and various file formats from USB devices, you can enjoy your favorite media on the go. It also includes a built-in FM/AM radio tuner for listening to your preferred radio stations.

Ask a question and I''ll find the answer in the document

Finding information in a document is now easier with AI

Ask the document