Page is loading ...

Professional Series Mid-Tower Case
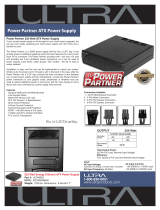
ATX8300PRO
ATX8300PROBK
Instruction Guide
The Professionals’ Source For Hard-to-Find Computer Parts
Tower Case
Revised: August 20, 2002

Technical Support
The following technical resources are available for this StarTech.com product:
On-line help:
We are constantly adding new information to the Tech Support section of our web site. To
access this page, click the Tech support link on our homepage, www.startech.com. In the
tech support section there are a number of options that can provide assistance with this
card.
Knowledge Base - This tool allows you to search for answers to common issues using
key words that describe the product and your issue.
FAQ - This tool provides quick answers to the top questions asked by our customers.
Downloads - This selection takes you to our driver download page where you can
findthe latest drivers for this product.
Call StarTech.com tech support for help: 1-519-455-4931
Support hours: Monday to Friday 9:00AM to 5:00PM EST (except holidays)
Warranty Information
This product is backed by a two-year warranty. In addition StarTech.com warrants its
products against defects in materials and workmanship for the periods noted below,
following the initial date of purchase. During this period, the products may be
returned for repair, or replacement with equivalent products at our discretion. The
warranty covers parts and labor costs only. StarTech.com does not warrant its products
from defects or damages arising from misuse, abuse, alteration, or normal wear and
tear.
Limitation of Liability
In no event shall the liability to StarTech.com Ltd. (or its officers, directors, employees or
agents) for any damages (whether direct or indirect, special, punitive incidental,
consequential, or otherwise), loss of profits, loss of business, or any pecuniary loss,
arising out of related to the use of the product exceed the actual price paid for
the product.
Some states do not allow the exclusion or limitation of incidental or consequential
damages. If such laws apply, the limitations or exclusions contained in this statement
may not apply to you.
9

Table of Contents
Introduction . . . . . . . . . . . . . . . . . . . . . . . . . . . . . . . . . . . . . . . . . . . . . . . . . . . . . . . . 2
Assembling Your Computer . . . . . . . . . . . . . . . . . . . . . . . . . . . . . . . . . . . . . . . . . . 3
Enhancing Your Tower Case . . . . . . . . . . . . . . . . . . . . . . . . . . . . . . . . . . . . . . . . . . 7
Technical Support . . . . . . . . . . . . . . . . . . . . . . . . . . . . . . . . . . . . . . . . . . . . . . . . . . . 9
Warranty Information . . . . . . . . . . . . . . . . . . . . . . . . . . . . . . . . . . . . . . . . . . . . . . . 9
1
Installing the Side Fan
This 8 cm side-panel cooling fan (StarTech.com ID: 8300SIDEFAN) is positioned directly
over your system’s CPU so that the cooling air flow goes where it is needed most. The
plastic swing arm allows you to move the fan out of the way when you need to work on
system components.
1. With your system turned off, unplugged, and on its right side, remove the side panel.
2. Align the fan in between the power supply and the input/output panel near the top
of the case with the fan’s filter facing upwards.
3. Make sure that the three screw holes in the fan line up with the three screw holes on
the case, and screw the fan to the case.
4. Attach the fan cables to your motherboard according to the motherboard
manufacturer’s instructions.
8
Dimensions 18.5 (l) x 7.5 (w) x 16.5 (h) in.
Weight 17.25 lbs.
Power Supply 300 Watt 12V ATX
Power Supply Connectors 5 x 4-pin LP4 female
2 x small internal power
1 x 20-pin ATX motherboard adapter
1 x 4-pin extended ATX power 12V
1 x Aux plug for Pentium 4
Power Supply Certification CSA, UL, FCC, CE, TUV
Motherboards Accepted 12.0 x 9.6 in. Standard ATX (including P4)
Expansion slots Seven
Bays Four external 5.25”
Two external 3.5”
Two internal 3.5”
Product Specifications

Introduction
Thank you for purchasing a StarTech.com professional series mid-tower computer case.
The convenient screwless design allows you to build and update your computer system
with ease. With a total of four 5.25” and four 3.5” drive bays, there is ample room to
expand and customize your system to suit your needs. This case includes a reliable
StarTech.com 300 Watt Pentium 4-compliant ATX 12V power supply and front-mounted
USB, FireWire, and audio ports for ultimate convenience and useability.
Features
• Allows easy access for building and upgrading your PC through screwless design
• Provides four external 5.25” drive bays, two external 3.5” drive bays, and two
internal 3.5” drive bays to allow for system customization
• Includes reliable StarTech.com 300 Watt 12V ATX power supply
• Provides front USB, FireWire, and audio ports for maximum ease of use
• Comes with built-in case fan and large front-panel vents to ensure peak performance
and stable operation
• Backed by StarTech.com’s two-year warranty
Before You Begin
To ensure a quick and easy case assembly, please read through this section carefully
before attempting to assemble your computer.
WARNING: Do not attempt to install any computer components with the system
plugged in. Never open your computer case when your system is turned on. Always
make sure that the computer is off and unplugged before attempting to assemble or
alter your computer. Computer equipment can also be severely damaged by static
electricity. Be sure that you are properly grounded before opening your computer case or
touching any components. StarTech.com recommends that you wear an anti-static strap
when installing any computer equipment. If an anti-static strap is unavailable, discharge
yourself of any static electricity build-up by touching a large grounded metal surface
(such as the computer case) for several seconds. Also be careful to handle cards and
motherboards by their edges and not the gold connectors.
2
Enhancing Your Tower Case
You can increase the performance and security of your StarTech.com ATX83000PRO or
ATX8300PROBK with additional products from StarTech.com. Visit our website and
search for “8300” for more details and purchasing information.
Installing a Hard Drive Shock Absorber Kit
The hard drive shock kit (StarTech.com ID: 8300SHOCKKIT) is an excellent way to
extend the life of your hard drive. The rubber buffers reduce the system vibrations
caused by high RPM drives. This kit is also ideal for people who have to frequently
move their PCs.
NOTE: For detailed instructions on how to install a hard disk drive, see “Installing a
Hard Disk Drive” on page 5.
1. Ease the rubber buffer into the cross-shaped holes on the hard disk bracket. Make
sure that the buffer is visible on both sides of the bracket.
2. Place the metal button concave-side-up (so that it looks like a bowl) against the buffer
on the outside of the bracket.
3. Insert a screw through the button, buffer, and bracket to attach the bracket to the
hard drive. Repeat for the three other holes.
Installing an Extra 3.5” Drive Bay
With the StarTech.com 8300HDDKIT, you can add two extra 3.5” drive bays to your
system without increasing the case size.
1. Separate the bracket from the stand by lifting the black tab and sliding the bracket
away from the stand.
2. With your system turned off, unplugged, and standing upright, remove the side
panel.
3. Slide the tabs on the stand into the two slots on the bottom of the case.
4. Make sure that the holes in the stand are aligned with the holes in the bottom of the
case and use the screw to attach the stand to the case, with the head of the screws
being on the outside of the case.
5. Use the instructions on pages 4 and 5 in this manual to install your drives to the
bracket.
7

6
3
Contents
This package should contain:
• 1 x ATX8300PRO/BK professional series mid-tower computer case with 300 Watt 12V
ATX power supply and case fan
• 1 x power cord
• Assorted screws and buffers
• Snap-on logo holder
• Lock tab for locking case
Requirements
This case does not include any hard or floppy disk drives, motherboards, sound cards,
USB/FireWire cards or any other computer component not listed above. You will need to
supply these components yourself. The front USB, sound, and FireWire ports require a
host controller (not included) to operate properly
Assembling Your Computer
NOTE: This section is intended as a guide only. When installing computer components,
be sure to refer to the manufacturer’s installation documentation before attempting to
install the parts.
Removing the Cover from Your Case
1. Make sure that the case is not plugged in and that you are properly grounded.
2. Gently lay the case on its right side.
3. Simultaneously pull the two tabs upwards and slide the panel back then lift off
towards you so it is entirely removed from the case.
Closing Your Case
1. Turn the panel so that the two tabs are aligned with the back of the computer.
2. Gently slide the panel into the case until it clicks into place. Make sure that the ridge
on the back of the panel is properly aligned with the computer case. When the panel
is correctly in place, it will be flush with the rest of the case and can not be removed
without unlocking the tabs. As an optional security or protection measure, you can
secure the panel with screws, although this is not necessary step.
5. Replace the expansion slot holder by sliding the hinge at the end of the holder into
the hole at the end of the expansion slot area and pressing down firmly.
NOTE: If you are going to be moving the computer case, StarTech.com recommends
securing the expansion slot holder with a screw to prevent damage.
Using the Front FireWire and Audio Ports
1. Make sure that your computer is equipped with a FireWire card and a sound card
and that they have been installed within reach of the cables hanging from the back of
the computer.
2. Plug the FireWire cable into your FireWire card.
3. Plug the pink microphone cable into the microphone port on your system.
4. Plug the green speaker cable into the speaker port on your system.
Powering Your Computer
1. Make sure that the red voltage indicator at the back of your computer is in the proper
position (115V for North America and 230V for most European countries).
2. Plug one end of the power cord into the computer and the other into an available
wall socket.

5
4
Installing Your Motherboard
NOTE: Please refer to your motherboard manufacturer’s installation procedures to
ensure proper installation of your motherboard.
1. Open your case using the procedure described on page 3.
2. If your motherboard comes with an input/output panel (the collection of ports on the
back of your system) that is different than the panel provided by StarTech.com,
remove the StarTech.com input/output panel by firmly pressing it from the outside
until it pops free. Insert the new input/output panel according to the manufacturer’s
instructions.
3. Align the motherboard so that the slots and ports on the board line up with the
card brackets and input/output panel along the back of the computer. Make note of
and mark the raised bumps in the case that line up with holes in the motherboard.
4. Screw your motherboard to the bumps in the case making sure you have a red buffer
between the screws and the motherboard.
5. Connect the power supply to the motherboard as directed by your motherboard
manufacturer.
6. Attach the labeled LED connectors (multi-colored ribbon) to your motherboard as
directed by your motherboard manufacturer.
7. Attach the labeled and numbered USB ribbon cable (grey with pink stripe) to your
motherboard as directed by your motherboard manufacturer.
8. Attach the cables from the rear fan to your motherboard’s main fan or exhaust fan as
indicated in your motherboard manufacturer’s manual.
Installing Your Floppy and CD Drives
NOTE: Please refer to your disk drive manufacturer’s installation procedures to ensure
proper installation of the drive.
Depending on the size of your floppy disk drive, you will install it in either the 3.5” bays
located just below the hard disk drive, or the 5.25” bays located near the top of the case.
Your CD drive will be installed in one of the 5.25” drive bays.
1. Remove the front plastic bay cover of the case.
2. Beneath the plastic bay cover will be a thin plate of metal that has been perforated
around the edges. Remove this plate by working it back and forth until it completely
snaps off.
3. Make sure that the black-handled floppy latch above the corresponding drive bay is
in the “Unlocked” position.
4. Slide the disk drive into place, making sure that it is flush with the front panel of the
computer and that the screw hole on the disk drive lines up with the hole in the bay.
5. Move the black-handled floppy latch into the “Locked” position to secure the drive.
NOTE: If you are going to be moving the computer case, StarTech.com recommends
securing the disk drive with a screw to prevent damage.
6. Connect your disk drive to your motherboard and power supply as directed in their
respective installation guides.
7. Repeat Steps 1 to 6 for any other disk drives you want to install in their respective
5.25” or 3.5” bays.
Installing a Hard Disk Drive
NOTE: Please refer to your hard disk drive manufacturer’s installation procedures to
ensure proper installation of the drive.
The hard disk drive bracket is the smaller grey removable bracket located below the 3.5”
drive bays.
1. Remove the hard disk drive bracket by pushing down on the black tab and firmly
pulling the bracket away from the case.
2. Slide your hard disk drive into the bracket, making sure that the screw holes on the
hard disk are aligned with the circular screw holes in the bracket.
3. Screw the hard disk drive to the bracket.
4. Repeat Step 3 for the three remaining screw holes on the hard disk drive.
5. Return the hard disk bracket to the computer case by aligning the bracket with the
grooves in the case and gently sliding the bracket forward until it clicks.
6. Connect your hard disk drive to your motherboard and power supply as directed in
their respective installation guides.
Removing the Expansion Slot Panel
You will need to remove an expansion slot panel on the back of your computer when
you want to add a FireWire card, sound card, etc. to your computer.
1. Remove the silver expansion slot holder by pulling firmly upward on the tab.
2. Remove one of the grey expansion slot covers by sliding it upwards until it is clear of
the computer case.
3. Install your expansion card as directed by the manufacturer.
4. Repeat Steps 2 and 3 for any other expansion cards you wish to install.
/