2
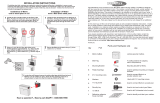
Using the template found on the reverse side
, carefully
arrange and mark the two top holes levelly and about
130cm to 165cm above the floor, or according to your
preference, then mark the bottom two holes.
1
Use Phillips Head screwdriver to remove handle from
inside of bin door and use provided screws to attach
handle to outside of bin door.
Using
the 4mm drill bit provided
, create four pilot holes at least
10mm deeper than screws provided, or about 40mm deep. If
the material is unusually hard you may need to use a rotary
impact drill rather than a standard drill to make the holes. Call
a handy man if needed. Put a small amount of caulk or silicone
into each hole.
3
Place one steel washer onto each of the four screws provided. Attach
the correct socket bit for the screw onto a hand driver or an electric
drill. Now carefully tighten the screws all the way into the wall. Do
not over-tighten or over-torque the screws or you may break off the
screws or strip out the holes.
4
130cm to 165cm
LEVEL
Installation of Wall Mount mailbox onto stucco or masonry.
(
For EIFS “faux” stucco, consult EIFS manufacturer.
)
4
1
1
3
Wall Mount Bin Style
Locking Mailbox.
Security Keys
Used to lock and unlock
your mailbox. Write down
your key number and keep
in a safe place in case you
need more keys made at
a later date.
4
Steel Washers
Used with mounting screws.
4
Rubber Grommets
Already inserted in the box.
Mounting Screws
Used to connect mailbox to masonry,
concrete or brick wall. May also be
used to attach to a wooden wall.
4mm Drill Bit
Used to drill hole into concrete,
brick, mortar or wood.
1
TORX (T25) Drive Bit
Used to drive screw into hole.
Parts and Hardware List
40mm
The Wall Mount Bin Style Locking Mailbox is designed for your security and convenience. This mailbox is constructed of heavy
duty galvanized steel and is designed to be installed on a vertical wall where mail may be delivered.
Below you will find a list of hardware parts and detailed installation instructions. Please take the time to carefully sort the
hardware and familiarize yourself with the function of each piece for ease of installation. Typical installation hardware has also
been provided for your convenience. Since concrete is a hard surface, take proper care when installing this hardware into hard
sufaces, making sure not to break the drill bit or screws provided. An electric drill may be required for hard surface installation.
This mailbox has an extra hardware pack containing 4 extra screws and 1 extra drill bit should you need it.

-
 1
1
-
 2
2
Mail Boss 7418 Installation guide
- Type
- Installation guide
Ask a question and I''ll find the answer in the document
Finding information in a document is now easier with AI
Related papers
Other documents
-
 AdirOffice 631-04-BLK-KC User manual
-
 Architectural Mailboxes 2681BE Installation guide
-
 Architectural Mailboxes 2689B-10 Installation guide
-
SereneLife SLMAB06 Owner's manual
-
 Architectural Mailboxes 2580B-10 Installation guide
-
 Architectural Mailboxes 2541B-10 Installation guide
-
 Architectural Mailboxes 2596SR Installation guide
-
 Architectural Mailboxes 2697B Installation guide
-
Architectural Mailboxes 2580B-10 Installation guide
-
 Architectural Mailboxes 2689W-10 Installation guide


