Page is loading ...

©2020 Energizer Auto. Armor All
es marca registrada de Energizer Auto
y se utiliza bajo licencia de
Cleva North America, Inc.
Wet/Dry Vacuums
Aspiradoras Mojado/Seco
OPERATOR’S MANUAL
MANUAL DEL USUARIO
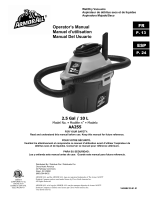
2.5 Gal / 10 L
Model No. • Modelo
VOM205P 0901
FOR YOUR SAFETY
Read and understand this manual before use. Keep this manual for future reference.
PARA SU SEGURIDAD
Lea y entienda este manual antes de usar.
Guarde este manual para futura referencia.
Distributed By / Distribuido Por
Cleva North America Inc.,
601 Regent Park Court
Greenville, SC 29607
©2020 Energizer Auto. Armor All
is a trademark of Energizer Auto
and is used under license by
Cleva North America, Inc.
EN
P. 02
ES
P. 13

2
SECTION Page
Thank you for purchasing this Armor All
®
wet/dry vacuum cleaner. Feel confident that with
Armor All
®
you are obtaining a high quality product engineered for optimal performance. This
vacuum is capable of picking up liquids and dry materials.
FOR YOUR SAFETY CAREFULLY READ AND UNDERSTAND ALL INSTRUCTIONS.
We take pride in producing a high quality, durable product. This Armor All
®
product carries a limited two (2)
year warranty against defects in workmanship and materials from dat
e of purchase under normal household
use. If product is to be used for commercial, industrial or rental use, a 90 day limited warranty will apply.
Please keep your receipt as proof of purchase. This warranty gives you specific legal rights, and you may
have other rights, which vary from state to state. For product service call Customer Service at 1-866-384-
8432.
Not Covered by Warranty:
• Any part that has become inoperative due to misuse, negligence, direct/indirect abuse, accidents,
improp
er maintenance, repairs, or alterations;
• Consumables such as filters and accessories;
• Normal wear and tear of parts and attachments, such as hose, nozzles, or casters;
• Normal deterioration of the exterior finish due to use or exposure;
• Any product where serial number/data label is tampered with or removed;
• Any product purchased from an unauthorized retailer.
Part No. VO70BZ.20.60.02
3
2
4
4
5
6
7
8
9
9
10
10
11
12
Warranty…………………………………….........…
…………………………………………………...…….......................
Safety Instructions & Warnings………………………………………….…………………………......................….
Double Insulation Instructions………………………………………………………………….….......................…...
Extension Cord…………………………………………………………………………………….......................…….
Unpacking & Checking Carton Contents………….……………………..……………….………........................….
General Assembly Instructions…………………………………………………………….…........................……….
Dry Vacuum Operation……..………..……………………………………………………………...........................……
Liquid Vacuum Operation……………………………………………………………………………........................….
Blower Operation…………..………………………………………………………………………….......................…
Maintenance…………………………………………………………………
…………….……….......................…….
Installing & Cleaning Reusable Cloth Filter……….……………...………………..….……….......................……..
Installing & Cleaning Foam Wet Filter………….………...………………….…..….…………….......................…..
Troubleshooting……………………………………………………………….………………………......................…
Exploded View & Parts List………………………………………………………………………......................…….
WARRANTY
TABLE OF CONTENTS
EN

3
IMPORTANT SAFETY INSTRUCTIONS
Read and understand all instructions before using this vacuum
Read and understand this owner’s manual and all labels on the Wet/Dry Vacuum cleaner before operating.
Safety is a combination of common sense, staying alert and knowing how your vacuum works. Use this
Wet/Dry Vac only as described in this manual. To reduce the risk of personal injury or damage to your
Wet/Dry Vac, use only Armor All
®
recommended accessories.
Household Type
SAVE THIS MANUAL FOR FUTURE REFERENCE.
When using an electrical appliance, basic precautions should always be followed including the
following:
WARNING:TO REDUCE THE RISK OF FIRE, ELECTRIC SHOCK OR INJURY:
• Do not run vac unattended.
• Do not vacuum, or use this Wet/Dry Vac near flammable liquids, gases, or explosive vapors like gasoline or
other fuels, lighter fluids, cleaners, oil-based paints, natural gas, hydrogen, or explosive dusts like coal dust,
magnesium dust, grain dust, or gun powder. Sparks inside the m
otor can ignite flammable vapors or dust.
• Do not vacuum anything that is burning or smoking, such as cigarettes, matches, or hot ashes.
• Keep cord away from heated surfaces.
• Do not expose to rain. Store indoors.
• Do not unplug by pulling on cord. To unplug, grasp the plug, not the cord.
• Do not use with damaged cord, plug or other parts.
• If your Wet/Dry Vac is not working as it should, has missing parts, has been dropped or damaged, left
outdoors or dropped into water, return it to an independent service cente
r.
• Do not pull or carry by cord, use cord as handle, close a door on cord, or pull cord around sharp edges or
corners.
• Do not run Wet/Dry Vac over cord.
• Do not handle plug or the Wet/Dry Vac with wet hands.
• To reduce the risk of health hazards from vapors or dusts, do not vacuum toxic materials.
• Do not use or store near hazardous materials.
• Do not use this Wet/Dry Vac with a torn filter or without the filter installed except when vacuuming liquids
as described in the operation section of this manual.
• Do not al
low to be used as a toy. Close attention is necessary when used by or near children.
• To reduce the risk of injury from accidental starting, unplug power cord before changing or cleaning filter.
• Do not leave Wet/Dry Vac unattended when plugged in. Unplug from outlet when not in use and before
servicing.
• Turn off Wet/Dry Vac before unplugging.
• Do not put any object into ventilation openings. Do not vacuum with any ventilation openings blocked;
keep free of dust, lint, hair or anything that may reduce a
ir flow.
• Keep hair, loose clothing, fingers, and all parts of body away from openings and moving parts.
• To reduce the risk of falls, use extra care when cleaning on stairs.
When using as blower:
• Direct air discharge only at work area.
• Do not use Wet/Dry Vac as a sprayer.
• Do not direct air at bystanders.
• Keep children away when blowing.
• Wear safety goggles.
SAFETY INSTRUCTIONS & WARNINGS

4
This Wet/Dry Vac is double-insulated, eliminating the need for a separate grounding system. Use only
identical replacements parts. Read the instructions for Servicing Double-Insulated Wet/Dry Vacs before
servicing. Use this Wet/Dry Vac as described in this manual.
Observe the following warnings that appear on the motor housing of your Wet/Dry Vac.
DOUBLE INSULATED - GROUNDING NOT REQUIRED - WHEN SERVICING USE ONLY
IDENTICAL REPLACEMENT PARTS.
WARNING: TO REDUCE THE RISK OF ELECTRIC SHOCK-DO NOT EXPOSE TO RAIN. STORE
INDOORS.
WARNING: FOR YOUR OWN SAFETY, READ AND UNDERSTAND OPERATOR’S MANUAL. DO
NOT RUN UNATTENDED. DO NOT PICK UP HOT ASHES, COALS, TOXIC, FLAMMABLE OR OTHER
HAZARDOUS MATERIALS, DO NOT USE AROUND EXPLOSIVE LIQUIDS OR VAPORS.
CAUTION:
• Do not vacuum drywall dust or fireplace soot or ash with standard Wet/Dry filter. This is a very fine dust
which will not be captured by the filter and may cause damage to motor. When vacuuming fine dust use a
fine dust filter (sold separately).
WARNING: SERVICING OF DOUBLE-INSULATED WET/DRY VACUUMM
WITH A DOUBLE-INSULATED WET/DRY VACUUM, TWO SYSTEMS OF INSULATION ARE PROVIDED
INSTEAD OF GROUNDING. NO GROUNDING MEANS IS PROVIDED ON A DOUBLE-INSULATED
APPLIANCE, NOR SHOULD A MEANS FOR GROUNDING BE ADDED. SERVICING A DOUBLE
INSULATED WET/DRY VACUUM REQUIRES EXTREME CARE AND KNOWLEDGE OF THE SYSTEM,
AND SHOULD BE DONE ONLY BY QUALIFIED SERVICE PERSONNEL. REPLACEMENT PARTS FOR
A DOUBLE-INSULATED WET/DRY VACUUM MUST BE IDENTICAL TO THE PARTS THEY REPLACE.
YOUR DOUBLE-INSULATED WET/DRY VAC IS MARKED WITH THE WORDS ‘DOUBLE INSULATED’
AND THE SYMBOL (SQUARE WITHIN A SQUARE) MAY ALSO BE MARKED ON THE
APPLIANCE.
• To reduce the risk of electric shock-unplug before cleaning or servicing.
• DO NOT use without filters in place.
CAUTION: TO REDUCE THE RISK OF INJURY FROM MOVING PARTS- UNPLUG BEFORE
SERVICING.
When using an extension cord with your Wet/Dry Vac refer to the following table to determine the required
A.W.G. wire size. Use only a 3-wire extension cord that has a 3-prong grounding type plug and 3-hole
receptacles that accept the tool’s plug. Before using the vacuum cleaner, make sure the power cord and
ex
tension cord are in good working conditions. Make repairs or replacements before using the vacuum
cleaner. Only use extension cords that are rated for outdoor use.
Length of Extension Cord
110V-120V
25 Feet
7.5 Meters
50 Feet
15.25 Meters
100 Feet
30.5 Meters
150 Feet
45.7 Meters
Amps
A.W.G. Wire Size
0-6
18
16
16
14
7-10
18
16
14
12
11-12
16
16
14
12
13-16 14 12 Not recommended
DOUBLE INSULATION INSTRUCTIONS
EXTENSION CORDS

5
NOTE: The hose and accessories for this
vacuum are 1.25 inch (3.18 cm) diameter.
UNPACKING & CHECKING CARTON CONTENTS
Key Description………………...
A Vac Assembly………….......
B Wall Mounting Support…….
C Hose ……………..........……
D Crevice Tool….……………..
E 2-in-1 Utility Nozzle..……….
F Small Car Nozzle……………
G Cloth Filter…………………..
H Foam Wet Filter……………..
I Screws………… ……………
J Storage Pouch………………
K Detail Kit (6 pc)...…………. .
L Operator’s Manual………….
Remove all contents from the box.
Remove the power head and take out any
contents inside the collection tank.
Check each item against the carton
contents list.
QTY
1
1
1
1
1
1
1
1
2
1
1
1

6
Before beginning assembly of product, make sure all parts are present. Compare parts with package
contents list and diagram. If any part is missing or damaged, do not attempt to assemble the product.
Contact customer service for replacement parts.
Estimated Assembly Time: 15 minutes
Tools Required for Assembly: Drill, Screwdriver
UNPACKING YOUR WET/DRY VACUUM & GENERAL ASSEMBLY
1. Verify that the power cord is disconnected from the outlet. (fig. 1)
2. Undo the latches. (fig. 2)
3. Lift the power head o
ff the container. (fig. 3)
4. Remove the contents from inside the container, make sure you have all contents as listed on page 5.
(fig. 4)
5. Find the handle and insert the ends into the handle opening on the power head. Apply force to lock the
handle into place. (fig. 5)
6. For dry vacuum cleaning, install the supplied reusable cloth filter. (fig. 6) See page 10 for filter installation.
7. For wet vacuum cleaning, install the supplied foam filter. (fig. 7) See page 11 for filter installation.
8. Place the power head back on the container, ali
gning the top section with the latches, and snap into
place. (fig. 8 & 9)
9. Insert the larger end of the hose into the desired port. (fig. 10)
10. Choose the desired accessories and insert onto the end of the hose. (fig. 11)
For your convenience this vacuum comes with a wall mounting support for storage.
GENERAL ASSEMBLY INSTRUCTIONS
WARNING:
DO NOT PLUG POWER CORD INTO POWER OUTLET; MAKE SURE PLUG IS
DISCONNECTED BEFORE ASSEMBLING THE WET/DRY VAC.

7
IMPORTANT!
• Do not mount the rack over 5 feet from the floor.
• Do not screw the rack to drywall only. Secure the screws to a stud.
• Do not hang from or sit on the vacuum when on mounting rack.
• Do not use the vacuum while it is mounted on the wall mounting support.
• Empty the tank before mounting the vacuum on the wall.
11. Make sure the rack is level and mark the hole locations. Make1/8-inch diameter pilot hole in each
marked location. Align the two screw holes so that they are over a stud and secure the mounting
support to the
wall stud with the two screws provided. (fig. 12)
12. Place the wet and dry vacuum cleaner into the support. (fig. 13)
POLARIZED PLUG
To reduce the risk of electrical shock, this appliance has a polarized plug (one blade wider than the other).
This plug will fit in a polarized outlet only one way. If the plug does not fit fully in the outlet, reverse the plug.
If it still does not fit, contact a qualified electrician to install the proper outlet. Do not change the plug in any
way. Double insulation eliminates the need for the three
wire grounded power cord and grounded
power supply system.
DRY VACUUMING
WARNING: BE SURE TO READ, UNDERSTAND, AND APPLY, INFORMATION ENTITLED ‘SAFETY
INSTRUCTIONS & WARNINGS’. DO NOT VACUUM IN AREAS WITH FLAMMABLE GASES, VAPORS,
OR EXPLOSIVE DUSTS IN THE AIR. FLAMMABLE GASES OR VAPORS INCLUDE BUT ARE NOT
LIMITED TO: LIGHTER FLUID, SOLVENT TYPE CLEANERS, OIL-BASED PAINTS, GASOLINE,
ALCOHOL, OR AEROSOL SPRAYS. EXPLOSIVE DUSTS INCLUDE BUT ARE NOT LIMITED TO:
COAL, MAGNESIUM, GRAIN, OR GUN POWDER. TO REDUCE THE RISK OF HEALTH HAZARDS
FROM VAPORS OR DUST, DO NOT VACUUM TOXIC MATERIALS.
1. Verify that the power cord is disconnected from the outlet. (fig. 1)
2. In order to prepare your vacuum for dry vacuuming, make sure the filter is completely covering the filter
cage against the power head. (fig. 2 & 3) Your Wet/Dry Vac comes with the reusable cloth filter pre-
installed. For installation instructions, see page 10.
3. Place the power head back on the collection tank, and secure it in place using the latches. (fig. 4)
OPERATING INSTRUCTIONS: DRY VACUUMING
4. Insert the larger end of the hose into the
vacuum port on the power head. Push the required attachment
onto the free end of the hose or extension. (fig. 5)
5. Plug in the power cord into the outlet. (fig. 6)
6. Turn the motor on by flipping the switch to the ‘I’ ON position and begin vacuuming. (fig. 7)
7. Once you have completed vacuuming, flip the switch to the ‘O’ OFF position and unplug the power cord
from the outlet.
O = OFF I = ON
DRY VACUUM OPERATION

8
DO NOT USE THE REUSABLE CLOTH FILTER FOR LIQUID VACUUMING.
LIQUID VACUUMING
WARNING: BE SURE TO READ, UNDERSTAND, AND APPLY, INFORMATION ENTITLED ‘SAFETY
INSTRUCTIONS & WARNINGS’. DO NOT VACUUM IN AREAS WITH FLAMMABLE GASES, VAPORS,
OR EXPLOSIVE DUSTS IN THE AIR. FLAMMABLE GASES OR VAPORS INCLUDE BUT ARE NOT
LIMITED TO: LIGHTER FLUID, SOLVENT TYPE CLEANERS, OIL-BASED PAINTS, GASOLINE,
ALCOHOL OR AEROSOL SPRAYS. EXPLOSIVE DUSTS INCLUDE BUT ARE NOT LIMITED TO: COAL,
MAGNESIUM, GRAIN OR GUN POWDER. TO REDUCE THE RISK OF HEALTH HAZARDS FROM
VAPORS OR DUST, DO NOT VACUUM TOXIC MATERIALS.
WARNING: DO NOT PLUG POWER CORD INTO POWER OUTLET. MAKE SURE PLUG IS
DISCONNECTED BEFORE CHANGING AND CLEANING FILTERS.
1. Verify that the power cord is disconnected from the outlet. (fig. 1)
2. Remove reusable cloth filter, then carefully install the foam sleeve filter over the filter cage and place the
power head back on the container. (fig. 2) See filter installation instructions on page 11.
DO NOT USE THE REUSABLE CLOTH FILTER FOR LIQUID VACUUMING.
OPERATING INSTRUCTIONS – WET VACUUMING
3. Fit the desired nozzle to the vacuum hose. (fig. 3)
4. Verify that the switch is in the ‘O’ OFF position before plugging the power cord into the o
utlet. (fig. 4)
5. Turn the motor on by flipping the switch to the ‘I’ ON position. (fig. 5)
6. After use, empty the container, clean and dry the inside and outside before storage. (fig. 6)
IMPORTANT! When vacuuming large quantities of liquids, do not immerse the nozzle completely in the
liquid; leave a gap at the tip of the nozzle opening to allow air inflow. The machine is fitted with a float valve
that stops the suction action when the container reaches its maximum capacity. You will notice an increase
in
motor speed. When this happens, turn off the machine, disconnect from power supply, and drain the
liquid into a suitable receptacle or drain. To continue vacuuming, refit the container with the drain cap. After
wet vacuuming, turn the machine off and remove plug from power supply. Empty the container, clean and
dry the inside and outside before storage.
REMEMBER! The foam filter must be removed after wet vacuuming, and a reusable cloth filter must be
installed before dry vacuuming again.
LIQUID VACUUM OPERATION

9
This Wet/Dry Vac has blowing capabilities. To use the blower feature follow the instructions listed.
WARNING:
ALWAYS WEAR SAFETY GOGGLES COMPLYING WITH ANSI Z87.1 (OR IN CANADA,
CSAZ94.3) BEFORE USING BLOWER.
WARNING:
KEEP BYSTANDERS CLEAR FROM BLOWING DEBRIS.
WARNING:
WEAR A DUST MASK IF BLOWING CREATES DUST THAT MIGHT BE INHALED.
1. Verify that the power cord is disconnected from the outlet. (fig. 1)
2. Make sure the container is empty before using as a blower.
3. Remove hose from the vacuum port.
4. Insert the larger end of the hose into the
blower
port on the backside of the power head. (fig. 2)
5. Ensure the power switch is turned off and plug into the power supply. (fig. 3)
6. Before turning on the vac, firmly hold loose end of the hose. Turn the motor on by flipping the switch to
the ‘I’ ON position. (fig. 4)
1. Verify that the power cord is
disconnected from the outlet. (fig. 1)
2. Disconnect the hose from the vacuum. (fig. 2)
3. Undo the latches and remove the power head from the container. (fig. 3)
4. Clear all dirt or debris from the container and hose. (fig. 4)
For filter changing and maintenance see instructions on page 10.
IMPORTANT! Clean or change the dust filter regularly for best performance. ALWAYS USE A DUST
FILTER FOR DRY VACUUMING. If the machine is used with out the dust filter, the motor will burn out and
the warranty will be voided. Always keep sp
are filters on-hand.
NOTICE! The filter included is made of high quality material designed to stop small dust particles. The
filter should be used for dry pick-up only. A dry filter is necessary to pick up dust. If the dust filter is wet, it
will clog quickly and be very difficult to clean. Handle the filter carefully when removing it for cleaning and
replacing it. Check the filters for tears or small holes, a small hole can let dust pass through and out of the
cleaner. Do not use a filter with holes or tear
s; replace the filter immediately if a hole or tear is found.
WARNING: ALWAYS DISCONNECT THE PLUG FROM THE POWER OUTLET BEFORE REMOVING
THE POWER HEAD FROM CONTAINER. ANY OTHER SERVICING SHOULD BE PERFORMED BY AN
AUTHORIZED SERVICE REPRESENTATIVE.
MAINTENANCE
BLOWER OPERATION

10
Installing Reusable Cloth Filter
1. Verify that the power cord is disconnected from the outlet. (fig.1)
2. Remove power head and place in upside down position.
3. Slide reusable cloth filter down over the filter cage making sure the cage is completely covered. ( fig. 2 &
3)
4. Replace and lock the power head onto the collection tank.
Removing and Cleaning Reusable Cloth Filter
1. With the removed power head in an upside down position, carefully remove the reusable cloth filter from
the filter
cage. (Fig. 4) Clean the filter by gently tapping or brushing dirt off. Cleaning should not be done
indoors in living areas.
2. Use a mild soap and water solution to wash reusable cloth filter and rinse with clean water. (fig. 5)
3. Allow the wet filter to air dry for 24 hours before installing onto the filter cage.
Installing Foam Wet Filter
1. Verify that the power cord is disconnected from the outlet. (fig. 1)
2. Remove power head and place in upside down position. Follow instructions to remove cloth filter
.
3. Carefully slide foam sleeve filter down over the filter cage making sure the whole cage is covered.
(fig. 2 & 3)
4. Replace the power head on to the container.
Cleaning Foam Wet Filter
1. With the removed power head in the upside down position, carefully remove foam wet filter. (fig. 4)
2. Use a mild soap and water solution to wash foam sleeve filter and rinse with clean water. (fig. 5)
3. Allow filter to air dry before installing and using again.
INSTALLING & CLEANING REUSABLE CLOTH FILTER
INSTALLING & CLEANING FOAM SLEEVE FILTER

11
WARNING: TO REDUCE THE RISK OF ELECTRIC SHOCK-UNPLUG BEFORE TROUBLESHOOTING.
Symptom
Possible Causes
Corrective Action
Vacuum will not operate.
1) No power supply.
1) Check power supply – cord,
breakers, fuses.
2) Faulty power cord.
2) Unplug and check the power
cord. If damaged, have it repaired
by a professional.
3) Collection tank full.
3) Empty container.
Dust comes from motor cover.
1) The reusable cloth filter is
missing or damaged.
1) Attach or replace the reusable
cloth filter.
Reduced efficiency and
motor/speed vibration.
1) There is a blockage in the
nozzle, hose, or the vacuum inlets.
Or the dust filter is blocked by fine
dust.
1) Check nozzle, hose and inlets
for blockage. Take off the filter
and clean it. Or install new filter.
TROUBLESHOOTING

12
EXPLODED VIEW & PARTS LIST

13
Sección Página
Gracias por comprar esta aspiradora mojado/seco de Armor All
®
. Siéntase cómodo que con Armor
All
®
está obteniendo un producto de alta calidad dirigido a el funcionamiento óptimo.
Esta aspiradora es capaz de recoger líquidos y materiales secos.
PARA SU SEGURIDAD LEA CUIDADOSAMENTE Y ENTIENDA TODAS LAS
INSTRUCCIONES.
Nosotros nos enorgullece en producir un producto durable de alta calidad. Este producto de Armor All
®
tiene una garantía limitada de dos años contra defectos en la ejecución y materiales a partir de la fecha de
compra bajo uso normal en su hogar. Si el producto va a ser utilizado para uso comercial, industrial o de
alquiler, una garantía limitada de 90 días se aplicará. Guarde por favor su recibo como prueba de la
compra. Esta garantía le da derechos legales específicos, y puede tener otros derechos, que varían de
estado en estado. Para servicio de su producto llame a Servicio al Cliente a 1-866-384-8432.
No cub
ierto por la garantía:
• Cualquier parte que esté inoperativa por culpa de uso indebido, negligencia, abuso directo/
indirecto, accidentes, mantenimiento inadecuado, reparaciones inadecuadas o alteraciones.
• Consumibles, tales como filtros y accesorios;
• Desgaste y rotura normal de piezas y accesorios, tales como mangueras, boquillas o ruedecillas.
• Deterioro normal del acabado exterior debido al uso o exposición.
• Cualquier producto cuya etiqueta con el número de serie/datos esté alterada
o faltante.
• Cualquier producto adquirido en un punto de ventas no autorizado.
Garantía….………………………………………………………………………………………….....................…..
Instrucciones de seguridad y advertencias.……………………………………..………………..........................
Instrucciones del aislamiento doble……. …………………………………………………………........................
Cordón de extensión..……………………………………………………………………………......................……
Desempaquetado y contenido de la caja………….. .……………………..…………………….......................….
Instrucciones de ensamblaje general...………………………..……………………………….......................…....
Recogido de materiales secos…...………………………………………………………………......................…..
Recogido de líquidos con la aspiradora…….……………………………………………………......................….
Soplador.……………………………………………………………………………………………...........................
Mantenimiento.…………
…………...………………………………………………………………......................….
Instalación y limpieza del filtro de tela……………...………………..….………………………........................…..
Instalación y limpieza del filtro de esponja……………...………………….…..….…………......................…….
Diagnostico ..…………………………………………………………………………………….........................……..
Partes de repuesto y diagrama………………………………………………………………….......................……
INDICE
GARANTÍA
14
13
15
15
16
17
18
19
20
21
21
22
22
23
ES

14
INSTRUCCIONES DE SEGURIDAD
IMPORTANTES
Lea y entienda todas las instrucciones antes de usar esta aspiradora.
Lea y entienda el manual del usuario y todas las etiquetas en la aspiradora mojado/seco antes de utilizar.
La seguridad es una combinación de sentido común, hay que permanecer alerta y saber como su
aspiradora trabaja. Utilizar esta aspiradora mojado/seco solamente según lo descrito en este manual. Para
reducir el riesgo de daños corporales o de daño a su aspiradora mojado/seco, utilice solamente l
os
accesorios recomendados Armor All
®
.
Para Uso Domestico Solamente.
GUARDE ESTE MANUAL PARA FUTURA REFERENCIA.
Al usar electrodomésticos, precauciones básicas siempre debe de ser seguidas incluyendo las
siguientes:
ADVERTENCIA:
• No deje la aspiradora desatendida cuando este desenchufada.
• No limpie con la aspiradora, o utilice esta aspiradora mojado/seco cerca de líquidos inflamables, gases, o
vapores explosivos como la gasolina u otros combustibles, líquido de butano, limpiadores, pinturas
a base
de aceite, gas natural, hidrógeno, o explosivos como el polvo de carbón, el polvo de magnesio, el polvo de
grano, o pólvora. Las chispas dentro del motor pueden encender vapores inflamables o polvos
combustibles.
• No aspire objetos que están encendidos o echando humo, por ejemplo cigarrillos, fósforos, o las cenizas
calientes.
• Mantenga el cordón eléctrico lejos de superficies calientes.
• No exponga a la lluvia. Almacene en interiores.
• No desenchufe tirando del cordón. Para desenchufar, agar
rare el enchufe, no el cordón.
• No utilice con el cordón, el enchufe u otras piezas dañadas.
• Si su aspiradora mojado/seco no está trabajando como debe, hay piezas que faltan, se ha caído o se ha
dañado, ha sido dejada la intemperie, o ha caído en el agua, devuélvala a un centro de servicio
independiente.
• No tire ni lleve por el cable, ni utilice el cordón de uso como manija, no cierre puertas sobre el cordón, o le
de tirones alrededor de bordes o de esquinas filosas.
• No pase la aspiradora moja
do/seco encima de su cordón eléctrico.
• No toque el enchufe o la aspiradora mojado/seco con las manos mojadas.
• Para reducir el riesgo de peligros para la salud por vapores o polvo, no aspire materiales tóxicos.
• No utilice ni almacene cerca de materiales peligrosos.
• No utilice esta aspiradora mojado/seco con un filtro rasgado o sin el filtro instalado excepto al limpiar
líquidos con la aspiradora según lo descrito en la sección de la operación de este manual.
• No utilice como j
uguete. La máxima atención es necesaria cuando sea utilizada por niños o cerca de éstos.
• Para reducir el riesgo de lesiones debido a un arranque accidental, desenchufe el cordón eléctrico antes
de cambiar o de limpiar el filtro.
• No deje la aspiradora mojado/seco desatendida cuando este conectada a un tomacorriente. Desenchufe
de la corriente eléctrica cuando no este siendo utilizada y antes de darle servicio de ajustes y reparaciones.
• Apague su aspiradora mojado/seco antes de desenchufar.
•
No ponga ningún objeto en las aberturas de la ventilación. No utilice la aspiradora con ninguna de las
aberturas de la ventilación bloqueadas; mantenga libre de polvo, pelusa, cabellos o cualquier cosa que
pueda reducir el flujo de aire.
• Mantenga el cabello, ropa suelta, dedos, y todas las partes del cuerpo lejos de aberturas y de piezas
móviles.
• Para reducir el riesgo de caídas, utilice cuidado adicional al limpiar en las escaleras.
Al usar como soplador:
• Dirija la descarga directa del aire solamente al área de trabajo.
• No utilice la aspiradora mojado/seco como rociador.
• No dirija el aire a las personas.
• Mantenga a los niños alejados del área.
• Utilice anteojos de seguridad.
INSTRUCCIONES DE SEGURIDAD Y ADVERTENCIAS
PARA REDUCIR EL RIESGO DE FUEGO, SACUDIDA
ELÉCTRICA O DE LESIÓN:

15
Esta aspiradora mojado/seco tiene aislamiento doble, eliminando la necesidad de un sistema de conexión a
tierra separado. Utilice solamente piezas de repuesto idénticas. Lea las instrucciones para mantenimiento
de su aspiradora mojado/seco con doble-aislamiento antes de realizar ajustes y reparaciones. Utilice esta
aspiradora según lo descrito en este manual. Observe las siguientes advertencias que aparecen en la
cubierta del motor de su aspiradora.
AISLAMIENTO DOBLE - NO REQUIERE
UN SISTEMA DE CONEXIÓN A TIERRA SEPARADO -
UTILICE SOLAMENTE PIEZAS DE REPUESTO IDÉNTICAS.
ADVERTENCIA: PARA REDUCIR EL RIESGO DE SACUDIDAS ELÉCTRICAS NO EXPONGA A LA
LLUVIA. ALMACÉNE EN INTERIORES.
ADVERTENCIA: PARA SU PROPIA SEGURIDAD, LEA Y ENTIENDA EL MANUAL DEL USUARIO.
NO DEJE DESATENDIDO. NO RECOJA CENIZAS CALIENTES, CARBONES, MATERIALES TÓXICOS,
INFLAMABLES U OTROS MATERIALES PELIGROSOS, NO UTILIZE ALREDEDOR DE LÍQUIDOS O DE
VAPORES EXPLOSIVOS.
PRECAUCIÓN:
• No limpie el polvo de yeso o cemento con la aspiradora, el hollín o la ceniza de la chimenea utilizando un
filtro estándar mojado/ seco. Este es un polvo muy fino el cuál no será capturado por el filtro y puede
causar daño al motor. Cuando aspire polvos finos use un filtro para polvos finos (vendido por aparte).
ADVERTENCIA: EN LA ASPIRADORA MOJADO/SECO CON AISLAMIENTO DOBLE SE
PROPORCIONAN DOS MEDIOS DE AISLAMIENTO EN VEZ DE CONEXIÓN A TIERRA. NO SE
PROPORCIONA NINGÚN MEDIO DE CONEXIÓN A TIERRA A UN APARATO ELECTRODOMÉSTICO
CON AISLAMIENTO DOBLE, NI SE DEBE AÑADIR A ÉSTE NINGUN MEDIO DE CONEXIÓN A TIERRA.
El SERVICIO DE AJUSTES Y REPARACINES DE LA ASPIRADORA CON AISLAMIENTO DOBLE
REQUIERE EXTREMO CUIDADO Y CONOCIMIENTO DEL SISTEMA, Y DEBE SER REALIZADO
ÚNICAMENTE POR PERSONAL DE SERVICIO AUTORIZADO. SU ASPIRADORA ESTA MARCADA
CON LAS PALABRAS ‘DOUBLE INSULATED’ EL SÍMBOLO (CUADRADO DENTRO DE UN
CUADRADO) TAMBIÉN ESTA MARCADO EN EL APARATO.
• Para reducir el riesgo de una sacudida eléctrica desenchufe antes de la limpieza o de mantenimiento.
• NO UTILIZE sin los filtros en su lugar.
PRECAUCIÓN: PARA REDUCIR EL RIESGO DE LESIÓN A CAUSA DE PIEZAS MOVIBLES
DESENCHUFE ANTES DE REPARAR.
Al utilizar un cordón de extensión con su aspiradora mojado/seco refiérase a la siguiente tabla para
determinar el tamaño requerido del cordón de A.W.G. Utilice solamente un cordón de extensión con 3
cables internos que tenga un enchufe a tierra
con 3 clavijas y receptáculos con 3 agujeros que acepten el
enchufe de la herramienta. Antes de usar la aspiradora asegúrese de que el cordón eléctrico y el cordón de
la extensión están en buenas condiciones para hacer el trabajo. Haga las reparaciones o los reemplazos
antes de usar la aspiradora. Únicamente use cordones de extensión con capacidad nominal para uso a la
intemperie.
Longitud del cordón de extensión
110V-120V
25 Pies
7.5 Metros
50 Pies
15.25 Metros
100 Pies
30.5 Metros
150 Pies
45.7 Metros
Amps
A.W.G. Tamaño del cordón
0-6
18
16
16
14
7-10
18
16
14
12
11-12
16
16
14
12
13-16
14
12
No se recomienda
INSTRUCCIONES DE AISLAMIENTO DOBLE
CORDÓNES DE EXTENSION

16
DESEMPAQUETADO Y CONTENIDO
Lista de contenido
Clave Descripción..............................Cant.
A Ensamblaje de la aspiradora.......1
B Soporte de montaje.....................1
C Manguera....................................1
D Herramienta para ranuras...........1
E 2-en-1 Boquilla de utilidad ..........1
F Boquilla para autos...………....…1
G Filtro de tela reutilizable ..............1
H Filtro de esponja……………….….1
I Tornillos.......................................2
J Bolsa para el juego…………….…1
K Juego de boquillas para
detalles (6 piesas)........................1
L Manual del usuario.......................1
Retire todo el contenido de la caja. Retire
el motor y saque cualquier contenido del
envase. Compruebe cada artículo contra
la lista de contenido.
NOTA: La Manguera y los accesorios de esta
aspiradora son de 1.25 pulgadas de diámetro.

17
Antes de comenzar a ensamblar el producto, asegúrese de tener todas las piezas. Compare las piezas con
la lista del contenido del paquete y el diagrama. No intente ensamblar el producto si falta alguna pieza o si
éstas están dañadas. Póngase en contacto con el Departamento de Servicio al Cliente para obtener las
piezas de repuesto.
Tiempo estimado de ensamblaje: 15 minutos
Herramientas necesarias para el ensamblaje: Taladro, destornillador
DESEMPAQUE DE SU ASPIRADORA Y ENSAMBLAJE
1. Verifique
que el cordón eléctrico esté desconectado del enchufe. (fig. 1)
2. Levante las asas hacia la posición de abrir. (fig. 2)
3. Levante la tapa que esta sobre el envase. (fig. 3)
4. Saque el contenido dentro del envase, asegúrese de tener todo el contenido según lo enumerado en la
página 16. (fig. 4)
5. Encuentra la manija e inserte los extremos en las aperturas sobre el cabezal del motor. Aplicar presión
para hasta que encaje en su lugar. (fig. 5)
6. Para aspirar materiales secos, instale el filtro de tela incluido. (fig. 6) Vea la pagina 21 para instalación
del filtro.
7. Para aspirar líquidos, instale el filtro de esponja incluido. (fig. 7) Vea la pagina 22 para instalación del
filtro.
8. Coloque nuevamente la tapa sobre el envase, alinee las asas, y presione hasta que estén aseguradas
en su lugar. (fig. 8 y 9)
9. Inserte el extremo grueso de la manguera en la entrada del envase (fig. 10)
10. Elija l
os accesorios deseados y colóquelos a la manguera. (fig. 11)
INSTRUCCIONES DE ENSAMBLAJE
ADVERTENCIA:
NO ENCHUFE EL CABLE ELÉCTRICO AL TOMACORRIENTE, ASEGURESE DE
QUE EL ENCHUFE ESTE DESCONECTADO ANTES DE ENSAMBLAR SU ASPIRADORA.

18
Para su conveniencia esta aspiradora viene con montaje para la pared.
¡IMPORTANTE!
• No monte el bastidor a más de 5 pies del piso.
• No sujete los tornillos a las paredes de tablero de yeso solamente. Sujete los tornillos al montante
detrás de los tableros de yeso.
• No se cuelgue del bastidor ni se siente en el.
• No use la aspiradora mientras esté montada sobre el bastidor en la pared.
• Vaciar el tanque antes de montar la aspiradora sobre el bastidor en la pared.
11. Verifique que el bast
idor este nivel y marque los agujeros. Taladre agujeros de piloto de 1/8 de pulgada
de diámetro en los puntos para los agujeros. Alinee los dos agujeros del bastidor que estén sobre el
montante de la pared. Sujete el bastidor con los dos tornillos. (fig. 12)
12. Monte la aspiradora sobre el bastidor. (fig. 13)
ENCHUFE POLARIZADO
Para reducir el riesgo de sacudidas eléctricas, este aparato electrodoméstico tiene un enchufe polarizado
(una hoja es mas ancha que la otra). Este enchufe entrara
en un tomacorriente polarizado solamente de
una manera. Si el enchufe no entra por completo en el tomacorriente, voltéelo. Si sigue sin entrar, póngase
en contacto con un electricista competente para instalar el tomacorriente adecuado. No modifique el
enchufe. Aislamiento doble elimina la necesidad de un enchufe de tres cables con tierra y de un
sistema de conexión a tierra separado.
ASPIRAR MATERIALES EN SECO
ADVERTENCIA: ASEGURESE DE LEER, ENTENDER, Y APLICAR LA INFORMACIÓN, DADA
SOBRE LAS “INSTRUCCIONES DE SEGURIDAD Y ADVERTENCIAS”. NO LIMPIE CON LA
ASPIRADORA EN ÁREAS CON GASES INFLAMABLES, VAPORES, O POLVOS EXPLOSIVOS EN EL
AIRE. LOS GASES O LOS VAPORES INFLAMABLES INCLUYEN PERO NO SE LIMITAN A: LÍQUIDO
DE BUTANO, SOLVENTES EN FORMA DE AEROSOL PARA LIMPIAR, PINTURAS A BASE DE
ACEITE, GASOLINA, ALCOHOL O AEROSOL. EL POLVO EXPLOSIVO INCLUYE PERO NO SE
LIMITA A: POLVO DE CARBÓN, GRANO DE MAGNESIO O POLVORA. PARA REDUCIR EL RIESGO
DE LOS VAPORES A LA SALUD, NO ASPIRE MATERIALES TÓXICOS CON LA ASPIRADORA.
1. Verifique que el cordón eléctrico esté desconectado del enchufe. (fig. 1)
2. Para preparar su aspiradora para limpiar en seco, verifique que el filtro este cubriendo completamente la
jaula del filtro y que llega hasta el cabezal. (fig. 2 y 3) (Su aspiradora viene con un filtro de tela pre-
instalado si no esta instalado vea las instrucciones en la pagina 21.)
3. Ponga la tapa en el envase, y asegúrela en su lugar usando las asas. (fig. 4)
RECOGIDA DE MATERIALES SECOS

19
INSTRUCCIONES DE FUNCIONAMIENTO: ASPIRAR MATERIALES EN SECO
4. Inserte el extremo grueso de la manguera en el cabezal y asegúrela en su lugar. Empuje el accesorio
requerido sobre el final libre de la manguera o de la extensión. (fig. 5)
5. Enchufe el cordón eléctrico en el tomacorriente. (fig. 6)
6. Encienda el motor moviendo el interruptor a la posición de encendido con el símbolo ‘I’ ON. (fig. 7)
7. Una vez que usted haya terminado de limpiar con la aspiradora, mueva el interruptor a la posición
de
apagado ‘O’ OFF y desenchufe el cordón eléctrico del tomacorrientes.
O = Apagado I = Encendido
NO UTILICE EL FILTRO DE TELA PARA ASPIRAR LÍQUIDOS CON LA ASPIRADORA.
ASPIRACION DE LÍQUIDOS
ADVERTENCIA: ASEGURESE DE LEER, ENTENDER, Y APLICAR LA INFORMACIÓN, DADA
SOBRE LAS “INSTRUCCIONES DE SEGURIDAD Y ADVERTENCIAS”. NO LIMPIE CON LA
ASPIRADORA EN ÁREAS CON GASES INFLAMABLES, VAPORES, O POLVOS EXPLOSIVOS EN EL
AIRE. LOS GASES O LOS VAPORES INFLAMABLES INCLUYEN PERO NO SE LIMITAN A: LÍQUIDO
DE BUTANO, SOLVENTES EN FORMA DE AEROSOL PARA LIMPIAR, PINTURAS A BASE DE
ACEITE, GASOLINA, ALCOHOL O AEROSOL. EL POLVO EXPLOSIVO INCLUYE PERO NO SE
LIMITA A: POLVO DE CARBÓN, GRANO DE MAGNESIO O POLVORA. PARA REDUCIR EL RIESGO
DE LOS VAPORES A LA SALUD NO ASPIRE MATERIALES TÓXICOS CON LA ASPIRADORA.
ADVERTENCIA: NO ENCHUFE EL CORDÓN ELECTRICO AL TOMACORRIENTES, ASEGÚRESE DE
QUE NO ESTE CONECTADA AL TOMACORRIENTE ANTES DE LIMPIAR O CAMBIAR LOS FILTROS.
1. Verifique que el cordón eléctrico esté desconectado del enchufe. Verifique que el envase esté limpio y
libre de polvo. (fig. 1)
2. Quite el filtro de tela reutilizable, después instale cuidadosamente el filtro de esponja sobre la jaula del
filtro y ponga la tapa de vuelta en el envase. (fig. 2) Vea las instrucciones de instalación del filtro en la
página 21.
NO UTILICE EL FILTRO DE TELA REUTILIZABLE PARA ASPIRAR LÍQUIDOS CON LA ASPIRADORA
3. Coloque a la manguera la boquilla qu
e desea utilizar. (fig. 3)
4. Verifique que el interruptor esté en posición de apagado ’O’ OFF antes de enchufar el cordón eléctrico
en el enchufe. (fig. 4)
5. Encienda el motor moviendo el interruptor a la posición de encendido con el símbolo ‘I’ ON. (fig. 5)
6. Después de cada uso, vacié el envase. (fig. 6)
RECOGIDA DE LÍQUIDOS

20
¡IMPORTANTE! Al aspirar grandes cantidades de líquidos con la aspiradora, no sumerja la apertura de
la manguera totalmente en el líquido; deje un boquete en la extremidad de la manguera para permitir
afluencia del aire. La máquina esta equipada con un flotador que detiene la acción de succión cuando el
envase alcanza su capacidad máxima. Usted notará un aumento en velocidad del motor. Cuando esto
suceda, apague la máquina, desconéctela del tomacorriente, y drene el líquido. Para continua
r aspirando,
reinstale la tapa del drenaje. Al terminar de aspirar, cerciórese que el interruptor esté en posición de
apagado y quite el enchufe del tomacorriente. Vacié el envase, limpie y seque el interior y el exterior antes
de almacenar.
¡RECUERDE! El filtro de esponja se debe quitar después de aspirar líquidos con la aspiradora, y un filtro
reutilizable de tela se debe instalar antes de limpiar otra vez materiales secos.
Esta aspiradora tiene capacidad para ser soplador. Para utilizar como s
oplador siga las instrucciones
enumeradas.
ADVERTENCIA:
SIEMPRE UTILIZE ANTEOJOS DE SEGURIDAD QUE CONFORMEN CON ANSI
Z87.1 (O EN CANADA, CSAZ94.3) ANTES DE USAR EL SOPLADOR.
ADVERTENCIA:
MANTENGA A LAS PERSONAS ALEJADAS DEL LOS RESIDUOS SOPLADOS.
ADVERTENCIA:
UTILIZE UNA MASCARA ANTIPOLVO SI AL SOPLAR SE CREA POLVO QUE
PUEDA SER INHALADO.
1. Verifique que el cordón eléctrico esté desconectado del enchufe. (fig. 1)
2. Asegúrese de que el envase este vacío antes de usar como soplador.
3. Retire la manguera del portal de aspirar.
4. Inserte el extremo grueso de la manguera en el portal del soplador localizado en la parte trasera de la
tapa. (fig. 2)
5. Asegúrese de que el interruptor este en la posición de apagado ‘O’ y enchufe al tomacorrientes. (fig. 3)
6. Antes de encender la aspiradora, asegure la manguera entre sus manos con firmeza. Encienda
el motor
moviendo el interruptor a la posición de ‘I’. (fig. 4)
SOPLADOR
/