Page is loading ...

Users Manual
For Odyssey
Stratos, Khartago, Cyclops, Tempest, Candela product families.
Lorelei and Epiphony II speakers

A brief history and a short philosophical take:
Rolf Gemein can easily be described as one of the true high end audio pioneers. As early as the
mid – 70’s, he experimented with then revolutionary design aspects such as different internal
cables, different types of solders, the influence of resonance control in the amplifier chassis, etc.
In 1979, Rolf started Symphonic Line with the intention of being solely responsible for the quest of
the perfect musical “illusion “. In the years since, his incredible ear and most importantly, his
tweaking and tuning abilities and complete devotion to music, produced phenomenal international
successes as born out by dozens of product - of- the-year, consumer, and best - at - show awards.
A common practice of many high end manufacturer, due mainly to increased profitability, is to
change their products every year. Unfortunately, too many fellow manufacturer are using this
marketing and sales technique, which is inherently unfair to the consumers. On the other hand,
Rolf Gemein’s relentless pursuit of excellence and his philosophical approach of “evolutionary
maturing processes” of his designs produced truly world - class products such as the classic RG 1
and the Kraft Reference series of amplifiers, Die Erleuchtung tube preamplifier, and the RG 8 Gold
Cartridge, all being hailed as the very best in the US, Europe, and Asia alike.
Odyssey Design Group, the US importer / distributor of Symphonic Line works very closely
together with Germany in design and production. Together, we created the Odyssey Project 2
Series, a new line of products designed by Symphonic Line in Germany, and build here in the US.
When we created Odyssey, we knew that we had something very special. After all, the Odyssey
designs were pure Symphonic Line’s, to be seen as the “little brothers” of the RG’s or Kraft
Reference’s. hi listening to the Odyssey products, you will immediately notice the familiar
smoothness, quickness, and tonality, that have become the hallmark sound signatures of
Symphonic Line.
What was really different, however, was the fact that due to several factors such as extremely
compact production designs, US based manufacturing, very reasonable profit margins, and pure
luck in finding some incredibly reasonable and at the same time enthusiastic suppliers, we were
able to achieve an unbelievable price / performance factor of our products.
We achieved all of our goals, which are:
- to become the value leader in the true high end market
- to offer one of the very best service and upgrade policies in the business
- to share our passion for music instead of audiophile and spectacular effects
- exclusive use of top - quality parts of high reliability
- being able to offer the same value in our next products.
Especially on the quality and value issues, we’ll be able to offer:
- the measuring, selecting, and matching of all output devices
- heavy machining throughout, use of metals only, and no plastics
- no silk screening, but only engraving
- hand - soldering of all contacts, with best available silver solder
- in - house metal finishing, and the exclusive use of anodizing processes
- three - level quality control at test points at 24 hrs /48 hrs burn - in, and small individual
listening tests before shipping on all electronics
We are very confident that the phenomenal performance, dedication, value, craftsmanship,
and service of Symphonic Line and Odyssey will create new standards in the high end
industry. We truly believe that ultimately Rolf Gemein’s lifelong obsession and work created
something that your soul will love very much. Happy listening, and enjoy.

Before operating your Odyssey unit,
please take the time and carefully
read all safety instructions and the
entire owner's manual.
You'll be given not only information
about safety concerns and technical
specifications, but also advice as how
to optimize your system sonically, as
well as information of our efforts to
create the single best value in the
high end audio market today.

Welcome
Thank you for purchasing a product from Odyssey Designs.
Your Odyssey unit has been designed by Symphonic Line in Germany. In 1979, Rolf Gemein
started Symphonic Line with the intention of creating the perfect musical “illusion”. In the years
since, his incredible talents and complete devotion to music produced phenomenal international
successes as borne out by dozens of product - of- the - year, consumer, and best - at - show
awards.
Countless hours were spent in developing an extremely sophisticated circuitry that is a “world class
high end performer”, and due to its compact design, very inexpensive to manufacture. Your
Odyssey product is very unique in this regard, and it provides the best possible value in audio
today.
We are confident that the performance, dedication, value, craftsmanship, and service support
given to Odyssey products will create new standards in the high end industry. We truly believe that
Rolf’ Gemein’s lifelong obsession and work has created something that your soul will love very
much.
Happy listening, and enjoy.

Safety Instructions
1. Casework: Do not operate the unit without the outer casework, internal electrical voltages
of the unit may cause serious injuries
2. Fuses: Do not bypass any fuse in the unit. Only replace the fuses with the same type and
ratings.
3. Power Requirements: An audiophile quality power cord with a three - prong plug is
included with your Odyssey unit. To prevent shock hazards, do not defeat the grounding plug. If
you have to use extension cords, make sure that cord / or outlets have a sufficient current of at
least 10 amps.
4. Ventilation and Temperature: Due to extensive measures in selecting the best possible
cooling devices, your Odyssey’s case temperature at full loads is extremely low for a high biased
solid state unit. The temperature is only slightly above room temperature, and thus, not too much
ventilation space is needed. The unit can be positioned even in small spaces.
5. Repairs: If a problem occurs with your Odyssey unit, do not attempt to repair it yourself.
Instead, contact Odyssey Designs your Odyssey distributor for repair services.

Quality Information
The trademark of Odyssey and Symphonic Line products is uncompromising ultra – high end
performance. Manual assembly and exclusive hand - soldering on all contacts surely enhances the
performance aspect. Your Odyssey product has been mostly hand -made. This aspect of the
manufacturing process is very expensive and time consuming, but ultimately, yields the best
possible returns in high performance sound qualities.
However, with manual labor comes the added danger of human errors. Together with the possibility
that electrical parts can always fail at any moment, regardless of parts model, quality, or
manufacturer “this is simply the nature of the (electrical) beast”, one can easily see why quality
control becomes even more important.
This is why we at Odyssey Designs see the quality control aspect as being so important. From the
very beginning, we made sure that all of our designs and parts are proven and reliable.
Lastly, we implemented a “three stage” quality control program. Nearly all problems related to
either faulty contacts or parts will become obvious within the first hours of operation. Thus, after
completion, each unit is moved into a “bum-in” room, where the electronics idle for at least 48 hrs.
Within this time span, all units are measured and biased twice. Finally, after 48 hrs, every piece
undergoes an individual distortion listening check. Throughout this “QC” process, each unit is
tracked according to its serial #.
Furthermore, each step of quality control is signed - off by the technician within this owner’s
manual.

Unpacking
Please inspect your unit immediately for any possible shipping damages. Pay special attention to
the glass inserts within the front plate. They should inspected for any cracks. Immediately report
any damage to your authorized Odyssey dealer, the shipping company, or Odyssey Design Group.
Please keep the shipping materials in a safe place for possible future reuse.
Location
1. Your Odyssey unit can be installed on a shelf, table, or equipment stand. Since the Tempest
weighs in at around 35 lbs. and the Stratos at around 50 lbs, please check the strength of
your surface material. The more stable and sturdier your surface is, the better resonances
and vibrations are controlled, which also results in better performance of your stereo
system. If preferred, you can also locate the amplifier on the floor. Due to the very effective
Audio Selection damping feet, pretty much all surfaces, wood, tile, carpet, etc. are
acceptable.
2. Due to the efficient design of the heatsinks of the amplifier, there is no need for a large
ventilation area around your Odyssey unit. Both, the Tempest and the Stratos can be
situated in tight areas.
3. DO NOT install your Odyssey product in an excessively hot or humid place.
4. This product is for indoor use only.
Set-Up
1. After positioning your Odyssey unit in the desired location, connect the supplied AC power
cord into the AC receptacle. Make sure, that the AC cord is properly grounded. DO NOT
defeat the grounding pin on the AC plug.
2. Caution: Make sure that your unit is turned off before connecting input and and
output wires. Always remember to turn off your unit whenever you connect or
disconnect any cables within your system. Depending on connected electronics and
cables, there is always a chance that your unit could be damaged if these
precautions aren’t taken.
3. Next, connect the RCA interconnect cables into the matching RCA input connectors. For
the amplifier, connect the cables from the loudspeakers into the speaker - binding posts on
the back of the amplifier. These solid and heavy, gold-plated connectors are designed to
accomodate either bare wires, spades, or banana plugs.

Tempest preamplifier connection to Stratos Stereo power amplifier
Stratos Stereo power amplifier connection to Tempest preamplifier

Tempest preamplifier connection to Stratos Mono power amplifier
Stratos Mono power amplifier connection to Tempest preamplifier

Tempest preamplifier connection to Khartago Stereo power amplifier
Khartago Stereo power amplifier connection to Tempest preamplifier

Tempest preamplifier connection to Khartago Mono power amplifier
Khartago Mono power amplifier connection to Tempest preamplifier

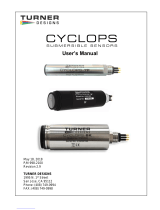
Cyclops integrated amplifier source connection

Tempest preamplifier: Basic hook up and operation:
●Tempest front panel: Big knob at left is turn on/off switch. Do not force it to go beyond when
a soft click takes place. Then unit is on (approximately a 9:00 position) or backwards is in
off position (approximately a 7:00 position). Big knob at right is volume control. Small
central knobs are for input source control: Select and Monitor. A small squared window cut
at extreme right is the IR sensor for remote volume operation if you ordered this option.
●Line inputs: Tempest has 3 line inputs plus a Monitor Loop.
●Monitor loop has two positions: Select and Tape. Select allows to listen to the source
selected by amplifier's (source) Select knob, this signal is sent to Tape Sel. Output so you
can record it or process it separately. When in Tape position it is the signal coming from a
tape deck, CD recorder or maybe another auxiliary device that will be heard.
●Phono inputs: Tempest has a reference grade phono preamplifier MC/MM capable. On the
back panel a switch aside phono inputs selects MM cartridge in up position and MC in
down position. Inputs at left are for MM cartridge, the pair of inputs at right are for MC
cartridge. Big screw terminal at extreme left is for connecting turntable's ground line to
preamplifier's chassis.
●Line outputs: There is a stereo output set at left extreme on preamplifier's back panel, if you
ordered a second output stereo set will be aside the main outputs.
●Connections: Always keep channels order, this is: white to white (left channel) and red to
red (right channel).
Stratos and Khartago (stereo and mono amplifiers): Basic hook up and operation:
●Power on rocker switch is on back panel.
●If you have a Stratos Stereo (Basic, Plus, Extreme) or a Khartago Stereo (Basic, Plus,
Extreme) plug to it's Left and Right input jacks the cables from preamplifier or receiver's
main output or pre out or check the user manual to find how the manufacturer labeled the
ouput jacks from preamplifier or receiver.
●For Stratos and Khartago families in mono versions follow the above procedure and be
careful to keep channel order. Mono amplifiers only accept one channel signal, Left or
Right.
●In all cases remember to always keep channels order, this is: white to white (left channel)
and red to red (right channel).
Cyclops integrated amplifier: Basic hook up and operation:
●Power on rocker switch is on back panel.
●Big knob at front is control volume.
●A small squared window cut at extreme right on front panel is the IR sensor for remote
volume operation if you ordered this option.
●Cyclops integrated amplifier only has one line input stereo set, you can connect to these
inputs a stereo signal from a source component like a CD, music server, etc.. Remember to
always keep channels order, this is: white to white (left channel) and red to red (right
channel).
(Specifications subject to chance without previous notice)

Warm - up Operation
The following and it's related pages are intended as a general reference to the proper setup and
operation of audio equipment. Every single audio and video system, Odyssey or other brands,
benefit from these simple steps, some of which are actually free and very effective. A little attention
and work can go a very long way as far as your system's performance is concerned
Even though most high-end audio equipment such as Odyssey products have been burned-in at
the factory for a minimum of 48 hours, there is still considerable operational time needed for your
unit to perform at its best. For enhanced sonic performance, we highly recommend you leave your
unit on at all times until break-in is complete. The length of the break-in period is highly variable
and dependent upon the specific product. There are specially-designed CDs, such as Reference
Recording's Test and Burn-In CD (RX1000) or the Sheffield and Purist Audio Designs PAD burn-in
CD's that contain special tracks that help with break-in. As a general rule, most equipment requires
several hundred hours of playing to fully break-in. There are several factors that determine the
extensive length of "break-in", such as charging of capacitors, establishing the electron flow on the
PC board, cables, soldering joints, etc. External conditions, such as the power quality and stability
of your power in your listening room, the kind of music you are listening to (more or less dynamics),
and many more factors will contribute to the break-in process. It is important to note, that the more
a given electronic unit has been played, the smaller the audible differences get.
Even though we generalize improvements across the board, the typical phases of break-in below
are more valid for solid state equipment, such as the Odyssey..
Within the break-in process, we distinguish four distinct phases of performance:
First Period: After turning on your amplifier or preamplifier for the first time, the units will require a
few minutes to stabilize. The sound will be rather harsh on the higher frequencies, and the dynamic
range is rather restricted with a flat overall presentation. This sonic signature will always be
apparent when you turn on "cold" components.
Second Period: This stage will be reached after approximately 1-2 hours of playing time and lasts
about 3-4 days. This stage is all about the charging of the power supply, and during this time, the
dynamics, soundstaging, focus, and transients will improve noticeably. Essentially, your unit will
start "opening up and relaxing." However, please also note that the amplifiers do a "Jeckyl and
Hyde" during this time to some degree. Meaning that one day you might not have any bass
whatsoever while the next day you might have too much of it, for example. Overall, the
presentation might be very unstable.
Third Period: After approximately 10-14 days of playing and being charged, the upper midrange
and highs will "smoothen out". The bass will improve in speed and articulation with less overhang.
The result is more even and natural tone balance.
Fourth Period: After about 6 weeks + of operation when left on continuously, your unit should be
very close to being fully broken in. The sound and performance has progressively improved and
your unit will perform to it's full sonic potential.
Even after the initial break-in period, the internal components lose their charge each time the unit is
turned off. The full re-charging can take hours (and sometimes days!). Therefore, the best sonic
performance is achieved when the components are kept fully charged at all times. This essentially
means leaving your equipment on at all times--if you are comfortable with that arrangement. If not,
at least be aware that it will take some time for your unit to warm up and fully charge each time you
power up. These charged-based performance issues are applicable to most electronic equipment,
and are especially critical in high-end solid-state gear such as Odyssey amplifiers and
preamplifiers.

To realize ultimate performance of your audio system, fine-tuned adjustments or "tweaking" should
be considered. This can involve everything from simply setting up the equipment properly to using
expensive system-enhancing products and acoustical room treatments. We will attempt to
categorize by cost the various options and provide some basic advice on optimizing system
performance.
In reviewing the following sections, it is important to understand that the suggested techniques and
products are system-specific. Therefore, we strongly advise you to audition the products before
purchasing them. Please feel free to call us and we will try to guide you through the veritable jungle
of tweak and enhancement products. Even though for the last 14 years we have accumulated an
extensive database of such tweak products with the emphasis of synergy with our products. We
strongly recommend to purchase any tweaks only after an in-home trial with your own system.

No cost tweaks
The simplest, most cost-effective measure to the most out of your audio system is to set up the
system properly. The following offers some advice on set-up:
a. Component Placement: Place all of your components on as solid a surface as possible. The
heavier and sturdier the foundation, the better. This usually means a solid equipment rack that is
spiked into the carpet or that sits squarely on the floor with no wobble. If preferred, you can also
locate the amplifier on the floor. Due to the extremely efficient design of our heat sinks, there is no
need to be concerned about any large ventilation areas around the units. Both, the various Stratos
models and the Tempest Pre-Amplifier can be situated in tight areas, but should be kept away from
excessively humid areas, as in the case with all audio / video components.
b. Power Cords: Where possible, make sure that the power cords of your components do not
overlap anywhere. These cables carry electromagnetic fields that could interfere with each other,
and thus overlapping could lead to "grainier" sound and other audible effects. Where cords must
cross each other, separate the cords by several inches using a small block of Styrofoam or wood.
c. Interconnects and Speaker Cables: The same logic used for the power cord layout applies to
interconnects and speaker cables, although to a lesser degree. Even though it is more difficult to
separate these cables without overlapping, try to lay them out as parallel as possible. Again, the
use of Styrofoam or similar material to separate the cables is recommended. It is especially
important to make sure power cords are separated from the interconnects and speaker cables.
d. Loudspeaker Placement: Placement of speakers in your listening room is probably the single
most important aspect of proper system set-up. First, set up your speakers by following the
recommendations in your manufacturer's owners manual as close as possible. Secondly, try to
avoid having your loudspeakers' drivers "look at" reflective surfaces such as windows or mirrors,
especially at short distances. It is also important to try to minimize the effect of sound reflection
from the side walls to your listening position. Left unchecked, this strong reflection (technically
referred to as the first reflection point) will result in less precise imaging and "smearing" of the
soundstage. This is due to the fact that the sound reaches your ear from the reflected path slightly
later than the sound originating directly from the speaker.
If the owner's manual for your speakers does not provide you with any specific procedures
for speaker placement, we would like to offer a basic rule of thumb. First, measure your
room in the direction that the speakers will face (usually this is the length of the room as
opposed to the width). Divide this distance by odd integers-- 3, 5, 7, and so on. This will
provide the theoretical distances that the front of the speakers should be positioned from
the back wall to minimize the effect of standing waves that develop within the room.
Individual room configurations, furniture, and other factors cause the ideal speaker
location to vary a bit from these theoretical positions, but these are usually the best points
to begin listening tests. A typical example is provided below:
Example: Suppose your listening room measures 15 ft. long x 12 ft. wide, and the
speakers will face the room's length-wise direction. Theoretically, the front of the speakers
should be positioned at 5 ft., 4 ft., 3 ft., etc. from the rear wall. Try a couple of these
distances as starting points and make slight adjustments as needed.

Low cost tweaks
a. De-coupling devices: Cones, spikes, or dampers nearly always help to improve the
performance of components and the sound of your system. This is why all Odyssey products are
outfitted with $30 Audio Selection™ dampers as standard equipment, instead of cheaper glued-on
rubber feet that are ineffective. We can also provide several different cones and spikes from Audio
Selection™ to you, factory direct, with 50% savings.
b. Loudspeakers: Especially your loudspeakers will benefit greatly from cones or spikes. Most
loudspeaker manufacturers supply these devices as part of their products, and we highly, highly
recommend using them. In the vast majority of systems, be it floorstanding or bookshelf speakers,
cones and spikes help to reduce or even eliminate overhang resonances from the woofers, and
thus improve the tonality, soundstaging, and dynamics of your system.
c. Cables: Cables are important components in any audio system. When properly matched to the
system, even relatively inexpensive audio cables can improve performance. Again, synergy is the
key. Please feel free to contact us regarding your system, and we will try to give you the best
possible advice based on our 12 years of experience in the high end electronics industry.
High cost tweaks
a. Cables: The degree of sound improvement with high-end audio cables will be system-specific.
Therefore, more expensive does not necessarily mean better performance. This is found to be
especially true when comparing the performance of very expensive cables. However, it is
nevertheless possible that higher price tags could mean that more expensive design principles and
materials are incorporated in the cable. Again, talk to your dealer or call us.
b. Resonance platforms and power line conditioners: Again as a rule of thumb these products
work well, but they are also system-specific.
c. Acoustical room treatment products: There are a wide variety of different products with
different materials, surfaces, sizes, and colors available. They are all effective, some more and
some less. However, if your budget allows even modest treatments, you should try them.
Essentially, only your budget and your interior decorating tastes (your spouse's too!) are the limit.

Care and Maintenance
Other than the internal fuses, there are no user serviceable parts inside your Odyssey amplifier or
preamplifier. Thus, the top cover should only be opened for checking these fuses. Any other check
up and work should be left to authorized service personnel. As for checking and changing internal
fuses, see
Always turn off the unit before opening the top cover.
Your Odyssey case is made of brushed aluminum. Since the finish is anodized instead of painted,
very minimal care and cleaning is required. Use only mild soap and a damp cloth to clean the case.
Under no circumstance should you use dripping water or fluids, or excessively wet cloths, since
drops of fluid can enter the inside of the case and cause serious damage to your unit. This would
also void your warranty. Don’t use chemical solvents to clean your case.
Even though your case is made of aluminum, the fact is that aluminum is still a very soft material,
and prone to scratch rather easily. Avoid touching your Odyssey case with any sharp or pointy
objects. All service work and possible upgrades are provided and performed by either Odyssey
Designs or by authorized service personnel only. We truly strive to give you the best possible
service, since we know the power of a satisfied customer and the resulting “word of mouth”
advertising very well. We also take great pride in providing the best service and excellence. Our
fast and reliable service offers you a high degree of peace of mind.
Call us for a cost -free maintenance check -up of your Odyssey unit.

Trouble Shooting
Should your Odyssey unit fail to operate at any time while switched on, please check the following
points carefully:
1. Check for proper power connection.
2. Switch off your Odyssey unit and check for proper connection of all input and output wires.
3. If all cables are connected properly, check the proper power connection on all of your other
components.
4. Turn on your Odyssey unit, and check the on / off switch. If it doesn’t light up, check the
external fuse, and replace this fuse with the correct value.
5. If the switch lights up, check for the internal fuses. Turn off your unit, disconnect the power
cord, and open the top cover. Check the internal fuses and replace if necessary. (Examine
either by visual check, Volt meter, or simply by replacing all of them).This is optional and
Odyssey can’t be responsible for any damages or injuries once the topcover has been
removed. We recommend to have a trained technician perform any technical tasks.
6. If the unit still fails to work properly, please contact your authorized Odyssey distributor, or
feel free to contact us directly. More specific troubleshooting can be performed over the
phone.

Stratos Stereo power amplifiers family
Specifications
Stratos Stereo:
base model specifications:
●2 x 150 Watts RMS @ 8 Ohms
●2 Ohm load stable
●Class A/AB
●2 - 400,000 Hz frequency range
●60,000µF memory
●45 amps current delivery
●<0.04% THD (not audible)
●>500 continuous damping factor
●Input impedance >10kOhms
●DC offset <1 mV
●RCA & XLR (bridged) inputs
●400 VA Plitron transformer
●Sanken Epitaxial Planar Transistors 2SA1216 & 2SC2922
●Anti vibration dual thickness PCB
●Power consumption when idle ±30Watts
●4 internal fuses 250V/6.3A, 5x20mm, fast blow
●Additional electrical protection fuse
●54 lbs weight / 24.5 kg
●Dimensions: 19 width x 18 deep x 7 height (in) / 48.3 width x 45.7 deep x 17.8 height (cm)
Stratos Stereo Plus:
improvements over base model:
●Additional 60,000µF memory bank for 120,000µF total
●55 lbs / 25 kg weight
Stratos Stereo Extreme:
improvements over Plus model:
●Additional 60,000µF memory bank for 180,000µF total
●>60 amps current delivery
●Additional 400 VA Plitron transformer for 800VA total
●Higher performance parts:
●Nichicon Muse capacitors, Vishay/Dale resistors, extra WIMA metal film capacitors
●Power consumption when idle ±35Watts
●70 lbs / 32 kg weight
/