Page is loading ...

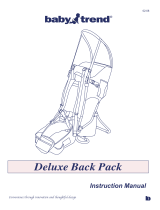
Smart Support
Infant Carrier
Owner's Manual
Manual del propietario
Read all instructions BEFORE
assembly and USE of product.
KEEP INSTRUCTIONS FOR
FUTURE USE.
Lea todas las instrucciones ANTES
de armar y USAR este producto.
CONSERVE LAS INSTRUCCIONES
PARA USO FUTURO.
IS0103.4ES
©2013 Artsana USA, INC. 07/13

2
WARNING
Failure to follow these warnings and the instructions could result in
serious injury or death
• Check to assure all buckles,
snaps, straps, and adjustments
are secure before each use.
• Do not use carrier with a child
weighing less than 17lbs or more
than 40lbs.
• Do not use carrier if child cannot
sit upright unassisted.
• Do not leave the child inside
the carrier, with the stand open,
standing on countertops, tables
or other elevated surfaces.
• Never leave your child
unattended inside the backpack.
• Ensure that the backpack is
safely opened and locked into
position before sitting the child
in it.
• Use the backpack only when
standing or walking. Do not use
the backpack when sitting down.
• Children may suffer from
the effects of weather and
temperature changes before
adults.
• The backpack stand must be
used only for short breaks and
not as a seat.
• After seating the child in the
infant carrier, adjust leg openings
to t baby's legs snugly.
• Blood circulation in your child’s
legs may be reduced during
transport. It is recommended to
make frequent breaks. Children
may tire very quickly.
• Ensure that the person using the
backpack knows how to use it
safely.
• When adjusting or closing the
backpack, always ensure that the
movable parts of the frame do
not come into contact with your
child.
• Do not carry more than one
child at a time.
• The use of the child retention
system is important for your
child’s safety. Always secure your
child with the child retention
system provided.
• When the child is inside the
backpack, he/she could be taller
than the person who is carrying
it.
FALL OR STRANGULATION HAZARD
Avoid serious injury from falling or sliding out.
Always use child retention system.

3
WARNING
• Always pay attention to
obstacles, located at the height
of the child’s head, which could
be a hazard (for example, door
frames, branches of trees, etc).
• When using the backpack, pay
special attention to the following
points:
• The balance of the person
carrying the backpack may
be adversely affected due to
the movement of the child
within it or the movements
of the person carrying it.
• Do not bend or lean forward
when carrying the backpack.
• Do not use the backpack
while doing sporting
activities.
• Care should be taken when
putting on or removing the
backpack.
• When the backpack is placed
onto the oor, or near the
oor, care should be taken
to avoid injury to your child’s
feet.
• Do not use the backpack if
any components are missing
or damaged.
• Do not t any accessories, spare
parts, or components to the
backpack that are not supplied or
approved by Chicco.
• If the backpack is left exposed
to direct sunlight for a long
time, allow it to cool before
placing your child in it. Prolonged
exposure to direct sunlight may
cause the fabric to fade.
• Prevent the backpack from
coming into contact with
salt water. It may cause the
formation of corrosion.
• Keep all plastic bags out of the
reach of children to prevent the
risk of suffocation.
Failure to follow these warnings and the instructions could result in
serious injury or death
FALL OR STRANGULATION HAZARD
Avoid serious injury from falling or sliding out.
Always use child retention system.

6
How to assemble the backpack
Ensamblaje
After removing the backpack from
the packaging, assemble the various
components as follows:
1. Raise the sun canopy to a vertical
position, in order not to hinder the
subsequent operations.
Una vez extraída la mochila de su
embalaje, proceder con el ensamblaje
de los distintos componentes:
1. Levantar la capota en vertical
para que no estorbe las operaciones
sucesivas.
WARNING
Before use, remove and dispose of all
plastic bags and packaging materials
and keep them out of reach of
children.
ADVERTENCIA
Antes del uso quitar y eliminar
las bolsas de plástico y todos los
elementos que formen parte de la
caja del producto y mantenerlos
fuera del alcance de los niños
1

8
4
How to assemble the backpack
Ensamblaje
4. Fit the fabric inside the joints with
the hook and loop straps.
4. Ajuste la tela dentro de las
uniones con las correas con gancho
y bucle.
5. To open rear stand of the
backpack, pull the stand toward the
rear of the backpack. The stand will
lock automatically into position.
5. Para abrir la estructura
posterior de la mochila, tirar
de la estructura hacia la parte
posterior de la mochila que quedará
automáticamente bloqueada
5
WARNING
The use of the stand is for short
breaks only, not as a seat.
ADVERTENCIA
La estructura de apoyo se debe usar
sólo para breves descansos y no
como sillita.

9
6
How to assemble the backpack
Ensamblaje
6. It is recommended to close the
stand, when the backpack is used on
the shoulders. Push the stand, until is
completely closed. The stand will lock
automatically. You can now complete
the assembly of the backpack.
6. Se aconseja cerrar la estructura
cuando se está utilizando la
mochila llevada en hombros.
Empujar la estructura hasta
cerrarla completamente. Quedará
automáticamente bloqueada. En
este punto, ya podemos terminar el
montaje de la mochila.

10
7. Fix the backrest to the joints of
the backpack, inserting the support
tubes, as shown in the diagram.
7. Fijar el respaldo en las
articulaciones de la mochila
colocando los tubos de soporte
como indica la gura.
8. Ensure the tubes are tted
correctly, checking that the locking
springs are visible in the external
holes, and pulling the backrest in an
upward direction.
8. Asegurarse que los tubos queden
perfectamente colocados, controlar
que los resortes de bloqueo resulten
visibles en los oricios externos y
empujar hacia arriba el respaldo.
How to assemble the backpack
Ensamblaje
7
8

11
How to assemble the backpack
Ensamblaje
9. Fix the supports of the sun canopy’s
second small arch, as shown in the
diagram.
9. Fijar los soportes del segundo
tensor de la capota como indica la
gura.
9
The sun canopy cannot be removed,
but it can be turned backwards
completely. Before turning the sun
canopy backwards, remove the
supports of the second arch to free
the canopy.
La capota no se puede quitar pero se
puede recoger completamente hacia
atrás. Quitar primero los soportes del
segundo tensor dejando la capota
libre.

12
10. To open the sun canopy, pull the
small front arch forward.
10. Para abrir la capota es suciente
con empujar el tensor anterior hacia
adelante.
Canopy
Capota
10

13
11. The seat of the backpack can be
adjusted up or down via the buckles,
located at the rear of the seat and
behind the crotch strap. To lower the
seat, push the plastic slide adjuster up
while sliding the webbing through it.
11. El asiento de la mochila puede
subirse o bajarse con las hebillas que
se encuentran en la parte trasera
del asiento y debajo de la correa de
la entrepierna. Para bajar el asiento,
empuje hacia arriba el dispositivo de
ajuste deslizable de plástico mientras
le atraviesa la cincha.
12. To raise the seat, pull down on the
end of the strap.
12. Para subir el asiento, tire hacia
abajo el extremo de la correa.
11
How to adjust the seat
Regulación del asiento
All buckles must be adjusted to the
same position to maintain the seat in
the horizontal position.
Ajustar todas las hebillas en la misma
posición para que el asiento quede
perfectamente horizontal.
12

14
How to adjust the seat
Regulación del asiento
13
13. The leg openings of the backpack
can be adjusted via the buckle,
located inside the carrier on the
crotch strap.To tighten the openings
pull down on the strap.
13. Las aberturas de la pierna del
morral se pueden ajustar vía la hebilla,
situada dentro del portador en la
correa de entrepierna. Para apretar
las aberturas tiran hacia abajo en la
correa.
WARNING
After seating the child in the infant
carrier, adjust leg openings to t
baby's legs snugly.
ADVERTENCIA
Después de asentar al niño en el
portador infantil, ajuste las aberturas
de la pierna para caber baby' piernas
de s comodamente.

15
14
14. The backpack has an insert/pillow
to offer maximum comfort to the
child.
14. La mochila tiene un minireductor
interno para el máximo confort del
bebé.
Insert/Pillow
Minireductor
WARNING
Never use the backpack without
insert/pillow.
ADVERTENCIA
No utilizar nunca la mochila sin el
mini reductor.

16
Child Retention System
Sistema de retención infantil
WARNING
For your child’s safety, always use the
child retention system.
ADVERTENCIA
Para la seguridad del niño, utilice
siempre el sistema de retención
infantil.
The backpack has a 5 point child
retention system which should be
adjusted to t the child securely
(shoulder straps, lap belt and crotch
strap).
15. Place the child into the backpack,
and secure child with the child
retention system. The height of
the child retention system can be
adjusted to two positions.
La mochila tiene Sistema de retención
infantil de 5 puntos (hombreras,
cinturón abdominal y separapiernas).
15. Coloque al niño dentro de la
mochila y asegúrelo con el sistema
de retención infantil. La altura del
sistema de retención infantil se puede
ajustar en dos posiciones.
15

17
16. Put the backpack onto your
shoulders, adjust the lap belt waist
strap and fasten the front buckle.
16. Cargar la mochila en la espalda y
ajustar la correa de la cintura
enganchando la hebilla anterior.
17. Fasten the chest buckle, and adjust
it to t the shoulder strap to the cor-
rect position.
17. Ajuste la hebilla del pecho y
regúlela de modo que se ajuste a la
correa para los hombros en la posición
correcta.
16
How to use the Backpack
Como utilizar la mochila
17

19
For More Information
Más información
For USA customers :
If you have any questions or comments about this product, or are missing any of the
parts, please do not return this product to the store. Contact us in one of the
following ways:
Para clientes de los EE. UU.:
Si tiene preguntas o sugerencias sobre este producto, o falta alguna de las partes, no
devuelva este producto a la tienda. Comuníquese con nosotros por alguno de los
siguientes medios:
@
(877)-424-4226
1826 William Penn Way
Lancaster, PA 17601
www.chiccousa.com

www.chiccousa.com
/


