
4-Cup Removable Reservoir
Coffeemaker
Cafetera de 4 Tazas con
Tanque de Agua Removible
SP Series / Serie de SP
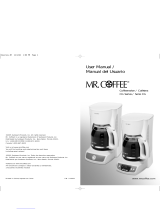
User Manual /
Manual de Usuario
©
2002 Sunbeam Products, Inc. All rights reserved.
MR. C FFEE
®
is a registered trademark of Sunbeam Products, Inc.
Distributed by Sunbeam Products, Inc., Boca Raton, Florida 33431.
©
2002 Sunbeam Products, Inc. Todos los derechos reservados.
MR. C FFEE
®
es una marca registrada de Sunbeam Products, Inc.
Distribuido por Sunbeam Products, Inc., Boca Raton, Florida 33431.
Printed in China / Empreso en China P.N. 109041

32
IMPORTANT SAFEGUARDS
When using electrical appliances, to reduce the risk of fire, electric shock,
and/or injury to persons, basic safety precautions should always be followed,
including the following:
1. Read all instructions carefully before using the Coffeemaker.
2. Do not touch the Coffeemaker’s hot surfaces. Use handles or knobs.
3. To protect against electric shock, do not place cord, plug or Coffeemaker
in water or any other liquid.
4. Close supervision is necessary when any appliance is used by or
near children.
5. Unplug from outlet when not in use and before cleaning. Allow to cool
before putting on or taking off parts and before cleaning the appliance.
6. Do not operate any appliance with a damaged cord or plug or after
the appliance malfunctions or has been damaged in any manner.
Return appliance to an authorized service facility for examination,
repair or adjustment.
7. The use of accessory attachments not recommended by MR. COFFEE
®
may cause injuries.
8. Do not use outdoors.
9. Do not let cord hang over edge of table or counter or touch hot surfaces.
10. To reduce the risk of fire or electric shock, do not remove rating label
cover. No user-serviceable parts inside. Repairs should be done by
authorized service personnel only.
11. Do not place on or near hot gas or electric burner, or in a heated oven.
12. Always plug cord into the wall outlet before turning on any controls.
To disconnect, turn power off, then remove plug from wall outlet.
13. Always use cold water to make coffee. Warm water or other liquids could
cause damage to the Coffeemaker.
14. Scalding may occur if the cover is lifted or brew basket is removed during
the brewing cycle.
15. Do not use this appliance for other than intended use.
16. Do not immerse appliance in any liquid.
WARNING
TO AVOID DAMAGE OF, OR INJURY FROM CARAFE,
FOLLOW THESE PRECAUTIONS:
• Do not set a hot carafe on a wet or cold surface.
• Do not place hot carafe on or near paper, cloth or other flammable material.
• Never use the carafe on a range top or in a conventional microwave oven.
• Do not allow liquid to evaporate from carafe. Do not heat carafe
when empty.
• Do not move entire unit when carafe contains hot liquid.
• Use the lid on the carafe while brewing and pouring coffee.
• Discard carafe if damaged in any manner, or a carafe having a loose
or weakened handle.
• Do not clean carafe with scouring powders, steel wool pads
or other abrasive materials.
WARNING:
To reduce the risk of fire or electric shock, do not remove
any service covers. There are no user-serviceable parts
inside the Coffeemaker. Only authorized personnel
should repair the Coffeemaker.
Special Cord Set Instructions
A short power supply cord is provided to reduce the hazards resulting from
entanglement or tripping over a longer cord.
• An extension cord may be used if care is exercised in its use.
• If an extension cord is used, the marked electrical rating of the extension
cord should be at least as great as the electrical rating of the appliance.
The extension cord should be arranged so that it does not drape over the
counter or tabletop where it can be pulled on by children or tripped over
accidentally. The electrical rating of the Coffeemaker is listed on the bottom
panel of the unit.
•
This appliance has a polarized plug (one blade is wider than the other).
To reduce the risk of electric shock, this plug will fit in a polarized outlet
only one way. If the plug does not fit fully in the outlet, reverse the plug.
If it still does not fit, contact a qualified electrician. Do not modify the plug
in any way.
SAVE THESE INSTRUCTIONS

5
Table of Contents
Important Safeguards . . . . . . . . . . . . . . . . . . . . . . . . . . . . . . . . . . . . . . . . . 2
To Avoid Damage or Injury . . . . . . . . . . . . . . . . . . . . . . . . . . . . . . . . . . . . . . 3
Special Cord Set Instructions . . . . . . . . . . . . . . . . . . . . . . . . . . . . . . . . . . . . 3
Precautions When Using This Coffeemaker . . . . . . . . . . . . . . . . . . . . . . . . . . 4
Introduction . . . . . . . . . . . . . . . . . . . . . . . . . . . . . . . . . . . . . . . . . . . . . . . . 5
Table of Contents . . . . . . . . . . . . . . . . . . . . . . . . . . . . . . . . . . . . . . . . . . . . 5
Setting Up Your Coffeemaker . . . . . . . . . . . . . . . . . . . . . . . . . . . . . . . . . . . . 6
Diagram of Parts . . . . . . . . . . . . . . . . . . . . . . . . . . . . . . . . . . . . . . . . . . . . . 7
Preparing Your Coffeemaker for Use . . . . . . . . . . . . . . . . . . . . . . . . . . . . . . . 8
Preparing Coffeemaker for Brewing Coffee . . . . . . . . . . . . . . . . . . . . . . . . . . 8
Programming Your Coffeemaker . . . . . . . . . . . . . . . . . . . . . . . . . . . . . . . . . . 9
Brewing Coffee . . . . . . . . . . . . . . . . . . . . . . . . . . . . . . . . . . . . . . . . . . . . . . 9
Filling the Water Reservoir . . . . . . . . . . . . . . . . . . . . . . . . . . . . . . . . . . . . . . 9
Putting In the Coffee . . . . . . . . . . . . . . . . . . . . . . . . . . . . . . . . . . . . . . . . . . 9
Suggested Coffee Measurement Chart . . . . . . . . . . . . . . . . . . . . . . . . . . . . . 10
Brewing Your Coffee . . . . . . . . . . . . . . . . . . . . . . . . . . . . . . . . . . . . . . . . . . 10
Cleaning Instructions. . . . . . . . . . . . . . . . . . . . . . . . . . . . . . . . . . . . . . . . . . . 12
Using MR. COFFEE
®
Cleaner . . . . . . . . . . . . . . . . . . . . . . . . . . . . . . . . . . . . . . 12
Troubleshooting . . . . . . . . . . . . . . . . . . . . . . . . . . . . . . . . . . . . . . . . . . . . . . 13
Service and Maintenance . . . . . . . . . . . . . . . . . . . . . . . . . . . . . . . . . . . . . . . 14
Questions, Comments and Suggestions . . . . . . . . . . . . . . . . . . . . . . . . . . . . . 14
Warranty Information . . . . . . . . . . . . . . . . . . . . . . . . . . . . . . . . . . . . . . . . . . 15
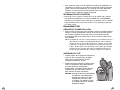
Introduction
Congratulations! You are the owner of the MR. COFFEE
®
4-Cup
Removable Reservoir Coffeemaker. Please read all of the instructions
in this booklet carefully before you begin to use this appliance.
Proper care and maintenance will insure the long life of this appliance
and its trouble-free operation. Save these instructions and refer
to them often for cleaning and care tips.
Precautions When Using This Coffeemaker
Things To Do –
• Avoid areas of the Coffeemaker that may become hot or emit steam when
the machine is ON, particularly the filter basket and the water reservoir.
• Avoid jerking or straining the power cord when unplugging.
Grasp the molded plug to unplug.
• Unplug the unit when not in use.
• Unplug the unit when wiping the exterior. Use only a damp cloth to wipe.
• Place machine well back from edge of counter.
Things Not To Do
–
• Do not place a cloth or otherwise restrict airflow beneath the Coffeemaker.
• Never reheat a beverage by passing it through the brewing system.
• Do not use abrasive or caustic cleaning compounds to clean the exterior
of the unit.
• Do not store the machine until warming plate has cooled.
• In order to avoid contact with any fluid, do not place your hand
underneath the filter basket.
• Do not permit children to use this machine without close adult supervision.
• The use of chemically softened water can inhibit proper filtration.
This will affect the beverage flavor and will cause a long drip time
from the filter basket. Avoid using chemically softened water.
coffee
4

5
Table of Contents
Important Safeguards . . . . . . . . . . . . . . . . . . . . . . . . . . . . . . . . . . . . . . . . . 2
To Avoid Damage or Injury . . . . . . . . . . . . . . . . . . . . . . . . . . . . . . . . . . . . . . 3
Special Cord Set Instructions . . . . . . . . . . . . . . . . . . . . . . . . . . . . . . . . . . . . 3
Precautions When Using This Coffeemaker . . . . . . . . . . . . . . . . . . . . . . . . . . 4
Introduction . . . . . . . . . . . . . . . . . . . . . . . . . . . . . . . . . . . . . . . . . . . . . . . . 5
Table of Contents . . . . . . . . . . . . . . . . . . . . . . . . . . . . . . . . . . . . . . . . . . . . 5
Setting Up Your Coffeemaker . . . . . . . . . . . . . . . . . . . . . . . . . . . . . . . . . . . . 6
Diagram of Parts . . . . . . . . . . . . . . . . . . . . . . . . . . . . . . . . . . . . . . . . . . . . . 7
Preparing Your Coffeemaker for Use . . . . . . . . . . . . . . . . . . . . . . . . . . . . . . . 8
Preparing Coffeemaker for Brewing Coffee . . . . . . . . . . . . . . . . . . . . . . . . . . 8
Programming Your Coffeemaker . . . . . . . . . . . . . . . . . . . . . . . . . . . . . . . . . . 9
Brewing Coffee . . . . . . . . . . . . . . . . . . . . . . . . . . . . . . . . . . . . . . . . . . . . . . 9
Filling the Water Reservoir . . . . . . . . . . . . . . . . . . . . . . . . . . . . . . . . . . . . . . 9
Putting In the Coffee . . . . . . . . . . . . . . . . . . . . . . . . . . . . . . . . . . . . . . . . . . 9
Suggested Coffee Measurement Chart . . . . . . . . . . . . . . . . . . . . . . . . . . . . . 10
Brewing Your Coffee . . . . . . . . . . . . . . . . . . . . . . . . . . . . . . . . . . . . . . . . . . 10
Cleaning Instructions. . . . . . . . . . . . . . . . . . . . . . . . . . . . . . . . . . . . . . . . . . . 12
Using MR. COFFEE
®
Cleaner . . . . . . . . . . . . . . . . . . . . . . . . . . . . . . . . . . . . . . 12
Troubleshooting . . . . . . . . . . . . . . . . . . . . . . . . . . . . . . . . . . . . . . . . . . . . . . 13
Service and Maintenance . . . . . . . . . . . . . . . . . . . . . . . . . . . . . . . . . . . . . . . 14
Questions, Comments and Suggestions . . . . . . . . . . . . . . . . . . . . . . . . . . . . . 14
Warranty Information . . . . . . . . . . . . . . . . . . . . . . . . . . . . . . . . . . . . . . . . . . 15
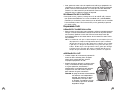
Introduction
Congratulations! You are the owner of the MR. COFFEE
®
4-Cup
Removable Reservoir Coffeemaker. Please read all of the instructions
in this booklet carefully before you begin to use this appliance.
Proper care and maintenance will insure the long life of this appliance
and its trouble-free operation. Save these instructions and refer
to them often for cleaning and care tips.
Precautions When Using This Coffeemaker
Things To Do –
• Avoid areas of the Coffeemaker that may become hot or emit steam when
the machine is ON, particularly the filter basket and the water reservoir.
• Avoid jerking or straining the power cord when unplugging.
Grasp the molded plug to unplug.
• Unplug the unit when not in use.
• Unplug the unit when wiping the exterior. Use only a damp cloth to wipe.
• Place machine well back from edge of counter.
Things Not To Do
–
• Do not place a cloth or otherwise restrict airflow beneath the Coffeemaker.
• Never reheat a beverage by passing it through the brewing system.
• Do not use abrasive or caustic cleaning compounds to clean the exterior
of the unit.
• Do not store the machine until warming plate has cooled.
• In order to avoid contact with any fluid, do not place your hand
underneath the filter basket.
• Do not permit children to use this machine without close adult supervision.
• The use of chemically softened water can inhibit proper filtration.
This will affect the beverage flavor and will cause a long drip time
from the filter basket. Avoid using chemically softened water.
coffee
4

76
S
ETTING
U
P
Y
OUR
C
OFFEEMAKER
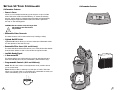
Coffeemaker Features
• Pause ’n Serve
Allows you to interrupt the brewing cycle and pour a cup of coffee
before the entire carafe is finished brewing. To restart the brewing
process, return carafe to warming plate and coffee will automatically
begin flowing through filter basket. Make sure carafe is placed all
the way on the warming plate.
CAUTION: Do not remove carafe for longer than
30 seconds or the filter basket
may overflow.
• Removable Water Reservoir
The water reservoir can be removed for easy cleaning or filling.
• Lighted On/Off Switch
Lighted On/Off switch allows you to know when the Coffeemaker is ON
for safe operation (SP3 and SP4 only).
• Removable Filter Insert
(SP3 and SP4 only)
The removable filter basket insert allows you to easily lift the filter basket
from the brew basket to add or remove filter and ground coffee.
• Audible Ready Signal
• 1 Hour Auto-Off
This feature keeps your coffee warm for one hour after brewing and
then automatically shuts off your coffeemaker (SPX3 and SPX4 only).
• Programmable Controls (SPX3 and SPX4 only)
Clock: The LED clock serves as a handy kitchen clock, and also allows
you to set the timer.
Timer: Would you like to wake up to a fresh pot of coffee? The timer
allows you to preset when you would like the coffeemaker to brew your
coffee automatically, up to 24 hours in advance.
Coffeemaker Features

76
S
ETTING
U
P
Y
OUR
C
OFFEEMAKER
Coffeemaker Features
• Pause ’n Serve
Allows you to interrupt the brewing cycle and pour a cup of coffee
before the entire carafe is finished brewing. To restart the brewing
process, return carafe to warming plate and coffee will automatically
begin flowing through filter basket. Make sure carafe is placed all
the way on the warming plate.
CAUTION: Do not remove carafe for longer than
30 seconds or the filter basket
may overflow.
• Removable Water Reservoir
The water reservoir can be removed for easy cleaning or filling.
• Lighted On/Off Switch
Lighted On/Off switch allows you to know when the Coffeemaker is ON
for safe operation (SP3 and SP4 only).
• Removable Filter Insert
(SP3 and SP4 only)
The removable filter basket insert allows you to easily lift the filter basket
from the brew basket to add or remove filter and ground coffee.
• Audible Ready Signal
• 1 Hour Auto-Off
This feature keeps your coffee warm for one hour after brewing and
then automatically shuts off your coffeemaker (SPX3 and SPX4 only).
• Programmable Controls (SPX3 and SPX4 only)
Clock: The LED clock serves as a handy kitchen clock, and also allows
you to set the timer.
Timer: Would you like to wake up to a fresh pot of coffee? The timer
allows you to preset when you would like the coffeemaker to brew your
coffee automatically, up to 24 hours in advance.
Coffeemaker Features

98
• Small oil droplets on the surface of brewed black coffee are due to
the extraction of oil from the coffee grounds. Oiliness may occur more
frequently if heavily roasted coffees are used. Over-extraction may also
cause oiliness, indicating a need to clean your Coffeemaker.
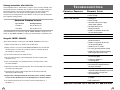
PROGRAMMING YOUR COFFEEMAKER
•
To set your clock, press down and hold the SET button, while alternately
pressing
the UP and DOWN buttons (indicated by arrows), until you reach your
desired time. Once you reach your desired time, release the SET button
and your clock will be programmed (SPX3 and SPX4 only).
Brewing Coffee
FILLING THE WATER RESERVOIR
• Remove water reservoir, open hinged lid and add the appropriate amount
of water. Place removable water reservoir at the top of the unit and
flush against it. Push down until plastic notches insert into slots on
the Coffeemaker on both sides.
NOTE: The amount of brewed coffee after the brewing process will always
be slightly less than the amount of water placed into the Coffeemaker,
since some water is absorbed by the coffee grounds and filter.
Add a little extra water at the beginning so that you have the
exact number of cups desired or you can remove the detachable
water tank from the Coffeemaker to fill with cool water.
PUTTING IN THE COFFEE
• Lift brew basket lid. Insert a standard flat
paper filter into the filter basket or a pre-
prepared coffee pack.
• After using your Coffeemaker several times,
the amount of coffee may be adjusted to suit
your particular taste, by decreasing or
increasing the amount of coffee used.
Be sure to use coffee ground specifically
for automatic-drip Coffeemakers.
CAUTION: Do not operate your Coffeemaker
if the basket is not inserted
completely. If the basket does
not insert completely, check to
see that the filter packet is
properly seated and basket
is locked into place.
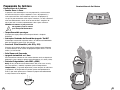
Preparing Your Coffeemaker for Use
• Carefully unpack the Coffeemaker and remove all packaging materials.
• Before making coffee in your new MR. COFFEE
®
Coffeemaker, thoroughly
clean the carafe, carafe lid, filter holder and detachable water tank with
warm, soapy water. Rinse and dry. Do not use harsh or abrasive cleaners.
NOTE: CARAFE, WATER RESERVOIR, CARAFE LID AND FILTER
BASKET ARE DISHWASHER SAFE.
• You may wipe the warming plate with a clean, damp cloth.
However, do not immerse the Coffeemaker in water or any other liquid.
• Prior to brewing your first pot of coffee, operate Coffeemaker once or
twice with water but without ground coffee or a paper filter. This will
remove any dust that may have settled inside the Coffeemaker which
might affect the flavor of the coffee.
IMPORTANT – Use Cold Water for Best Results
• Wash decanter, removable water reservoir, decanter lid and removable
filter basket insert with a mixture of mild detergent and water. Rinse each
thoroughly.
PREPARING COFFEEMAKER FOR BREWING COFFEE
• Place your MR. COFFEE
®
Coffeemaker on a flat, level surface away from
any edge.
• Plug the unit into a 120 Volt, 60 Hz AC only outlet.
• The lid of the carafe must be properly snapped on during the brewing
process and the carafe must be set on the warming plate.
• The filter basket must be properly locked in during the brewing process.
CAUTION: If the filter basket is not completely inserted, the
Pause ’n Serve feature will not function properly.
It could cause hot water or hot coffee to overflow.
• Do not re-use coffee grounds since this will greatly impair coffee flavor.
• Reheating coffee is not recommended. Coffee is at its peak flavor
immediately after brewing.

98
• Small oil droplets on the surface of brewed black coffee are due to
the extraction of oil from the coffee grounds. Oiliness may occur more
frequently if heavily roasted coffees are used. Over-extraction may also
cause oiliness, indicating a need to clean your Coffeemaker.
PROGRAMMING YOUR COFFEEMAKER
•
To set your clock, press down and hold the SET button, while alternately
pressing
the UP and DOWN buttons (indicated by arrows), until you reach your
desired time. Once you reach your desired time, release the SET button
and your clock will be programmed (SPX3 and SPX4 only).
Brewing Coffee
FILLING THE WATER RESERVOIR
• Remove water reservoir, open hinged lid and add the appropriate amount
of water. Place removable water reservoir at the top of the unit and
flush against it. Push down until plastic notches insert into slots on
the Coffeemaker on both sides.
NOTE: The amount of brewed coffee after the brewing process will always
be slightly less than the amount of water placed into the Coffeemaker,
since some water is absorbed by the coffee grounds and filter.
Add a little extra water at the beginning so that you have the
exact number of cups desired or you can remove the detachable
water tank from the Coffeemaker to fill with cool water.
PUTTING IN THE COFFEE
• Lift brew basket lid. Insert a standard flat
paper filter into the filter basket or a pre-
prepared coffee pack.
• After using your Coffeemaker several times,
the amount of coffee may be adjusted to suit
your particular taste, by decreasing or
increasing the amount of coffee used.
Be sure to use coffee ground specifically
for automatic-drip Coffeemakers.
CAUTION: Do not operate your Coffeemaker
if the basket is not inserted
completely. If the basket does
not insert completely, check to
see that the filter packet is
properly seated and basket
is locked into place.
Preparing Your Coffeemaker for Use
• Carefully unpack the Coffeemaker and remove all packaging materials.
• Before making coffee in your new MR. COFFEE
®
Coffeemaker, thoroughly
clean the carafe, carafe lid, filter holder and detachable water tank with
warm, soapy water. Rinse and dry. Do not use harsh or abrasive cleaners.
NOTE: CARAFE, WATER RESERVOIR, CARAFE LID AND FILTER
BASKET ARE DISHWASHER SAFE.
• You may wipe the warming plate with a clean, damp cloth.
However, do not immerse the Coffeemaker in water or any other liquid.
• Prior to brewing your first pot of coffee, operate Coffeemaker once or
twice with water but without ground coffee or a paper filter. This will
remove any dust that may have settled inside the Coffeemaker which
might affect the flavor of the coffee.
IMPORTANT – Use Cold Water for Best Results
• Wash decanter, removable water reservoir, decanter lid and removable
filter basket insert with a mixture of mild detergent and water. Rinse each
thoroughly.
PREPARING COFFEEMAKER FOR BREWING COFFEE
• Place your MR. COFFEE
®
Coffeemaker on a flat, level surface away from
any edge.
• Plug the unit into a 120 Volt, 60 Hz AC only outlet.
• The lid of the carafe must be properly snapped on during the brewing
process and the carafe must be set on the warming plate.
• The filter basket must be properly locked in during the brewing process.
CAUTION: If the filter basket is not completely inserted, the
Pause ’n Serve feature will not function properly.
It could cause hot water or hot coffee to overflow.
• Do not re-use coffee grounds since this will greatly impair coffee flavor.
• Reheating coffee is not recommended. Coffee is at its peak flavor
immediately after brewing.

1110
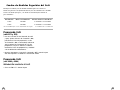
Suggested Coffee Measurement Chart
For best results, use level coffee scoop of fresh coffee beans.
When using pre-ground coffee, use level tablespoon (tbsp.) or level coffee scoops
of drip grind or a grind recommended for automatic drip coffeemakers.
TO BREW WHOLE COFFEE BEANS USE THIS AMOUNT OF GROUND COFFEE
4 cups 3 scoops 5 tablespoons or 2-1/2 scoops
2 cups 2 scoops 3 tablespoons or 1-1/2 scoops
Use more or less coffee to suit your taste 2 level tablespoons = 1 level coffee scoop
Brewing Your Coffee
(SP3 and SP4 only)
• Once you have inserted your desired level
of coffee and water, push the ON button
to start the brew cycle. The ON Light will
go on, indicating that the Coffeemaker has
begun the brewing cycle. In a few minutes
the Coffeemaker will complete the brewing
cycle and switch over to the warming mode.
• Turn your switch to the OFF position
when
the carafe is empty or when
the Coffeemaker
is not in use.
Brewing Your Coffee
(SPX3 and SPX4 only)
BREW COFFEE NOW
• Insert desired level of water and coffee
(See Instructions on pages 9 and 10).
• Press the BREW NOW button and the
LED light will illuminate indicating the
coffeemaker has begun the brewing
process. In a few minutes the coffeemaker
will complete the brewing cycle and
switch over to the warming mode.
BREW COFFEE LATER
• To set the time that you would like to brew your coffee, press the
DELAY BREW button and a clock Icon will appear on the LED screen.
• Press and hold down SET button while pressing the UP and DOWN
buttons (indicated by arrows), until you reach your desired brew time.
• Release the SET button and your desired brew time will be programmed.
• Press the BREW NOW button to then activate the delayed brewing
process. A Clock Icon will remain on the LED screen until the brewing
cycle has been completed.
BREWING COFFEE AFTER DELAY BREW IS ACTIVATED
• After activating the Delay Brew mode,
should you desire to brew your coffee
at an earlier time, simply press the
BREW NOW button and your coffeemaker
will begin its brew cycle immediately.
This will effectively cancel out the
programmed brew setting.
CANCEL DELAY BREW SETTING
• To cancel your programmed brew time without brewing coffee, simply
press the BREW NOW button twice. This action will momentarily turn
your coffeemaker on and then off again. The Clock Icon will disappear
from the LED screen and the programmed brew time will be cancelled.

1110
Suggested Coffee Measurement Chart
For best results, use level coffee scoop of fresh coffee beans.
When using pre-ground coffee, use level tablespoon (tbsp.) or level coffee scoops
of drip grind or a grind recommended for automatic drip coffeemakers.
TO BREW WHOLE COFFEE BEANS USE THIS AMOUNT OF GROUND COFFEE
4 cups 3 scoops 5 tablespoons or 2-1/2 scoops
2 cups 2 scoops 3 tablespoons or 1-1/2 scoops
Use more or less coffee to suit your taste 2 level tablespoons = 1 level coffee scoop
Brewing Your Coffee
(SP3 and SP4 only)
• Once you have inserted your desired level
of coffee and water, push the ON button
to start the brew cycle. The ON Light will
go on, indicating that the Coffeemaker has
begun the brewing cycle. In a few minutes
the Coffeemaker will complete the brewing
cycle and switch over to the warming mode.
• Turn your switch to the OFF position
when
the carafe is empty or when
the Coffeemaker
is not in use.
Brewing Your Coffee
(SPX3 and SPX4 only)
BREW COFFEE NOW
• Insert desired level of water and coffee
(See Instructions on pages 9 and 10).
• Press the BREW NOW button and the
LED light will illuminate indicating the
coffeemaker has begun the brewing
process. In a few minutes the coffeemaker
will complete the brewing cycle and
switch over to the warming mode.
BREW COFFEE LATER
• To set the time that you would like to brew your coffee, press the
DELAY BREW button and a clock Icon will appear on the LED screen.
• Press and hold down SET button while pressing the UP and DOWN
buttons (indicated by arrows), until you reach your desired brew time.
• Release the SET button and your desired brew time will be programmed.
• Press the BREW NOW button to then activate the delayed brewing
process. A Clock Icon will remain on the LED screen until the brewing
cycle has been completed.
BREWING COFFEE AFTER DELAY BREW IS ACTIVATED
• After activating the Delay Brew mode,
should you desire to brew your coffee
at an earlier time, simply press the
BREW NOW button and your coffeemaker
will begin its brew cycle immediately.
This will effectively cancel out the
programmed brew setting.
CANCEL DELAY BREW SETTING
• To cancel your programmed brew time without brewing coffee, simply
press the BREW NOW button twice. This action will momentarily turn
your coffeemaker on and then off again. The Clock Icon will disappear
from the LED screen and the programmed brew time will be cancelled.

1312
Cleaning Instructions After Initial Use
Your Coffeemaker must be cleaned when you begin to notice excessive steaming or the
brewing time increases considerably. This condition is caused by a buildup of lime and
mineral deposits from your water. If the pumping action stops before all the water
has been pumped out of the machine, then the appliance requires cleaning.
The frequency of cleaning depends on the hardness of water used. The following table
gives suggested cleaning intervals.
SUGGESTED CLEANING INTERVAL
Type of Water Cleaning Frequency
Soft Water Every 80 Brew Cycles
Hard Water Every 40 Brew Cycles
Your Coffeemaker may be cleaned by using MR. COFFEE
®
CLEANER or vinegar. For best
results, use MR. COFFEE
®
CLEANER, it is superior to vinegar and has no unpleasant odor.
Using MR. COFFEE
®
CLEANER
(Read caution statement on side panel of MR. COFFEE
®
CLEANER box before use.)
1) Fill the decanter with 4 to 5 decanter cups of warm water.
2) Empty contents of one packet of MR. COFFEE
®
CLEANER into the decanter and
stir with a plastic or wooden spoon until the cleaner is completely dissolved.
This will make a clear blue solution.
3) Pour the blue solution into the water reservoir.
4) Place the empty decanter on the warming plate. The lid access filter basket
should be closed.
5) Turn your Coffeemaker on by pushing the switch to the ON position so that
the switch illuminates.
6) When the blue solution has stopped flowing, turn your Coffeemaker off by pushing
the switch to the OFF position.
7) Discard the blue solution and thoroughly rinse the decanter, decanter lid,
filter basket and filter basket lid.
8)
Repeat Steps 1 through 7 with clean water only (no blue solution). Continue
to rinse out the unit until you see no remaining traces of the blue solution.
9) If a normal brewing flow rate is not achieved, repeat cleaning Steps No. 1
through No. 8.
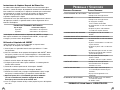
T
ROUBLESHOOTING
P
OTENTIAL
P
ROBLEMS
P
ROBABLE
C
AUSE
“ON” LIGHT DOES NOT ILLUMINATE • Unplugged
• Power outage
COFFEE IS NOT BREWING • Unplugged
• Power outage
• The water reservoir is empty;
check water window
• The filter basket is not
properly inserted
• Carafe is not placed all the way
on the warming plate
COFFEEMAKER ONLY BREWS WATER • No grounds in filter basket
COFFEEMAKER BREWS SLOWLY • Coffeemaker needs cleaning
FILTER BASKET OVERFLOWS • The filter basket is not
properly inserted
• Carafe is not placed all the way
on the warming plate
• Carafe lid not on carafe
• Too many grounds placed in filter
• Carafe was removed from warming
plate longer than 30 seconds
BURNING COFFEE SMELL • Empty carafe was left on
hot warming plate
• Coffee was spilled on
a warming plate
COFFEE IS NOT HOT • Power outage
• The Automatic Shut-Off function
has been activated
COFFEE TASTES BAD • Coffee ground other than for
automatic-drip Coffeemaker was used
• Ground coffee-to-water ratio
was unbalanced
GROUNDS ARE IN COFFEE • Paper filter not properly seated
in basket
• Filter overflowed
Questions? You can call us toll-free at 1-800-672-6333.

1312
Cleaning Instructions After Initial Use
Your Coffeemaker must be cleaned when you begin to notice excessive steaming or the
brewing time increases considerably. This condition is caused by a buildup of lime and
mineral deposits from your water. If the pumping action stops before all the water
has been pumped out of the machine, then the appliance requires cleaning.
The frequency of cleaning depends on the hardness of water used. The following table
gives suggested cleaning intervals.
SUGGESTED CLEANING INTERVAL
Type of Water Cleaning Frequency
Soft Water Every 80 Brew Cycles
Hard Water Every 40 Brew Cycles
Your Coffeemaker may be cleaned by using MR. COFFEE
®
CLEANER or vinegar. For best
results, use MR. COFFEE
®
CLEANER, it is superior to vinegar and has no unpleasant odor.
Using MR. COFFEE
®
CLEANER
(Read caution statement on side panel of MR. COFFEE
®
CLEANER box before use.)
1) Fill the decanter with 4 to 5 decanter cups of warm water.
2) Empty contents of one packet of MR. COFFEE
®
CLEANER into the decanter and
stir with a plastic or wooden spoon until the cleaner is completely dissolved.
This will make a clear blue solution.
3) Pour the blue solution into the water reservoir.
4) Place the empty decanter on the warming plate. The lid access filter basket
should be closed.
5) Turn your Coffeemaker on by pushing the switch to the ON position so that
the switch illuminates.
6) When the blue solution has stopped flowing, turn your Coffeemaker off by pushing
the switch to the OFF position.
7) Discard the blue solution and thoroughly rinse the decanter, decanter lid,
filter basket and filter basket lid.
8)
Repeat Steps 1 through 7 with clean water only (no blue solution). Continue
to rinse out the unit until you see no remaining traces of the blue solution.
9) If a normal brewing flow rate is not achieved, repeat cleaning Steps No. 1
through No. 8.
T
ROUBLESHOOTING
P
OTENTIAL
P
ROBLEMS
P
ROBABLE
C
AUSE
“ON” LIGHT DOES NOT ILLUMINATE • Unplugged
• Power outage
COFFEE IS NOT BREWING • Unplugged
• Power outage
• The water reservoir is empty;
check water window
• The filter basket is not
properly inserted
• Carafe is not placed all the way
on the warming plate
COFFEEMAKER ONLY BREWS WATER • No grounds in filter basket
COFFEEMAKER BREWS SLOWLY • Coffeemaker needs cleaning
FILTER BASKET OVERFLOWS • The filter basket is not
properly inserted
• Carafe is not placed all the way
on the warming plate
• Carafe lid not on carafe
• Too many grounds placed in filter
• Carafe was removed from warming
plate longer than 30 seconds
BURNING COFFEE SMELL • Empty carafe was left on
hot warming plate
• Coffee was spilled on
a warming plate
COFFEE IS NOT HOT • Power outage
• The Automatic Shut-Off function
has been activated
COFFEE TASTES BAD • Coffee ground other than for
automatic-drip Coffeemaker was used
• Ground coffee-to-water ratio
was unbalanced
GROUNDS ARE IN COFFEE • Paper filter not properly seated
in basket
• Filter overflowed
Questions? You can call us toll-free at 1-800-672-6333.

1514
Service and Maintenance
Replacement Parts
• Filters
For better tasting coffee and tea, we recommend that you use MR. COFFEE
®
brand
4-cup paper filters or MR. COFFEE
®
brand permanent filters. These filters are
available at most grocery stores.
• Decanters
You can usually purchase a replacement decanter from the store where
you purchased your Coffeemaker. If you are unable to find a replacement,
please call 1-800 MR COFFEE (1-800-672-6333) in the U.S. and Canada for
information on where you can find a store that carries replacement decanters.
Repairs
If your Coffeemaker requires service, do not return it to the store where you purchased
it. All repairs must be made by Sunbeam or by an authorized MR. COFFEE
®
Service
Center. If you live in the U.S. or Canada, please call us at the following toll-free
telephone number to find the location of the nearest authorized service center:
1-800 MR COFFEE (1-800-672-6333)
To assist us in serving you, pl
ease have the model number (SP3, SP4, SPX3 or SPX4)
and date of purchase information when you call.
Questions, Comments and Suggestions
We welcome your thoughts; please include your complete name, address and telephone
number when you write or e-mail us at:
consumeraffairs@consumer.Sunbeam.com
You may also visit our website and discover the secret to brewing the perfect cup of
coffee. You’ll also find a rich blend of gourmet recipes, entertaining tips and the latest
information on MR. COFFEE
®
products.
www.mrcoffee.com
Consumer Affairs Department
MR. COFFEE
®
A Product of Sunbeam Corporation
P.O. Box 948389
Maitland, FL 32794-8389
coffee
One-Year Limited Warranty
Sunbeam Products, Inc. (“Sunbeam”) warrants that for a period of one year from the date of
purchase, this product will be free from defects in material and workmanship. Sunbeam, at its
option, will repair or replace this product or any component of the product found to be
defective
during the warranty period. Replacement will be made with a new or remanufactured
product or
component. If the product is no longer available, replacement may be made with a similar product
of equal or greater value. This is your exclusive warranty.
This warranty is valid for the original retail purchaser from the date of initial retail purchase
and is not transferable. Keep the original sales receipt. Proof of purchase is required to obtain
warranty performance. Sunbeam dealers, service centers, or retail stores selling Sunbeam products
do not have the right to alter, modify or in any way change the terms or conditions of this warranty.
This warranty does not cover normal wear of parts or damage resulting from any of the following:
negligent use or misuse of the product, use on improper voltage or current, use contrary to the
operating instructions, disassembly, repair or alteration by anyone other than Sunbeam or an
authorized service center. Further, the warranty does not cover acts of nature, such as fire, flood,
hurricanes and tornadoes.
Sunbeam shall not be liable for any incidental or consequential damages caused by the breach of
any express or implied warranty. Except to the extent prohibited by applicable law, any implied
warranty of merchantability or fitness for a particular purpose is limited in duration to the duration
of the above warranty. Some states, provinces or jurisdictions do not allow the exclusion or
limitation of incidental or consequential damages or limitation on how long an implied warranty
lasts, so the above limitations or exclusion may not apply to you. This warranty gives you specific
legal rights, and you may also have other rights that vary from state to state or province to province.
How to Obtain Warranty Service
Take the product to an authorized Sunbeam service center. You may obtain a list of service centers
and other repair/replacement instructions by calling 1-800-672-6333 or send an e-mail to
Consumeraffairs@consumer.sunbeam.com. Please include name, address, telephone number,
product model number and description of the problem.
DO NOT RETURN THIS PRODUCT TO THE PLACE OF PURCHASE
Questions, Comments and Suggestions
We welcome your thoughts, please include your complete name,
address and telephone number when you e-mail or write us at:
e-mail: Consumeraffairs@consumer.Sunbeam.com
Mail:
Consumer Service Department
MR. COFFEE
A Product of Sunbeam Products, Inc.
P. O. Box 948389
Maitland, FL 32794-8389
Do not send product to the above address
©2001 Sunbeam Products, Inc. All rights reserved.
SUNBEAM
®
and MR. COFFEE
®
are registered trademarks of Sunbeam Products, Inc.
Made in China
For products purchased in the United States –
SUNBEAM SERVICE CENTER
c/o Warranty Center
117 Industrial Row
Purvis, MS 39475
For products purchased in Canada –
SUNBEAM CANADA CORP., LTD.
c/o Service Trek
1351 Matheson Blvd. East, Units 5 & 6
Mississauga, ON L4W 2A1
Page is loading ...
Page is loading ...
Page is loading ...
Page is loading ...
Page is loading ...
Page is loading ...
Page is loading ...
Page is loading ...
Page is loading ...
Page is loading ...
Page is loading ...
Page is loading ...
Page is loading ...
Page is loading ...
Page is loading ...
Page is loading ...

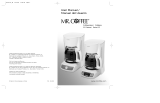
4-Cup Removable Reservoir
Coffeemaker
Cafetera de 4 Tazas con
Tanque de Agua Removible
SP Series / Serie de SP
User Manual /
Manual de Usuario
©
2002 Sunbeam Products, Inc. All rights reserved.
MR. C FFEE
®
is a registered trademark of Sunbeam Products, Inc.
Distributed by Sunbeam Products, Inc., Boca Raton, Florida 33431.
©
2002 Sunbeam Products, Inc. Todos los derechos reservados.
MR. C FFEE
®
es una marca registrada de Sunbeam Products, Inc.
Distribuido por Sunbeam Products, Inc., Boca Raton, Florida 33431.
Printed in China / Empreso en China P.N. 109041
-
 1
1
-
 2
2
-
 3
3
-
 4
4
-
 5
5
-
 6
6
-
 7
7
-
 8
8
-
 9
9
-
 10
10
-
 11
11
-
 12
12
-
 13
13
-
 14
14
-
 15
15
-
 16
16
-
 17
17
-
 18
18
-
 19
19
-
 20
20
-
 21
21
-
 22
22
-
 23
23
-
 24
24
-
 25
25
-
 26
26
-
 27
27
-
 28
28
-
 29
29
-
 30
30
-
 31
31
-
 32
32


Ask a question and I''ll find the answer in the document
Finding information in a document is now easier with AI
in other languages
- español: Sunbeam SP Series Manual de usuario
Related papers

Other documents
-
 Mr Coffee SP3 User manual
-
 Mr. Coffee CG12 User manual
-
 Mr. Coffee 114202 User manual
-
 Mr. Coffee 110687 User manual
-
 Mr. Coffee BVMC-JPX37-R User manual
-
 Mr. Coffee Mr. Coffee JPX37-R Series Coffee Maker Use Owner's manual
-
 Mr. Coffee PL Series User manual
-
Toastmaster TCM12C User manual
-
 Mr. Coffee CJX21CP User manual
-
Mr Coffee VBX20 User manual


