Kenmore Elite 36363672201 Owner's manual
- Category
- Microwaves
- Type
- Owner's manual
This manual is also suitable for

L I T
®
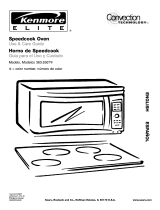
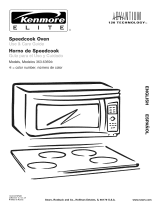
Convection
TECHNOILOGYTM
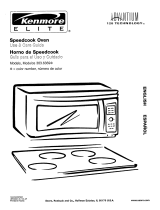
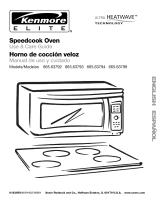
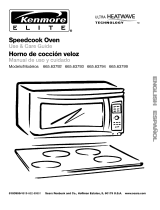
Speedcook Oven
Use 8, Care Guide
Homo de Speedcook
Gui'a pal'a el Uso y ©uidado
Models, Modelos 363o6367t_
#: = color number, nOmero de color
I1'1
Z
H,,=
m
In
x
m
0
r =
164D3370P277
(SR40347) 253 JR
Printed in Korea
3828W5A2949
Sears, Roebuck and Co., Hoffman Estates, IL 60179 U.S.A.
www.sears.com

Safety Instructions
Precautions to Avoid Possible Exposure
to Excessive Microwave Energy ................... 4
important Safety instructions ,. .................... 4-7
Grounding instructions ................................ 7
Care and Maintenance
Cleaning the Appliance .............................. 27, 28
Light Bulb Replacement ......................... 28
The Vent Fan and Vent Filters .................. 29
Charcoal Filter ...................................... 30
Operation
Important Parts of Your Speedcook Oven ............... 8
Controls and Cooking Options ....................... 9, 10
Operating Instructions ............................. I1-25
Microwave Terms ................................... 26
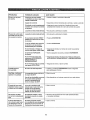
Troubleshooting Tips
Probtems and Solutions ....................... 31, 32
Things That Are Normal ........................... 32
Consumer Services
Model/Serial Number Location ........................ 2
Warranty .............................................. 3
Master Protection Agreements ........................... 3
Consumer Services ................................... 64
Repair Services ....................................... 64
En EspaSol
tnstrucciones en espa_ot ................................ 33
For your convenience and future reference, please write down
your model and serial numbers in the space provided.. The
model number and serial number of your Speedcook Oven can
be found on a label when the door is open
MODEL NUMBER:
363.
SERIAL NUMBER:

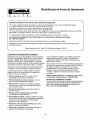
SPEEDCOOK OVEN WARRANTY
E
I T E ®
F
FULL ONE YEAR WARRANTY ON SPEEDCOOK OVEN
For one year from the date of purchase, if this Kenmore Elite Speedcook Oven fails due to a defect in material
or workmanship, Sears will repair it free of charge.
FULL FIVE-YEAR WARRANTY ON THE MAGNETRON
For five years from the date of purchase, if the magnetron in this Kenmore Elite Speedcook Oven should fail due
to a defect in material or workmanship, Sears will repair it free of charge..
The above warranty coverage applies only to Speedcook Ovens which are used for private household purposes..
WARRANTY SERVICE IS AVAILABLE BY CONTACTING SEARS SERVICE AT 1-800-4-MY-HOME2
This warranty applies only while this product is in use in the United States..
This warranty gives you specific legal rights, and you may also have other rights which vary from state to state.
Sears Roebuck and Co Dept. 817 WA Hoffman Estates, IL 60179
J
Master Protection Agreements
Congratulations on making a smart purchase_ Your new
Kenmore_ product is designed and manufactured for years
of dependable operation But like all products, it may
require preventive maintenance or repair from time to time.
That's when having a Master Protection Agreement can
save you money and aggravation.
Purchase a Master Protection Agreement now and protect
yourself from unexpected hassle and expense
The Master Protection Agreement also helps extend
the lifeof your new product Here's what's included
in the Agreement:
v' Expert service by our 12,000 professional repair
specialists
i/' Unlimited service and no charge for parts and labor
on all covered repairs
v' "No-lemon" guarantee--replacement of your covered
productif four or more product failures occur within
twelve months
v' Product replacement if your covered product
can't be fixed
v"Annual Preventive Maintenance Check at your
request - no extra charge
it" Fast help by phone---phone support from a Sears
technician on products requiring in-home repair,
plus convenient repair scheduling
v' Power surge protection against electrical damage
due to power fluctuations
v" Rental reimbursement if repair of your covered
product takes longer than promised
Once you purchase the Agreement, a simple phone
call is all that ittakes for you to schedule service_
You can call anytime day or night, or schedule a
service appointment online.
Sears has over 12,000 professional repair specialists,
who have access to over 4,5 million quality parts and
accessories. That's the kind of professionalism you can
count on to help prolong the life of your new purchase
for years to come Purchase your Master Protection
Agreement today!
Some limitations and exclusions apply.
For prices and additional information, call
1-800-827-6655.
Sears Installation Service
For Sears professional installation of home appliances,
garage doer openers, water heaters, and other major
home items, in the US A call 1-800-4-MY-HOME _.

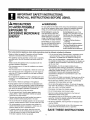
IMPORTANT SAFETY INSTRUCTIONS.
READ ALL INSTRUCTIONS BEFORE USING.
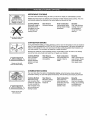
PRECAUTIONS
TOAVOIDPOSSIBLE
EXPOSURETO
EXCESSIVEMICROWAVE
ENERGY
WARNING
For your safety, the information inthis manual must be followed to minimize
the risk of fire, explosion, electric shock, exposure to excessive microwave
energy, or to prevent property damage, personal injury or loss of life.
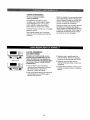
Do Not Attempt to operate this
oven with the door open since
open-dooroperationcan result in
harmful exposure to microwave
energy, it is important not to defeat
or tamper with the safety interlocks.
Do Not Place any object between
the oven front face and the door or
allow soil or cleaner residue to
accumulate on sealing surfaces.
Do Not Operate the oven if itis
damaged.. It is particularly important
that the oven door close properly
and that there is no damage to the:
1 door (bent),
2 hinges and latches(broken or
loosened),
3 door seals and sealing surfaces..
The Oven Should Not be adjusted
or repaired by anyone except
properly qualified service personnel
When using electrical appliances, basic safety precautions should be followed, including the following:
• Read and follow the specific "Precautions to Avoid Possible
Exposure to Excessive Microwave Energy" above..
• This appliance must be grounded. Connect only to a properly
grounded outlet See the Grounding Instructions section on
page 7.
• tnstatlor locate this appliance only in accordance with the
provided Installation instructions
• This microwave oven is UL listed for installation over electric
and gas ranges.
• This microwave oven is not approved or tested for marine use..
• This over-the-range oven is designed for use over ranges no
wider than 36:' It may be installed over both gas and electric
cooking equipmenL
• Do not operate this appliance if it has a damaged power cord
or plug, if it is not working properly, or if it has been damaged
or dropped.=
• Do not cover or block any openings on the appliance.
• Use this appliance only for itsintended use as describedin this
guide. Do not use corrosive chemicals or vapors in this appliance_
This microwave oven is specifically designed to heat, dry or cook
food, and is not intendedfor laboratory or industrial use
• To reduce the risk of fire in the oven cavity:
Do not overcook food.. Carefully attend appliance when
paper, plastic or other combustible materials are placed
inside the oven while cooking.
Remove wire twist-ties and metal handles from paper or
plastic containers before placing them in the oven.
-- Do not use the oven for'storage purposes. Do net leave paper
products, cooking utensils or food in the oven when not in use..
Do not pop popcorn in your microwave oven unless in a
special microwave popcorn accessory or unless you use
popcorn labeled for use in microwave ovens
-- If materials inside the oven ignite, keep the oven door
closed, turn the oven off and disconnect the power cord,
or shut off power at the fuse or'circuit breaker panel
If the door is opened, the fire may spread.
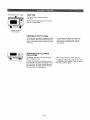
Do not use the Sensor Features twice in succession on the
same food portion If food isundercooked after the first
countdown, use Cook Time for additional cooking time.
• When using the Convection or Combination functions, both
the outside and inside of the oven will become hot Always use
hot pads to remove containers of food and accessories such
as the oven shelf
,,Thermometer--Do not use regular cooking or oven
thermometers when cooking by microwave or combination..
The metal and mercury in these thermometers cou[d cause
arcing and possible damage to the oven.. Do not use a
thermometer'in food you are microwaving unless the
thermometer is designed or recommended for use in the
microwave oven
• Do not clean with metal scouringpads.. Pieces can burn off the
pad and touch electrical parts involving risk of electric shock.
• Do not store any materials, other than our recommended
accessories, in this oven when not in use.
• Do not store this appliance outdoors. Do not use this product
near water--for example, in a wet basement, near a swimming
pool, near a sink or in similar locations.
• Keep power cord away from heated surfaces..
° Do not immerse power cord or plug inwater..
° See door' surface cleaning instructionsin the Care and
Maintenance section of this guide
• This appliance must only be serviced by qualified service
personnel. Contact the nearest authorized service facility
for examination, repair or adjustment..
• As with any appliance, close supervision is necessary when
used by children.
• Do not store anything directly on top of the microwave oven
surface when the microwave oven is in operation.
SAVE THESE iNSTRUCTiONS

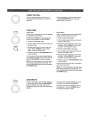
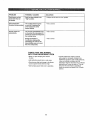
AWARNING!
ARCING
ff you see arcing, press the STOP/CLEAR button and
correct the problem.
Arcing is the microwave term for sparks in the oven.,
Arcing is caused by:
. The metal shelf not installed correctly so it touches the
microwave wail,
• Metal or foil touching the side of the oven
• Turntable ring support not installed correctly
. Foil not molded to food (upturned edges act like antennas).
° Metal, such as twist-ties, poultrypins or gold-rimmed dishes,
in the microwave,
= Recycled paper towels containing small metal pieces being
used in the microwave,
AWARNING!
FOODS
° Do not pop popcorn inyour microwave oven unless in a
special microwave popcorn accessory or unless you use
popcorn labeled for use in microwave ovens
• Do not boil eggs in a microwave oven Pressure will build up
inside egg yolk and will cause it to burst, possibly resulting
in injury
• Operating the microwave with no food inside for more than a
minute or two may cause damage to the oven and could start
a fire It increases the heat around the magnetron and can
shorten the life of the oven..
• Foods with unbroken outer "skin" such as potatoes, hot dogs,
sausages, tomatoes, apples, chicken livers and other giblets,
and egg yolks should be pierced to allow steam to escape
during cooking
• Some products such as whole eggs and sealed containers--
for example, closed jars--are able to explode and should not
be heated in this microwave oven Such use of the microwave
oven could result in injury
SUPERHEATED WATER
Liquids, such as water_ coffee, or tea, are able to be
overheated beyond the boiling point without appearing to
be boiling, Visible bubbling or boiling when the container
is removed from the microwave oven is not always present°
THIS COULD RESULT IN VERY NOT LIQUIDS SUDDENLY
BOILING OVER WHEN THE CONTAINER IS DISTURBED
OR A SPOON OR OTHER UTENSIL IS INSERTED INTO
THE LIQUID.
Toreduce the risk of injury to persons:
Do not overheat the liquid.,
Stir the liquid both before and halfway through heating it
Do not use straight-sided containers with narrow necks,,
After heating, allow the container to stand in the microwave
oven for a short time before removing the container,
Use extreme care when inserting a spoon or other utensil
into the container,,
Foods cooked in liquids (such as pasta) may tend to boi! more
rapidly than foods containing less moisture,, Should this occur,
refer to the Care and Maintenance section for instructions on
how to clean the inside of the oven
• Avoid heating baby food in glass jars, even with the lid off
Make sure all infant food is thoroughly cooked, Stir food to
distribute the heat evenly Be careful to prevent scalding
when warming formula.. The container may feel cooler
than the formula really is..Always test the formula before
feeding the baby,
• Don't defrost frozen beverages in narrow-necked bottles
(especially carbonated beverages), Even if the container is
opened, pressure can build up, This can cause the container
to burst, possibly resulting in injury.
° Hot foods and steam can cause burns,, Be careful when
opening any containers of hot food, including popcorn bags,
cooking pouches and boxes To prevent possible injury,
direct steam away from hands and face,,
° Do not overcook potatoes They could dehydrate and catch
fire, causing damage to your oven,
• Cook meat and poultry thoroughly--meat to at least an
INTERNAL temperature of !60°F and poultry to at least
an INTERNAL temperature of 180°E Cooking to these
temperatures usually protects against foodborne illness
5

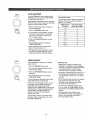
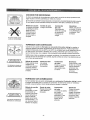
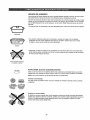
MICROWAVE=SAFE COOKWARE
Do not operate the oven without the turntable and the
turntable support seated and in place. The turntable
must be unrestricted so it can rotate.
Make ,sure all cookware used in your microwave oven is
suitable for microwaving. Most glass casseroles, cooking
dishes, measuring cups, custard cups, pottery or china
dinnerware which does not have metallic trim or glaze with
a metallic sheen can be used. Some cookware is labeled
"suitable for microwavingo"
, if you are not sure if a dish is microwave-safe, use this test:
Place in the oven both the dish you are testing and a glass
measuring cup filled with 1 cup of water--set the measuring
cup either inor' next to the dish Microwave 30-45 seconds at
high. if the dish heats, it should not be used for microwaving.
If the dish remains cool and only the water in the cup heats,
then the dish is microwave-safe
• Oversized food or oversized metal cookware should not be
used in a microwave/convection oven because they increase
the risk of electric shock and could cause a fire.
• Sometimes the oven floor, turntable and walls can become too
hot to touch. Be careful touching the floor, turntable and walls
during and after cooking.
• Ifyou use a meat thermometer while cooking, make sure it is
safe for use in microwave ovens
• Do not use recycled paper products Recycled paper towels,
napkins and waxed paper can contain metal flecks that may
cause arcing or ignite.. Paper' products containing nylon or
nylon filaments should be avoided, as they may also ignite..
• Some Styrofoam trays (like those that meat is packaged on)
have a thin strip of metal embedded in the bottom. When
microwaved, the metal can burn the floor of the oven or ignite
a paper towel
• Use of the shelf accessory:
Remove the shelf from the oven when not in use.
Use pot holders when handling the shelf and cookware,.
They may be hot.
Be sure that the shelf ispositioned properiy inside the oven
to prevent product damage..
Do not cover the shelf or any part of the oven with meta_foil.
This witl cause overheating of the microwave/convection oven.
Do not use your microwave/convection oven to dry
newspapers..
Not all plastic wrap is suitabte for use in microwave ovens.
Check the package for proper use..
Paper towels, waxed paper and plastic wrap can be used
to cover dishes in order to retain moisture and prevent
spattering. Be sure to vent plastic wrap so steam can escape..
Do not use paper products when the microwave/convection
oven isoperated in the Convection or Combination mode
Cookware may become hot because of heat transferred from
the heated food. Pot holders may be needed to handle the
cookware.
"Boitable" cooking pouches and tightly closed plastic bags
shoutd be slit, pierced or'vented as directed by package.
If they are not, plastic could burst during or immediately
after cooking, possibly resulting in injury..Also, plastic storage
containers should be at least partially uncovered because they
form a tight seal When cooking with containers tightly covered
with plastic wrap, remove covering carefully and direct steam
away from hands and face_
Use foil only as directed in this guide TV dinners may be
microwaved in foil trays less than 314" high; remove the top
foil cover and return the tray tothe box. When using foil in the
microwave oven, keep the foil at least 1" away from the sides
of the oven.
Plasticcookware--Plastic cookware designed for microwave
cooking is very useful, but should be used carefully Even
microwave-safe plastic may not be as tolerant of overcooking
conditions as are glass or ceramic materials and may soften
or char if subjected to short periods of overcooking.. In longer
exposures to overcooking, the food and cookware could ignite.
Follow these guidelines :
1 Use microwave-safe plasticsonly and use them in
strict compliance with the cookware manufacturer's
recommendations.
2 Do not microwave empty containers
3 Do not permit children to use plastic cookware without
complete supervision.

Grounding Instructions
WARNING
Improper use of the grounding plug can result in
a risk of electric shock°
Ensure proper ground exists before use
This appliance must be grounded, in the event of an electrica_
short circuit, grounding reduces the risk of electric shock by
providing an escape wire for the electric current.,
This appliance is equipped with a power cord having a
grounding wire with a grounding plug. The ptug must be
plugged into an out_etthat is properly installedand grounded
Consult a qualified electrician or service technician if the
grounding instructions are not completely understood, or if
doubt exists as to whether the appliance is properly grounded
tf the outlet is a standard 2-prong wall outlet, it is your personal
responsibility and obligation to have it replaced with a properly
grounded 3-prong wail outlet..
Do not under any circumstances cut or remove the third
(ground) prong from the power cord..
Do not use an adapter plug with this appliance..
Do not use an extension cord with this appliance Ifthe power
cord is too short, have a qualified electrician or service
technician install an outlet near the appliance
For best operation, plug this appliance into its own electrical
outlet to prevent flickering of lights, blowing of fuse or tripping
of circuit breaker
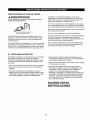
THE VENT FAN
The fan will operate automatically under certain conditions
(see Automatic Fan feature) Take care to prevent the starting
and spreading of accidental cooking fires while the vent fan
is in use..
• Clean the underside of the microwave often. Do not allow
grease to build up on the microwave or the fan filters.
• In the event of a grease fire on the surface units below the
microwave oven, smother a flaming pan on the surface unit
by covering the pan completely with a lid, a cookie sheet or
a flat tray..
, Use care when cleaning the vent fan filters.. Corrosive
cleaning agents, such as lye-based oven cleaners,
may damage the filters..
• When preparing flaming foods under the microwave,
turn the vent fan on..
° Never leave surface units beneath your microwave oven
unattended at high heat settings, Boilovers cause smoking
and greasy spillovers that may ignite and spread if the
microwave vent fan is operating To minimize automatic fan
operation, use adequate sized cookware and use high heat
on surface units only when necessary,.
SAVE THESE INSTRUCTIONS

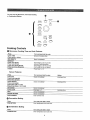
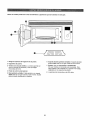
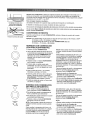
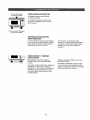
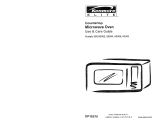
NOTE: Throughout this guide, features and appearance may vary from your model.
0
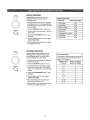
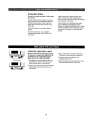
1 Door Latch Release Handle.
2 Door Latches.
3 Window with Metal Shield_ Screen allows cooking to be
viewed while keeping microwaves confined in the oven..
4 Control Panel and Selector Dial.
5 Removable Turntable. Turntable and support must be in
place when using the oven. The turntable may be removed
for cleaning..
6 Removable Turntable Support, The turntable support
must be in place when using the oven
7 Shelf° Use with Convection or Combination baking.
(Do not use when microwave cooking..) For best resuits,
use the shelf in its "low" positron, hanging down from
the shelf supports..
8 Microwave power is 900 watts
8

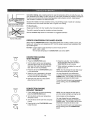
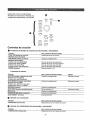
You can cook by Microwave, Convection Baking
or Combination Baking
O4
A_O COOK
f_r_0 P,131EAT
DL_ItO$1
Af3o M_tl_tlE
5zOel_._
S_^R_JU_IE_
Cooking Controls
O Microwave Cooking Time and Auto Features
Press Turn and push dial to enter
COOK TIME Amount of cookingtime
(Press once or twice)
ADD MINUT_ Starts immediately!
DEFROST
Press once (Auto) Food weight up to six pounds
Press twice (Time) Amount of defrosting time
Press three times (Bread) Food weight up to two pounds
Press four times (Express) Food weight up to one pound
POWER Power level 1-10
Sensor Features
Press Turn and push dial to enter Option
POPCORN Starts immediately! more/less time
Press once (regular)
Press twice (snack)
AUTO REHEAT Starts immediately! more/less time
Press once (plate)
Press twice (112 to 1 cup)
Press three times (1 to 2 cups)
BEVERAGE Starts immediatety!
AUTO COOK Food type 1-7 more/less time
RICE Starts immediately!
FROZEN ENTREE Starts immediatelyl
SURE SIMMER" Enter simmer time
(_ Convection Baking
Press Turn and push dial to enter
CONVECTION Oven temperature and cook time
_) Combination Baking
Press
COMBINATION
Turn and push dial to enter
Oven temperature and cook time
9

,,,_,,,,_,,,_,..,,,,7 /
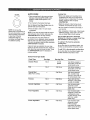
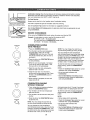
MICROWAVE COOKING
Your oven uses microwave energy to cook by a set time or weight, or automatically by sensor..
Sensor microwave works by detecting the increasing humidity released during cooking_ The oven
automatically adjusts the cooking time to various types and amounts of food._
Cooking Method
Microwave energy is
distributed evenly
throughout the oven
for thorough, fast
cooking of foodr_
Heat Source
Microwaveenergy,.
Heat Conduction
Heat produced within
food by instant energy
penetration.
Benefits
Fast, high efficiency
cooking Oven and
surroundings do
not get hot. Easy
clean-up
Do not use the shelf when
microwave cooking
Alwaysuse theshelf
whenconvectionbaking.
CONVECTION BAKING
During Convection baking, a heating element is used to raise the temperature of the air inside the
oven._Any oven temperature from 225°F to 450°F may be programmed. A fan gently circulates this
heated air throughout the oven, over and around the food, producing golden brown exteriors and
rich moist interiors_This circulation of heated air is called convection.
Because the heated air is kept constantly moving, not permitting a layer of cooler air to develop
around the food, some foods cook faster than in regular oven cooking.
Cooking Method
Hot air circulates
around food to
producebrowned
exteriors and seal
in juices..
Heat Source
Circulating heated air
(Convection)..
Heat Conduction
Heat conducted from
outside of food to
inside,,
Benefits
Aids in browning and
seals in flavor Cooks
some foods faster
than regutar ovens,
Alwaysusethe shetf
withCombination
COMBINATION BAKING
Your oven also offers the option of Combination baking, using microwave energy along with
convection cooking You cook with speed and accuracy, while browning and crisping to perfection
Cooking Method
Microwave energy
and convection heat
combine to cook foods
in up to one-half the
time of regular ovens,
whi_e browning and
sealing in juices
Heat Source
Microwave energy
and circulating
heated air.
Heat Conduction
Food heats from
instant energy from
penetration and heat
conducted from
outside of food
Benefits
Shortened cooking
time from microwave
energy, plus browning
and crisping from
convection heat
10

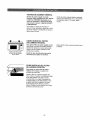
USING THE DIAL
You can make selections on the oven by
turning the dial and pressing it to enter the
selection
Pressing the dial can also be used in place
of the START/ENTER button for quicker
programming of the oven,
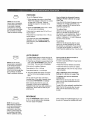
COOK TIME
COOK TIME
Cook Time i
Al!ows you to microwave for any time between
I5 seconds and 95 minutes,
Power level 10 (High)is automatically set,
but you may change it for more flexibility,
1 Press the Cook Time button.
2 Turn the dial to set the cook time and press
the dial to enter
3 Change power level if you don't want full
power. (Press POWER. Turn the dial to
select, Press the dial to enter..)
4 Press the dial or the START/ENTER button
to start cooking,,
You may open the door during Cook Time to
check the food, Close the door and press the
diat or START/ENTER to resume cooking.,
NOTE: You may change the cook time at any
time during cooking by turning the dial, You
may also change the power level by pressing
the POWER button..
Cook Time II
Lets you change power levels automatically
during cooking Here's how to do it:
1 Press the Cook Time button
2 Turn the dial to set the first cook time and
press the dial to enter,
3 Change the power tevel if you don't want
full power,, (Press POWER, Turn the dial
to select,, Press the dial to enter..)
4 Press the Cook Time button again,
5 Turn the dial to set the second cook time
and press the dial toenter.,
6 Change the power level if you don't want
ful! power (Press POWER Turn the dial
to select Press the dial to enter)
7 Press the dial or the STARTIENTER button
to start cooking.
At the end of the first cook time, the second
cook time counts down,,
NOTE: You may change the cook time at any
time during cooking by turning the dial You
may also change the power level by pressing
the POWER button..
ADD MINUIE
ADD MINUTE
This is a quick way to set and start cooking in
l-minute blocks each time the ADD MINUTE
button is pressed, The cook time may be
changed by turning the dial at any time during
cooking,
The power level will automatically be set at
10 and the oven wiltstart immediately,
The power level can be changed as time is
counting down. Press the POWER button,
turn the dial and press to enter.
11

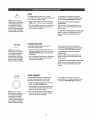
DEFROST
START.(EtCIER
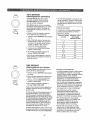
AUTO DEFROST
Use Auto Defrost for meat, poultry and fish
weighing up to 6 pounds. Use Time Defrost
for most other frozen foods..
Auto Defrost automatically sets the defrosting
times and power teveis to give even defrosting
results for meats, poultry and fish_
• Remove meat from package and place on
microwave-safe dish.
1 Press the DEFROST button once.
Turn the dial tothe food weight, using the
Conversion Guide at right For example,
dial 1_2for 12 pounds (1 pound, 3 oz..)
Press the dial to enter.
3 Press the STARTIENTER button to start
defrosting.
4 Turn the food over if the oven signals
TURN FOOD OVER
• Remove defrosted meat or shield warm
areas with small pieces of foil.
• After defrosting, most meats need to stand
5 minutes to complete defrosting. Large
roasts should stand for about 30 minutes.
Conversion Guide
If the weight of food is stated in pounds and
ounces, the ounces must be converted to
tenths (.!) of a pound
Weight of Food Enter Food Weight
in Ounces (tenths of a pound)
I-2 .1
3 ,2
4-5 .3
6-7 .4
8 .5
9-10 .6
1! .7
12-13 .8
14-15 9
DEFROST
TIME DEFROST
Use Time Defrost to defrost for a selected
length of time.
1 Press the DEFROST button twice.
2 Turn the dial to select the time you Want.
Press the dial to enter.
3 Press the START/ENTER button to start
defrosting..
4 Turn the food over if the oven signals
TURN FOOD OVER
You may change the defrost time at any time
during defrosting by turning the dial..
Power level is automatically set at 3, but can
be changed You can defrost small items
quickly by raising the power level after
entering the time.. Power level 7 cuts the total
defrosting time in about half; power level 10
cuts the total time to approximately 1/3.
However, food will need more frequent
attention than usual.
A dull thumping noise may be heard during
defrosting. This is normal when oven is not
operating at High power..
Defrosting Tips
• Foods frozen in paper or plastic can be
defrosted in the package. Closed packages
should be slit, pierced or vented AFTER food
has partially defrosted Plastic storage
containers should be partially uncovered.
, Family-size, prepackaged frozen dinners can
be defrosted and microwaved, tf the food is
in a foil container, transfer it to a microwave-
safe dish.
• Foods that spoil easily should not be allowed
to sit out for more than one hour after
defrosting. Room temperature promotes
the growth of harmful bacteria.
• For more even defrosting of larger foods,
such as roasts, use Auto Defrost.. Be sure
large meats are completely defrosted before
cooking.
° When defrosted, food should be cool
but softened in all areas If still slightly icy,
return to the microwave very briefly, or
Iet it stand a few minutes.
!2

DEFROST
START/ENTER
<>o
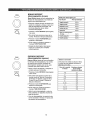
BREAD DEFROST
Bread Defrost automatically sets the
defrosting times and power levels for
defrosting bread.
=Remove any wire twist-ties from package
and place bread on a microwave-safe dish.
Small servings of bread should be removed
from packaging,,
t Press the DEFROST button three times.,
2 Turn the dial to the food weight Press the
dial to enter.
3 Press the STARTIENTER button to start
defrosting.,
4 Turn the food over when the oven signals
TURN FOOD OVER.
• After defrosting, let bread stand 5 minutes
to complete defrosting.,
Bread Defrost Chart
Bread Type Approximate weight
t Small Bagel 0.2 Ib
t Large Bagel 0,3 Ib
4 Slices of Bread 0.2 Ib
t Loaf of Bread t .0Ib
I Dinner Roll 0.2 ib
t Hamburger/Hot Dog Bun 0.2 Ib
1Small Muffin 0,2 Ib
1 Large Muffin 0,3 Ib
DEFROST
EXPRESS DEFROST
Express Defrost automatically sets the
defrosting times and power levels to give
even defrosting results for meats, poultry
and fish weighing up to one pound
• Remove meat from package and place on
microwave-safe dish.
1 Press the DEFROST button four times
2 Turn the dial to the food weight, using the
Conversion Guide at right For example,
dial.5 for 5 pounds (8 oz,) Press the dial
to enter,
3 Press the START/ENTER button to start
defrosting,,
4 Turn the food over if the oven signals
TURN FOOD OVER.
° Remove defrosted meat or shield warm
areas with small pieces of foil,,
• After defrosting, most meats need to stand
5 minutes to complete defrosting,
Conversion Guide
If the weight of food is stated in pounds and
ounces, the ounces must be converted to
tenths (,,1)of a pound,
Weight of Food Enter Food Weight
in Ounces (tenths of a pound)
1-2 .1
3 ,2
4-5 ,3
6-7 .4
8 ,,5
9-10 .6
11 ,7
I2-t3 ,8
I4-15 9
13

POWE_
©
START/ENTEg
The power level may be entered or changed
immediately after entering the time for Cook
Time, Time Defrost or Add Minute. The
power level may also be changed during time
countdown
1 First, follow directions for Cook Time,
Time Defrost or Add Minute.
2 Press the POWER button..
3 Turn the dial clockwise to increase and
counterclockwise to decrease the power
level. Press the dial to enter.
4 Press the START/ENTER button to start
cooking.
Variable power levels add flexibility to
microwave cooking The power levels on the
microwave oven can be compared to the
surface units on a range Each power level
gives you microwave energy a certain percent
of the time..Power level 7 is microwave energy
70% of the time. Power level 3 is energy 30%
of the time. Most cooking wil! be done on High
(power level 10) which gives you 100% power..
Power level 10 willcook faster but food may
need more frequent stirring, rotating or turning
over. A lower setting wil! cook more evenly
and need less stirring or rotating of the food
Some foods may have better flavor, texture or
appearance if one of the lower settings is used
Use a tower' power level when cooking foods
that have a tendency to boil over, such as
scalloped potatoes.
Rest periods (when the microwave energy
cycles off) give time for the food to "equalize"
or transfer heat to the inside of the food..An
example of this is shown with power' level 3-
the defrost cycle If microwave energy did not
cycle off, the outside of the food would cook
before the inside was defrosted.
Here are some examples of uses for various
power levels:
High 10: Fish, bacon, vegetables, boiling
liquids°
Meal-High 7: Gentle cooking of meat and
poultry; baking casseroles and reheating
Medium 5: Slow cooking and tenderizing
for stews and less tender cuts of meat.
Low 2 or 3: Defrosting; simmering; delicate
sauces.
Warm 1: Keeping food warm; softening butter.
14

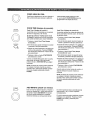
HUMIDITY SENSOR
The Sensor Features detect the increasing humidity released during cooking The oven
automatically adjusts the cooking time to various types and amounts of food,,
Do not use the Sensor Features twice in succession on the same food portion--it may result in
severely overcooked or burnt food.. If food is undercooked after the countdown, use Cook Time
for additional cooking time
, The proper containers and covers are essential for best sensor cooking.,
Covered
,,Atways use microwave-safe containers and cover them with lids or vented plastic wrap
Never use tight sealing plastic containers--they can prevent steam from escaping and
cause food to overcook,
Vented
Dryoff dishes sothey don't
misleadthe sensor
, Be sure the outside of the cooking containers and the inside of the microwave oven are dry
before placing food in the oven,, Beads of moisture turning into steam can mislead the sensor,
AUTO COOK
AUTO COOK
Because most cooking containers must be covered during Auto Cook, this feature is best with
foods that you want to steam or retain moisture
NOTE: Use ofthe metal shetf with Auto Cook is not recommended,,
Recommended Foods
A wide variety of foods including meats, fish and vegetables can be cooked using this feature,,
Foods Not Recommended
Foods that must be cooked uncovered, foods that require constant attention, foods that require
addition of ingredients during cooking and foods calling for a dry look or crisp surface after cooking
should not be cooked using this feature it is best to use Cook Time,
15

AUTO COOK
NOTE: Do not use this
feature twice in succession on
the same food portion--it may
result in severely overcooked
or burnt food iffood is
undercooked after the
countdown use Cook Time
for additional cooking.
AUTO COOK
1 Place covered food in the oven and close
the door. Press the AUTO COOK button,,
SELECT FOOD TYPE appears in the
display.
2 Turn the dial to the desired food type..
See the Sensor Food Type Guide betow for
specific foods and instructions,.
3 Press the dial to enter,.The oven starts
immediately.
NOTE: if the door was open while the control
was being set, close the door and press the
STARTIENTER button to begin cooking.
Do not open the oven door before the
countdown time is displayed--steam escaping
from the oven can affect cooking performance,,
If the door is opened, close the door and press
START/ENTER immediately
If ground meat was selected, the oven may
signal you to drain and stir the meat. Open the
door. drain the meat and close the door. Press
the START/ENTER button if necessary to
resume cooking.
Cooking Tips
. When oven signals and countdown time
is displayed, the door may be opened for
stirring, turning or rotating food To resume
cooking, close the door and press
START/ENTER..
• Match the amount of food to the size of
container.. Fitl containers at least t/2 full
• Be sure outside ofcontainer and inside of
oven are dry..
• After completion of Cook cycle, if food needs
additional cooking, return food to the oven
and use Cook Time to finish cooking.
How to Adjust the Oven's Automatic
Settings for a Shorter or Longer Cook Time
(Not available for all food types)
To subtract t0% from the automatic
cooking time:
At any time after the countdown begins, turn
the dial counterclockwise and press to enter.
To add 10% to the automatic cooking time:
At any time after the countdown begins, turn
the dial clockwise and press to enter,
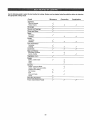
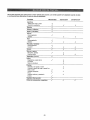
Sensor Food Type Guide
Food Type Servings
ChickenPieces 1 to 4
Fish 1 to 4
Ground Meat
(Beef, Pork, Turkey)
Potatoes 1 to 4
Canned Vegetables t to 4
Fresh Vegetables 1 to 4
Frozen Vegetables 1 to 4
Serving Size
2to 8
pieces
4 to 16 ozo
8 to 32 oz.
8 to 32 oz,
4 to !6 oz,
4 to 16 ozo
4 to 16 oz.
Comments
Use oblong, square or'
round dish.. Cover with
vented plastic wrap,
Use oblong, square or
round dish Cover with
vented plastic wrap,
Use round casserole
dish. Crumble meat
into dish Cover with lid
or vented plastic wrap..
Pierce skin with fork.
Arrange [na star pattern
in center of turntable,.
Use microwave-safe
casserole or bowl
Cover with lid or vented
plastic wrap.
Use microwave-safe
casserole or bowl,.Add
2 tablespoons water
for each serving Cover
with lid or vented
plastic wrap
Use microwave-safe
casserole or bowl..
Follow package
instructionsfor adding
water Cover with lid or
vented plasticwrap.
16

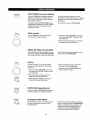
POPCORN
NOTE: Do not use this
feature twice insuccession
on the same food portion--
it may result in severely
overcooked or burnt food
Iffood is undercooked after
the countdown use Cook
Time for additional cooking.
POPCORN
To use the Popcorn feature:
1 Follow package instructions, using Cook
Time if the package is less than 1.5 ounces
or iarger than 3 5 ounces Place the
package of popcorn in the center of the
turntable.
2 Press the POPCORN button once or twice..
The oven starts immediately,
Press once for a regular size (3.0 to 3 5 oz )
bag of popcorn.
Press twice for a snack size (t5 to 175 oz..)
bag of popcorn..
if you open the door while POPCORN is
displayed, an error message will appear.
Close the door, press STOPICLEAR and
begin again.
How to Adjust the Automatic Popcorn
Setting to Provide a Shorter or Longer
Cook Time
if you find that the brand of popcorn you use
underpops or overpops consistently, you
can add or subtract 20-30 seconds to the
automatic popping time..
To subtract time:
Within the first 30 seconds after the oven
starts, turn the dial counterclockwise for
20 seconds (-) less cooking time..Press to
enter. Turn again to reduce cooking time
another 10 seconds (--), total 30 seconds
less time.,Press to enter.
To add time:
Within the first 30 seconds after the oven
starts, turn the dial clockwise for an extra
20 seconds (+) cooking time. Press to enter..
Turn again to add another 10 seconds (++),
total 30 seconds additional time. Press to enter
AUTO REHEAT
NOTE: Do not use this
feature twice in succession
on the same food portion--
it may result in severely
overcooked or burnt food..
iffood is not hot enough after
the countdown use Cook
Time for additional reheating.,
AUTO REHEAT
The Auto Reheat feature reheats servings of
previously cooked foods or a plate of leftovers..
1 Place the cup of liquid or covered food in the
oven,. Press AUTO REHEAT once, twice or
three times. The oven starts immediately
Press once for a plate of leftovers,
Press twice for 1/2 to 1 full cup.
Press three times for t to 2 full cups.
2 The oven signals when steam is sensed
and the time remaining begins counting
down..
Do not open the oven door until time is
counting down, If the door is opened, close
it and press START/ENTER immediately.
After removing food from the oven, stir,
if possible, to even out the temperature
Reheated foods may have wide variations in
temperature., Some areas of food may be
extremely hot.
Some Foods Not Recommended for
Use with Auto Reheat
it is best to use Cook Time for these foods:
• Bread products.,
° Foods that must be reheated uncovered,
• Foods that need to be stirred or rotated..
° Foods calling for a dry look or crisp surface
after reheating
How to Adjust the Oven's Automatic
Settings for a Shorter or Longer Time
To subtract 10% from the automatic
cooking time:
Within the first 30 seconds after the oven
starts, turn the dial counterclockwise and
press to enter.
To add 10% to the automatic cooking time:
Within the first 30 seconds after the oven
starts, turn the dial clockwise and press
to enter
BEVERAGE
NOTE: Do not use this
feature twice in succession
on thesame food portion--
itmay result inseverely
overcooked or burnt food.
Iffood is undercooked after
the countdown use Cook
Time for additional cooking.
BEVERAGE
Press the BEVERAGE button to heat an
8-10 oz. cup of coffee or other beverage.
The oven starts immediately..
I7
Drinks heated with the Beverage feature may
be very hot.,Remove the container with care,.

RICE
NOTE: Do not use this
feature twice insuccession
on the same food portion--
it may result in severely
overcooked or burnt food,,
if food is undercooked after
the countdown use Cook
Time for additional cooking
RICE
The Rice feature wi]! cook 1/2-2 cups of
uncooked rice.. Follow the package instructions
for the amount of water to add,
1 Place covered food in the oven. Press the
RICE button The oven starts immediately.
2 The oven signals when steam is sensed and
the time remaining begins counting down
Stir the food if necessary
Do not open the oven door until time is
counting down. if the door is opened, close
it and press START/ENTER immediately.
To subtract 10% from the automatic
cooking time:
Within the first 30 seconds after the oven
starts, turn the dial counterclockwise and
press to enter.
To add 10% to the automatic cooking time:
Within the first 30 seconds after the oven
starts, turn the dial clockwise and press
to enter
FROZEN ENTREE
NOTE: Do not use this
feature twice in succession
on the same food portion--
it may result in severely
overcooked or burnt food,.
If food is undercooked after
the countdown use Cook
Time for additional cooking
FROZEN ENTREE
The Frozen Entree feature will cook an
8-22 ounce frozen entree.
1 Loosen one corner' of the plastic cover on
the entree and place in the oven,. Press the
FROZEN ENTREE button.. The oven starts
immediately.
2 The oven signals when steam is sensed and
the time remaining begins counting down.
Stir the food if necessary
Do not open the oven door until time is
counting down. If the door is opened, close
it and press START/ENTER immediately
To subtract 10% from the automatic
cooking time:
Within the first 30 seconds after the oven
starts, turn the dial counterclockwise and
press to enter.
To add 10% to the automatic cooking time:
Within the first 30 seconds after the oven
starts, turn the dial clockwise and press
to enter,.
SURE S_MMER
NOTE: Do not use this
feature twice in succession
on the same food portion--
it may result in severeiy
overcooked or burnt food
• Iffood is undercooked after
the countdown use Cook
Time for additional cooking
SURE SIMMER'"
The Sure Simmer feature will bring foods
such as soups and stews to a boil, then
allow them to simmer for up to 2 hours.
1 Cover food with a lid and place in the oven,,
Press the SURE SIMMER button,.
2 Turn the dial to set the amount of time you
want the food to simmer after boiling and
press the dial to begin cooking.
3 The oven signals when the food begins to
boil and the simmer time begins counting
down Stir the food if necessary.
Do not open the oven door until time is
counting down. Ifthe door is opened, close
it and press START/ENTER immediately,
18

Alwaysusetheshelfin its"low"
positionwhenconvectionbaking
Convection baking uses a heating element to raise the temperature of the air inside the oven. Any
oven temperature from 225°F to 450°F may be set.,A fan gently circulates this heated air throughout
the oven, over and around the food, producing golden brown exteriors and rich, moist interiors
This circulation of heated air is called convection
Because the heated air is kept constantly moving, not permitting a layer of cooler air to develop
around the food, some foods cook faster than in regular oven cooking
For Best Results°.
Always use the shelf in its "low" position when Convection baking..
The shelf is required for good air circulation and even browning
See the Cookware Tips section for information on suggested cookware,
Incorrect shelf position
RECIPE CONVERSION FOR BAKED GOODS
When using the CONVECTION mode to cook baked goods such as cakes, cookies, pizzas, pies,
breads, etc., reduce the oven temperature 25°F from the recipe to prevent over browning on the
top of baked goods
Example: A recipe states to bake brownies for 25-30 minutes at 400°F
400OF- 25_F = 375OF
The new bake temperature in CONVECTION mode will be 375°Fo
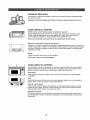
CONVECTION
©
STABT/ENTEB
CONVECTION BAKING
WITH PREHEAT
1 Press the CONVECTION button..
2 Turn the dial to set the oven temperature
and press diat to enter. Do not enter bake
time now. (The cook time wilt be entered
later, after the oven is preheated,)
3 Press the dial or the START/ENTER button
to start preheating.
4 When the oven is preheated, it willsignal.
tf you do not open the door within I hour,
the oven will turn off automatically
5 Open the oven door and, using caution,
place the food in the oven
6 Close the oven door, Turn the dial to
set the cook time and press the dial or
STARTIENTER to start cooking.
7 When cooking is complete, the oven will
signal and turn off
NOTE: You may change the cook time at any
time during cooking by turning the dial
You may change the oven temperature
at any time during cooking by pressing the
POWER button, Turn the dial to set the oven
temperature and press the dial to enter..
To view the cook time and oven temperature
during cooking, press the CONVECTION
button,
CONV_L'3ION
©
STARTIENTEI_
CONVECTION BAKING
WITHOUT PREHEAT
1 If your recipe does not require preheating,
press the CONVECTION button.
2 Turn the dial to set the oven temperature
and press to enter,
3 Turn the dial to set the cook time and press
to enter
4 Press the dial or the START/ENTER button
to start the oven,
NOTE; You may change the cook time at
any time during cooking by turning the dial
Some recipes call for preheating.
You may change the oven temperature
at any time during cooking by pressing the
POWER button. Turn the dial to set the oven
temperature and press the dial to enter.
Toview the cook time and oven temperature
during cooking, press the CONVECTION
button..
19

Always use the shelf inils"low"
positionwhen combination baking
Incorrect shelf position
Combination baking offers the best features of microwave energy and convection cooking,.
Microwaves cook food fast and convection circulation of heated air browns foods beautifully
Any oven temperature from 225°F to 450°F may be set..
For Best Results.,.
Always use the shelf in its "tow" position when Combination baking,.
The shelf is required for good air circulation and even browning,
See the Cookware Tips section for information on suggested cookware,,
See the Best Method of Cooking section to determine which foods are appropriate to cook
using Combination.
RECIPE CONVERSION
When using the COMBINATION mode, reduce the recipe cook time by 25%.
Example: A recipe states to cook a roast for 60 minutes at 400°F
60 minutes x 0°25 = !5 minutes saved
The new cook time in COMBINATION mode will be:
60 minutes - !5 minutes = 45 minutes.
COMt_tNATt0N
©
5TAnT/ENTEtt
COMBINATION BAKING
WITH PREHEAT
1 Press the COMBINATION button.
2 Turn the dial to set the oven temperature
and press dial to enter.. Do not enter
COMBINATION cook time now. (The cook
time will be entered later, after the oven is
preheated. )
3 Press the dial or the START/ENTER button
to start preheating.
4 When the oven is preheated, it will signat.
if you do not open the door within 1 hour,
the oven will turn off automatically
5 Open the oven door and, using caution,
place the food in the oven
6 Close the oven door. Turn the dial to
set the cook time and press to enter,.Press
the dial or the START/ENTER button to
start cooking.
7 When cooking is cornplete, the oven will
signal and turn off.
NOTE: You may change the cook time at
any time during cooking by turning the dial..
You may change the oven temperature
and microwave power' level at any time during
cooking by pressingthe POWER button Turn
the dial to set the oven temperature and press
the dial to enter. Then, turn the dial to set
microwave power level 1 through 4 and press
the diaf to enter The defauit power level is 4,.
To view the cook time and oven temperature
during cooking, press the COMBINATION
button,
• Check the Cookware Tips section for correct
cookware when using Combination
• Do not use metal cookware with
Combination.
° See the Best Method of Cooking section
to determine which foods are appropriate to
cook using Combination..
COMi]INATION
©
STAJIT/£NIEfl
COMBINATION BAKING
WITHOUT PREHEAT
1 if your recipe does not require preheating,
press the COMBINATION button.
2 Turn the dial to set the oven temperature
and press to enter.
3 Turn the dial to set the cook time and press
to enter.
4 Press the dial or the START/ENTER button
to start the oven..
NOTE: You may change the cook time at
any time during cooking by turning the dial,.
You may change the oven temperature
and microwave power level at any time during
cooking by pressing the POWER button. Turn
the diaJto set the oven temperature and press
the dial to enter..Then, turn the dial to set
microwave power level t through 4 and press
the dial to ente_ The default power level is 4.
Toview the cook time and oven temperature
during cooking, press the COMBINATION
button..
NOTE:
• Some recipes call for preheating..
• Check the Cookware Tips section for correct
cookware when using Combination
• Do not use metal cookware with
Combination,_
• See the Best Method of Cooking section
to determine which foods are appropriate
to cook using Combination.
2O
Page is loading ...
Page is loading ...
Page is loading ...
Page is loading ...
Page is loading ...
Page is loading ...
Page is loading ...
Page is loading ...
Page is loading ...
Page is loading ...
Page is loading ...
Page is loading ...
Page is loading ...
Page is loading ...
Page is loading ...
Page is loading ...
Page is loading ...
Page is loading ...
Page is loading ...
Page is loading ...
Page is loading ...
Page is loading ...
Page is loading ...
Page is loading ...
Page is loading ...
Page is loading ...
Page is loading ...
Page is loading ...
Page is loading ...
Page is loading ...
Page is loading ...
Page is loading ...
Page is loading ...
Page is loading ...
Page is loading ...
Page is loading ...
Page is loading ...
Page is loading ...
Page is loading ...
Page is loading ...
Page is loading ...
Page is loading ...
Page is loading ...
Page is loading ...
-
 1
1
-
 2
2
-
 3
3
-
 4
4
-
 5
5
-
 6
6
-
 7
7
-
 8
8
-
 9
9
-
 10
10
-
 11
11
-
 12
12
-
 13
13
-
 14
14
-
 15
15
-
 16
16
-
 17
17
-
 18
18
-
 19
19
-
 20
20
-
 21
21
-
 22
22
-
 23
23
-
 24
24
-
 25
25
-
 26
26
-
 27
27
-
 28
28
-
 29
29
-
 30
30
-
 31
31
-
 32
32
-
 33
33
-
 34
34
-
 35
35
-
 36
36
-
 37
37
-
 38
38
-
 39
39
-
 40
40
-
 41
41
-
 42
42
-
 43
43
-
 44
44
-
 45
45
-
 46
46
-
 47
47
-
 48
48
-
 49
49
-
 50
50
-
 51
51
-
 52
52
-
 53
53
-
 54
54
-
 55
55
-
 56
56
-
 57
57
-
 58
58
-
 59
59
-
 60
60
-
 61
61
-
 62
62
-
 63
63
-
 64
64


Kenmore Elite 36363672201 Owner's manual
- Category
- Microwaves
- Type
- Owner's manual
- This manual is also suitable for
Ask a question and I''ll find the answer in the document
Finding information in a document is now easier with AI
in other languages
Related papers
-
 Kenmore Elite 36363672200 Owner's manual
-
 Kenmore Elite 36363692301 Owner's manual
-
 Kenmore Elite 36363692302 Owner's manual
-
 Kenmore Elite 79080369310 Owner's manual
-
 Kenmore Elite 79080373310 User manual
-
 Kenmore Elite 665.63799 Owner's manual
-
 Kenmore Elite 66563799200 Owner's manual
-
Kenmore Elite 790.8037 User manual
-
 Kenmore Elite 721. 67903 User guide
-
 Kenmore Elite 565.60582 User manual


Other documents
-
Sears 363.63672200 Owner's manual
-
GE Advantium ZSC2201 Owner's manual
-
GE ZSC2201NSS User manual
-
Monogram ZSC2202JSS Owner's manual
-
GE ZSC1001 User manual
-
-
-
GE Monogram GEZSC1001KSS User guide
-
-
 GE Monogram ZSC1001 User manual
