ENGLISH
20
MAKING CONNECTIONS
Connect various external devices to the TV and switch input modes to select an external device. For more
information about an external device’s connection, refer to the manual supplied with each device.
Available external devices are: HD receivers, DVD players, VCRs, audio systems, USB storage devices, PC,
camcorders or cameras, gaming devices, and other external devices.
y
If you record a TV program on a DVD recorder or VCR, make sure to connect the TV signal input
cable to the TV through a DVD recorder or VCR. For more information about recording, refer to the
manual supplied with the connected device.
y
The external device connection may differ from the model.
y
Connect external devices to the TV regardless of the order of the TV port.
MAKING CONNECTIONS
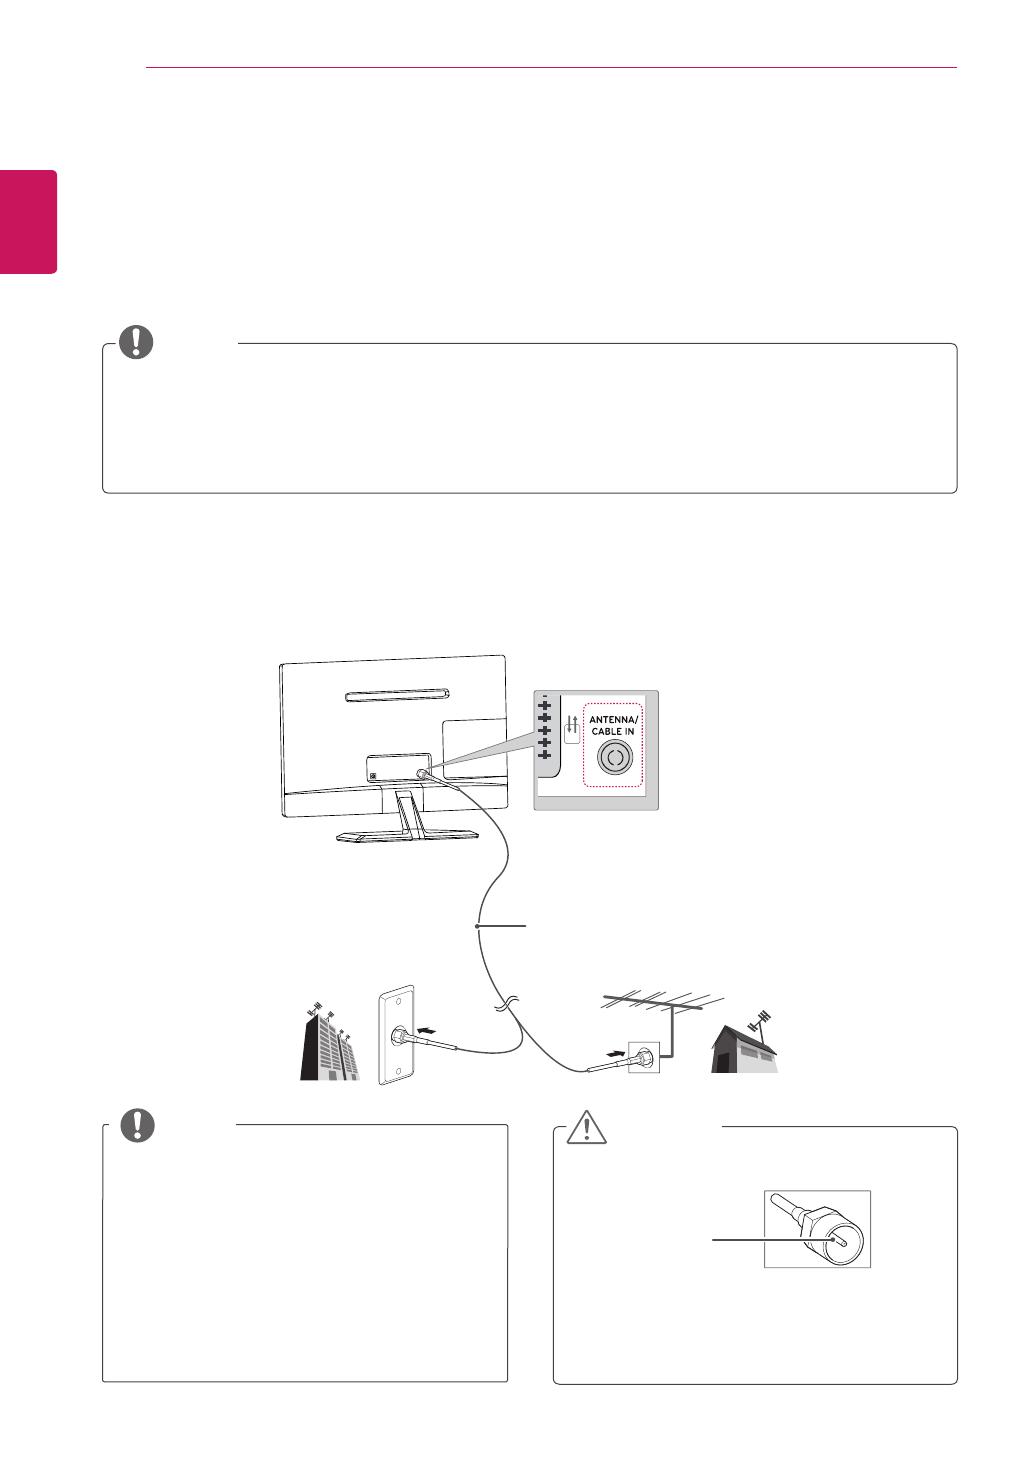
Connecting an antenna
Connect an antenna, cable or cable box to watch TV referring to the following. The illustrations may differ
from the actual accessories and an RF cable is optional.
Connect the TV to a wall antenna socket with an RF cable (75 ).
y
Use a signal splitter to use more than 2 TVs.
y
If the image quality is poor, install a signal
amplifier properly to improve the image
quality.
y
If the image quality is poor with an antenna
connected, aim the antenna to the proper
direction.
y
Visit
http://AntennaWeb.org
for more
information about the antenna and cable
connection.
NOTE
y
Make sure not to bend the copper wire of
the RF cable.
y
Complete all connections instructions
between devices, and then connect the
power cord to the power outlet to prevent
damages to your TV.
CAUTION
Copper wire
Wall Antenna Socket
Outdoor Antenna
y
VHF Antenna
y
UHF Antenna
(Not Provided)
NOTE


