Cuisinart CPT-520XA Operating instructions
- Category
- Toasters
- Type
- Operating instructions
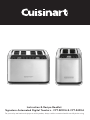
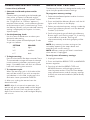
Cuisinart CPT-520XA offers a range of features to simplify your toasting experience. With dual toasting slots, you can toast multiple slices simultaneously. Choose from seven shade settings to achieve your desired browning preference. The defrost function helps thaw frozen bread quickly and evenly. Customize your toasting preferences with the bread type options for white, crumpet, fruit bread, English muffins, rye/brown, and grain bread. The single-slice function ensures even toasting on one side of the bread.
Cuisinart CPT-520XA offers a range of features to simplify your toasting experience. With dual toasting slots, you can toast multiple slices simultaneously. Choose from seven shade settings to achieve your desired browning preference. The defrost function helps thaw frozen bread quickly and evenly. Customize your toasting preferences with the bread type options for white, crumpet, fruit bread, English muffins, rye/brown, and grain bread. The single-slice function ensures even toasting on one side of the bread.


-
 1
1
-
 2
2
-
 3
3
-
 4
4
-
 5
5
-
 6
6
-
 7
7
-
 8
8
-
 9
9
-
 10
10
-
 11
11
-
 12
12
-
 13
13


Cuisinart CPT-520XA Operating instructions
- Category
- Toasters
- Type
- Operating instructions
Cuisinart CPT-520XA offers a range of features to simplify your toasting experience. With dual toasting slots, you can toast multiple slices simultaneously. Choose from seven shade settings to achieve your desired browning preference. The defrost function helps thaw frozen bread quickly and evenly. Customize your toasting preferences with the bread type options for white, crumpet, fruit bread, English muffins, rye/brown, and grain bread. The single-slice function ensures even toasting on one side of the bread.
Ask a question and I''ll find the answer in the document
Finding information in a document is now easier with AI
Related papers
-
Cuisinart CPT-520C Series User manual
-
Cuisinart CPT-540C Series User manual
-
Cuisinart CPT-720 Owner's manual
-
Cuisinart CPT-740 Owner's manual
-
Cuisinart CPT-T40 Owner's manual
-
Cuisinart CPT-T20 Owner's manual
-
-
-
-
Other documents
-
Galaxy 4010483 User manual
-
KitchenAid 5AKMT423AC0 Owner's manual
-
-
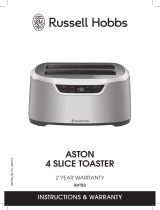 Russell Hobbs rht50 User manual
-
Catler TS 4010 Specification
-
Catler TS 8011 Operating instructions
-
Catler TS 4011 Specification
-
Breville Lift & Look Touch BTA630 Operating instructions
-
Sunbeam KEM1100SSTA6240 User manual
-
