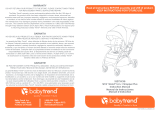
Baby Trend Sit N Stand 2.0 User manual

Category
Strollers
Type
User manual

Baby Trend Sit N Stand 2.0 is a versatile stroller with a front seat, a platform/jump seat, and a mobile phone positioning parent tray, designed to accommodate multiple children and their belongings. It features a maximum weight capacity of 110 lbs for the combined weight of children and accessories, ensuring a safe and comfortable ride for all.

Baby Trend Sit N Stand 2.0 is a versatile stroller with a front seat, a platform/jump seat, and a mobile phone positioning parent tray, designed to accommodate multiple children and their belongings. It features a maximum weight capacity of 110 lbs for the combined weight of children and accessories, ensuring a safe and comfortable ride for all.

SS27XXXC_2L_052322.1
Read all instructions BEFORE assembly and USE of product.
KEEP INSTRUCTIONS FOR FUTURE USE.
Lea todas las instrucciones ANTES de armar y USAR el
producto. CONSERVE LAS INSTRUCCIONES PARA USO FUTURO.
Sit N’ Stand® 2.0
1-800-328-7363
(8:00 a.m. ~ 4:30 p.m. PST)
www.babytrend.com
Baby Trend, Inc.
13048 Valley Blvd.
Fontana CA 92335
Instruction Manual
Manual de Instrucciones SS27XXXC
12
Copyright © 2022, Baby Trend Inc., All Rights Reserved. Todos los derechos reservados.
WARRANTY
DO NOT RETURN YOUR PRODUCT TO THE STORE. PLEASE CONTACT
BABY TREND® FOR REPLACEMENT PARTS, SERVICE AND REPAIR.
The Baby Trend® warranty covers workmanship defects within 1 year of purchase. Any
product which has been subjected to misuse, abuse, abnormal use, excessive wear and
tear, improper assembly, negligence, environmental exposure, alteration or accident,
or has had its serial number altered or removed invalidates all claims against the
manufacturer. Any damage to property during installation is the sole responsibility of
the end user.
Customer Service Department can be contacted at 1 (800) 328-7363 Monday through
Friday between 8:00 a.m. and 4:30 p.m. (PST). Return Authorizations are required
prior to returning product(s) to Baby Trend®. Please visit http://babytrend.com/pages/
limited-warranty for complete warranty details.
GARANTIA
NO DEVUELVA SU PRODUCTO A LA TIENDA. POR FAVOR CONTACTE A
BABY TREND® PARA PIEZAS DE REPUESTO, SERVICIO Y REPARACION.
La garantía de Baby Trend® cubre defectos de fábrica por 1 año después de la
compra. Cualquier producto que haya sido sometido a uso inadecuado, abuso, uso
anormal, desgaste excesivo, montaje incorrecto, negligencia, exposición ambiental,
alteración o accidente, o cuyo número de serie haya sido alterado o removido, anula
todos los reclamos contra el fabricante. Cualquier daño a la propiedad durante la
instalación es la exclusiva responsabilidad del usuario final.
El Departamento de Servicio al Cliente está disponible llamando al 1 (800) 328-7363,
de lunes a viernes de 8:00 a.m. a 4:30 p.m. (PST). Se requiere una Autorización de
Devolución antes de poder devolver el o los productos a Baby Trend®. Visite http://
babytrend.com/pages/limited-warranty para conocer todos los detalles de la garantía.
Baby Trend, Inc. 13048 Valley Blvd. Fontana CA 92335
1-800-328-7363 • (8:00am ~ 4:30pm PST)
www.babytrend.com
34
WARNING WARNING
Copyright © 2022, Baby Trend Inc., All Rights Reserved. Todos los derechos reservados.
The maximum weight that can be carried in the storage basket is 10 lb
(4.53 kg). Mobile phone positioning parent tray and child tray each hold 5
lb (2.26 kg). Excessive weight may cause a hazardous unstable condition
to exist.
• The maximum weight for the front seat is 50 lb (22.68 kg). The maximum
weight for the platform / jumpseat is 50 lb (22.68 kg).
The rear stand on platform / jump seat is designed for a child who is
at least 2 1/2 years old and is not over 40 inches (101.6 cm) tall. The
maximum weight for the following combined features still within the
individual limits is 110 lb (45.35 kg): front seat, platform / jumpseat ,
and any of the accessories. Excessive weight may cause a hazardous
unstable condition to exist.
WARNING: Please follow all of these
instructions to ensure the safety of your child. Keep
these instructions for future reference.
WARNING: Failure to follow these instructions
could result in serious injury or death. Avoid serious
injury from falling or sliding out, always use the safety
harness and insure that the children are properly
positioned according to these instructions.
WARNING: Never leave children unattended.
Purses, shopping bags, parcels, diaper bags or accessory items may
change the balance of the stroller and cause a hazardous, unstable
condition.
Be certain the stroller is completely opened and locked in place before
allowing a child near the stroller.
NEVER use the stroller on stairways or escalators.
NEVER allow your stroller to be used as a toy.
To clean use only mild household soap or detergent and warm water on a
sponge or clean cloth.
Check your stroller for loose screws, worn parts, torn material or stitching
on a regular basis. Replace or repair parts as needed.
Discontinue use of stroller should it malfunction or become damaged.
Please contact our customer service department to arrange for repair or
obtain replacement parts.
NEVER run or jog with this stroller.
56
ADVERTENCIA ADVERTENCIA
Copyright © 2022, Baby Trend Inc., All Rights Reserved. Todos los derechos reservados.
El peso máximo que se puede transportar en la canasta de
almacenamiento es de 10 lb (4,53 kg) con la parte trasera
completamente extendida y 20 lb (9,07 kg) con la canasta cerrada. La
bandeja para teléfonos móviles de los padres y la bandeja secundaria
sostienen cada una 5 libras (2.26 kg). El peso excesivo puede causar
una condición inestable peligrosa.
• El peso máximo para el asiento delantero es 50 libras (22.68 kg). El
peso máximo de la plataforma / asiento de salto es 50 libras (22.68 k).
• La platforma trasera en el asiento / plataforma de salto ha sido diseñado
para un niño que es por lo menos 2 1/2 años de edad y no tiene más de
40 pulgadas (101.6 cm) de altura. El peso máximo para las siguientes
características combinadas aún dentro de los límites individuales es de
110 libras (45,35 kg): asiento delantero, plataforma / asiento de salto y
cualquiera de los accesorios. El exceso de peso podría ocasionar una
inestabilidad peligrosa.
ADVERTENCIA:
Por favor, siga todas estas
instrucciones para garantizar la seguridad de su hijo.
Conserve estas instrucciones para referencia futura.
ADVERTENCIA: El incumplimiento de estas
instrucciones podría ocasionar una lesión grave o la
muerte. Evite lesiones graves por caídas o resbalones.
Siempre use el arnés de seguridad y asegúrese de que
los niños estén ubicados correctamente de acuerdo a
estas instrucciones.
ADVERTENCIA: Nunca pierda de vista a
los niños.
• Los bolsos, bolsas de compras, paquetes, bolsas de pañales o artículos
accesorios podrían cambiar el equilibrio del carrito y una condición de
inestabilidad peligrosa.
• Procure que el carrito esté completamente abierto y bien trabado antes
de permitir que un niño se acerque al mismo.
NUNCA use el carrito en escaleras mecánicas o comunes.
NUNCA permita el uso de su carrito como un juguete.
• Para limpiarlo, use solamente jabón doméstico o detergente suaves y
agua tibia en una esponja o trapo limpio.
• Verique con frecuencia que su carrito no tenga tornillos sueltos, piezas
gastadas, materiales o costuras rasgados. Reemplace o repare las
piezas conforme sea necesario.
• Deje de usar el carrito si presenta fallas o daños. Por favor,
comuníquese con nuestro departamento de servicio al cliente para
gestionar la reparación u obtención de piezas de reemplazo.
NUNCA corra o trote con esta carrito
8
ASSEMBLY ENSAMBLAR
Copyright © 2022, Baby Trend Inc., All Rights Reserved. Todos los derechos reservados.
7
PARTS PIEZAS
Copyright © 2022, Baby Trend Inc., All Rights Reserved. Todos los derechos reservados.
Check that you have all the parts for this model before assembling the stroller.
Verique que tenga todas las piezas para este modelo antes de montar el carrito.
Canopy
(Packed in Stroller)
Dosel
(Emballado en el carrito)
Stroller
Carrito
Mobile Phone Positioning
Parent Tray
Bandeja para teléfonos
móviles de los padres
IMPORTANT! To ensure safe operation of your stroller,
please follow these instructions carefully. Please keep these
instructions for future reference.
IMPORTANT! Before assembly and each use, inspect
this product for damaged hardware, loose joints, missing parts
or sharp edges. NEVER use if any parts are missing or broken.
IMPORTANT! Adult assembly is required.
¡IMPORTANTE! Para asegurar el funcionamiento
seguro de su carrito, siga estas instrucciones cuidadosamente.
Por favor, conserve estas instrucciones para referencia futura.
¡IMPORTANTE! Antes del montaje y de cada uso,
inspeccione el producto para detectar daños en el equipo,
uniones sueltas, piezas faltantes o bordes losos. NUNCA use
el carrito con piezas faltantes o rotas.
¡IMPORTANTE! Se requiere el montaje por parte de
un adulto.
(2) Front Wheels
(2) Ruedas Delantera
Rear Axle-Platform
Eje trasero-Plataforma
Child Tray
Bandeja para Niños
Infant Car Seat Sold Separately
Sillita Para El Automóvil Se Vende Por Separado
910
ASSEMBLY ENSAMBLAR ASSEMBLY ENSAMBLAR
Copyright © 2022, Baby Trend Inc., All Rights Reserved. Todos los derechos reservados.
FRAME SETUP
CONFIGURACIÓN DEL MARCO
1) • Lay the frame on the side
opposing the fold latch.
Release the fold latch by
pulling it outward (Fig. 1a).
Slightly open frame to remove
the canopy from the frame
(Fig 1b).
• Put the frame upright and
rmly pull backward on the
stroller handle to snap the
frame open (Fig. 1c).
NOTE: The frame must fully
click into position.
• Ponga el marco en el lado que
se opone al pestillo plegable.
Libere el pestillo jalando de
él hacia afuera (Fig. 1a). Abra
el marco parcialmente para
sacar el dosel del marco
(Fig. 1b).
• Ponga el marco en posición
vertical y tire rmemente hacia
atrás del asa de la carriola
para abrir el marco (Fig. 1c).
NOTA: El marco debe
bloquear completamente en
su posición.
Fig. 1c
Fig. 1b
Fig. 1a
FRONT WHEEL
RUEDA DELANTERA
2) • Insert each front wheel into the
housing on both sides of stroller
frame. Line up the peg with the
housing and rmly push into
place (Fig. 2).
• Inserte cada rueda delantera en
el armazón en ambos lados del
marco de la carriola. Alinee la
clavija con el armazón y empuje
rmemente en su lugar (Fig. 2).
REAR AXEL - PLATFORM
EJE TRASERO-PLATAFORMA
3) • From the underside, align
the rear axle with platform over
the rear frame tubes. Push in
evenly on both sides until secure
(Fig. 3a).
• Ensure to press the rear axle-
platform under the lower bar
(Fig. 3b). NOTE: Ensure the rear
axle-platform clicks into position
on both sides. Pull on each side
to ensure it is locked in place
before use.
Fig. 2
Black cap
facing outwards
Cubierta negra mirando
hacia el exterior
11 12
ASSEMBLY ENSAMBLAR ASSEMBLY ENSAMBLAR
Copyright © 2022, Baby Trend Inc., All Rights Reserved. Todos los derechos reservados.
Fig. 3a
Fig. 3b
NEVER use stroller if the rear
axle-platform does not lock into
place. If you need assistance,
please contact the customer
service line for additional
assistance: 1(800) 328-7363
Monday through Friday between
8:00 a.m. and 4:30 p.m. (PST).
• Desde la parte inferior, alinee
el eje trasero-plataforma sobre
los tubos del bastidor trasero.
Empuje uniformemente por
ambos lados hasta que esté
seguro (Fig. 3a).
Asegúrese de presionar la
plataforma del eje trasero debajo
de la barra inferior (Fig. 3b).
NOTA: Asegúrese de que el eje
trasero-plataforma encaje en su
posición en ambos lados. Tire de
cada lado para asegurarse de
que está bloqueado en su lugar
antes de su uso.
NUNCA utilice el cochecito si el
eje trasero-plataforma no se ja
en su lugar. Si necesita ayuda,
póngase en contacto con la
línea de atención al cliente para
obtener asistencia adicional:
1(800) 328-7363 de lunes a
viernes entre las 8:00 a.m. y las
4:30 p.m. (PST).
CHILD TRAY
BANDEJA PARA NIÑOS
WARNING:
The
child’s tray is not a restraint
device: always secure your
child with the seat belt. DO
NOT lift the stroller by the
child’s tray. Use care when
child is in the stroller and
securing the front tray. Do
not place hot liquids or more
than 5 lbs (2.26 kg) in the
child tray. Serious burns or
unstable conditions could
result.
ADVERTENCIA:
La bandeja para niños no es
un dispositivo de restricción:
siempre sujete a su hijo con
el cinturón de seguridad. NO
use la bandeja para niños
para levantar el carrito.
Sea prudente al colocar la
bandeja para niños en el
carrito cuando haya un niño
en el carrito. No coloque
líquidos calientes ni más
de 5 lbs (2.26 kg) sobre la
bandeja para niños, ya que
podría causar quemaduras
graves o inestabilidad.
13 14
ASSEMBLY ENSAMBLAR ASSEMBLY ENSAMBLAR
Copyright © 2022, Baby Trend Inc., All Rights Reserved. Todos los derechos reservados.
4) To attach child tray: Push tray
downward and onto each side
of the front armrests until both
sides snap into place (Fig. 4a).
Check that the tray is secured by
slightly pulling it upwards.
To access child seat: pull one
release lever (Fig. 4b) on the
underside of the child tray and lift
upward. Either side can rotate up
to access the seat (Fig. 4c).
NOTE: To remove the child tray:
Press the 2 buttons to rotate tray
up. Pull each release lever on
both sides of the tray and pull
upward.
Para conectar la bandeja
para niños: Empuje la
bandeja hacia abajo y hacia
cada lado de los reposabrazos
delanteros hasta que ambos
lados encajen en su lugar
(Fig. 4a). Asegúrese que
la bandeja esté asegurada
jalando ligeramente hacia
arriba.
Para acceder al asiento para
niños: tire de la palanca de
liberación (Fig. 4b) en la parte
inferior de la bandeja para
niños y levántela. Cualquier
lado puede girar hacia arriba
para acceder al asiento
(Fig. 4c). NOTA: Pulse los 2
botones para girar la bandeja
hacia arriba. Para retirar la
bandeja para niños: Tire de
cada palanca de liberación en
ambos lados de la bandeja y
tire hacia arriba.
Fig. 4b
Fig. 4a
Release Lever
La palanca de liberación
Fig. 4c
CANOPY
DOSEL
5) • To attach the canopy: align
both sides of the canopy
clips onto the plastic tabs.
Slide clips forward to lock
into place (Fig. 5a).
NOTE: Ensure the canopy
is completely snapped into
position.
To open the canopy: push
front bar forward while
holding back of canopy.
Canopy rachets forward or
backward (Fig. 5b).
Para jar el dosel: alinee
ambos lados de los clips
del dosel en las pestañas
de plástico. Deslice los
clips hacia adelante para
jarlos en su lugar (Fig. 5a).
NOTA: Asegúrese de que el
dosel esté completamente
encajado en su posición.
Para abrir el dosel: empuje
la barra delantera hacia
adelante mientras que
sostiene el forro del asiento.
El dosel se desplaza hacia
adelante o hacia atrás
(Fig. 5b).
Fig. 5a
Fig. 5b
OUT
IN
15 16
ASSEMBLY ENSAMBLAR ASSEMBLY ENSAMBLAR
Copyright © 2022, Baby Trend Inc., All Rights Reserved. Todos los derechos reservados.
Fig. 5c
To close the canopy:
pull front of canopy back
towards stroller handle
(Fig. 5c).
To remove the canopy:
Slide both canopy clips
back towards the stroller
handle (Fig. 5a).
Para cerrar el dosel: jale
la parte delantera de la
cubierta hacia la manija de
la carriola (Fig. 5c).
Para quitar el dosel:
deslice los dos clips del
dosel hacia la manija de la
carriola (Fig. 5a).
BASKET ACCESS
ACCEDER LA CANASTA
6) To access front of basket:
open and close the leg
rest with the hook and loop
fastener. Lift the leg rest to
access the basket (Fig. 6a).
• Para acceder al frente de
la canasta: abra y cierre el
reposa piernas con el cierre
de gancho y bucle. Levante el
reposa piernas para acceder
a la canasta (Fig. 6a).
Fig. 6a
17 18
ASSEMBLY ENSAMBLAR ASSEMBLY ENSAMBLAR
Copyright © 2022, Baby Trend Inc., All Rights Reserved. Todos los derechos reservados.
Fig. 6b
Fig. 6c
MOBILE PHONE POSITIONING PARENT TRAY
BANDEJA PARA TELÉFONOS MÓVILES DE LOS PADRES
WARNING: Do not place
hot liquids or more than 5 lbs
(2.26 kg) in the parent tray.
Serious burns or unstable
conditions can result.
WARNING: Care must be
taken when folding stroller
to prevent damage. Make
sure all accessories, mobile
phones, diaper bags or
purses are removed before
folding. Failure to remove
items in, or on the stroller may result in damage to the
stroller or the item (s) if not removed. Baby Trend® will
not be liable or warrant any damage.
ADVERTENCIA: Nocoloque líquidos
calientes ni más de 5 lbs (2.26 kg) libras sobre
la bandeja para padres, ya que podría causar
quemaduras graves o inestabilidad.
ADVERTENCIA: Se debe tener cuidado
al plegar el choche de bebé para evitar daños.
Asegúrese de quitar todos los accesorios, teléfonos
móviles, bolsas de pañales o carteras antes de
doblar. Si no se quitan los elementos, se pueden
dañar el cochecito o los artículos. Baby Trend® no se
responsabiliza ni garantiza ningún daño.
To access rear of basket:
Locate the convenience
basket below the rear jump
seat (Fig. 6b). Ensure
the hook and loop straps
are attached to the lower
frame joint (Fig. 6c).
Para acceder a la parte
trasera de la canasta:
Ubique la cesta de
conveniencia debajo del
asiento de salto trasero
(Fig. 6b). Asegúrese de
que las correas de gancho
y lazo estén unidas a la
junta inferior del marco
(Fig. 6c).
19 20
ASSEMBLY ENSAMBLAR ASSEMBLY ENSAMBLAR
Copyright © 2022, Baby Trend Inc., All Rights Reserved. Todos los derechos reservados.
Arch
Arco
7) To Insert The Parent Tray:
(1) Face the tray with the
prominent arch side towards
the canopy (Fig. 7a).
(2) Align the parent tray tabs
to the inner tabs on both
sides of the stroller. Press
the tray down rmly until
both tabs click into position
(Fig. 7b).
Colocación de la bandeja
para padres: (1) Cara
a la bandeja con el lado
prominente del arco hacia el
dosel (Fig. 7a).
(2) Alinee las pestañas de
la bandeja para padres
principal con las pestañas
internas de ambos lados del
carrito. Presione la bandeja
rmemente hasta que
ambas pestañas encajen en
su posición (Fig. 7b).
Pour insérer le plateau
pour parents : (1) Face au
plateau avec le côté de l’arc
proéminent vers l’auvent
(Fig. 7a).
Fig. 7a
Fig. 7b
2
“Click”
“Clic”
“Click”
“Clic”
1
Mobile phone positioner: Align
mobile phone to the clip and
insert it through the grips. Make
sure to push the phone all the
way down into the positioner
(Fig. 7c). NOTE: The positioner
may not accommodate all
mobile phones or other devices.
Do not use positioner as a
secure holder when stroller is
not in use or if your phone is
loose or is too large.
Removal: Under the stroller
frame locate the parent tray
tabs. Press them inwards and
lift up the tray from the housing
(Fig. 7d).
Bandeja para teléfono móvil:
Alinee el teléfono móvil con el
clip e insértelo a través de los
agarres. Asegúrese de empujar
el teléfono hasta el fondo de la
bandeja ( Fig. 7c).
NOTA: El posicionador puede
no admitir todos los teléfonos
móviles o dispositivos. No
use el posicionador como un
soporte seguro cuando no
esté en uso o si su teléfono
está suelto o si es demasiado
grande.
Extracción: Ubique las
pestañas de la bandeja para
padres que se encuentran
debajo de la estructura del
carrito. Presiónelas y levante la
bandeja de la carcaza (Fig. 7d).
Fig. 7c
Fig. 7d
Some mobile phones require
pulling the tabs to insert.
Algunos teléfonos móviles
requieren tirar de las lengüetas
para insertar.
21 22
SAFETY SEGURIDAD SAFETY SEGURIDAD
Copyright © 2022, Baby Trend Inc., All Rights Reserved. Todos los derechos reservados.
REAR BRAKES
FRENOS TRASEROS
WARNING: Always set brakes when the
stroller is not being pushed so that the stroller will not
roll away. NEVER leave stroller unattended on a hill or
incline as the stroller may slide down the hill.
ADVERTENCIA: Siempre aplique los
frenos cuando el carrito no esté siendo empujado,
para impedir que ruede fuera de su alcance. Nunca
deje el carrito desatendido en una colina o pendiente,
ya que podría deslizarse pendiente abajo.
8) To engage rear brakes, apply downward pressure to the
brake levers located on the rear axle (Fig 8a). The stroller
may require forward or rearward movement in order to
engage the brake. Check that the stroller will not move
once the brakes are properly applied. To release, gently lift
up on the brake levers (Fig. 8b).
• Para activar los frenos traseros, aplique presión
descendente a las palancas de freno situadas en el
eje trasero (Fig 8a). El carrito podría requerir un leve
movimiento hacia delante o hacia atrás para alinear los
dientes del freno con el piñón del freno de cada rueda.
(Fig. 8b). Verique que el carrito no se mueva y que
ambos frenos estén aplicados correctamente.
Fig. 8bFig. 8a
USING THE FRONT SEAT
USO DEL ASIENTO DELANTERO
WARNING: Avoid serious injury from falling or
sliding out. Always use the safety harness.
STRANGULATION HAZARD:
Child can
strangle in loose safety harness. Never leave child in
seat when safety harness is loose or undone.
ADVERTENCIA: Evite lesiones graves por
caídas o resbalones. Siempre use el arnés de seguridad.
PELIGRO DE ESTRANGULAMIENTO:
El niño se puede estrangular con las correas sueltas del
arnés de seguridad . Nunca deje al niño en el asiento
cuando las correas estén sueltas del arnés de seguridad
o sin terminar de colocar.
9) The shoulder straps of the
5-point harness have multiple
positions. Select the position
that places the shoulder strap
level with, or below the top of
the child’s shoulder (Fig. 9a).
• Las correas del hombro del
arnés de 5 puntos tienen
múltiples posiciones de
sujeción. Escoja la posición
que sitúe a la correa del
hombro al mismo nivel o a un
nivel inferior a la parte superior
del hombro del niño (Fig. 9a).
Adjust to child’s shoulder
Ajuste de los hombros del niño
Fig. 9a
23 24
SAFETY SEGURIDAD SAFETY SEGURIDAD
Copyright © 2022, Baby Trend Inc., All Rights Reserved. Todos los derechos reservados.
Fig. 9b
• To secure the child, place the
safety harness around the child’s
waist and over the shoulders.
Place the crotch strap between
the child’s legs. Insert the male
end of each shoulder/waist belt
into the crotch buckle. Tighten all
buckles to the proper t for the
child (Fig. 9b).
• Para asegurar al niño, coloque
el arnés de seguridad alrededor
de la cintura del niño y sobre
los hombros. Coloque la correa
de la entrepierna entre las
piernas del niño. Introduzca el
extremo macho del cinturón de
cada hombro o de la cintura
en la hebilla de la correa de
la entrepierna. Apriete todas
las hebillas para ajustarlas
adecuadamente para el niño
(Fig. 9b).
Adjust for a snug t
Regule para lograr un buen ajuste
Fig. 9c
To make adjustments: (1) Push the button on the center
clasp and all the harness straps will release. (2) Pass
them through the slots on the seat fabric (Fig. 9c).
Para ajustar: (1) Presione el botón en el cierre central
y se liberarán todas las correas del arnés. (2) Páselas a
través de las aberturas en la tela del asiento (Fig. 9c).
2
1
25 26
SAFETY SEGURIDAD SAFETY SEGURIDAD
Copyright © 2022, Baby Trend Inc., All Rights Reserved. Todos los derechos reservados.
• Use the hook and loop fasteners on the rear seat opening
to access straps and rethread. Select the position that
places the shoulder strap level with, or below the top of the
child’s shoulder (Fig. 9d).
• Use los sujetadores de gancho y bucle en la abertura
del asiento trasero para acceder a las correas y volver a
enhebrar. Seleccione la posición que coloca el nivel de la
correa para el hombro con o debajo de la parte superior
del hombro del niño (Fig. 9d).
Fig. 9d
Rear of seat opening
Apertura en la parte trasera del asiento
Adjust to child’s shoulder
Ajuste de los hombros del niño
USING THE REAR JUMP SEAT
USO DEL ASIENTO DE SALTO
WARNING: The rear platform and jump seat
are designed to accommodate a child who is at least
2 1/2 years old, has good balance and coordination,
and is not over 40 inches tall.
ADVERTENCIA: La plataforma trasera y
el asiento adicional están diseñados para adaptarse
a un niño de al menos 2 años y medio, con buen
equilibrio y coordinación, y una altura que no supere
las 40 pulgadas (101 cm).
10) • Have the child sit on the jump seat facing backwards.
Secure the child with the jump seat 3-point harness
(Fig. 10a). Put the seat belt around the child’s waist, and
buckle to the crotch strap (Fig. 10b). Adjust the seat belt
to be snug around the child’s waist.
RELEASE! Push the button on the center clasp and the all
the harness straps will release (Fig. 10c).
• Siente al niño en el asientode salto mirando hacia atrás.
Sujete al niño con el arnés de 3 puntas del asiento trasero
(Fig. 10a). Coloque el cinturón de seguridad alrededor de
la cintura del niño y abroche la correa de la entrepierna
(Fig. 10b). Ajuste el cinturón de seguridad ceñidamente
alrededor de la cintura del niño.
¡LIBERAR!
Presione el botón en la presilla central para
destrabar las dos hebillas del arnés (Fig. 10c).
27 28
SAFETY SEGURIDAD SAFETY SEGURIDAD
Copyright © 2022, Baby Trend Inc., All Rights Reserved. Todos los derechos reservados.
Fig. 10bFig. 10a
Fig. 10c
Center Clasp
Presilla central
Waist Strap
Correa de la Cintura
Crotch Strap
Correa de la Entrepierna
Adjust for a Snug Fit
Ajuste ceñidamente
jump seat 3-point harness
arnés de 3 puntas del asiento adicional
FRONT SEAT RECLINE
RECLINACIÓN DEL ASIENTO DELANTERO
WARNING: The upright position should be
used only for a child that is at least 6 months old.
ADVERTENCIA:La posición erguida
se debe usar únicamente para un niño de al menos
6 meses.
Reclined
Reclinada
Upright
Vertical
NOTE: Only use recline for the front seat. Always place in the
upright position when using the jump seat.
NOTA: Solo use la reclinación para el asiento delantero. Coloque
siempre en posición vertical cuando use el asiento adicional.
29 30
SAFETY SEGURIDAD SAFETY SEGURIDAD
Copyright © 2022, Baby Trend Inc., All Rights Reserved. Todos los derechos reservados.
USING THE PLATFORM
USO DE LA PLATAFORMA
WARNING:
The rear platform and jump seat
are designed to accommodate a child who is at least 2
1/2 years old, has good balance and coordination, and is
not over 40 inches tall.
ADVERTENCIA:
La plataforma trasera y el
asiento adicional están diseñados para adaptarse a un
niño de al menos 2 años y medio, con buen equilibrio
y coordinación, y una altura que no supere las 40
pulgadas (101 cm).
12) First engage the rear brakes
(Fig. 12a). Place child in
rear-facing standing position.
NOTE: Ensure the child
holds the frame with both
hands at all times.
• Primero enganche los frenos
traseros (Fig. 12a). Coloque
al niño en posición de pie
mirando hacia atrás.
NOTA: Asegúrese de que el
niño sostenga el marco con
ambas manos en
todo momento.
Fig. 12a
Rear Axle-Platform
Eje trasero-Plataforma
Fig. 11
11) To recline the seat press the
clip ends together to release
and pull down. To place seat
into an upright position, press
the clip ends together while
holding the end of strap. Push
clip upwards to secure into
desired position (Fig. 11).
• Para reclinar el asiento
presione los extremos de la
presilla juntos y tire hacia
abajo. Para poner el asiento en
la posición vertical, presione los
extremos de la presilla juntos,
sostenga el aro y empuje hacia
arriba (Fig. 11).
32
FOLD PLEGAR
Copyright © 2022, Baby Trend Inc., All Rights Reserved. Todos los derechos reservados.
31
SAFETY SEGURIDAD
Copyright © 2022, Baby Trend Inc., All Rights Reserved. Todos los derechos reservados.
CANOPY TOGGLE
PASADOR DE DOSEL
• Use the canopy toggle
when using the platform
or to hold the canopy
together when using and
adjusting jump seat. Pull
the small strap over the
toggle (Fig. 12b).
• Use el pasador del dosel
cuando use la plataforma
o para sostener el dosel
al usar y ajustar el asiento
adicional. Tire la correa
pequeña sobre el pasador
(Fig. 12b). Fig. 12b
TO FOLD STROLLER
PARA PLEGAR EL CARRITO
WARNING: Care must be taken
when folding and unfolding the stroller to
prevent nger entrapment.
CAUTION: Do not allow children
near stroller while folding and unfolding.
WARNING: Care must be taken
when folding and unfolding the stroller
to prevent damage. Make sure all
accessories, mobile phones, diaper bags
or purses are removed before folding.
Failure to remove items in, or on the
stroller so may result in damage to the
stroller or the item (s) if not removed.
Baby Trend® will not be liable or warrant
any damage.
ADVERTENCIA: Se debe ser
prudente al plegar y desplegar el carrito
para evitar que queden dedos atrapados.
PRECAUCIÓN: No permita que
los niños se acerquen al carrito mientras
lo pliega.
ADVERTENCIA: Se debe tener
cuidado al plegar el choche de bebé para
evitar daños. Asegúrese de quitar todos
los accesorios, teléfonos móviles, bolsas
de pañales o carteras antes de doblar. Si
no se quitan los elementos, se pueden
dañar el cochecito o los artículos. Baby
Trend® no se responsabiliza ni garantiza
ningún daño.
33 34
FOLD PLEGAR FOLD PLEGAR
Copyright © 2022, Baby Trend Inc., All Rights Reserved. Todos los derechos reservados.
13) Always push canopy forward
away from handle before
folding the stroller (Fig. 13a).
Engage the rear brakes
before folding the stroller
(See step 8).
(1) To fold the stroller, slide
the thumb latch to the left.
(2) Squeeze the pull trigger
while pushing forward on the
handle (Fig. 13b).
• Once the stroller begins to
fold, push upward on the
handle (Fig. 13c).
• Siempre empuje el dosel
hacia adelante lejos de la
manija antes de plegar la
carriola (Fig. 13a). Enganche
los frenos traseros antes
de plegar la carriola (Vea el
paso 8).
• Una vez que la carriola
comienza a doblarse,
empuje hacia arriba la
manija (Fig. 13c).
Fig. 13b
Fig. 13a
2
1
• Continue pushing handle
upward and use the fold assist
strap to close the stroller
(Fig. 13d).
• Ensure the fold latch clicks
and secures the stroller closed
(Fig. 13e).
(1) Para doblar el carrito,
deslice el pestillo hacia la
izquierda. (2) Apriete el gatillo
mientras empuja el manubrio
hacia delante (Fig. 13b).
• Continúe empujando la manija
hacia arriba y use la correa
de asistencia de doblar para
cerrar la carriola (Fig. 13d).
Asegúrese de que el pestillo
para plegar haga clic y
asegure el carrito (Fig. 13e).
NOTE: You may rotate the
child tray down for a compact
fold. Press the 2 buttons and
rotate the tray down (Fig. 13f).
NOTA: Puede girar la bandeja
hacia abajo para un pliegue
compacto. Pulse los 2 botones
y gire la bandeja hacia abajo
(Fig. 13f).
Fig. 13c
Fig. 13d
Fig. 13e
Fig. 13f
36
INFANT CAR SEAT / SILLITA PARA EL AUTOMÓVIL INFANT CAR SEAT / SILLITA PARA EL AUTOMÓVIL
35
UNFOLD DESPLEGAR
Copyright © 2022, Baby Trend Inc., All Rights Reserved. Todos los derechos reservados.
TO UNFOLD STROLLER
PARA DESPLEGAR EL CARRITO
14) • Release the fold latch
(Fig. 14a).
• Firmly pull backward on the stroller
handle to snap the frame open
(Fig. 14b).
NOTE: The frame must fully click
into position.
• Suelte el pestillo para plegar
(Fig. 14a).
Tire rmemente hacia atrás del asa
de la carriola para abrir el marco
(Fig. 14b).
NOTA: El marco debe bloquear
completamente en su posición.
Fig. 14a
Fig. 14b
INFANT CAR SEAT
SILLITA PARA EL AUTOMÓVIL
WARNING: To avoid serious injury
from falling, ALWAYS use the safety belt to
secure the car seat.
ADVERTENCIA: Para evitar lesiones
serias, siémpre use el cinturón de seguridad sujetar
la sillita.
Infant car seat sold separately
(visit babytrend.com for compatibilty chart)
Asiento infantil para automóvil se vende por separado
(visite babytrend.com para ver la tabla de compatibilidad)
ATTENTION: CS01 EZ-Lift, CS02 EZ-Lift PLUS and CS03
EZ-Lift PRO Infant Car Seats must attach to the module of
the strollers front seat. These models require child tray and
seat back adjustment to the most reclined position.
NOTE: To make seat position adjustments refer to step 11.
ATENCIÓN: CS01 EZ-Lift, CS02 EZ-Lift PLUS and CS03
EZ-Lift PRO Sillas de Auto deben fijarse al módulo del
asiento delantero del carrito. Estos modelos requieren el
ajuste de la bandeja para niños y el respaldo del asiento a
la posición más reclinada.
NOTA: Para realizar ajustes de posiciones en la sillita lea el
paso 11.
37 38
INFANT CAR SEAT / SILLITA PARA EL AUTOMÓVIL INFANT CAR SEAT / SILLITA PARA EL AUTOMÓVIL
CAR SEATS MODULE CONNECTION
CONEXIÓN PARA SILLITA PARA EL AUTOMÓVIL
15) Align the car seat module to the inner frame connectors.
Carefully rest the car seats lower rear against the angle point
of the tray. Latch the module into the stroller frame. Press
down rmly for the click. ALWAYS ensure that the car seat is
properly connected and locked onto the stroller before each
use by lifting up on the car seat handle (Fig. 15a).
• Alinee el módulo de la sillita para el automóvil con los
Fig. 15a
Angle point
Punto angular
“Click”
“Clic”
CS01 EZ-Lift, CS02 EZ-Lift PLUS and
CS03 EZ-Lift PRO Infant Car Seats conectores del armazón interno. Apoye con cuidado la parte
trasera inferior del asiento del automóvil contra el punto angular
de la bandeja. Enganche el módulo en el marco del carrito.
Presione rmemente hasta que haga clic. SIEMPRE verique
que la sillita para el automóvil esté conectada correctamente
y trabada en el carrito antes de cada uso levantándola del
manubrio de la sillita para el automóvil (Fig. 15a).
Removing the car seat:
Retirada de la silla de auto:
NOTE: Set handle to the carry position (Fig. 15b).
Squeeze the release handle located at the Top-rear of the
car seat and lift away from the stroller (Fig. 15c).
NOTA: Coloque el manubrio en la posición de traslado
(Fig. 15b). Apriete el manubrio de liberación ubicado en
la parte Superior trasera de la sillita para el automóvil y
levántelo para retirarlo del carrito (Fig. 15c).
Fig.15b Fig. 15c
Press
Prensa
  • Page 1 1
  • Page 2 2
  • Page 3 3
  • Page 4 4
  • Page 5 5
  • Page 6 6
  • Page 7 7
  • Page 8 8
  • Page 9 9
  • Page 10 10
  • Page 11 11
  • Page 12 12
  • Page 13 13
  • Page 14 14
  • Page 15 15
  • Page 16 16
  • Page 17 17
  • Page 18 18
  • Page 19 19
  • Page 20 20
  • Page 21 21
  • Page 22 22
  • Page 23 23
  • Page 24 24
  • Page 25 25
  • Page 26 26

Baby Trend Sit N Stand 2.0 User manual

Category
Strollers
Type
User manual

Baby Trend Sit N Stand 2.0 is a versatile stroller with a front seat, a platform/jump seat, and a mobile phone positioning parent tray, designed to accommodate multiple children and their belongings. It features a maximum weight capacity of 110 lbs for the combined weight of children and accessories, ensuring a safe and comfortable ride for all.

Ask a question and I''ll find the answer in the document

Finding information in a document is now easier with AI

in other languages