Page is loading ...

Installation and Care Guide
Freestanding Bath with Heated Surface
Retain serial number for reference:
Conserver le numéro de série pour référence:
Guarde el número de serie para referencia:_____________________
Français, page ″Français-1″
Español, página ″Español-1″
1237788-2-B

Installation Instructions
WARNING: When using electrical products, basic precautions should always be followed,
including the following:
WARNING: Risk of electric shock. Connect only to a circuit protected by a Ground-Fault
Circuit-Interrupter (GFCI)*.
WARNING: Risk of electric shock. Grounding is required. A qualified electrician should make all
electrical connections.
WARNING: Risk of electric shock. Disconnect power before servicing.
WARNING: Risk of property damage. Building materials and wiring should be routed away from
the heat-producing components of the bath.
WARNING: Risk of injury or property damage. Please read all instructions thoroughly before
beginning installation, including the following requirements.
NOTICE: Follow all plumbing, electrical, and building codes. In Canada, install this unit in accordance
with the Canadian Electrical Code, Part 1.
NOTICE: Provide service access to the power supply and heater components.
NOTICE: If the supply cord is damaged, it must be replaced by the manufacturer, its service agent, or
similarly qualified agent in order to avoid a hazard.
*Outside North America, this device may be known as a Residual Current Device (RCD).
Product Information
Electrical Requirements
WARNING: Risk of burns, fire, electric shock, or injury. Do not operate the heater if the power
supply cord is damaged. For proper guidance to have this product repaired, please call:
1-800-4KOHLER from within the USA or Canada, or 001-800-456-4537 from within Mexico.
This installation must have a Class A Ground-Fault Circuit-Interrupter (GFCI)*. The GFCI protects against
line-to-ground shock hazard. Use a 120 V, 15 A, 60 Hz service for the bath with heated surface.
*Outside North America, this device may be known as a Residual Current Device (RCD).
1237788-2-B 2 Kohler Co.

Tools and Materials
Before You Begin
NOTICE: Adequate floor support must be provided. Note the model number located on the heater side
of the bath, then visit the product page at www.kohler.com for additional information.
NOTICE: Do not support the load weight of the bath by the rim.
NOTICE: Before installing a rim-mount bath faucet, refer to the specification sheet on the product page at
www.kohler.com.
Observe all local plumbing and building codes.
Unpack and inspect the bath and components for damage. Return the bath and components to the
carton until installation.
To simplify future maintenance, make sure all plumbing connections around the bath are easily
accessible.
Carefully plan moving the bath into the installation area. This bath will not easily fit through
doorways.
Two people are needed to install this product.
Install the bath to an adequately supported, level finished floor.
This bath is designed for freestanding installation only.
If installing a rim-mount faucet, make sure there is no interference with the drain overflow before
drilling any holes. Consult local and national codes for minimum air gap requirements if installing a
spout on the rim.
Illustrations shown may not look like your actual product but they still apply for this installation.
This bath conforms to CSA B45.5/IAPMO Z124. All dimensions are nominal.
Safety Glasses PencilTape Measure
Silicone Sealant Level
Plus:
• Drop Cloth
• Shims
• Short Ø 1-1/2" PVC Pipe or Coupling
• 2x4
• Wood Blocks
Silicone Adhesive
Kohler Co. 3 1237788-2-B

1. Prepare the Rim-Mount Faucet (Optional)
NOTICE: Before installing a rim-mount bath faucet, refer to the specification sheet on the product page at
www.kohler.com for faucet area dimensions for your model.
NOTICE: To accommodate the bath shroud, use flexible connections to attach the water supplies to a
rim-mount faucet.
Position the faucet in the desired location along the bath. Ensure the faucet will not interfere with
the drain and overflow.
NOTE: Refer to the installation instructions packed with the faucet to determine faucet hole size.
Use a pencil to mark the faucet centerlines for drilling.
Carefully drill the faucet holes.
Bath
Rim
Recommended Faucet Area
(See Specification Sheet
for Dimensions)
1237788-2-B 4 Kohler Co.

2. Prepare the Site
NOTICE: Measure your product for site preparation. Note the model number located on the heater side
of the bath, then visit the product page at www.kohler.com for additional information.
NOTICE: Do not attempt to remove the hardened casting material covering the wooden support blocks.
The casting material is required to properly position and install the bath.
IMPORTANT! To ensure a successful installation, install the bath on a level finished floor.
IMPORTANT! Make sure the subfloor offers adequate support for the bath.
Remove and discard the thin plastic film covering the support blocks.
Temporarily position the shroud in the installation location.
Verify the shroud is level. If needed, position shims under the shroud.
Using a pencil, trace the shroud hole on the floor.
Remove the shroud and set aside.
Secure any shims to the floor.
Position and install a standard PVC or brass bath drain pipe. Install the drain pipe so it extends
2-1/8″ (54 mm) above the finished floor.
NOTE: The drain pipe may need to be trimmed, depending on the drain installed.
Drain Pipe
Shroud
Finished
Floor
Trace the
hole.
Support Block
2-1/8"
(54 mm)
Kohler Co. 5 1237788-2-B

3. Prepare the Bath
NOTICE: Refer to the drain instructions to dry fit to the bath. Do not cement and complete the drain
installation until instructed to do so.
Dry fit the drain and overflow assembly to the bath. Refer to the drain instructions. Do not apply
sealant or cement to the drain components at this time.
Temporarily position a 2x4 in the installation area to support the bottom of the bath opposite the
drain.
With help, position the bath (without the shroud) and drain assembly over the drain pipe. Trim the
drain pipe as needed
Loosen the drain and overflow connections from the bath.
Remove the bath, leaving the drain and overflow assembly attached to the drain pipe.
Remove the temporary 2x4 support from the installation area.
Cement and assemble the drain and overflow components. Connect the drain to the drain pipe.
Apply slow-drying silicone adhesive to the bottom of the shroud.
Carefully position the shroud over the drain, aligning the hole with the traced mark on the floor.
Apply sealant to the
bottom before positioning.
Attach to the
drain pipe.
Dry fit the
drain assembly.
Temporary
2x4 Support
1237788-2-B 6 Kohler Co.

4. Install the Electrical Outlet – United States and Canada
WARNING: Risk of electric shock. Connect the power supply to a properly grounded,
grounding-type receptacle protected by a Ground-Fault Circuit-Interrupter (GFCI) or Residual
Current Device (RCD). Do not remove the plug grounding pin. Do not use a grounding adapter.
Your bath with heated surface is equipped with a cord and plug. The power supply has been wired
at the factory. A qualified electrician must install a GFCI-protected, 120 V, 15 A, grounded outlet.
Locate the outlet under the floor or inside the shroud, and within 24″ (610 mm) of the heated
surface power supply.
GFCI-Protected
Receptacle
Power Supply
User
Keypad
Heated
Surface
Kohler Co. 7 1237788-2-B

5. Make Electrical Connections – Latin America
NOTE: The electrical rating of the product is printed on a label on the lumbar end of the bath. The bath
with heated surface is designed to operate between 110 V and 240 V at either 50 Hz or 60 Hz.
WARNING: Risk of electric shock. Disconnect the power before performing the following
procedures.
WARNING: Risk of electric shock. Connect the bath to a properly grounded Ground-Fault
Circuit-Interrupter (GFCI) or Residual Current Device (RCD) for protection against line-to-ground
shock hazard.
IMPORTANT! The white wire should be connected to the load neutral terminal on the GFCI or RCD
breaker. The green wire is the equipment ground and must be connected to the neutral bus in the main
circuit breaker box.
Follow local electrical codes. Bond in accordance with local codes.
Remove the 120 V plug from the electrical cord on the junction box mounted to the control board.
Connect service to the junction box with a 240 V plug (not included) or hardwire connection.
Control Power
Junction Box
Black (L1)
Wire Connector
Green (Ground)
From Control
White (Neutral)
Wire Connectors
Electrician to provide
suitable strain relief.
* Connections to be Made
at the Circuit Breaker
Typical 240 V Wiring Connection
Field Wiring
(From Junction Box
to GFCI Breaker)
* Equipment Ground
* Line Neutral
(White
Curly Wire)
Neutral Bus
(In Breaker Box)
240 V
240 V
Typical Single-Pole
Circuit Breaker
with GFCI
Breaker Box
L1
N
120/240 VAC Source
Bond in accordance with national and
local codes. Open bonding lugs are
located at the top of the junction box.
Load Neutral
1237788-2-B 8 Kohler Co.

6. Install the Bath
Apply a generous amount of silicone sealant to the support blocks on the base of the shroud.
Apply sealant to both sides of the gaskets on the drain and overflow assembly.
NOTE: To provide access for securing the faucet connections, temporarily position block spacers at the
corners between the shroud and the bath rim. Position the blocks to avoid damaging the alignment guides
located under the bath rim.
With help, carefully lift the bath into place over the shroud and onto the block spacers.
Secure all faucet connections and fittings.
Plug the power cord into the installed outlet.
Carefully remove the blocks and make sure the bath rim engages the top of the shroud on all sides.
Install the drain flange and overflow cover according to the drain instructions.
Close the bath drain. Fill the bath to the overflow, and check for leaks.
If desired, apply a thin, continuous bead of clear or color-matched silicone sealant to the seam
between the bath and the finished floor.
Test Run the Bath
Check all electrical connections and make sure the electrical power to the bath is on.
Operate the user keypad to test the temperature settings.
For additional information on bath operation, refer to the ″Operating Instructions″ section.
Operating Instructions
IMPORTANT SAFETY INSTRUCTIONS
READ AND FOLLOW ALL INSTRUCTIONS
Apply silicone
sealant.
Temporary
Blocks
Alignment
Guide
Kohler Co. 9 1237788-2-B

Operating Instructions (cont.)
SAVE THESE INSTRUCTIONS
INSTRUCTIONS PERTAINING TO A RISK OF FIRE, ELECTRIC SHOCK, OR INJURY TO PERSONS
WARNING: When using electrical products, basic precautions should always be followed,
including the following:
DANGER: Risk of accidental injury or drowning. To reduce the risk of injury, do not permit
children to use this unit unless they are closely supervised at all times.
WARNING: Risk of personal injury. To avoid injury, exercise care when entering or exiting the
bath.
WARNING: Risk of electric shock. Do not permit electric appliances (such as a hair dryer, lamp,
telephone, radio, or television) within 5’ (1.5 m) of this bath.
WARNING: The use of alcohol, drugs, or medication can greatly increase the risk of fatal
hyperthermia. Prolonged immersion in hot water may induce hyperthermia. Hyperthermia occurs
when the internal temperature of the body reaches a level several degrees above the normal body
temperature of 98.6°F (37°C). The symptoms of hyperthermia include an increase in the internal
temperature of the body, dizziness, lethargy, drowsiness, and fainting. The effects of hyperthermia
include: (a) failure to perceive heat, (b) failure to recognize the need to exit the bath, (c)
unawareness of impending hazard, (d) fetal damage in pregnant women, (e) physical inability to
exit the bath, and (f) unconsciousness resulting in the danger of drowning.
WARNING: Risk of hyperthermia. People using medications and/or having an adverse medical
history should consult a physician before using a bath equipped with a heater.
WARNING: Risk of fetal injury. Pregnant or possibly pregnant women should consult a physician
before using the bath with heated surface.
WARNING: Risk of hyperthermia or drowning. Do not use the bath with heated surface
immediately following strenuous exercise.
WARNING: Risk of hyperthermia or drowning. Water temperature in excess of 100°F (38°C) may
cause injury. Test and adjust the water temperature before use.
Use this heated bath only for its intended purpose as described in this guide. Do not use attachments not
recommended by Kohler Co.
The heated bath must be connected only to a supply circuit that is protected by a Ground-Fault
Circuit-Interrupter (GFCI)*. Such a GFCI should be provided by the installer and should be tested on a
routine basis. To test the GFCI, press the test button. The GFCI should interrupt power. Press the reset
button. Power should be restored. If the GFCI fails to operate in this manner, the GFCI is defective. If the
GFCI interrupts power to the bath without the test button being pressed, a ground current is flowing,
indicating the possibility of an electric shock. Do not use this heated bath. Disconnect the heater and have
the problem corrected by a qualified service representative before using.
Your new KOHLER bath has been listed by Underwriter’s Laboratories, ensuring safety for you and your
family. This bath also conforms to rigid ANSI and IAPMO standards set within the plumbing industry.
* Outside North America, this device may be known as a Residual Current Device (RCD).
1237788-2-B 10 Kohler Co.

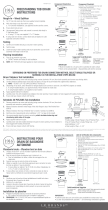
Operating Instructions
Keypad Operation
Power Icon - Turns the heater ON and OFF.
Heat/Temperature Indicator - The [Flame] icon illuminates yellow, orange, or red depending on the
heat level. Yellow indicates low heat, orange indicates medium heat, and red indicates high heat.
Up Arrow - Increases the temperature.
Down Arrow - Decreases the temperature.
NOTICE: The heater will remain on until it is manually turned OFF by pressing the [Power] icon.
NOTE: After 60 minutes of inactivity, the heater will automatically reset to low heat if the temperature
was set to medium or high.
NOTE: The heater will turn on at the last selected temperature setting.
Error Codes
Heat indicator blinking red - The heater is not functioning.
Heat indicator blinking yellow - The temperature sensor is not functioning or is loose.
Refer to the ″Troubleshooting″ section to troubleshoot any problems.
Confirm Heating System Operation
Press the [Power] icon on the user keypad.
Observe that the heat indicator turns yellow and the heater produces low heat.
Press the [Up] arrow. Verify that the heat indicator turns orange and the temperature increases.
Press the [Up] arrow a second time. Verify that the heat indicator turns red and the temperature
increases.
Press the [Down] arrow. Verify that the heat indicator turns orange and the temperature decreases.
Press the [Down] arrow a second time. Verify that the heat indicator turns yellow and the
temperature decreases.
Press the [Power] icon to turn the heater OFF.
Increase Temperature
Decrease TemperaturePower On/Off
Heat/Temperature Indicator
Kohler Co. 11 1237788-2-B

Care and Cleaning
For best results, keep the following in mind when caring for your KOHLER product:
•
Always test your cleaning solution on an inconspicuous area before applying to the entire surface.
•
Wipe surfaces clean and rinse completely with water immediately after applying cleaner. Rinse and
dry any overspray that lands on nearby surfaces.
•
Do not allow cleaners to soak on surfaces.
•
Use a soft, dampened sponge or cloth. Never use an abrasive material such as a brush or scouring
pad to clean surfaces.
For detailed cleaning information and products to consider, visit www.kohler.com/clean. To order Care &
Cleaning information, call 1-800-456-4537.
Warranty
ONE-YEAR LIMITED WARRANTY
KOHLER plumbing products are warranted to be free of defects in material and workmanship for one year
from date of installation.
Kohler Co. will, at its election, repair, replace or make appropriate adjustment where Kohler Co. inspection
discloses any such defects occurring in normal usage within one (1) year after installation. Kohler Co. is not
responsible for removal or installation costs. Use of in-tank toilet cleaners will void the warranty.
To obtain warranty service contact Kohler Co. either through your Dealer, Plumbing Contractor, Home
Center or E-tailer, or by writing Kohler Co., Attn.: Customer Care Center, 444 Highland Drive, Kohler, WI
53044, USA, or by calling 1-800-4-KOHLER (1-800-456-4537) from within the USA and Canada, and
001-800-456-4537 from within Mexico, or visit www.kohler.com within the USA, www.ca.kohler.com from
within Canada, or www.mx.kohler.com in Mexico.
IMPLIED WARRANTIES INCLUDING THAT OF MERCHANTABILITY AND FITNESS FOR A
PARTICULAR PURPOSE ARE EXPRESSLY LIMITED IN DURATION TO THE DURATION OF THIS
WARRANTY. KOHLER CO. AND/OR SELLER DISCLAIM ANY LIABILITY FOR SPECIAL,
INCIDENTAL OR CONSEQUENTIAL DAMAGES. Some states/provinces do not allow limitations on how
long an implied warranty lasts, or the exclusion or limitation of special, incidental or consequential damages,
so these limitations and exclusions may not apply to you. This warranty gives you specific legal rights. You
may also have other rights which vary from state/province to state/province.
This is Kohler Co.’s exclusive written warranty.
Troubleshooting
This section is for general aid only. A Kohler Co. Authorized Service Representative or qualified electrician
should correct any electrical problems. For warranty service, call 1-800-4KOHLER from within the USA and
Canada, or 001-800-456-4537 from within Mexico.
NOTE: The product model number is located on the heater side of the bath.
NOTE: For service parts information, visit your product page at www.kohler.com.
Troubleshooting Table
Symptoms Probable Cause Recommended Action
1. Heated bath does not turn
on.
A. No power to power supply. A. Set/reset GFCI or RCD breaker;
check wiring.
B. User keypad cable loose or
damaged.
B. Check wire connections. If
necessary, replace user keypad
cable.
C. User keypad does not work. C. Check wire connections. Replace
user keypad.
D. Power supply does not work. D. Replace power supply.
2. Bath is turned on, but
there is little or no heat.
A. Heater cable loose or damaged. A. Check wire connections. If
necessary, replace heater cable.
1237788-2-B 12 Kohler Co.

Troubleshooting (cont.)
Troubleshooting Table
Symptoms Probable Cause Recommended Action
B. Heater/insulation loose on the
bath.
B. Secure the heater/insulation to the
bath.
C. Heat indicator is yellow or
orange.
C. Press the [Up] arrow to increase
temperature.
D. Heater does not work. D. Replace the heater.
E. Temperature sensor does not
work.
E. Replace the heater.
3. Temperature does not
automatically reset to low
after 1 hour.
A. Temperature sensor does not
work.
A. Replace the heater and/or keypad.
4. Heat indicator is blinking
red.
A. Heating system needs to be
reset.
A. Press the [Power] icon to turn the
power OFF. Wait 10 seconds, then
turn the power ON.
B. Heater does not work. B. Replace the heater.
5. Heat indicator is blinking
yellow.
A. Heating system needs to be
reset.
A. Press the [Power] icon to turn the
power OFF. Wait 10 seconds, then
turn the power ON.
B. Temperature sensor does not
work.
B. Replace the heater.
Kohler Co. 13 1237788-2-B
/