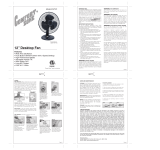
Hydrofarm ACF16 User guide

Type
User guide

This manual is also suitable for

Hydrofarm 5 x ACF16 is a 3-speed oscillating wall fan that delivers powerful airflow to keep you cool and comfortable in your home. Featuring a sturdy construction with a secure mounting bracket, this fan can be easily mounted onto a wall for optimal air circulation. Its adjustable fan head allows you to direct the airflow where you need it most, while the oscillation function ensures even distribution of air throughout the room.

Hydrofarm 5 x ACF16 is a 3-speed oscillating wall fan that delivers powerful airflow to keep you cool and comfortable in your home. Featuring a sturdy construction with a secure mounting bracket, this fan can be easily mounted onto a wall for optimal air circulation. Its adjustable fan head allows you to direct the airflow where you need it most, while the oscillation function ensures even distribution of air throughout the room.

INSTRUCTIONS
2
www.Hydrofarm.com
IMPORTANT SAFETY PRECAUTIONS
Please read all safety informaon before using
this product.
1. Use fan only as described in this manual.
Other use is not recommended and may
cause re, electric shock or injury.
2. This fan is intended for household use only
and not for commercial or industrial use.
3. Be sure fan is mounted onto a secure
structure.
4. Unplug fan when moving it from one locaon
to another, before pung on or taking o
parts (such as the safety grill), and before
cleaning.
5. To protect against electric shock, do not
immerse unit, put plug or cord in water or
spray with liquids.
6. Do not use outdoors or in window. Rain may
create electrical hazard.
7. Do not place fan or parts near an open
ame, cooking or other heang appliance.
8. Do not operate without fan grill in place.
9. Avoid contact with moving parts. Never
insert ngers, pencils or any other object
through the guard when fan is running.
10. Close supervision is necessary when any
appliance is used by or near children.
11. The use of aachment not recommended by
manufacturer may be hazardous.
12. Do not operate fan with a damaged cord or
plug, or aer the fan malfuncons or has
been dropped or damaged in any manner.
Discard fan or return to an authorized service
facility for examinaon and/or repair.
13. Do not let cord hang over the edge of a table
or counter, or let it touch any hot surfaces.
14. Do not run cord under carpeng. Do not
cover cord with throw rugs, runners, or
similar coverings. Do not route cord under
furniture or appliances. Arrange cord away
from trac area, where it will not be tripped
over.
15. To disconnect, grip plug and pull from wall
outlet. Never yank cord.
16. This fan has a polarized plug (one blade is
wider than the other). To reduce the risk of
electric shock, this plug is intended to t in
a polarized outlet only one way. If the plug
does not t fully in the outlet, reverse the
plug. If it sll does not t, contact a qualied
electrician. DO NOT aempt to defeat this
safety feature.
17. This product employs an overload protecon
fuse. A blown fuse indicates an overload
or short-circuit situaon. If the fuse blows,
unplug the product from the outlet. Replace
the fuse as per the user servicing instrucons
below. Follow product marking for proper
fuse rang and check the product. If the
replacement fuse blows, a short-circuit
may be present and the product should
be discarded or returned to an authorized
service facility for examinaon and/or repair.
18. RISK OF FIRE: Do not replace power supply
plug—it contains a safety device (fuse) that
should not be removed. Discard product if
the plug is damaged.
WARNING: To reduce the risk of re or
electrical hazard, do not use this fan with any
solid state speed control device.
Unplug or disconnect this fan from the
power supply before servicing.
ASSEMBLY INSTRUCTIONS
1. Unscrew the plasc nut on the front of the
motor case by turning counterclockwise.
2. Mount the rear grill to the front of the motor
cover by matching 2 holes on the grill to the
2 round knobs on the cover. Push in rmly
unl the 2 knobs protrude through the 2
holes.
3. Tighten the rear grill with the nut, making
sure that the nut is screwed in far enough so
that the rear grill is ush with the outside of
the motor housing cylinder.
4. Put the fan blade onto the motor sha by
matching the slots of the blade. Tighten
the blade with the blade cap by turning it
counterclockwise.
5. Test fan by rotang with your hands. Make
sure there is no contact with the nut. The
fan blade should rotate freely. If it doesn’t,
remove the blade and repeat steps 3-5.
6. Mount front grill onto rear grill by using the
grill support band. Cover both front and rear
INSTRUCTIONS
3
grill, secure with the phillips screw on band.
7. Use 2 tapping screws to mount the bracket
in the desired posion. Firmly push the
assembled fan onto the mounng bracket.
OPERATION
1. Plug the power supply plug into a outlet.
2. To adjust fan speed, pull the switch pull (right
string). The switch knob will rotate through
all three speeds and back to OFF.
3. To make the fan oscillate, pull the oscillaon
pull (le string).
CLEANING THE BLADES
1. Always unplug the fan before cleaning.
Simply li the clips on ring of the grills and
remove the front grill.
2. Use a so cloth, moistened with a mild soap,
to clean fan and grill. DO NOT use abrasive
cleaners.
3. DO NOT immerse fan in water and
never allow water to drip into the motor
component.
4. DO NOT use gasoline, paint thinner or other
chemicals to clean the fan.
USER SERVICING INSTRUCTIONS
This fan features a fused safety plug that is
designed to cut o electric current to the fan if
an electrical fault occurs. Please see below for
more informaon on how to properly use your
fan and replace the safety plug fuse, if needed.
IMPORTANT: To avoid risk of re, replace fuse
only with a 2.5 Amp, 125 Volt fuse.
1. Grasp plug and remove from the receptacle
or other outlet device. Do not unplug by
pulling on cord.
2. If your fan loses power and you suspect that
the fuse on your fan has blown, you should
rst remove the spare fuse holder aached
to the cord plug. Remove the spare fuse from
the plasc spare fuse holder, and set the
spare fuse aside.
3. You can gain access to the blown fuse by
sliding open the door on the side of the plug.
Slide the door outward unl the blown fuse
is fully visible.
4. Remove the blown fuse and snap the
replacement fuse into place. Fully close the
fuse door by sliding back into place. Discard
the blown fuse. The plug should now be
ready for normal use.
5. If the replacement fuse blows, a short-circuit
may be present and the product should
be discarded or returned to an authorized
service facility for examinaon and/or repair.
Slide
door
open
Fuse
1. Front grill
2. Fan blade
3. Rear grill
4. Motor cover
5. Base
6. Power cord
7. Switch pull
8. Oscillaon pull
9. Switch knob
10. Plasc nut
11. Blade cap
12. Support Band
WARRANTY
www.Hydrofarm.com
ACF16 - rev.05.05.2015
LIMITED WARRANTY
Hydrofarm warrants the ACF16 to be free from defects in materials and workmanship. The warranty
term is for one year beginning on the date of purchase. Misuse, abuse, or failure to follow instrucons
is not covered under this warranty. Hydrofarm will, at our discreon, repair or replace the ACF16
covered under this warranty if it is returned to the original place of purchase. To request warranty
service, please return the ACF16 , with original sales receipt and original packaging, to your place of
purchase. The purchase date is based on your original sales receipt.
GARANTÍA LIMITADA
Hydrofarm garanza el ACF16 de estar libre de defectos en materiales y mano de obra. El plazo de
garana es de uno año a parr de la fecha de compra. El mal uso, abuso o incumplimiento de las
instrucciones no están cubiertos por esta garana. Hydrofarm será a nuestra discreción, reparará o
reemplazará, el ACF16 cubierto bajo esta garana si se devuelve al lugar original de compra. Para
solicitar el servicio de garana, por favor devuelva el ACF16, con el recibo de compra original y el
embalaje original, a su lugar de compra. La fecha de compra se basa en su recibo de compra original.
GARANTIE LIMITÉE
Hydrofarm juse l’ACF16 pour être exempts de défauts de matériaux et de fabricaon. La durée de la
garane est de un an au à compter de la date d’achat. Une ulisaon abusive, ou de l’échec de suivre
les instrucons ne sont pas couverts par cee garane. Hydrofarm sera, à notre discréon, réparer ou
remplacer le ACF16 couvert par cee garane si elle est retournée à l’endroit d’achat originale. Pour
obtenir le service de garane, s’il vous plaît retourner le ACF16, avec facture et emballage d’origine, à
votre lieu d’achat. La date d’achat est basé sur votre facture originale.
BEGRENZTE GARANTIE
Hydrofarm gewährleistet die ACF16 frei von Fehlern in Material und Verarbeitung sind. Die
Gewährleistungsfrist beträgt ein Jahr ab dem Kaufdatum. Missbrauch ist Missbrauch oder
Nichtbefolgung von Anweisungen von dieser Garane nicht abgedeckt. Hydrofarm wird nach unserer
Wahl reparieren oder ersetzen das ACF16 im Rahmen dieser Garane gedeckt, wenn sie auf den
ursprünglichen Händler zurückgegeben wird. Um Garaneleistungen zu beantragen, senden Sie die
ACF16, mit Original-Kaueleg und Originalverpackung, um Ihre Verkaufsstelle. Das Kaufdatum ist auf
dem Original-Kaueleg basiert.
  • Page 1 1
  • Page 2 2
  • Page 3 3
  • Page 4 4
  • Page 5 5
  • Page 6 6
  • Page 7 7
  • Page 8 8

Hydrofarm ACF16 User guide

Type
User guide
This manual is also suitable for

Hydrofarm 5 x ACF16 is a 3-speed oscillating wall fan that delivers powerful airflow to keep you cool and comfortable in your home. Featuring a sturdy construction with a secure mounting bracket, this fan can be easily mounted onto a wall for optimal air circulation. Its adjustable fan head allows you to direct the airflow where you need it most, while the oscillation function ensures even distribution of air throughout the room.

Ask a question and I''ll find the answer in the document

Finding information in a document is now easier with AI

in other languages