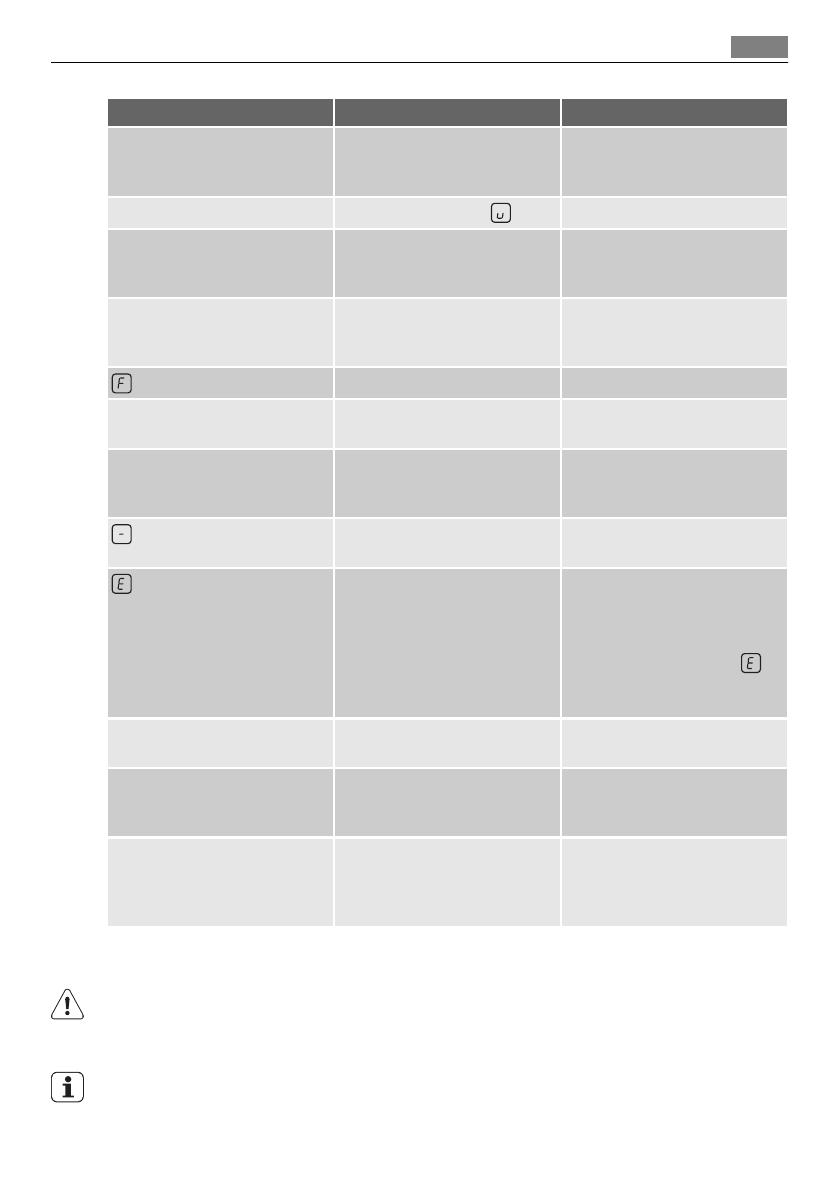
Problem/Display Possible Cause Remedy
There is water on the control
panel or the control panel is
covered with fat splashes
Wipe the control panel
STOP+GO is activated
Switch off STOP+GO
Display is switching between
two heat settings
Power management is reduc-
ing the power of this cooking
zone
See the section “Switching the
power function on and off”
The residual heat indicator is
not displaying anything
The cooking zone was only on
for a short time and is therefore
not hot
If the cooking zone is supposed
to be hot, call your local Service
Force Centre.
lights up
Unsuitable cookware Use suitable cookware
No cookware on the cooking
zone
Put cookware on zone
Diameter of the base of the
cookware is too small for the
cooking zone
Move to smaller cooking zone
Use suitable cookware
lights up
Automatic switch-off has been
triggered
Switch appliance off. Switch
appliance on again
and number are displayed
Electronics fault Disconnect the appliance from
the electrical supply for a few
minutes (Take the fuse out of
the house’s wiring system) If
after switching on again,
is
displayed again, call the cus-
tomer service department
Acoustic signal sounds when
appliance is switched off
The control panel is wholly or
partly covered by objects.
Remove objects.
Repeated acoustic signal (6x),
appliance switches off
One or more sensor fields have
been covered for longer than
10 seconds
Uncover sensor field
Acoustic signal sounds and ap-
pliance switches itself on and
then off again; after 5 seconds
another acoustic signal sounds
The On/Off sensor field has
been covered up, e.g. by a cloth
Do not place any objects on the
control panel
If you are unable to remedy the problem by following the above suggestions, please
contact your local Service Force Centre.
WARNING!
Repairs to the appliance are only to be carried out by qualified service engineers. Consid-
erable danger to the user may result from improper repairs.
If the appliance has been operated incorrectly, the engineer's visit will be chargeable, even
during the warranty period.
What to do if ...
15


