15
Basic Operations
Listening to the radio
— Preset Tuning
Before using this function, preset radio
stations in the tuner’s memory (see “Step
3: Presetting radio stations”).
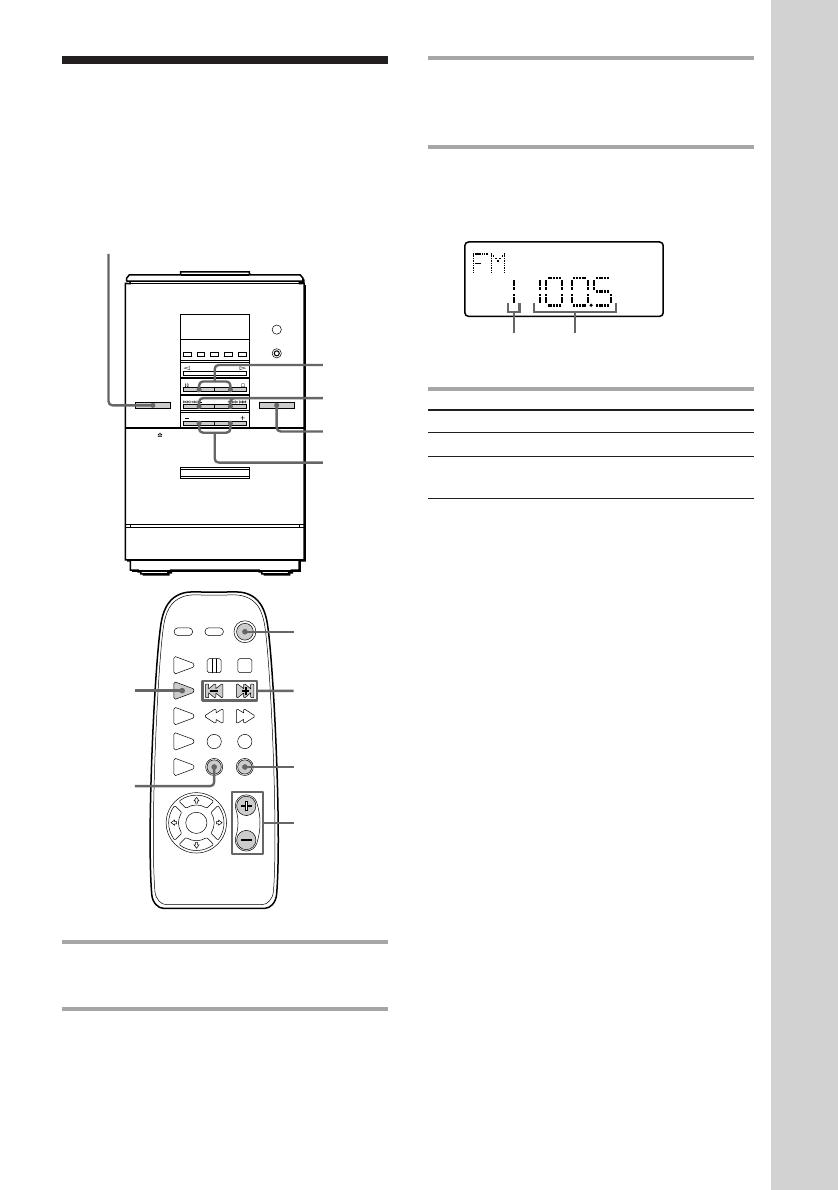
3 Press TUNING/PLAY MODE on
the remote repeatedly until
“PRESET” appears.
4 Press TUNING +/– (or ≠/±
on the remote) to tune in the desired
preset station.
1 Press FUNCTION repeatedly until
“FM” or “AM” appears.
2 Press FM or AM (or TUNER/BAND
on the remote repeatedly).
Preset
number
Frequency
TUNED
PRESET
MHz
ST
To Do this
Turn off the radio Press 1/u.
Adjust the volume Press VOLUME +/– (or
VOL +/– on the remote).
To listen to non-preset radio
stations
Press TUNING/PLAY MODE on the remote
repeatedly in step 3 until “MANUAL”
appears, then press TUNING +/– (or
≠/± on the remote) to tune in the
desired station.
Tips
• Pressing TUNER/BAND on the remote while the
power is off automatically turns on the power and
tunes to the last received station (One Touch Play).
• You can switch from another source to the radio
just by pressing TUNER/BAND on the remote
(Automatic Source Selection).
• If an FM programme is noisy, press STEREO/
MONO on the remote repeatedly until “MONO”
appears. There will be no stereo effect, but the
reception will improve. Press this button again to
restore the stereo effect.
• To improve broadcast reception, remove the rear
cover and put the aerial out of the cabinet (see “To
remove the AM aerial” on page 6 ).
1/u
(Power)
4
3
VOL
+/–
STEREO/
MONO
2
2
VOLUME
+/–
4
1
1/u
(Power)