Page is loading ...

S300-2DQ-CB-G
97333C 6/98PAGE 1
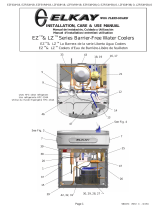
HALSEY TAYLOR OWNERS MANUAL
USES HFC-134A REFRIGERANT
FIG. 1
11
1 THRU 8
SEE FIG. 5
33
SEE FIG. 4
23
20
31
22
12
42
32
29
24
26
SEE FIG. 3
13
19
14
41
40
18
30
27
15, 16, 17
21
25
9, 10
28

S300-2DQ-CB-G
PAGE 297333C 6/98
E = INSURE PROPER VENTILATION BY MAINTAINING 4" (102mm) (MIN.) CLEARANCE FROM CABINET LOUVERS TO WALL.
ASEGURE UNA VENTILACIÓN ADECUADA MANTENIENDO UN ESPACIO E 4" (102mm) (MÍN.) DE HOLGURA ENTRE LA
REJILLA DE VENTILACIÓN DEL MUEBLE Y LA PARED
ASSUREZ-VOUS UNE BONNE VENTILATION EN GARDANT 4" (102mm) (MIN.) ENTRE LES ÉVENTS DE LENCEINTE ET LE
MUR.
F = POWER CORD 4' (1219mm) LONG
CABLE ELÉCTRICO DE 4' (1219mm) PIE, DE LARGO
CORDON DALIMENTATION 4' (1219mm)
G = WALL SCREW HOLES
AGUJEROS DE TORNILLOS DE PARED
TROUS DE VIS DU MUR
FIG. 2
LEGEND/LEYENDA/LÉGENDE
A = RECOMMENDED WATER SUPPLY LOCATION 3/8 O.D. UNPLATED COPPER TUBE CONNECT STUB OUT 1-1/2 IN.
(38mm) FROM WALL SHUT OFF BY OTHERS
SE RECOMIENDA UBICAR EL TUBO CORTO DE CONEXIÓN AL TUBO DE COBRE SIN CHAPAR DE 3/8" DE DIÁM.
EXT. A 1-1/2" (38 mm) FUERA DE LA LLAVE DE PASO EN LA PARED COLOCADA POR TERCEROS.
EMPLACEMENT RECOMMANDÉ D'ALIMENTATION EN EAU PAR TUBE EN CUIVRE NON PLAQUÉ DE 3/8 PO. (9,5
mm) D.E. CONNECTANT UNE TUYAUTERIE DE 1-1/2 PO. (38 mm) DEPUIS LE ROBINET D'ARRÊT FOURNI PAR
D'AUTRES.
B = RECOMMENDED LOCATION FOR WASTE OUTLET 1-1/4 O.D. DRAIN
UBICACIÓN RECOMENDADA PARA EL DRENAJE DE SALIDA DE AGUA, DE 1¼ DE DIÁMETRO.
EMPLACEMENT RECOMMANDÉ POUR LE DRAIN DE D.E. 1-1/4" DE SORTIE DEAU.
C = 1-1/4 TRAP NOT FURNISHED
PURGADOR DE 1¼ NO PROPORCIONADO
SIPHON 1-1/4 NON FOURNI
D = ELECTRICAL OUTLET LOCATION
UBICACIÓN DE LA TOMA DE ELECTRICIDAD
EMPLACEMENT DE LA PRISE DE COURANT

S300-2DQ-CB-G
97333C 6/98PAGE 3
22 111C
22112C
22113C
30980C
31386C
31428C
50787C
70606C
70607C
70640C
70659C
70683C
70793C
31397C
1
2
3
4
5
6
7
8
9
10
11
12
13
14
PART. NO. DESCRIPTION
ITEM NO.
HOT TANK PARTS LIST
Heater Clamping Bracket
Heater Clamping Bracket (thrd)
Retaining Bracket
Heater Element & Jacket 115V
Tank & Tube Assy
Hot Control Assy
Washer-Spacer
Drain Plug
Screw 1/4-20 x 3.00" HSHC
Screw #8-18 x 5/16" HHTC
Belleville Washer
1/4 Union
1/4 Elbow
Hot Tank Assy 115V (Serv)
SERVICING THE HOT CONTROL AND FUSE ASSEMBLY
1. A temperature sensing non-resetable fuse in the wire is located approximately 3" (76mm) from the thermostat.
The fuse is located under the retaining bracket (Item 3) in the groove on the heater element jacket (Item 4).
2. The thermostat must be used with a washer-spacer (Item 7) and be centered in the heater element jacket for
proper temperature control. Locate the heater element jacket about 3/4" (19mm) above the bottom of the tank.
3. The heater element jacket must be fastened VERY TIGHTLY to the tank (45+/-10 inch/lbs. of torque on the mounting
screw Item 9). Failure to TIGHTEN heater element jacket may cause rapid failure of the fuse assembly.
10
3
6
7
9
11
1
2
8
13
4
5
12
FIG. 3
ITEM 14
FIG. 4
ITEM 33
39
36
38
35
37
34

S300-2DQ-CB-G
PAGE 497333C 6/98
ITEM NO. PART NO.
DESCRIPTION
45675C
40048C
40089C
10031C
40322C
60291C
61313C
100322740560
101486340560
601506551550
401505742830
70683C
192682851550
35786C
194243901550
35766C
31038C
35839C
66200C
66504C
101486931560
66521C
401458348410
401458448410
401486648410
401455643730
401474943730
401484743730
55832C
192668251550
15009C
55996C
40579C
40596C
40597C
51543C
33659000
70921C
92712C
21591C
30010C
22588C
Bubbler Body
Button CP
Nut - Cover CP
Nut - Retaining
Orifice Assy
Screen SS
Regulator
Gasket - Black
Gasket
Drain Elbow Assy
Basin
Union - 1/4
Condenser
Compressor Serv Pack (115V)
Cover - Elect Sheild
Cover - Relay (115V)
OL/Relay (115V)
Cold Control
Drier - R134A
Evap/Chiller Assy
Toe Plate
Heat Exchanger
Panel - Side (LH) PV
Panel - Side (RH) PV
Panel - Front PV
Shelf - "S" Series
Base - "S" Series
Service Plate "S" Series
Flow Regulator Assy
Wiring Assy SD-CB
Assy - Nipple
Strainer
Hot Valve Assy
Shroud - Hot Valve
Gooseneck - Hot
Handle - Red
Gasket - Body
Nut - Mounting
Kit - Hot valve
Hot Tank Switch Brkt
Hot Tank Switch
Bracket - Hot tank Mtg.
FOR PARTS, CONTACT YOUR LOCAL DISTRIBUTOR OR CALL 1.800.323.0620
PARA PIEZAS, CONTACTE A SU DISTRIBUIDOR LOCAL O LLAME AL 1.800.323.0620
POUR OBTENIR DES PIÈCES, CONTACTEZ VOTRE DISTRIBUTEUR LOCAL OU COMPOSEZ LE 1.800.323.0620
2222 CAMDEN COURT
OAK BROOK, IL 60523
630.574.3500
PRINTED IN U.S.A.
IMPRESO EN LOS E.E.U.U.
IMPRIMÉ AUX É.-U.
*INCLUDES RELAY & OVERLOAD. IF UNDER WARRANTY, REPLACE
WITH SAME COMPRESSOR USED IN ORIGINAL ASSEMBLY.
NOTE: All correspondence pertaining to any of the above water coolers or
orders for repair parts MUST include Model No. and Serial No. of cooler, name
and part number of replacement part.
ITEMIZED PARTS LIST
1
2
3
4
5
6
7
8
9
10
11
12
13
14
15
16
17
18
19
20
21
22
23
24
25
26
27
28
29
30
31
32
33
34
35
36
37
38
39
40
41
42
WIRING DIAGRAM
This Drawing is merely for illustrating the
components of the electrical system.
Stream Height Adjustment
1) Remove cover nut.
2) Lift off push button cap.
3) Turn exposed screw to change stream height.
Clockwise adjustment will raise stream
height and counter-clockwise adjustment will
lower stream height.
To Replace Cartridge:
a) Shut off water cooler.
b) Remove cover nut and push button.
c) Use spanner wrench to remove retaining
nut.
d) Lift out cartridge and bottom gasket.
Insert replacement and gasket.
e) To adjust stream height see note 3 above.
FIG. 5
PUSH BUTTON
NUT - COVER
BUBBLER
BODY
REGULATOR
NUT-RETAINING
ORIFICE ASSY
GASKET-BLACK
SCREEN SS
/