Page is loading ...

AC-Series Operator’s Manual-E/F 1
HR-2500GH
HR-2700GH
HIGH PRESSURE WASHERS

2 AC-Series Operator’s Manual-E/F
Introduction
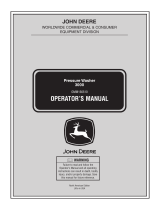
THANK YOU for purchasing a John Deere product.
READ THIS MANUAL carefully to learn how to operate
and service your machine correctly. Failure to do so
could result in personal injury or equipment damage.
This manual and safety signs on your machine may also
be available in other languages. (See your John Deere
dealer to order.)
THIS MANUAL SHOULD BE CONSIDERED a permanent
part of your machine and should remain with the machine
when you sell it.
MEASUREMENTS in this manual are given in both
metric and customary U.S. unit equivalents. Use only
correct replacement parts and fasteners. Metric and inch
fasteners may require a specic metric or inch wrench.
RIGHT HAND AND LEFT HAND sides are determined by
the direction the machine will travel when going forward.
WRITE SERIAL NUMBER in the Specification or
Identication Numbers section. Accurately record all the
numbers to help in tracing the machine should it be stolen.
Your dealer also needs these numbers when you order
parts. File the identication numbers in a secure place
off the machine.
WARRANTY is provided from your John Deere dealer for
customers who operate and maintain their equipment as
described in this manual. The warranty is explained on
the warranty certicate shown in this manual.
This warranty provides you the assurance that your John
Deere dealer will back products where defects appear
within the warranty period. Should the equipment be
abused, or modied to change its performance beyond
the original factory specifications, the warranty will
become void. Setting fuel delivery above specications
or otherwise overpowering the machine will result in such
action.
Warranty and product support for the engines is provided
by Honda
®
. The Honda engine warranty is explained in
the Honda Warranty Certicate that accompanies this
pressure washer. Additional copies of the Engine Warranty
Certicate are available from your John Deere dealer.

AC-Series Operator’s Manual-E/F 3
Contents
Page
Safety .................................................................................. 5
Safety Signs
..................................................................... 10
Controls ............................................................................11
Preparing the Washer
Check Engine Oil ................................................................. 12
Gasoline Engine Oil ............................................................. 12
Filling Fuel Tank ................................................................... 13
Inlet Water Supply Requirements ....................................... 14
Pump Oil .............................................................................. 15
Connect Hoses and Prime Pump ........................................ 15
Installing Nozzle .................................................................. 16
Final Checklist ..................................................................... 16
Operating the Washer
Starting and Operating Engine ........................................... 17
Stopping the Engine ............................................................ 17
Locking Trigger Gun ............................................................ 17
Water Pressure .................................................................... 18
Changing Nozzle ................................................................. 18
Selecting the Proper Nozzle ................................................ 18
15° Nozzle-Yellow ................................................................ 19
25°Nozzle-Green ................................................................. 19
Detergent Injector Nozzle-Black (Brass) ............................. 19
Cleaning Horizontal Surfaces .............................................. 20
Cleaning Vertical Surfaces .................................................. 20
Removing Paint ................................................................... 20
Cleaning Radiator Fins ........................................................ 20
Detergent Usage Guide ....................................................... 21
Cleaning with Detergents .................................................... 22
Shut-down ........................................................................... 22
Troubleshooting .............................................................. 23
Maintenance Chart ........................................................... 25
Service
Cleaning Water Inlet Screen ................................................ 26
Cleaning Detergent Hose Strainer ....................................... 26
Water Pump Oil ................................................................... 26
Check Engine Oil ................................................................. 27
Changing Engine Oil ............................................................ 27
Gasoline Engine Oil ............................................................. 27
Servicing Air Cleaner .......................................................... 28
Cleaning and Gapping Spark Plug ...................................... 28
Adjusting Idle Speed ............................................................ 28
Storage
Storing Washer .................................................................... 29
Removing Washer from Extended Storage ......................... 29
Specications
Specications ..................................................................... 30
Record Serial Number ......................................................... 30
All information, illustrations and specications in this manual are based
on the latest information available at the time of publication. The right is
reserved to make changes at any time without notice.
Page
Accessories
High Pressure Hose ........................................................... 31
Rotating Brush ..................................................................... 31
0° Nozzle-Red ..................................................................... 31
40° Nozzle-White ................................................................. 31
Rotating Nozzle ................................................................... 32
All-Purpose Cleaning ........................................................... 32
Surface Preparation ............................................................. 32
Degreasing .......................................................................... 32
Spray Wax ........................................................................... 33
Rust Inhibiting Antifreeze ..................................................... 33
Detergent Booster ............................................................... 33
Plus-4 Motor Oil ................................................................... 34
Gasoline Conditioner & Stabalizer ....................................... 34
Warranty ............................................................................ 35

4 AC-Series Operator’s Manual-E/F
Contents

AC-Series Operator’s Manual-E/F 5
Safety
RECOGNIZE SAFETY INFORMATION
This is the safety alert symbol. When you see this symbol
on your machine or in this manual, be alert to the potential
for personal injury.
Follow recommended precautions and safe operating
practices.
UNDERSTAND SIGNAL WORDS
A signal word--DANGER, WARNING or CAUTION--is used
with the safety-alert symbol. DANGER identies the most
serious hazards.
DANGER or WARNING safety signs are located near spe-
cic hazards. General precautions are listed on
CAUTION safety signs. CAUTION also calls attention to
safety messages in this manual.
FOLLOW SAFETY INSTRUCTIONS
Carefully read all safety messages in this manual and on
your machine safety signs. Keep safety signs in good con-
dition. Replace missing or damaged safety signs. Be sure
new equipment components and repair parts include the
current safety signs. Replacement safety signs are avail-
able from your John Deere dealer.
Learn how to operate the machine and how to use controls
properly. Do not let anyone operate without instruction.
Keep your machine in proper working condition. Unauthor-
ized modications to the machine may impair the function
and/or safety and affect machine life.
If you do no understand any part of this manual and need
assistance, contact your John Deere dealer.

6 AC-Series Operator’s Manual-E/F
PROTECT AGAINST HIGH PRESSURE
SPRAY
Spray from high pressure nozzles can penetrate the skin
and cause serious injury. Keep spray from contacting
hands or body.
If an accident occurs, see a doctor immediately. Any high
pressure spray injected into the skin must be surgically
removed within a few hours or gangrene may result.
Doctors unfamiliar with this type of injury should refer-
ence a knowledgeable medical source. Such information
is available from Deere & Company Medical Department
in Moline, Illinois, U.S.A.
WORK IN A VENTILATED AREA
Engine exhaust fumes can cause sickness or death. If
it is necessary to run an engine in an enclosed area,
remove the exhaust fumes from the area with an exhaust
pipe extension.
If you do not have an exhaust pipe extension, open the
doors and get outside air into the area.
HANDLE FUEL SAFELY-AVOID FIRES
Handle fuel with care: it is highly ammable. Do not re-
fuel the machine while smoking or when near open ame
or sparks.
Always stop engine before refueling machine. Fill fuel
tank outdoors.
Prevent res by keeping machine clean of accumulated
trash, grease and debris. Always clean up spilled fuel.
DRAIN GASOLINE WHEN STORING
MACHINE
Gasoline stored in fuel tank can explode.
Never store equipment with gasoline in the tank inside a
building where fumes may reach an open ame or spark.
Always drain gasoline from fuel tank and carburetor bowl
when storing machine. Allow engine to cool before storing.

AC-Series Operator’s Manual-E/F 7
CLEANING DETERGENT PRECAUTIONS
Know the detergent being used. Be prepared to tell a
physician exactly what you are using in the event of an
emergency. Read all detergent labels and follow all
instructions exactly regarding preparation, use, safety,
transportation, and disposal. Keep all detergents out of
the reach of children, pets and livestock.
NEVER spray combustible liquids of any kind.
Do not use highly corrosive detergents or acid-type
cleaners with this washer.
HANDLE CHEMICAL PRODUCTS SAFELY
Direct exposure to hazardous chemicals can cause injury.
Potentially hazardous chemicals used with the pressure
washer includes such items as detergents.
A Material Safety Data Sheet (MSDS) provides specic
details on detergents; physical and health hazards,
safety procedures and emergency response techniques.
Check the MSDS before you start any job using a deter-
gent. That way you will know exactly what the risks are
and how to do the job safely. Then follow procedures and
recommended equipment. (See your John Deere dealer
for MSDS Sheets on products used with this equipment.)
MSDS

8 AC-Series Operator’s Manual-E/F
WEAR PROTECTIVE CLOTHING
Wear close tting clothing and safety equipment appropri-
ate to the job.
Prolonged exposure to loud noise can cause impairment or
loss of hearing.
Wear a suitable hearing protective device such as earmuffs
or earplugs to protect against objectionable or uncomfort-
able loud noises.
Operating equipment safely requires the full attention of
the operator. Do not wear radio or music headphones while
operating machine.
IMPORTANT SAFETY INSTRUCTIONS
WARNING: To reduce the risk of injury, read this operator’s
manual completely. When using this product, the following
basic precautions should always be followed:
1. Read all the instructions before using the product.
2. High pressure water spray can cut skin. Do not “lock”
trigger in the open position. Do not direct spray at
persons. Keep operating area clear of all persons
and pets. Warn children that the water spray can
cut. Supervise children closely.
3. Do not allow children or untrained persons to operate
the washer.
4. Do not spray electrical switches, receptacles or light
bulbs, or glass or fragile objects that may shatter
5. Dirt and debris removed by spray can cause eye
injury. Wear eye protection.
6. Do not move washer with engine running. Always stop
engine and allow washer to cool before handling.
7. Wet surfaces can be slippery. Wear shoes and keep
both feet on the ground. Do not climb on items being
cleaned. Do not overreach or stand on unstable
support. Keep good footing and balance at all times.
8. When the spray trigger is released, water pressure
is trapped in the discharge hose. Release trapped
pressure by triggering the spray gun after the washer
is turned off.
9. Do not operate the washer when fatigued or under
the inuence of drugs or chemicals. Stay alert.
Watch what you are doing.
10. Do not operate the washer if fuel, pump oil or water
leaks are visible. Resume operation ONLY after
washer has been inspected and repaired.
11. Follow the maintenance instruction specied in this
manual.

AC-Series Operator’s Manual-E/F 9
INSPECT HIGH PRESSURE WASHER
Be sure all covers, guards and shields are in place.
Locate all operating controls and safety labels.
Keep all hardware and plumbing ttings tight.
PREPARE FOR EMERGENCIES
Be prepared if a re starts.
Keep a rst aid kit and re extinguisher handy.
Keep emergency numbers for doctors, ambulance service,
hospital and re department near your telephone.
SERVICE HIGH PRESSURE WASHER SAFELY
Before servicing washer, disconnect spark plug wire, relieve
water pressure and allow unit to cool down.
Service washer in a clean dry at area. If applicable, block
wheels to prevent unit from rolling.

10 AC-Series Operator’s Manual-E/F
SAFETY SIGNS
34-0599-E/S-030600-ENG
No ponga combustible cuando
el producto este en operacion.
Permita que el motor se enfrie
por 2 minutos antes de
reablastecer de combustible.
RISK OF FIRE
Do not add fuel when
product is operating. Allow
engine to cool for two (2)
minutes before refueling.
RIESGO DE FUEGE
CAUTION/PRECAUCION
RISK OF BURNS
MUFFLER AND
ADJACENT AREAS
MAY EXCEED 150°F.
RIESGO DE QUEMAR
EL AMORTIGUADOR Y LAS
AREAS ADYACENTES PUEDEN
TENER TEMPERATURAS POR
ARRIBA DE 150°F.
34-0598-010699-E/S-ENG.
WARNING
ADVERTENCIA
34-1608
34-0599
34-0598

AC-Series Operator’s Manual-E/F 11
Controls
HR-2500GH AND HR-2700GH
2500P02-013107P03-013107
B
A
C
D
E
A-- Water Supply Inlet
B-- High Pressure Outlet
C-- Detergent Strainer
D-- Choke
E-- Throttle
GUN, WAND, HOSE

12 AC-Series Operator’s Manual-E/F
CHECK ENGINE OIL
NOTE: All washers are shipped with engine oil. Check proper level.
1. Place unit on level surface.
2. Remove oil ller cap/dipstick (A) and wipe it clean.
3. Insert ller cap/dipstick into oil ller neck, but DO NOT screw it in.
4. Remove dipstick. Proper oil level is at midpoint of dipstick (A). Add oil if necessary to bring oil level to top of
threads (B).
5. Install and tighten cap.
P05-013107
Preparing the Washer
GASOLINE ENGINE OIL
Use oil viscosity based on the expected air temperature
range during the period between oil changes.
John Deere TURF-GARD
TM
is preferred. Also
recommended is John Deere PLUS-4
®
.
Other oils may be used if they meet one or more of the
following:
•API Service Classication SH
•API Service Classication SG
•CCMC Specication G4
•CCMC Specication G5
DWG13-102299R0
-40°F
-22°F
-4°F
14°F
32°F
50°F
68°F
86°F
104°F
122°F
50°C
40°C
30°C
20°C
10°C
0°C
-10°C
-20°C
-30°C
-40°C
SAE 10W
-40
SAE 10W
-30
SAE 5W
-30
A
B
P04-013107

AC-Series Operator’s Manual-E/F 13
FILLING FUEL TANK
CAUTION: Risk of re. Handle fuel carefully.
-Do not add fuel when product is operating. Stop
engine and allow engine to cool for two minutes
before refueling. Hot surfaces can cause burns
and ignite spilled fuel. Do not touch mufer.
-Fill fuel tank outdoors away from ames and
open sparks.
-Do not smoke when lling fuel tank.
-Do not overll fuel tank. (There should be no
fuel in ller neck.)
-Avoid spilling fuel. Wipe clean after refueling.
-Move from refueling area before starting.
-Prevent fires by keeping engine clean of
accumulation, grease, trash and debris.
IMPORTANT: Do not permit dirt or other foreign matter
to enter the fuel system. This will cause
hard starting, poor performance and
engine damage. Always use clean fuel
storage containers and funnels.
Use clean, fresh, lead-free gasoline. Do not use stale
gasoline or gasoline that has been stored for a long
time. Stale gasoline does not vaporize properly, causing
hard starts. Use of TY15977 gasoline stabilizer is highly
recommended . Use of leaded gasoline or gasohol is NOT
recommended.
IMPORTANT: Do not mix oil with gasoline.
1. Wipe dust and dirt from around fuel tank. Remove
ller cap (A) and place cap in a clean area away from
mufer.
2. Slowly ll the fuel tank to bottom of ller neck with lead
free gasoline. Do not overll, leave approximately 5mm
(0.19 in.) of open space at the top of the tank for fuel
expansion.
3. Replace and tighten ller cap.
Fuel Tank Capacity
HR-2500GH, HR-2700GH ............ 1.72L (0.46 gal)
A
Preparing the Washer

14 AC-Series Operator’s Manual-E/F
INLET WATER SUPPLY REQUIREMENTS
1. Inlet water supply must be a minimum of 20 PSI (1.4
bar).
Attempting to operate the washer with less than
adequate water supply will cause rapid wear of
packings, valves and bearings that will dramatically
shorten pump life. Symptoms of inadequate water
supply are pump shuddering and attening of the
supply hose.
2. Inlet water ow must be at least 125% of pump rated
ow (see table below). Check volume by timing how
long it takes to ll a 5 gallon (19 L) container. For
example, a ow rate of 3.0 GPM would ll a 5 gallon
container in 5/3 minute (100 seconds).
3. Water supply hose should be a good grade of garden
hose with a minimum I.D. 5/8 in. (16mm) and no longer
than 50 ft. (15.24 m). If longer supply hose must be
used, check to be certain ow is at least equal to the
“GPM Supply Required” value listed at the bottom of
this page for your washer.
4. If non-pressurized (static draw) water supply is used,
check to be certain ow is at least 125% of pump
rated ow (see table below). In static draw situations,
water ow rate (GPM) can be increased by elevating
the water supply tank or changing to a larger inside
diameter water supply hose.
5. Adding on extension to the supply hose will reduce
water ow rates. Check for adequate water ow rate
each time an extension is added. Water ow rates
can be increased by using the largest possible internal
diameter supply hose.
IMPORTANT: Inlet water temperature must not be more
than 125° F (60° C). Damage to the pump
may result.
Washer Rated Flow GPM Supply
(GPM) Required
HR-2500GH ............... 2.3 ............................3
HR-2700GH ............... 2.3 ............................3
PIC4-092299R0
Preparing the Washer

AC-Series Operator’s Manual-E/F 15
PUMP OIL
This pump does not require periodic changing of the oil. It
uses a high grade synthetic oil which will last for the
life of the pump.
P07-013107
Preparing the Washer
CONNECT HOSES AND PRIME PUMP
IMPORTANT: Be sure that inlet water screen (C) is clean and in
place before connecting water supply hose to
washers. The water pump and valves could
be damaged from contaminants.
NOTE: Filling supply hose with water before attaching to pump
will greatly reduce priming time.
1. Prime water supply hose. Shut off water.
2. Connect water supply hose to washer inlet (B). Be sure
water supply and hose meet specications. Do not turn
water on at this time.
CAUTION: Check pressure rating printed on the
hose. Use proper hoses.
3. Connect high pressure hose screw connect (D) to washer
outlet (A). Screw clockwise to tighten.
4. Open water supply. Squeeze trigger on gun. Allow water to
run (without engine running) until water runs out of pressure
hose. Start engine and cycle trigger on gun until “crackling”
sound (air in lines) stops. Turn off water supply.
P07-013107
A
B
C
P10-013107
D

16 AC-Series Operator’s Manual-E/F
Preparing the Washer
INSTALLING NOZZLE
CAUTION: To avoid injury from escaping uids
under pressure, relieve the pressure in the
system by stopping the washer and depressing
gun trigger. Lock trigger before changing or
adjusting nozzle.
Be sure nozzle is tightly attached before operating
to help prevent nozzle release.
1. Retract locking ring (A) of quick-connect tting and
insert male quick-connect tting of nozzle (B).
2. Push ring forward and lock nozzle in place. Be sure
nozzle is fastened to wand.
FINAL CHECKLIST
1. Check engine oil and fuel.
2. Open water supply completely.
3. Check all hose connections.
4. Check hoses for kinks.
PIC81•102299R0
A
B

AC-Series Operator’s Manual-E/F 17
Operating the Washer
STARTING AND OPERATING ENGINE
CAUTION: Do not run engine in an enclosed area.
Exhaust gas contains carbon monoxide, an odorless and
poisonous gas that can cause sickness or death.
IMPORTANT: To prevent possible pump damage, do not allow
washer pump to run in bypass (with gun trigger
released) for longer than 3 minutes.
IMPORTANT: During rst two hours of engine operation, engine
may operate at low or erratic RPM as the engine
moving parts break in.
1. Pull choke control lever (B) out to “CHOKE” position.
NOTE: A warm engine requires less choking than a cold
engine.
2. Move throttle lever (C) up to the fast (or high) position.
NOTE: For best engine performance it is recommended the engine
be operated with the throttle in the FAST or HIGH position
3. Place foot on washer frame.
4. Point nozzle away from people, animals or fragile materials
and squeeze gun trigger. If trigger is not squeezed while pulling
recoil starter, pressure will build up until recoil starter can not
be pulled over.
CAUTION: Be sure nozzle output end is not directed at
bystander or objects. Pressurized output spray will start
almost instantaneously at engine start-up and can cause
serious personal injury or property damage. Release
trigger immediately upon engine start.
5. Pull recoil starter grip lightly until resistance is felt, then pull
briskly until engine starts.
IMPORTANT: Do not allow starter grip to snap back against
engine. Return it gently to prevent damage to
starter.
6. Push “CHOKE” control lever (B) in as soon as engine warms
up enough to run smoothly. If engine is warm, push choke
lever in as soon as engine starts.
STOPPING THE ENGINE
IMPORTANT: To stop engine in emergency, turn throttle (C)
down to “STOP” position.
1. Move throttle lever (C) down to “STOP” position.
2. Trigger gun to relieve spray.
PIC158•113099R0
C
B
DWG14-102299R0
LOCKING GUN TRIGGER
CAUTION: Gun trigger should be locked when not
in use or whenever adjustments are being made
to gun or nozzle. This will help prevent accidental
discharge of high pressure uid.
1. Pivot lock (A) out to prevent trigger engagement.
2. Pivot lock in to release trigger.
PIC73-102299R1
A

18 AC-Series Operator’s Manual-E/F
WATER PRESSURE
Water pressure is preset on washers and should only be
serviced by an authorized dealer.
P07-013107
Operating the Washer
PIC81-102299R0
CHANGING NOZZLE
CAUTION: High pressure spray can cause serious
injury. Keep away from spray. Never point the gun
at yourself or anyone else. Never put your hand,
ngers, eyes or body directly over spray. Do not
point spray toward fragile materials.
CAUTION: To avoid injury from escaping uids
under pressure, relieve the pressure in the system
by stopping the washer and depressing gun
trigger. Lock trigger before changing or adjusting
nozzle.
Be sure nozzle is tightly attached before operating
to help prevent nozzle release.
1. Retract locking ring (A) of quick-connect tting and
remove nozzle (B).
2. Insert nozzle and push ring forward and lock nozzle in
place. Be sure nozzle is fastened to wand.
SELECTING THE PROPER NOZZLE
Pressure and volume are partially determined by the size
of the orice in the nozzle. Standard numbers are on the
nozzles to indicate spray pattern and orice size. For
example, a nozzle stamped 2503 has a 25° spray pattern
and a 3.0 orice.
B
A

AC-Series Operator’s Manual-E/F 19
Operating the Washer
15° NOZZLE-YELLOW
This nozzle provides a chiseling effect suitable for surface
preparation. The spray should be directed at a 45° angle to
the surface. Recommended uses are:
-Removing peeling paint.
-Removing mildew stains.
PIC86-102299R0
25° NOZZLE-GREEN
This is a ushing nozzle. It produces a brush effect with a
wider spray pattern and less concentrated spray pressure
than a 15° nozzle. Recommended uses are:
-Wet sweeping leaves from walks and drives.
-Cleaning stable oors.
-Cleaning swimming pool bottoms.
-Cleaning barbecue grill.
PIC87-092299R0
DETERGENT INJECTOR NOZZLE-BLACK
(BRASS)
This nozzle must be used with and is included in the
detergent injector kit. This nozzle will allow a soft
spray to soak on a surface with a liquid detergent. It is
recommended for applying cleaning solution for removing
mildew and oxidation stain from houses; or cleaning
effervescent brick.
PIC89-102299R0

20 AC-Series Operator’s Manual-E/F
Operating the Washer
CLEANING HORIZONTAL SURFACES
Move nozzle wand from side to side. Direct spray at an
angle to force debris ahead and away from the cleared
area.
Depending on the material to be removed and nozzle
pressure, hold nozzle end 8 to 10 inches (20 to 25 cm) from
the surface and use slow, overlapping strokes. If debris
is easy to remove, move nozzle back to cover more area
for faster cleaning.
CLEANING VERTICAL SURFACES
IMPORTANT: Remember that the washer can deliver a high pressure spray that can break glass and gouge
soft wood and other materials.
When cleaning building interiors or exteriors without detergents, work from top to bottom. This will help eliminate
streaks. In interiors, start with the ceiling rst, then the walls and the oor last.
Clean around windows carefully. If glass panes are not well-caulked and puttied, the high pressure spray could
break the glass.
Never spray directly overhead. Always spray ahead to
avoid dripping or falling debris.
8" - 10"
(20-25 cm)
REMOVING PAINT
IMPORTANT: Remember that high pressure spray
can gouge soft woods and other
materials, as well as loosen grout.
1. Direct spray at a 45° angle about 4 to 12 inches (10
to 30 cm) from surface.
2. Spray in a back and forth motion, try to get beneath
the loose and bubbled paint.
3. Do not be concerned with the paint that remains. It should be sufciently bonded so as not to cause repainting
problems.
4. Some remaining paint may curl up at the edges. These edges should be scraped with a steel brush or scraper
just before painting.
CLEANING RADIATOR FINS
IMPORTANT: Some engine and radiator manufacturers
may not permit cleaning radiators with a
high pressure washer. See equipment
Operator’s Manual.
1. Use clean water without detergent.
IMPORTANT: Spray straight into the radiator to prevent
bending ns.
2. If possible, direct spray in the direction opposite to
normal air ow through the radiator.
/