Page is loading ...

Creative Cedar Designs
www.creativecedardesigns.com
Customer Service:
Please log onto our website and fi ll out
a request for missing / damaged parts.
Email: [email protected]
Phone: 1-888-363-4967
WARNING: CHOKING HAZARD
Unassembled parts may be a choking
hazard to children 3 years and younger.
The plastic bags that contain the hardware
may present a choking hazard to small
children. Please keep these bags and all
plastic bags out of the reach of children.
Do not allow children to play with them and
dispose of them immediately when empty.
CAUTION: Adult Assembly Required
Hardware contains small pieces with sharp
points. Keep parts out of the reach of
children until assembled. Parts of this product
can present dangers if improperly assembled
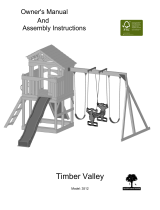
Platform Swing
Model: BP 021
Revision Date: 5/28/2019

2
ATTENTION: READ THIS BEFORE USE OF YOUR PLAYSET OR ACCESSORY:
Observing the following statements and warnings reduces the likelihood of serious or fatal injury.
This product has been designed for single family home/residential use only and is not intended for use in any public setting. Placement in public settings constitutes misuse of this product.
Play Safe Installation Checklist:
→ No children are to be allowed to use the equipment until it is properly installed.
→ Refer to the assembly instructions of your particular product for any applicable minimum use zones.
→ Fully read and understand the assembly instructions supplied with your particular product.
→ Accessories are to be used only on approved designs. Do not alter the product design in any way, or add/remove any components.
→ Supplied bolt covers must also be fastened securely before use. Make certain all hardware is tightened securely.
→ Using an appropriate saw, cut off all protruding threaded ends of bolts and other fasteners and
remove any sharp edges with a metal fi le as needed. Once done, coat all cut fastener ends with a lead-free paint to prevent rust.
→ Place the equipment on level ground, no less than six feet (1.8 meters) from any structure or obstruction such as, but not limited to: fences, garage, house, shed,
overhanging branches, laundry lines, or electrical wires.
→
A fall onto a hard surface can result in serious injury to the equipment user. Make certain residential playground equipment is not installed over concrete, asphalt,
packed earth or any other hard surface.
→
Verify that any suspended climbing ropes, chain, or cable are securely anchored at both ends and cannot be made to loop back upon itself.
→ Where applicable, use a water sealant on your product to protect wood surfaces and prevent cracking and warping.
→ Make certain to adjust all swings so there is a minimum 8’’ clearance between the swing and the ground surface.
→ Where applicable, follow all anchoring and shock absorbing surfacing requirements.
Play Safe Use Checklist:
→ On-site adult supervision must be provided for children of all ages at all times.
→ Refer to your instructions for the number and weight of all occupants that may safely use this equipment singly or simultaneously,
→ Instruct children not to walk close to, in front of, behind, or between moving items, such as but not limited to, swings, slides and gliders.
→ Instruct children not to twist swing chains or ropes or loop them over the top support bar since this may reduce the strength of the chain or rope.
→ Instruct children to avoid swinging empty seats.
→ Teach children to sit in the center of the swing with their full weight on the center of the seat.
→ Instruct children not to use the equipment in any manner other than intended.
→ Instruct children not to dismount the equipment while it is in motion.
→ Do not allow children to wear inappropriate items, such as but not limited to, loose fi tting clothing, hood and neck drawstrings, scarves, cord-connected items, capes
and ponchos. These items can cause death by strangulation.
→
Instruct children not to climb on or use the playset or accessories when the products are wet.
→ Where applicable, Check the openings between rollers and sliding surfaces of roller slides for foreign materials that could be potentially hazardous to users,
→
Instruct children not to attach items to the playground equipment that are not specifi cally designed for use with the equipment, such as, but not limited to,
jump ropes, clothesline, pet leashes, cables and chain as they may cause a strangulation hazard.
→ Instruct children to remove their bike or other sports helmet before playing on the playground equipment. Dress children with well-fi tting and full foot enclosing
footwear. Examples of inappropriate footwear are clogs, fl ip fl ops, and sandals.
WARNING: Lawn swings are designed for use by children two years of age and older. The use by children under the age of two can result in entrapment between the seat and back rest
because the child’s body may pass through the opening, causing entrapment of the child’s head. Such entrapment may result in strangulation. NEVER place children in a rearward facing
position or with legs between the seat and backrest.
Play Safe Maintenance Checklist:
→
At the beginning of each play season:
● Tighten all hardware.
●
Lubricate all metallic moving parts per manufacturer’s instructions.
●
Check all protective coverings on bolts, pipes, edges, and corners. Replace if they are loose, cracked, or missing.
●
Check all moving parts including swing seats, ropes, cables, and chains for wear, rust, or other deterioration. Replace as needed.
●
Check metal parts for rust. If found, sand and repaint using a nonlead-based paint meeting the requirements of 16 CFR 1303.
●
Check all wood members for deterioration and splinters. Sand down splinters and replace deteriorating wood members.
●
Reinstall any plastic parts, such as swing seats or any other items that were removed for the cold season.
●
Rake and check depth of loose fi ll protective surfacing materials to prevent compaction and to maintain appropriate depth. Replace as necessary.
→
Twice a month during play season:
●
Tighten all hardware.
●
Check all protective coverings on bolts, pipes, edges, and corners. Replace if they are loose, cracked, or missing.
●
Rake and check depth of loose fi ll protective surfacing materials to prevent compaction and to maintain appropriate depth. Replace as necessary.
→
Once a month during play season:
●
Lubricate all metallic moving parts per manufacturer’s instructions.
●
Check all moving parts including swing seats, ropes, cables, and chains for wear, rust, or other deterioration. Replace as needed.
●
Lubricate all metallic moving parts per manufacturer’s instructions.
●
At the end of each play season, or when the temperature drops below 32°F, remove plastic swing seats and other items as specifi ed by the manufacturer
and take indoors or do not use.
● Rake and check depth of loose fi ll protective surfacing materials to prevent compaction and to maintain appropriate depth. Replace as necessary.
● Owners shall be responsible for maintaining the legibility of all playset identifi cation and warning labels.
IMPORTANT! ANCHORING AND SURFACING INSTRUCTIONS
ASTM requires all kits must be anchored to the ground and, if the unit has a climbing rope, the rope end must be anchored as well. If soil conditions permit stakes to be pulled out easily, cementing into ground is necessary
●
To anchor the unit to the ground, Follow the instructions included in this plan to apply metal anchoring devices to your unit, or use 2” x 4” x 18” (45mm x 95mm x 457mm) pressure treated stakes. Pound stakes into ground at least 12”
(305mm) at all inside corners of the posts (including A-frame legs and climbing unit posts). Attach with four (4) 3-1/2” screws (approved for treated wood) per stake into each tower and/or A-frame upright.
●
If the unit has a climbing rope, securely anchor the rope at both ends. Be sure anchors are buried or otherwise covered with protective surfacing. Exposed anchors, hooks, bolts, etc. can create tripping hazards or lead to other injuries.
●
One of the most important things you can do to reduce the likelihood of serious head injuries is to install shock-absorbing protective surfacing under and around your play equipment. The protective surfacing should
be applied to a depth that is suitable for the equipment height in accordance with ASTM F1292. There are diff erent types of surfacing to choose from; whichever product you select, follow these guidelines:
Loose-Fill Materials:
♦ Maintain a minimum depth of 9 inches of loose-fi ll materials such as wood mulch/chips, engineered wood fi ber (EWF), or shredded/recycled rubber mulch for equipment up to 8 feet high; and 9 inches of sand or pea
gravel for equipment up to 5 feet high. NOTE: An initial fi ll level of 12 inches will compress to about a 9-inch depth of surfacing over time. The surfacing will also compact, displace, and settle, and should be
periodically refi lled to maintain at least a 9-inch depth.
♦
Use a minimum of 6 inches of protective surfacing for play equipment less than 4 feet in height. If maintained properly, this should be adequate. (At depths less than 6 inches, the protective material is too easily displaced or compacted.)
♦ Use containment, such as digging out around the perimeter and/or lining the perimeter with landscape edging. Don’t forget to account for water drainage.
♦ Check and maintain the depth of the loose-fi ll surfacing material. To maintain the right amount of loose-fi ll materials, mark the correct level on play equipment support posts. That way you can easily see when to
replenish and/or redistribute the surfacing.
♦ Do not install loose fi ll surfacing over hard surfaces such as concrete or asphalt.
Poured-In-Place Surfaces or Pre-Manufactured Rubber Tiles: You may be interested in using surfacing other than loose-fi ll materials—like rubber tiles or poured-in-place surfaces.
♦ Installations of these surfaces generally require a professional and are not “do-it-yourself” projects.
♦ Review surface specifi cations before purchasing this type of surfacing. Ask the installer/manufacturer for a report showing that the product has been tested to the following safety standard: ASTM F1292 Standard
Specifi cation for Impact Attenuation of Surfacing Materials within the Use Zone of Playground Equipment. This report should show the specifi c height for which the surface is intended to protect against serious head
injury. This height should be equal to or greater than the fall height—vertical distance between a designated play surface (elevated surface for standing, sitting, or climbing) and the protective surfacing
below—of your play equipment.
♦ Check the protective surfacing frequently for wear.
Placement: Proper placement and maintenance of protective surfacing is essential. Be sure to;
♦ Extend surfacing at least 6 feet from the equipment in all directions.
♦ For to-fro swings, extend protective surfacing in front of and behind the swing to a distance equal to twice the height of the top bar from which the swing is suspended.
♦ For tire swings, extend surfacing in a circle whose radius is equal to the height of the suspending chain or rope, plus 6 feet in all directions.
Disposal Instructions:
→
Disassemble and dispose of the playground equipment in such a way that no unreasonable hazards will exist at the time the playground equipment is discarded.
Save this instruction sheet in the event the manufacturer needs to be contacted.

3
DIMENSIONS
SWING USE ZONE EXTENDS NO LESS THAN 158”
SWINGS MUST HAVE A MINIMUM OF 8” ABOVE THE PROTECTIVE SURFACING.
MAXIMUM WEIGHT LIMIT IS 300 LBS
8” MIN
40”
7” MIN
7” MIN
79” MIN
158” MIN

4
TOOLS REQUIRED
1/2” WRENCH
PARTS LIST
(2) Rope-Chain
Platform Swing
ADJUSTABLE
WRENCH
OR

5
STEP 1
Padding removed
for clarity
SNAP
BUTTON
ALIGN
HOLES
Long section
x2
Corner section
x4
1. Unfold Platform Swing and connect Long Section tubing as shown.
Note: the snap button will lock in once aligned. The sides should be angled upward.
2. Connect Corner Section tubing as shown, then wrap the velcro around the Long Section.

6
STEP 2
x4
x4
Rope-Chain (x2)
1. Insert rope with eye bolt thru square hole of velcro fl ap.
2. Remove nut & (1) washer, insert into hole. Install washer then tighten with nut, as shown.

7
STEP 3
1. Wrap velcro around Corner Sections as shown.
2. Attach to swing hangers. NOTE: Adjust chain to meet minimum dimensions.

888-363-4967
Got Questions? We’ve got answers!
Call our Customer Support Representatives
Available Monday - Friday, 9am - 4pm (EST)
Technical Support from experienced Customer Service
Representatives who have actually built a swing set themselves.
Visit our web site at: www.Creativecedardesigns.com
/