Page is loading ...

OM-20000187 v1 November 2019
WAAS GUS
Signal Generator
USER GUIDE

2 WAAS GUS Signal Generator User Guide Rev 1
Proprietary Notice
WAAS GUS Signal Generator User Guide
Publication Number: OM-2000187
Revision Level: 1
Revision Date: November 2019
Limited Rights Notice
These data are submitted with limited rights under Contract No. 693KA8-18-C-00013. These data may be
reproduced and used by the Customer with the express limitation that they will not, without written permission of
the Contractor, be used for purposes of manufacture nor disclosed outside; except that the Customer may disclose
these data outside for the following purposes, if any; provided that the Customer makes such disclosure subject to
prohibition against further use and disclosure:
The information provided herein may be disclosed by the Customer for any purpose related to the use and operation
of related NovAtel supplied equipment, including without limitation, maintenance, revision of equipment, design
upgrades, testing, and any other required Customer activity.
This Notice must be marked on any reproduction of these data, in whole or in part.
The information contained in this document is subject to change without notice and should not be construed as a
commitment by NovAtel Inc. unless such commitment is expressly given in a covering document.
NovAtel
®
is a registered trademark of NovAtel Inc.
All other brand names are trademarks of their respective holders.
© Copyright NovAtel Inc. All rights reserved.
Unpublished rights reserved under International copyright laws.

WAAS GUS Signal Generator User Guide Rev 1 3
Table of Contents
Customer Service 8
Notices 9
Foreword 10
1 Introduction 11
1.1 Features...................................................................................................................................... 13
1.2 Accessories and Options ............................................................................................................ 13
1.3 Functional Overview ................................................................................................................... 13
2 Minimum Connections 15
3 Setup Considerations 19
3.1 Front Panel Functionality ............................................................................................................ 19
3.1.1 H/W Fault........................................................................................................................... 19
3.1.2 10 MHz .............................................................................................................................. 19
3.1.3 CW Mode........................................................................................................................... 19
3.1.4 Transmit Inhibit (Tx INHIBIT).............................................................................................19
3.1.5 Initiated Built in Test (IBIT) ................................................................................................ 20
3.1.6 1PPS ................................................................................................................................. 20
3.2 Rear Panel Functionality ............................................................................................................. 20
3.2.1 Power ................................................................................................................................ 20
3.2.2 CW Switch ......................................................................................................................... 21
3.2.3 Ground Screw.................................................................................................................... 21
3.2.4 CMP and WMP.................................................................................................................. 21
3.2.5 Code PPS Output .............................................................................................................. 21
3.2.6 1PPS In ............................................................................................................................. 21
3.2.7 10 MHz In and 10 MHz Out ............................................................................................... 21
3.2.8 RF Out ............................................................................................................................... 22
3.2.9 IF Out................................................................................................................................. 22
4 Operation 24
4.1 Communications with the Signal Generator................................................................................ 24
4.1.1 Serial Port Default Settings ............................................................................................... 24
4.1.2 Communicating Using a Remote Terminal........................................................................ 24
4.1.3 Communicating Using a Personal Computer .................................................................... 24
4.2 Message Control and Data Lines................................................................................................ 24
4.2.1 Other Control Lines ........................................................................................................... 25
5 Messages 26
5.1 WMP Message Structure ............................................................................................................ 26
5.1.1 Packet Synchronization Field ............................................................................................ 26
5.1.2 L1/L5 Indication Field ........................................................................................................ 26
5.1.3 Command Message .......................................................................................................... 27
5.1.4 Status Message................................................................................................................. 37
5.1.5 CRC-16/CCITT Checksum Field ....................................................................................... 44
5.2 Error Handling............................................................................................................................. 44
6 Firmware Updates 46
6.1 Contacting the NovAtel Customer Support ................................................................................. 46
6.2 Downloading the Files................................................................................................................. 47

4 WAAS GUS Signal Generator User Guide Rev 1
Table of Contents
6.3 Decompressing the Files .............................................................................................................47
6.4 Running WinLoad ........................................................................................................................47
6.4.1 Open a File to Download ...................................................................................................48
6.4.2 Downloading firmware .......................................................................................................50
A Technical Specifications 51

WAAS GUS Signal Generator User Guide Rev 1 5
Figures
1 WAAS GUS Signal Generator System Overview ......................................................................... 12
2 Signal Generator .......................................................................................................................... 13
3 Interface Block Diagram ............................................................................................................... 14
4 Signal Generator Setup Example ................................................................................................. 16
5 Coaxial Cable ............................................................................................................................... 17
6 Power Switch ............................................................................................................................... 17
7 Signal Generator Front Panel ...................................................................................................... 19
8 Close-up of Connectors on Rear Panel ....................................................................................... 20
9 RS-485 Symbol Timing Diagram ..................................................................................................25
10 Application of Frequency/Chipping Rate Ramp ........................................................................... 35
11 Input Command Flowchart ........................................................................................................... 36
12 Serial Number and Version Label ................................................................................................ 46
13 Main Screen of WinLoad .............................................................................................................. 48
14 WinLoad’s Open Dialog ............................................................................................................... 48
15 Open File in WinLoad ................................................................................................................... 49
16 COM Port Setup ........................................................................................................................... 49
17 Update Process Complete ........................................................................................................... 50
18 Signal Generator Dimensions ...................................................................................................... 51
19 Power Cable ................................................................................................................................. 55

6 WAAS GUS Signal Generator User Guide Rev 1
Tables
1 External Reference Characteristics ...............................................................................................21
2 L1 IF Bandwidth Requirements .....................................................................................................22
3 IF Output Phase Noise ..................................................................................................................23
4 L5 IF Bandwidth Requirements .....................................................................................................23
5 Packet Format ...............................................................................................................................26
6 Packet Synchronization Field ........................................................................................................26
7 Packet Synchronization Field Bit Format.......................................................................................26
8 L1/L5 Indication Field ....................................................................................................................27
9 L1/L5 Indication Bit Field ...............................................................................................................27
10 Command Message Fields............................................................................................................27
11 Command Message Identifier Field...............................................................................................28
12 Command Message Identifier Bit Fields........................................................................................28
13 L1/L5 Control Command Bit Fields................................................................................................ 28
14 L1/L5 Control Command Field.......................................................................................................29
15 Resulting I Modulation Format.......................................................................................................29
16 Resulting Q Modulation Format.....................................................................................................30
17 L1 Initialization Command Fields .................................................................................................. 30
18 L5 Initialization Command Fields 500 SPS ...................................................................................31
19 Symbol Rate/RF Configuration Field .............................................................................................31
20 Sub-Chip Field...............................................................................................................................32
21 Code Chip Advance Field..............................................................................................................32
22 Symbol Advance Field...................................................................................................................32
23 L1 I Channel G2 Coder Initialization Field ....................................................................................32
24 L1 Q Channel G2 Coder Initialization Field ...................................................................................33
25 L5 I Channel XB(I) Coder Initialization Field..................................................................................33
26 L5 Q Channel XB(Q) Coder Initialization Field ..............................................................................33
27 L1/L5 Code Chip Rate and Carrier Frequency Command Fields ..................................................34
28 Code Chip Rate Field ....................................................................................................................34
29 Code Chip Rate Ramp Field..........................................................................................................34
30 Carrier Frequency Field Bit Format ............................................................................................... 34
31 Carrier Frequency Ramp Field Bit Format.....................................................................................35
32 Status Message Fields .................................................................................................................. 37
33 Uplink Range Fields ......................................................................................................................37
34 Uplink Range Code Chip Sub-Phase Field ...................................................................................38
35 Uplink Range Code Chip Counter Field ........................................................................................38
36 Uplink Range Symbol Counter Field .............................................................................................38
37 Switch Status Field ........................................................................................................................ 38
38 Switch Status Bit Fields ................................................................................................................. 38
39 Error Status Field........................................................................................................................... 39
40 Error Status Bit Fields.................................................................................................................... 39
41 Hardware Status Field ................................................................................................................... 41
42 Hardware Status Bit Fields ............................................................................................................ 41
43 Reset Command Second Epoch Counter ..................................................................................... 42
44 Hardware Reset Second Epoch Counter ......................................................................................42
45 Firmware Version Number Field ....................................................................................................43
46 FPGA Version Number Field ......................................................................................................... 43
47 Signal Generator State Field .........................................................................................................43
48 Signal Generator State Value........................................................................................................43

Tables
WAAS GUS Signal Generator User Guide Rev 1 7
49 CRC-16/CCITT Checksum Field...................................................................................................44
50 CRC-16/CCITT Checksum Field...................................................................................................44
51 CRC-16-CCITT Characteristics..................................................................................................... 44
52 Errors ............................................................................................................................................ 45
53 Target Card Identification.............................................................................................................. 49
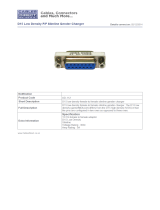
54 L1 and L5 WMP Connector Pin-Out Descriptions ........................................................................ 54
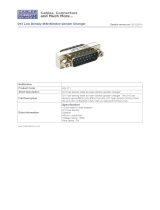
55 L1 and L5 CMP Connector Pin-Out Descriptions ......................................................................... 54

8 WAAS GUS Signal Generator User Guide Rev 1
Customer Service
Contact Information
If you have any questions or concerns regarding your WAAS GUS Signal Generator, please log a support request
with NovAtel Customer Support using one of the following methods:
Log a Case and Search Knowledge:
Website: www.novatel.com/support
Log a Case, Search Knowledge and View Your Case History: (login access required)
Web Portal: https://novatelsupport.force.com/community/login
E-mail:
Telephone:
U.S. and Canada: 1-800-NOVATEL (1-800-668-2835)
International: +1-403-295-4900:
WAAS GUS Signal Generator Firmware Updates
Firmware updates are firmware revisions to an existing model, which improves basic functionality of the signal
generator.
The process for obtaining firmware updates is discussed in Chapter 6, Firmware Updates starting on page 46. If
you need further information, please contact NovAtel using one of the methods given above.

WAAS GUS Signal Generator User Guide Rev 1 9
Notices
This equipment has been tested and found to comply with the limits for a class A digital device, pursuant to Part 15
of the FCC rules. These limits are designed to provide reasonable protection against harmful interference when the
equipment is operated in a commercial environment.
This equipment generates, uses, and can radiate radio frequency energy and, if not installed and used in accordance
with the instruction manual, may cause harmful interference to radio communications. Operation of this equipment
in a residential area is likely to cause harmful interference in which case the user will be required to correct the
interference at his own expense.
Changes or modifications to this equipment not expressly approved by NovAtel Inc. could result in violation of
FCC and CE Marking rules and void the user’s authority to operate this equipment.
Where applicable, follow the electrical codes for the country of installation. Examples of country codes include:
• USA National Electrical Code (NFPA 70)
• Canada Canadian Electrical Code (CSA C22)
• UK British Standards Institute (BSI 7671)
To maintain compliance with the limits of a Class A digital device, you must use properly
shielded interface cables when using the serial ports. Appropriate cables include Belden #9539,
or equivalent, and Belden #8770 cable for input power source (ensuring the shield is connected
to the protection ground).
CAUTION:
Double pole/neutral fusing
CAUTION:
The WAAS GUS Signal Generator must be installed in a Restricted Access Location only.
Except for the externally accessible AC Fuses located on the rear panel, the WAAS GUS Signal
Generator is not user-serviceable. In the event of any failure of the unit, do NOT remove any
cards or covering panels from the unit. Return the unit to the factory for repair.

10 WAAS GUS Signal Generator User Guide Rev 1
Foreword
Congratulations!
Congratulations on your purchase of the Wide Area Augmentation System (WAAS) Signal Generator designed to
generate a Ground Uplink Station (GUS) signal.
NovAtel is an industry leader in state-of-the-art GPS receiver and Signal Generator design. We believe that our
WAAS GUS Signal Generator will meet your high expectations, and are working hard to ensure that future products
and enhancements will maintain that level of satisfaction.
This is your primary hardware and software reference.
Scope
This manual contains sufficient information on the installation and operation of the WAAS GUS Signal Generator
and its software to allow you to effectively integrate and fully operate it. It is beyond the scope of this manual to
provide details on service or repair. Contact your local NovAtel dealer for any customer-service related inquiries.
The WAAS GUS Signal Generator utilizes a comprehensive user-interface command structure, which requires
communications through its WAAS Message Processor (WMP) communications (COM) ports. WAAS GUS Signal
Generator commands and logs can be found in Chapter 5, Messages starting on Page 26.
What’s New in Rev 1 of this manual?
• Describes the WAAS GUS Signal Generator
• Quadrature channel enhancements
• Default and user selectable alternate RF output frequencies at a higher output signal level
• TNC or Type-N connectors used for RF external interfaces
Equipment Compatibility
The WAAS GUS Signal Generator (NovAtel P/N 01020347) is compatible with the legacy WAAS GUS-TYPE 1
Signal Generator (P/N 01017287) with the following exceptions and clarifications:
• The use of TNC connectors throughout (instead of BNC).
• The RF Output level has been increased to -50 dBm (from -100 dBm). The Main IF Output level of -20 dBm
remains unchanged.
• Additional commands have been added to support additional functionality. The equipment will operate as
the legacy unit when controlled with the legacy command set.

WAAS GUS Signal Generator User Guide Rev 1 11
Chapter 1 Introduction
The WAAS GUS Signal Generator is a high performance L1/L5 Signal Generator. It generates a modulated
Intermediate Frequency (IF) signal that is upconverted, amplified and transmitted to a Geo-stationary Earth Orbit
(GEO) satellite. The primary GUS interfaces to the Signal Generator are the Safety Computer (SC), Radio
Frequency Uplink (RFU) and Frequency Distribution Amplifier (FDA). The Signal Generator also provides, for L1:
• Coarse/Acquisition (C/A) codes with Pseudo Random Number (PRN) values of 120 to 158 inclusive
(selectable via the initialization command)
• 70 MHz Binary-Phase Shift Keyed (BPSK) modulated or Quadrature-Phase Shift Keyed (QPSK) modulated
IF output signal generation using the SBAS message with the selected 1023 bit PRN code
• In-phase (I) channel, I channel with dataless quadrature (Q) channel or I channel with independent data on
the Q channel
• User configurable 1227.6 MHz (default) or 1575.42 MHz (alternate) RF output signal carrying the
configured modulation for L1
• L5 codes with PRN values of 120 to 158 inclusive (selectable using the Initialization Command, see Page
30)
• 70 MHz BPSK or QPSK modulated IF output signal generation using the SBAS message with the selected
10230 bit PRN code
• In-phase Manchester encoded (I) channel, I channel with dataless quadrature (Q) channel or I channel with
independent Manchester enclosed data on the Q channel
• User configurable 1176.45 MHz (default) or 1227.6 MHz (alternate) RF output signal carrying the
configured modulation for L5
The Signal Generator consists of the Baseband Signal Generator (BSG), IF Signal Generator (ISG) and the
Loopback Signal Generator (LSG). Figure 1 shows an example of a system containing the Signal Generator and
Receivers.

12 WAAS GUS Signal Generator User Guide Rev 1
Chapter 1 Introduction
Figure 1: WAAS GUS Signal Generator System Overview
Reference Description Reference Description
1 RFU antenna 11 L1/L5 IF signals
2 GEO satellite 12 L1 GPS, L2 GPS, L1 GEO, L5 GEO
3 RF Upconverter and Power Amplifier 13 L1/L5 RF loop back from satellite
4 WAAS GUS Signal Generator 14 RF Switch
5 Receiver (WAAS G-III) 15 L-Band Filter and Low Noise Amplifier
6 RS-485 message input from CMP 16 L1 and L5 at L2 SIGGEN RF loop
7 RS-232 command input from WMP 17 L1 and L5 TLT
8 GPS antenna 18 L1 and L5 GEO or TLT
9 Test loop translator 19 Power combiner/splitter
10 C1/C5 uplink
Figure 1 shows a high level implementation of a WAAS GUS setup (see Chapter 2, Minimum Connections on
Page 15 and Chapter 3, Setup Considerations on Page 19, for more information on this topic). Figure 2 shows the
Signal Generator Front.

Introduction Chapter 1
WAAS GUS Signal Generator User Guide Rev 1 13
Figure 2: Signal Generator
1.1 Features
The Signal Generator has the following standard features:
• 19” rack-mountable 3U stainless steel enclosure
• NovAtel's advanced Signal Generator technology
1.2 Accessories and Options
The Signal Generator can be used with the following accessories:
• Power cable to connect the Signal Generator to a 100 to 240 V AC power source
• Optional Data Source Modules (used in a test environment and for firmware loading)
• Optional coaxial cables for the TNC and Type-N connectors on the Signal Generator
• Optional (WAAS G-III) Receiver
Should you need to order an accessory or a replacement part, contact NovAtel.
1.3 Functional Overview
The Signal Generator is comprised of two independent L1 and L5 generators which precisely control the frequency
and phase of L1/L5 code and carrier signals and generate two independent L1 and L5 70 MHz IF signals. The L1 IF
output has the L1 message structure with a factory configurable IF bandwidth of 2, 4 or 22 MHz for the Signal
Generator. The L5 IF output has the L5 signal structure with an IF bandwidth of 22 MHz.
The Signal Generator provides two loopback signals that are monitored by the WAAS G-III Receiver. These RF
signals are frequency upconverted replicas of the 70 MHz L1 and L5 outputs. By default, the 70 MHz L1 is
upconverted to 1227.6 MHz. Similarly, by default, the 70 MHz L5 is upconverted to 1176.45 MHz. The user can
select alternate RF frequencies of 1575.42 MHz for the L1 signal and 1227.6 MHz for the L5 signal.
The L1 and L5 Signal Generators share a common 10 MHz frequency source from the GUS frequency standard and
a 1PPS timing reference from the GUS receiver. The command and status interface between the Signal Generator
and the WAAS GUS Message Processor (WMP) is independent for L1 and L5. Similarly, the message interface
with the Comparator Message Processor (CMP) is independent for L1 and L5. This allows for independent L1 and
L5 control and message data streams.
The primary signals generated are output on 70 MHz IF carriers which, outside the unit, are subsequently frequency
upconverted to the necessary uplink frequencies. The Signal Generator contains facilities to precisely control the
frequency and phase of both the code modulation and carrier of the generated signals.

14 WAAS GUS Signal Generator User Guide Rev 1
Chapter 1 Introduction
A quadrature channel can be added to the L1 and L5 signals within the Signal Generator. When used, the normal
signal is referred to as the I channel, and the quadrature signal is referred to as the Q channel. See also Section
5.1.3.2, Control Command starting on Page 28.
Figure 3 shows the interfaces of the Signal Generator.
Figure 3: Interface Block Diagram
After a cold start or after a power reset, the Signal Generator performs an Initiated Built-in Test (IBIT) memory
self-test and internal calibration.
Provided a 1PPS reference source is made available to the Signal Generator, it can receive WAAS messages from
the Safety Computer within 2 minutes of powering up.

WAAS GUS Signal Generator User Guide Rev 1 15
Chapter 2 Minimum Connections
When installed in a GUS, the Signal Generator requires the following connections:
AC Power - to the local mains supply to power the Signal Generator
L1 and/or L5 CMP - Comparator Message Processor as the WAAS message source
L1 and/or L5 WMP - WAAS Message Processor as the Signal Generator control terminal
10 MHz In - from the System 10 MHz Reference Source
1 PPS In - from the System 1 PPS Reference Source
L1 and/or L5 IF Output - to the Satellite Uplink path as the main Signal Generator output signal
L1 and/or L5 RF Output - to the local Signal Generator signal monitoring facility
All of the above connections are described in more detail in Chapter 3, Setup Considerations.
To demonstrate and/or experiment with signals generated by the Signal Generator in a test environment, outside of
the GUS, refer to the setup shown in Figure 4 on Page 16. Additional information on using the Signal Generator in
a test environment can be found in the WAAS SIGGEN GUI User Guide (NovAtel Document D25548) and
WAAS SIGGEN UDSM User Guide (NovAtel Document D25598).

16 WAAS GUS Signal Generator User Guide Rev 1
Chapter 2 Minimum Connections
Figure 4 displays how you might typically set up the Signal Generator to test the signal.
Figure 4: Signal Generator Setup Example
Reference Description
1 WAAS GUS Signal Generator (NovAtel P/N 1020347)
2 WAAS G-III Receiver (NovAtel P/N 01018740)
3 10 MHz Low Noise OCXO Reference Oscillator
4 Personal Computer (PC)
5 Off-the-Shelf USB to RS-232 Adapter
6 Data Source Module (NovAtel P/N 01020346)
7
Externally Powered GPS Antenna
8 50 Ohm 3:1 RF Combiner, SMA
9 50 dB SMA Coaxial Attenuators, 50 ohm
10 SMA Coaxial DC-block (the WAAS G-III Receiver RF1 In outputs DC power by default)
11 DB-9 Serial Cable
12 USB Cable Type-A to micro-USB (NovAtel P/N 60723119)
13 50 ohm Coaxial Cable, Male TNC to Male SMA (NovAtel P/N 60423064)
14 50 ohm Coaxial Cable, Male Type-N TNC to Male SMA
15 120 VAC Power Cable (NovAtel P/N 60723070)
16 50 ohm Coaxial Cable, Male TNC to Male TNC
17 CAT-5 Ethernet Cable
18 Local Area Network
19 Gain Element (either an amplifier or an attenuator)
1
1. To guarantee the noise power is between -152 dBm/Hz and -132 dBm/Hz at the input to the receiver.
The normal tracking range of the receiver is for CNos between 30 dB/Hz and 60 dB/Hz.

Minimum Connections Chapter 2
WAAS GUS Signal Generator User Guide Rev 1 17
An example configuration would result from the following steps (see also Figure 4):
1. Place the Signal Generator on a suitable work surface.
2. Connect the 1PPS In port on the Signal Generator to the 1PPS Out port on the Receiver with
interconnecting coaxial cable. A typical coaxial cable is shown in Figure 5.
Figure 5: Coaxial Cable
3. Connect the 10 MHz In port on the Signal Generator to the 10 MHz external reference with an
interconnecting coaxial cable.
4. Connect the 10 MHz In port on the Receiver to the 10 MHz Out port on the Signal Generator with an
interconnecting coaxial cable.
5. Connect the L1 and L5 CMP ports and the L1 and L5 Code 1PPS Out ports on the Signal Generator to
their respective Data Source Modules. Set the Data Source Modules L1 and L5 selector switches
respectively.
6. Connect the Data Source Modules to the Test PC using the USB cables supplied with the Data Source.
7. Connect the L1 and L5 RF OUT ports on the Signal Generator to attenuators which are then connected to
inputs of the RF Combiner using interconnecting coaxial cables. The attenuators should be selected so that
the signal power at the receiver input is between -105 to -90 dBm given an input noise power density to the
receiver of -150 dBm/Hz. (Typical attenuator vales are approximately 50dB.)
8. Connect a Powered GPS Antenna to a LNA which is then connected to the input of the RF Combiner using
interconnecting coaxial cables. The total gain due to the antenna LNA, cable losses, combiner and any
external LNA should be approximately +20 dB or equivalently the noise power provided at the receiver
input, accounting for cascaded gain and noise figure, should be approximately -150 dBm/Hz.
9. Connect the output of the RF Combiner to a DC Block which is then connected to the RF1 In of the
Receiver using interconnecting coaxial cables.
10. Connect the L1 and L5 WMP ports on the Signal Generator to a serial port on your PC with serial data
cables.
11. Connect the Data port on the Receiver to the same LAN that your Test PC is connected to using a network
cable.
12. Connect AC power to the power input port on the back of the Signal Generator using the supplied power
cable. Similarly, power the receiver and ensure your PCs are powered.
13. Press the power switch on the back of the Signal Generator, see Figure 6. The Power LED on the front
panel glows green while power is applied.
Figure 6: Power Switch
14. Control the Signal Generator using the Signal Generator GUI running on the Test PC.

18 WAAS GUS Signal Generator User Guide Rev 1
Chapter 2 Minimum Connections
15. Monitor your L1 and L5 data using available logs and commands from the Receiver through the Test PC.
The sections of Chapter 3, Setup Considerations on Page 19 give further details on steps #1 to #13 while Chapter
4, Operation on Page 24 helps with step #14. See the Signal Generator specific command and logs in Chapter 5,
Messages on Page 26. For other commands and logs available with the Receiver, please refer to its WAAS G-III
Reference Receiver user manual (OM-20000137).

WAAS GUS Signal Generator User Guide Rev 1 19
Chapter 3 Setup Considerations
The Signal Generator is a device that is intended for use in dry stable environments.
For proper ventilation, the Signal Generator requires clearance of 6 inches minimum on all sides, except for the rear
panel, which should remain clear from obstructions. Installations not meeting this requirement must ensure a
minimum forced air flow rate of 1 cu-m/minute through the ventilation holes of the unit.
3.1 Front Panel Functionality
As seen in Figure 7, there is a power LED that glows green when power is applied to the Signal Generator.
Figure 7: Signal Generator Front Panel
3.1.1 H/W Fault
This LED glows red when there is an internal hardware fault. It will cycle on and off at a 1 Hz rate when the 1PPS
input signal is lost. See also Section 5.1.4.6, Hardware Status Fields on Page 41.
3.1.2 10 MHz
This LED glows green when there is a 10 MHz reference present. The 10 MHz reference input level is in the range
+12 to +14 dBm and has an impedance of 50 ohms.
3.1.3 CW Mode
When the L1 CW Only or L5 CW Only switch is manually selected, the Signal Generator removes all modulation
from the L1 or L5 signal carrier respectively. The corresponding LED on the front panel glows red at the same time.
3.1.4 Transmit Inhibit (Tx INHIBIT)
This L1 or L5 Tx INHIBIT LED glows red if the L1 or L5 IF output is disabled. Incomplete L1 or L5 message data
transfer forces the unit to inhibit L1 or L5 signal transmission respectively for one second following the error.
This transmit inhibit function is controlled by a discrete signal that is applied via the Comparator input port. This
function is fail safe, so that if the control lines become open the transmission is inhibited.
Observe ventilation requirements.

20 WAAS GUS Signal Generator User Guide Rev 1
Chapter 3 Setup Considerations
3.1.5 Initiated Built in Test (IBIT)
IBIT is performed at power-up or upon a hardware reset. IBIT includes ROM and RAM testing. The front panel
specifies whether the L1 or L5 IBIT passed or failed. A green LED signifies an IBIT pass and an unlit LED
signifies an IBIT failure.
3.1.6 1PPS
The 1PPS LEDs are green and will cycle on and off at a 1 Hz rate to indicate the presence of a 1PPS output signal.
3.2 Rear Panel Functionality
The connections on the rear panel and their connector types are shown in Figure 8.
Figure 8: Close-up of Connectors on Rear Panel
Each connector is keyed to ensure that the cable can be inserted in only one way, to prevent damage to both the
Signal Generator and the cables. Furthermore, the connectors that are used to mate the cables to the Signal
Generator require careful insertion and removal. Observe the following when handling the cables.
• To insert a cable, make certain you are using the appropriate cable for the port - the serial cable has a
different connector (DB9) than the PPS cable (TNC), or the RF cable (N-Type) connectors.
3.2.1 Power
After initial connection of the power supply to the Signal Generator and pressing the power switch on the back of
the unit (see Figure 8 above), the Power LED on the front of the unit (see Figure 7 on Page 19) glows green.
The Signal Generator requires an input supply voltage that comes from a normal power source of 120 volts AC at
60 Hz or 230 volts AC at 50 Hz through its 3-pin (hot, neutral and ground) power connector.
Note: Where marked L1/L5, the top row of connectors is for the L1
signal and bottom row of connectors is for the L5 signal. Likewise
for the 10 MHz In/Out, the top connector is the Input and the bottom
is the Output.
DO NOT PULL DIRECTLY ON THE CABLES.
For safety reasons, ensure the 3-pin AC power plug is connected to a properly grounded AC
mains supply.
/