
I
lo
a"

The
1997
Chevrolet Tahoe and Suburban Owner’s Manual
1-1
2-1
3-1
4-1
5-
1
6-1
7-1
8-
1
9-
1
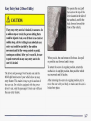
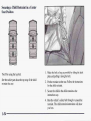
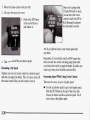
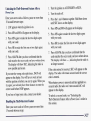
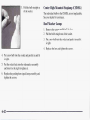
Seats and Restraint Systems
This section tells you how to use your seats and safety belts properly. It also explains the “SIR’ system.
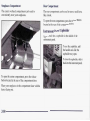
Features and Controls
This section explains how to start and operate your vehicle.
Comfort Controls and Audio Systems
This section tells you how to adjust
the
ventilation and comfort controls and how to operate your audio system.
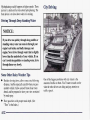
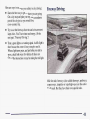
Your Driving and the Road
Here you’ll find helpful information and tips about
the
road and
how
to drive under different conditions.
Problems on the Road
This section tells what to do if you have a problem while driving, such as a flat tire or overheated engine, etc.
Service and Appearance Care
Here the manual tells you how to keep your vehicle running properly and looking good.
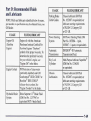
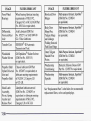
Maintenance Schedule
This section tells you when to perform vehicle maintenance and what fluids and lubricants to use.
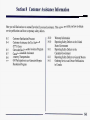
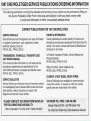
Customer Assistance Information
This section tells you how to contact Chevrolet for assistance and how to get service and owner publications.
It also gives you information on “Reporting Safety Defects” on page
8-
10.
Index
Here’s an alphabetical listing of almost every subject in this manual.
You
can use
it
to quickly find
something you want to read.
i

GENERAL MOTORS, GM, the GM Emblem,
CHEVROLET, the CHEVROLET Emblem,
the name TAHOE and the name SUBURBAN are
registered trademarks of General Motors Corporation.
This manual includes the latest information at the time it
was printed. We reserve the right
to
make changes in the
product after that time without further notice. For
vehicles first sold in Canada, substitute the name
“General Motors of Canada Limited” for Chevrolet
Division whenever it appears in this manual.
Please keep this manual in your vehicle,
so
it
will be
there if
you
ever need it when you’re
on
the road. If you
sell the vehicle, please leave this manual in it
so
the new
owner can use it.
Litho in
U.S.A.
C9709
C
First Edition
ii
We sumort voluntarv
WE
SUPPORT
VOLUNTARY TECHNICIAN
CERTIFICATION
THROUGH
National Institute
for
AUTOMOTIVE
SERVICE
EXCELLENCE
L1
d
technician certification.
For Canadian Owners Who Prefer a
French Language Manual:
Aux
propriktaires canadiens:
Vous pouvez vous
procurer un exemplaire de ce guide en franGais chez
votre concessionaire
ou
au:
DGN Marketing Services Ltd.
1500
Bonhill Rd.
Mississauga, Ontario L5T 1C7
@Copyright General Motors Corporation 1997
All Rights Reserved

About Driving
Your
Vehicle
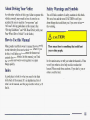
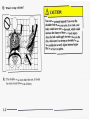
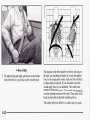
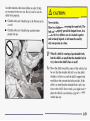
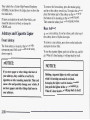
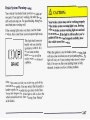
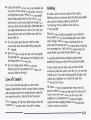
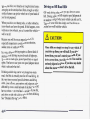
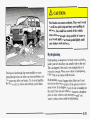
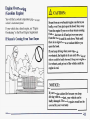
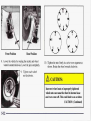
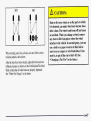
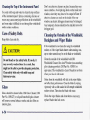
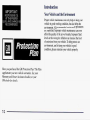
Safety Warnings and Symbols
As with other vehicles of this type, failure to operate this You will find a number of safety cautions in this book.
vehicle correctly may result in loss
of
control or an We use a box and the word CAUTION to tell you
accident. Be sure to read the “on-pavement” and about things that could hurt you if you were to ignore
“off-road” driving guidelines in this manual. (See the warning.
“Driving Guidelines” and “Off-Road Driving with your
Four-Wheel-Drive Vehicle” in the Index.)
I
How
to Use this Manual
Many people read their owner’s manual from beginning
to end when they first receive their new vehicle. If you
do this, it will help you learn about the features and
controls for your vehicle. In this manual, you’ll find
that pictures and words work together to explain
things quickly.
Index
A good place to look for what you need is the Index
in the back of the manual. It’s an alphabetical list of
what’s in the manual, and the page number where you’ll
find it.
m
~
These mean there
is
something that could hurt
you or other people.
1
In the caution area, we tell you what the hazard is. Then
we tell you what to do
to
help avoid or reduce the
hazard. Please read these cautions. If you don’t, you or
others could be hurt.
..
-
iii

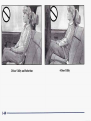
You
will also find a circle
with a slash through it in
this book. This safety
symbol means “Don’t,”
“Don’t do this,” or “Don’t
let this happen.”
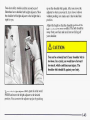
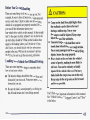
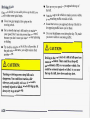
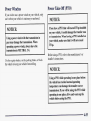
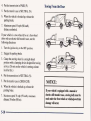
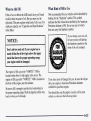
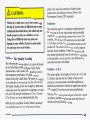
Vehicle Damage Warnings
Also, in this book you will find these notices:
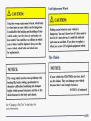
I
NOTICE:
These mean there
is
something that could
damage your vehicle.
In the notice area, we tell
you
about something that can
damage your vehicle. Many times, this damage
would
not be covered by your warranty, and
it
could be costly.
But the notice will tell
you
what to do to help avoid
the damage.
When you read other manuals, you might see
CAUTION and NOTICE warnings
in
different colors
or
in different words.
You’ll also see warning labels
on
your vehicle. They use
the same words, CAUTION or NOTICE.
iv

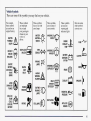
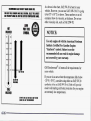
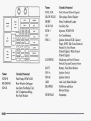
Vehicle
Symbols
These are some
of
the symbols
you
may find
on
your vehicle.
For example,
these symbols
are used on an
original battery:
POSSIBLE
A
CAUTION
INJURY
PROTECT
EYES BY
SHIELDING
CAUSTIC
ACID COULD
BAllERY
CAUSE
BURNS
AVOID
SPARKS
OR
FLAMES
SPARK
OR
,\I/,
COULD
FLAME
EXPLODE
BATTERY
These symbols
are important
for you and
your passengers
whenever your
vehicle is
driven:
DOOR LOCK
UNLOCK
FASTEN
SEAT
BELTS
POWER
WINDOW
These symbols
have to
do
with
your lamps:
SIGNALS
e
TURN
WARNING
A
HAZARD
FLASHER
RUNNING
*
.
0
DAYTIME
LAMPS
FOG LAMPS
$0
These symbols
are on some
of
your controls:
WINDSHIELD
WIPER
WINDSHIELD
DEFROSTER
WINDOW
DEFOGGER
VENTILATING
FAN
These symbols
are used on
warning and
indicator lights:
COOLANT
-
TEMP
-
CHARGING
I-1
BATTERY
SYSTEM
BRAKE
(a)
COOLANT
a
ENGINE OIL
w,
PRESSURE
ANTI-LOCK
(@)
BRAKES
Here are some
other symbols
you may see:
FUSE
t
LIGHTER
n
HORN
)cr
SPEAKER
b
FUEL
p3
V

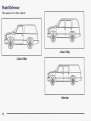
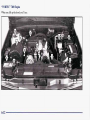
Model
Reference
This
manual
covers
these
models:
2-Door Utility
4-DOOr Utility
E
I\
e
Suburban
vi

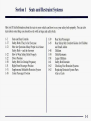
Section
1
Seats and Restraint Systems
Here you’ll find information about the seats in your vehicle and how
to
use your safety belts properly. You can also
learn about some things you should
nut
do with air bags and safety belts.
1-2
1-17
1-21
1-22
1-22
1-30
1-3 1
1-3 1
1-38
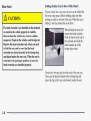
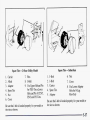
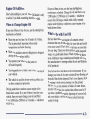
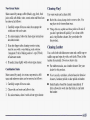
Seats and Seat Controls
Safety Belts: They’re for Everyone
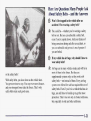
Here Are Questions Many People
Ask
About
Safety Belts
--
and the Answers
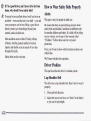
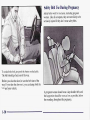
How to Wear Safety Belts Properly
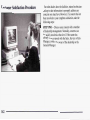
Driver Position
Safety Belt Use During Pregnancy
Right Front Passenger Position
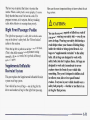
Supplemental Inflatable Restraint System
Center Passenger Position
1-39
1-45
1-48
1-50
1-58
1-61
1-62
1-62
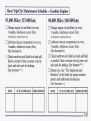
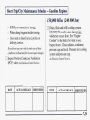
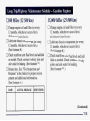
Rear Seat Passengers
Rear Safety Belt Comfort Guides for Children
and Small Adults
Children
Child Restraints
Larger Children
Safety Belt Extender
Checking Your Restraint Systems
Replacing Restraint System Parts
After a Crash
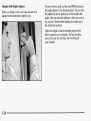
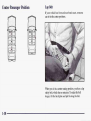
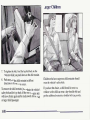
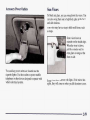
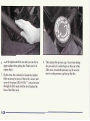
1-1

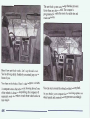
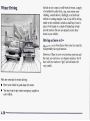
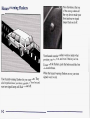
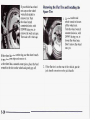
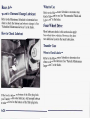
Seats
and Seat
Controls
This section tells
you
about the seats
--
how to adjust
them and fold them up and down. It also tells you about
reclining front seatbacks and head restraints.
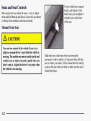
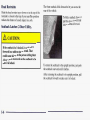
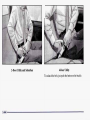
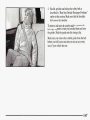
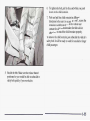
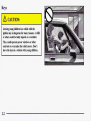
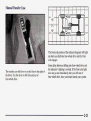
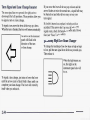
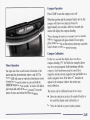
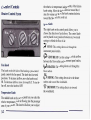
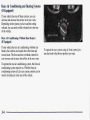
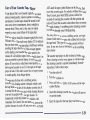
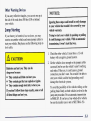
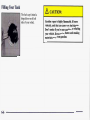
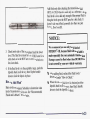
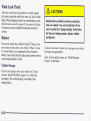
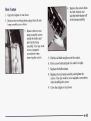
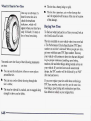
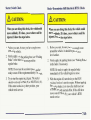
Manual Front Seat
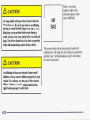
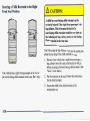
You can lose control of the vehicle if you try to
adjust a manual driver’s seat while the vehicle is
moving. The sudden movement could startle and
confuse you, or make you push a pedal when you
don’t want to. Adjust the driver’s seat only when
the vehicle is not moving.
If your vehicle has
a
manual
bucket, split bench or full
bench seat,
you
can adjust it
with this lever at the front
of the seat.
1
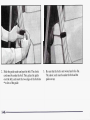
Slide the lever at the front
of
the seat toward the
passenger’s side to unlock it. Using your body, slide the
seat to where you want it. Then, release the lever and try
to move the seat with your body to make sure the seat is
locked into place.
1-2

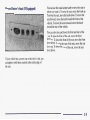
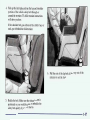
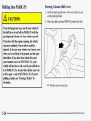
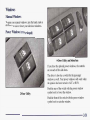
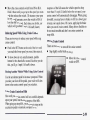
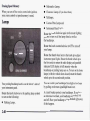
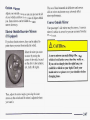
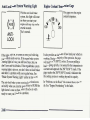
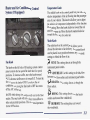
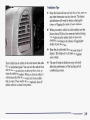
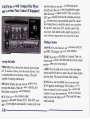
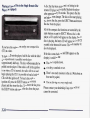
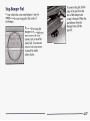
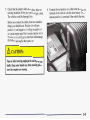
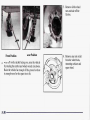
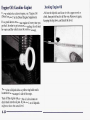
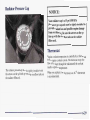
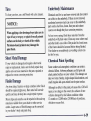
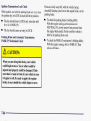
Power Driver’s Seat
(If Equipped)
If your vehicle has a power seat on the driver’s side,
you
can adjust it with these controls at the outside edge
of
the seat.
You
can
use the round center knob to move the seat to
where you want it.
To
raise the seat, move the knob up.
To
lower the seat, move the
knob
down.
To
move the
seat forward, move the knob toward the front
of
the
vehicle.
To
move the seat rearward, move the
knob
toward the rear
of
the vehicle.
You can also raise and lower the front and rear of the
seat.
To
raise the front
of
the seat, move the front
lever up.
To
lower the front of the seat, move the front
lever down.
To
raise the rear of the seat, move the rear
lever up.
To
lower the rear
of
the seat, move the rear
lever down.
1-3

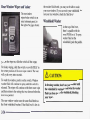
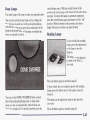
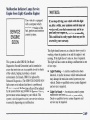
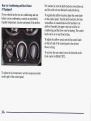
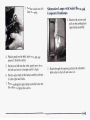
Power Lumbar Adjustment
(If
Equipped)
If
you have power lumbar
adjustment, you can
increase or decrease lumbar
support in an area of the
lower seatback.
To
increase support, press and hold the front
of
the
rocker switch. Let go
of
the switch when the lower
seatback reaches the desired level
of
support.
To
decrease support, press and hold the rear of the
rocker switch. Let
go
of
the switch when the lower
seatback reaches the desired level
of
support.
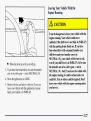
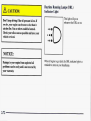
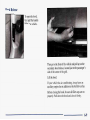
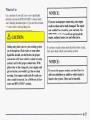
Reclining Front Seatbacks
To
adjust the seatback, move the lever rearward.
Release the lever to lock the seatback where you want it.
Move the lever again rearward and the seatback will
go
to an upright position.
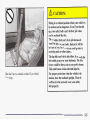
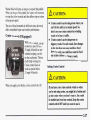
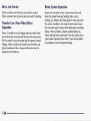
1-4

But
don’t have a seatback reclined
if
your
vehicle
is
moving.
Sitting in
a
reclined position when your vehicle is
in motion can be dangerous. Even if you buckle
up, your safety belts can’t do their job when
you’re reclined like this.
The shoulder belt can’t do its job because it
I
won’t be against your body. Instead, it will be
in front of you. In a crash you could go into it,
receiving neck or other injuries.
The lap belt can’t do its job either. In a crash the
belt could go up over your abdomen. The belt
forces would be there, not at your pelvic bones.
This could cause serious internal injuries.
For proper protection when the vehicle is in
motion, have the seatback upright. Then sit
well back in the seat and wear your safety
belt properly.
1-5

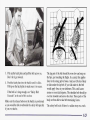
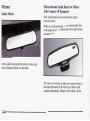
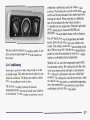
Head Restraints
Slide the head restraint up or down
so
that the top of
the
restraint is closest to the top of your ears. This position
reduces the chance of a neck injury in a crash.
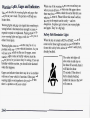
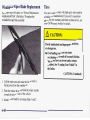
Seatback Latches (2-Door Utility)
I
If the seatback isn’t locked, it could move
forward in
a
sudden stop or crash. That
could cause injury
to
the person sitting there.
Always press rearward on the seatback to be
sure it
is
locked.
The front seatback folds forward to let you access the
rear of the vehicle.
To
fold a seatback forward,
pull this lever forward and
tilt the seatback forward.
To return the seatback to the upright position, just push
the seatback rearward until it latches.
After returning the seatback to its upright position, pull
the seatback forward to make sure it is locked.
1-6

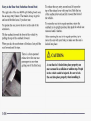
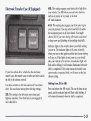
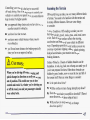
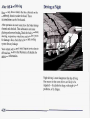
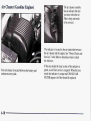
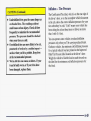
Easy Entry Seat (2-Door Utility)
1
If
any easy entry seat isn’t locked, it can move. In
a sudden stop or crash, the person sitting there
could be injured. And, even if there is no crash or
sudden stop, a driver sitting in an unlocked easy
entry seat could be startled by the sudden
movement and hit the wrong control or pedal,
causing an accident. After you’ve used it, be sure
to
push rearward on any easy entry seat to be
sure it is locked.
The driver and passenger front bucket seat and the
60/40
split bench seat of your vehicle have an easy
entry feature. This makes it easy
to
get in and out of
the rear seat. On vehicles equipped with the power
driver’s seat, only the passenger’s front seat will have
the easy entry feature.
To operate the seat, pull
forward
on
the top
of
the
lever located at the side of
the seatback, and tilt the
back forward toward the
front
of
the vehicle.
When you do, the seat bottom will release. Just pull
or push the seat forward until it stops.
To return the seat to its regular position, return the
seatback
to
its upright position, then push the whole
seat rearward until it latches.
After returning the seat to its regular position, try
to
move
the
seat with your body, to make sure the seat is
locked into place.
1-7

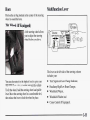
Rear
Seats
I
~
If
a head restraint is not installed on the seatback
~
or stored in the vehicle properly, it could be
1
thrown about the vehicle in
a
crash or sudden
maneuver. People in the vehicle could be injured.
Remove the head restraints only-when you need
to fold the seat, and be sure that the head
restraints are stored securely in the storage bag
and placed under the rear seat. When the seat is
returned to the passenger position, be sure the
head restraints are installed properly.
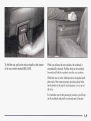
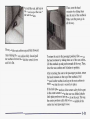
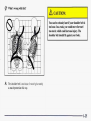
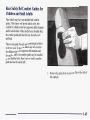
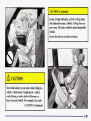
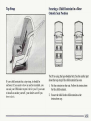
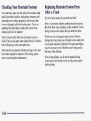
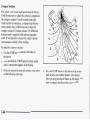
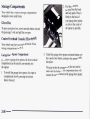
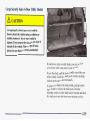
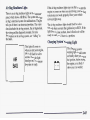
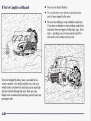
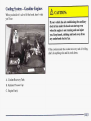
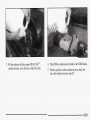
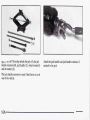
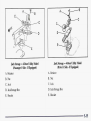
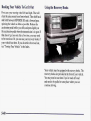
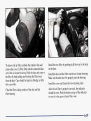
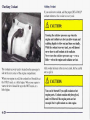
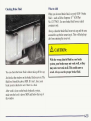
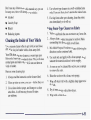
Folding the Rear Seat (2-Door Utility Model)
If your vehicle has a rear seat, the seat can be folded flat
for more cargo space. Before folding, make sure that
nothing is under or in front of the seat. When the seat is
folded, it will lay almost flat on the floor.
When folding the seat, first
remove the head restraints.
Push the button at the top of
the seat back and slide the
head restraint out of the
height-adjust tubes.
Detach the stowage bag from the back of the rear seat.
Then, put the head restraints in the stowage bag and
place the bag in the rear seat footwell, under the seat.
1-8

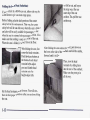
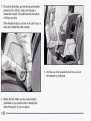
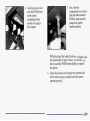
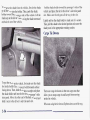
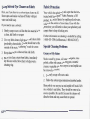
To
fold the seat, pull on the release handle at the bottom
of the seat cushion marked
RELEASE.
When you release the seat cushion,
the
seatback
is
automatically released. Pull the loop
on
the seatback
forward and fold the seatback onto the seat cushion.
While the seat
is
in
the folded position, hang the latch
plate end of the outer passenger position safety belts
on
the hooks at the top of each retractor cover, out
of
the way.
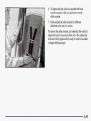
To
return the seat to the passenger position, just lift up
on the seatback and push it rearward
until
it latches.
1-9

After returning the seat to the passenger position, pull
forward on the seatback to make sure it is locked into
place. Also, return the safety belts and head restraints
to
their original positions,
so
they will be available for rear
seat passengers to use.
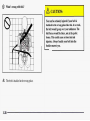
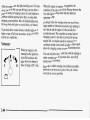
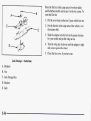
Folding the Rear Seat
(&Door
Utility Model)
If your vehicle has a
60/40
rear seat, either side may be
folded down
to
give you more cargo space.
Before folding, place the latch portion of the center
safety belt in the center armrest. That way, the center
safety belt will be out of the way when the seat is folded
and also will be easily available for passengers to use
when the seat is returned to the passenger position. Also,
make sure that nothing is under or in front of the seat.
When the seat is folded, it will lay flat on the floor.
When folding the seat,
first remove the head
restraints. Push the release
buttons at the bottom of
each head restraint height
adjust post and slide the
head restraint out of the
height-adjust tubes.
Set the head restraints aside for now. You will stow them
in
their proper position after you are done folding the seat.
1-10

To
fold the seat, pull up on
the strap loop at the rear of
the seat cushion.
Then, pull the seat cushion up and fold it forward.
After folding the seat cushion fully forward, pull
the seatback forward and fold the seatback down
until
it is flat.
Then, stow the head
restraints by sliding them
into the rear of the seatback.
Make sure the posts go
in
all the way.
To
return the seat to the passenger position, first remove
the head restraints by sliding them
out
of
the seat cushion.
Lift the seatback up and push rearward
all
the way. Then,
lower the seat cushion until it latches in position.
After returning the seat to the passenger position, return
the head restraints to the top
of
the seatback. Pull
forward on the seatback and up on the seat cushion
to
make sure that the seat is securely in place.
If the latch plate portion
of
the center safety belt was put
in the center armrest when the seat was folded, take the
latch plate portion out and place
it
on the seat. That way,
the center position safety belt will be available for the
center rear seat passenger to use.
1-11

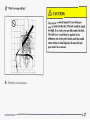
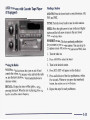
Folding the Second Seat (Suburban)
If your vehicle has a
60/40
rear seat, either side may be
folded down to give
you
more cargo space.
Before folding, place the latch portion
of
the center
safety belt in the center armrest. That way, the center
safety belt will be out of the way when the seat is folded
and also will be easily available for passengers to use
when the seat is returned to the passenger position. Also,
make sure that nothing is under or in front of the seat.
When the seat is folded, it will lay flat on the floor.
When folding the seat, first
remove the head restraints.
Push the release buttons at
the bottom
of
each head
restraint height-adjust
post and slide the head
restraint
out
of the
height-adjust tubes.
Set the head restraints aside for now.
You
will stow
them in their proper positions after you are done folding
the seat.
To fold the seat, pull up on
the strap loop at the rear
outer edge
of
the seat
cushion. Then, pull the seat
cushion up.
After folding the seat cushion forward, push down on
the lever at the side
of
the seatback and fold the seatback
forward until it is flat.
Then, stow the head
restraints by sliding them
into the rear of the seatback.
Make sure the posts go in
all the way.

To create a load floor,
release the panels from the
seatback by pushing
rearward on the latch and
fold them out to cover the
rear seat footwell.
To return the seat to the passenger position, lift the load
floor panels and latch them into the seatback.
Then lift the rear seatback up and push rearward
until
it
latches. Return
the
head restraints to their
original positions and lower the seat cushion until it
latches into position.
After returning the seat
to
the passenger position, pull
forward on the seatback and up on the cushion
to
make
sure the seat is locked into place.
If the latch plate portion of the center safety belt was put
in the center armrest when the seat was folded, take the
latch plate portion out and place it on the seat. That way,
the center position safety belt will be available for the
center rear seat passenger to use.
1-13
Page is loading ...
Page is loading ...
Page is loading ...
Page is loading ...
Page is loading ...
Page is loading ...
Page is loading ...
Page is loading ...
Page is loading ...
Page is loading ...
Page is loading ...
Page is loading ...
Page is loading ...
Page is loading ...
Page is loading ...
Page is loading ...
Page is loading ...
Page is loading ...
Page is loading ...
Page is loading ...
Page is loading ...
Page is loading ...
Page is loading ...
Page is loading ...
Page is loading ...
Page is loading ...
Page is loading ...
Page is loading ...
Page is loading ...
Page is loading ...
Page is loading ...
Page is loading ...
Page is loading ...
Page is loading ...
Page is loading ...
Page is loading ...
Page is loading ...
Page is loading ...
Page is loading ...
Page is loading ...
Page is loading ...
Page is loading ...
Page is loading ...
Page is loading ...
Page is loading ...
Page is loading ...
Page is loading ...
Page is loading ...
Page is loading ...
Page is loading ...
Page is loading ...
Page is loading ...
Page is loading ...
Page is loading ...
Page is loading ...
Page is loading ...
Page is loading ...
Page is loading ...
Page is loading ...
Page is loading ...
Page is loading ...
Page is loading ...
Page is loading ...
Page is loading ...
Page is loading ...
Page is loading ...
Page is loading ...
Page is loading ...
Page is loading ...
Page is loading ...
Page is loading ...
Page is loading ...
Page is loading ...
Page is loading ...
Page is loading ...
Page is loading ...
Page is loading ...
Page is loading ...
Page is loading ...
Page is loading ...
Page is loading ...
Page is loading ...
Page is loading ...
Page is loading ...
Page is loading ...
Page is loading ...
Page is loading ...
Page is loading ...
Page is loading ...
Page is loading ...
Page is loading ...
Page is loading ...
Page is loading ...
Page is loading ...
Page is loading ...
Page is loading ...
Page is loading ...
Page is loading ...
Page is loading ...
Page is loading ...
Page is loading ...
Page is loading ...
Page is loading ...
Page is loading ...
Page is loading ...
Page is loading ...
Page is loading ...
Page is loading ...
Page is loading ...
Page is loading ...
Page is loading ...
Page is loading ...
Page is loading ...
Page is loading ...
Page is loading ...
Page is loading ...
Page is loading ...
Page is loading ...
Page is loading ...
Page is loading ...
Page is loading ...
Page is loading ...
Page is loading ...
Page is loading ...
Page is loading ...
Page is loading ...
Page is loading ...
Page is loading ...
Page is loading ...
Page is loading ...
Page is loading ...
Page is loading ...
Page is loading ...
Page is loading ...
Page is loading ...
Page is loading ...
Page is loading ...
Page is loading ...
Page is loading ...
Page is loading ...
Page is loading ...
Page is loading ...
Page is loading ...
Page is loading ...
Page is loading ...
Page is loading ...
Page is loading ...
Page is loading ...
Page is loading ...
Page is loading ...
Page is loading ...
Page is loading ...
Page is loading ...
Page is loading ...
Page is loading ...
Page is loading ...
Page is loading ...
Page is loading ...
Page is loading ...
Page is loading ...
Page is loading ...
Page is loading ...
Page is loading ...
Page is loading ...
Page is loading ...
Page is loading ...
Page is loading ...
Page is loading ...
Page is loading ...
Page is loading ...
Page is loading ...
Page is loading ...
Page is loading ...
Page is loading ...
Page is loading ...
Page is loading ...
Page is loading ...
Page is loading ...
Page is loading ...
Page is loading ...
Page is loading ...
Page is loading ...
Page is loading ...
Page is loading ...
Page is loading ...
Page is loading ...
Page is loading ...
Page is loading ...
Page is loading ...
Page is loading ...
Page is loading ...
Page is loading ...
Page is loading ...
Page is loading ...
Page is loading ...
Page is loading ...
Page is loading ...
Page is loading ...
Page is loading ...
Page is loading ...
Page is loading ...
Page is loading ...
Page is loading ...
Page is loading ...
Page is loading ...
Page is loading ...
Page is loading ...
Page is loading ...
Page is loading ...
Page is loading ...
Page is loading ...
Page is loading ...
Page is loading ...
Page is loading ...
Page is loading ...
Page is loading ...
Page is loading ...
Page is loading ...
Page is loading ...
Page is loading ...
Page is loading ...
Page is loading ...
Page is loading ...
Page is loading ...
Page is loading ...
Page is loading ...
Page is loading ...
Page is loading ...
Page is loading ...
Page is loading ...
Page is loading ...
Page is loading ...
Page is loading ...
Page is loading ...
Page is loading ...
Page is loading ...
Page is loading ...
Page is loading ...
Page is loading ...
Page is loading ...
Page is loading ...
Page is loading ...
Page is loading ...
Page is loading ...
Page is loading ...
Page is loading ...
Page is loading ...
Page is loading ...
Page is loading ...
Page is loading ...
Page is loading ...
Page is loading ...
Page is loading ...
Page is loading ...
Page is loading ...
Page is loading ...
Page is loading ...
Page is loading ...
Page is loading ...
Page is loading ...
Page is loading ...
Page is loading ...
Page is loading ...
Page is loading ...
Page is loading ...
Page is loading ...
Page is loading ...
Page is loading ...
Page is loading ...
Page is loading ...
Page is loading ...
Page is loading ...
Page is loading ...
Page is loading ...
Page is loading ...
Page is loading ...
Page is loading ...
Page is loading ...
Page is loading ...
Page is loading ...
Page is loading ...
Page is loading ...
Page is loading ...
Page is loading ...
Page is loading ...
Page is loading ...
Page is loading ...
Page is loading ...
Page is loading ...
Page is loading ...
Page is loading ...
Page is loading ...
Page is loading ...
Page is loading ...
Page is loading ...
Page is loading ...
Page is loading ...
Page is loading ...
Page is loading ...
Page is loading ...
Page is loading ...
Page is loading ...
Page is loading ...
Page is loading ...
Page is loading ...
Page is loading ...
Page is loading ...
Page is loading ...
Page is loading ...
Page is loading ...
Page is loading ...
Page is loading ...
Page is loading ...
Page is loading ...
Page is loading ...
Page is loading ...
Page is loading ...
Page is loading ...
Page is loading ...
Page is loading ...
Page is loading ...
Page is loading ...
Page is loading ...
Page is loading ...
Page is loading ...
Page is loading ...
Page is loading ...
Page is loading ...
Page is loading ...
Page is loading ...
Page is loading ...
Page is loading ...
Page is loading ...
Page is loading ...
Page is loading ...
Page is loading ...
Page is loading ...
Page is loading ...
Page is loading ...
Page is loading ...
Page is loading ...
Page is loading ...
Page is loading ...
Page is loading ...
Page is loading ...
Page is loading ...
Page is loading ...
Page is loading ...
Page is loading ...
Page is loading ...
Page is loading ...
Page is loading ...
Page is loading ...
Page is loading ...
Page is loading ...
Page is loading ...
Page is loading ...
Page is loading ...
Page is loading ...
Page is loading ...
Page is loading ...
Page is loading ...
Page is loading ...
Page is loading ...
Page is loading ...
Page is loading ...
Page is loading ...
Page is loading ...
Page is loading ...
Page is loading ...
Page is loading ...
Page is loading ...
Page is loading ...
Page is loading ...
Page is loading ...
Page is loading ...
Page is loading ...
Page is loading ...
Page is loading ...
Page is loading ...
Page is loading ...
Page is loading ...
Page is loading ...
Page is loading ...
Page is loading ...
Page is loading ...
Page is loading ...
Page is loading ...
Page is loading ...
Page is loading ...
Page is loading ...
Page is loading ...
Page is loading ...
Page is loading ...
Page is loading ...
Page is loading ...
Page is loading ...
Page is loading ...
Page is loading ...
Page is loading ...
Page is loading ...
Page is loading ...
Page is loading ...
Page is loading ...
Page is loading ...
Page is loading ...
Page is loading ...
Page is loading ...
Page is loading ...
Page is loading ...
Page is loading ...
Page is loading ...
Page is loading ...
-
 1
1
-
 2
2
-
 3
3
-
 4
4
-
 5
5
-
 6
6
-
 7
7
-
 8
8
-
 9
9
-
 10
10
-
 11
11
-
 12
12
-
 13
13
-
 14
14
-
 15
15
-
 16
16
-
 17
17
-
 18
18
-
 19
19
-
 20
20
-
 21
21
-
 22
22
-
 23
23
-
 24
24
-
 25
25
-
 26
26
-
 27
27
-
 28
28
-
 29
29
-
 30
30
-
 31
31
-
 32
32
-
 33
33
-
 34
34
-
 35
35
-
 36
36
-
 37
37
-
 38
38
-
 39
39
-
 40
40
-
 41
41
-
 42
42
-
 43
43
-
 44
44
-
 45
45
-
 46
46
-
 47
47
-
 48
48
-
 49
49
-
 50
50
-
 51
51
-
 52
52
-
 53
53
-
 54
54
-
 55
55
-
 56
56
-
 57
57
-
 58
58
-
 59
59
-
 60
60
-
 61
61
-
 62
62
-
 63
63
-
 64
64
-
 65
65
-
 66
66
-
 67
67
-
 68
68
-
 69
69
-
 70
70
-
 71
71
-
 72
72
-
 73
73
-
 74
74
-
 75
75
-
 76
76
-
 77
77
-
 78
78
-
 79
79
-
 80
80
-
 81
81
-
 82
82
-
 83
83
-
 84
84
-
 85
85
-
 86
86
-
 87
87
-
 88
88
-
 89
89
-
 90
90
-
 91
91
-
 92
92
-
 93
93
-
 94
94
-
 95
95
-
 96
96
-
 97
97
-
 98
98
-
 99
99
-
 100
100
-
 101
101
-
 102
102
-
 103
103
-
 104
104
-
 105
105
-
 106
106
-
 107
107
-
 108
108
-
 109
109
-
 110
110
-
 111
111
-
 112
112
-
 113
113
-
 114
114
-
 115
115
-
 116
116
-
 117
117
-
 118
118
-
 119
119
-
 120
120
-
 121
121
-
 122
122
-
 123
123
-
 124
124
-
 125
125
-
 126
126
-
 127
127
-
 128
128
-
 129
129
-
 130
130
-
 131
131
-
 132
132
-
 133
133
-
 134
134
-
 135
135
-
 136
136
-
 137
137
-
 138
138
-
 139
139
-
 140
140
-
 141
141
-
 142
142
-
 143
143
-
 144
144
-
 145
145
-
 146
146
-
 147
147
-
 148
148
-
 149
149
-
 150
150
-
 151
151
-
 152
152
-
 153
153
-
 154
154
-
 155
155
-
 156
156
-
 157
157
-
 158
158
-
 159
159
-
 160
160
-
 161
161
-
 162
162
-
 163
163
-
 164
164
-
 165
165
-
 166
166
-
 167
167
-
 168
168
-
 169
169
-
 170
170
-
 171
171
-
 172
172
-
 173
173
-
 174
174
-
 175
175
-
 176
176
-
 177
177
-
 178
178
-
 179
179
-
 180
180
-
 181
181
-
 182
182
-
 183
183
-
 184
184
-
 185
185
-
 186
186
-
 187
187
-
 188
188
-
 189
189
-
 190
190
-
 191
191
-
 192
192
-
 193
193
-
 194
194
-
 195
195
-
 196
196
-
 197
197
-
 198
198
-
 199
199
-
 200
200
-
 201
201
-
 202
202
-
 203
203
-
 204
204
-
 205
205
-
 206
206
-
 207
207
-
 208
208
-
 209
209
-
 210
210
-
 211
211
-
 212
212
-
 213
213
-
 214
214
-
 215
215
-
 216
216
-
 217
217
-
 218
218
-
 219
219
-
 220
220
-
 221
221
-
 222
222
-
 223
223
-
 224
224
-
 225
225
-
 226
226
-
 227
227
-
 228
228
-
 229
229
-
 230
230
-
 231
231
-
 232
232
-
 233
233
-
 234
234
-
 235
235
-
 236
236
-
 237
237
-
 238
238
-
 239
239
-
 240
240
-
 241
241
-
 242
242
-
 243
243
-
 244
244
-
 245
245
-
 246
246
-
 247
247
-
 248
248
-
 249
249
-
 250
250
-
 251
251
-
 252
252
-
 253
253
-
 254
254
-
 255
255
-
 256
256
-
 257
257
-
 258
258
-
 259
259
-
 260
260
-
 261
261
-
 262
262
-
 263
263
-
 264
264
-
 265
265
-
 266
266
-
 267
267
-
 268
268
-
 269
269
-
 270
270
-
 271
271
-
 272
272
-
 273
273
-
 274
274
-
 275
275
-
 276
276
-
 277
277
-
 278
278
-
 279
279
-
 280
280
-
 281
281
-
 282
282
-
 283
283
-
 284
284
-
 285
285
-
 286
286
-
 287
287
-
 288
288
-
 289
289
-
 290
290
-
 291
291
-
 292
292
-
 293
293
-
 294
294
-
 295
295
-
 296
296
-
 297
297
-
 298
298
-
 299
299
-
 300
300
-
 301
301
-
 302
302
-
 303
303
-
 304
304
-
 305
305
-
 306
306
-
 307
307
-
 308
308
-
 309
309
-
 310
310
-
 311
311
-
 312
312
-
 313
313
-
 314
314
-
 315
315
-
 316
316
-
 317
317
-
 318
318
-
 319
319
-
 320
320
-
 321
321
-
 322
322
-
 323
323
-
 324
324
-
 325
325
-
 326
326
-
 327
327
-
 328
328
-
 329
329
-
 330
330
-
 331
331
-
 332
332
-
 333
333
-
 334
334
-
 335
335
-
 336
336
-
 337
337
-
 338
338
-
 339
339
-
 340
340
-
 341
341
-
 342
342
-
 343
343
-
 344
344
-
 345
345
-
 346
346
-
 347
347
-
 348
348
-
 349
349
-
 350
350
-
 351
351
-
 352
352
-
 353
353
-
 354
354
-
 355
355
-
 356
356
-
 357
357
-
 358
358
-
 359
359
-
 360
360
-
 361
361
-
 362
362
-
 363
363
-
 364
364
-
 365
365
-
 366
366
-
 367
367
-
 368
368
-
 369
369
-
 370
370
-
 371
371
-
 372
372
-
 373
373
-
 374
374
-
 375
375
-
 376
376
-
 377
377
-
 378
378
-
 379
379
-
 380
380
-
 381
381
-
 382
382
-
 383
383
-
 384
384
-
 385
385
-
 386
386
-
 387
387
-
 388
388
-
 389
389
-
 390
390
-
 391
391
-
 392
392
-
 393
393
-
 394
394
-
 395
395
-
 396
396
-
 397
397
-
 398
398
-
 399
399
-
 400
400
-
 401
401
-
 402
402
-
 403
403
-
 404
404
-
 405
405
-
 406
406
-
 407
407
-
 408
408
-
 409
409
-
 410
410
-
 411
411
-
 412
412
-
 413
413
-
 414
414
-
 415
415
-
 416
416
-
 417
417
-
 418
418
-
 419
419
-
 420
420
-
 421
421
-
 422
422
-
 423
423
-
 424
424
-
 425
425
-
 426
426
-
 427
427
-
 428
428
-
 429
429
-
 430
430
-
 431
431
-
 432
432
-
 433
433


Ask a question and I''ll find the answer in the document
Finding information in a document is now easier with AI
Other documents
-
GMC 1996 Suburban Owner's manual
-
-
-
-
Geo TRACKER 1994 Owner's manual
-
-
-
-
-