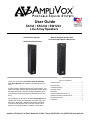
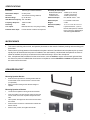
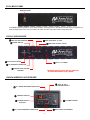
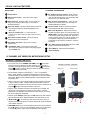
AmpliVox S1234 is a line array speaker system that combines flexibility with functionality, featuring a sealed-type rotational molded enclosure and a rated power output of 50W. It has balanced microphone and line inputs, as well as an unbalanced line input with a Hi-Z Neutrik combo - 1/4in. jack. The speaker also includes a buffered 600-ohm, 1/4in. jack line output (pre-fader), phantom power input for powering electret condenser microphones, and RCA input and output jacks.
AmpliVox S1234 is a line array speaker system that combines flexibility with functionality, featuring a sealed-type rotational molded enclosure and a rated power output of 50W. It has balanced microphone and line inputs, as well as an unbalanced line input with a Hi-Z Neutrik combo - 1/4in. jack. The speaker also includes a buffered 600-ohm, 1/4in. jack line output (pre-fader), phantom power input for powering electret condenser microphones, and RCA input and output jacks.


-
 1
1
-
 2
2
-
 3
3
-
 4
4
-
 5
5
-
 6
6
-
 7
7
-
 8
8


AmpliVox S1234 User manual
- Category
- DJ controllers
- Type
- User manual
AmpliVox S1234 is a line array speaker system that combines flexibility with functionality, featuring a sealed-type rotational molded enclosure and a rated power output of 50W. It has balanced microphone and line inputs, as well as an unbalanced line input with a Hi-Z Neutrik combo - 1/4in. jack. The speaker also includes a buffered 600-ohm, 1/4in. jack line output (pre-fader), phantom power input for powering electret condenser microphones, and RCA input and output jacks.
Ask a question and I''ll find the answer in the document
Finding information in a document is now easier with AI
Related papers
Other documents
-
Pyle PDMIC78 User manual
-
-
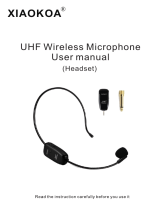 XIAOKOA Wireless Microphone Headset, UHF Wireless Mic Headset and Handheld 2 in 1, 160 ft (50M) Range, Rechargeable for Voice Amplifier, Stage Speakers, Teacher, Tour Guides, Fitness Instructor User manual
-
 AV Amplivox SW725 User manual
-
VocoPro SilentPA-PORTABLE Owner's manual
-
Anchor Seville LP-500 Owner's manual
-
Okayo WT-500T User manual
-
DAP Audio D1535 User manual
-
 Galaxy Audio Any Spot Traveler AS-TV8 User manual
-
Acclaim Lighting ACL7500 User manual


