Page is loading ...


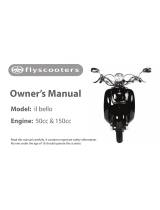
Owner’s Manual
Our scooter presents you with a challenge; a challenge to master a machine,
a challenge to experience adventures, a challenge to be free. Unlike an
automobile, there is no metal cage around you. There is only you and the
road, linked together by a vehicle that responds to your every command like
no other. Your reward is your freedom.
To answer this challenge, and to enjoy the adventures ahead, you should first
become thoroughly familiar with this owners manual. As you read this
manual, you will find information that is preceded by a NOTICE. This
information is intended to help you avoid damages to your scooter, your
body, property of others and the environment.

LIMITED WARRANTY
Shanghai Jialing Vehicle Business Co., Ltd warrants that the products are free, under normal use and
maintenance, from any defects in material and workmanship. If any such defects should be found in
products within applicable warranty period, Jialing shall, at its option, repair or replace the parts as
specified herein.
This warranty shall not apply to:
(a.) Any defects caused or repairs required as a result of abusive operation, negligence, accident,
improper installation (modification) or inappropriate use as outlined in the owner’s manual.
(b.) Any products tampered with, modified, adjusted or repaired by any unauthorized party.
(c.) Damage caused or repairs by a result of the use of unapproved items, for example, oils or tools
not specified or approved by party A, including but not limited inappropriate tools.
(d.) Any additional accessory installed by owner which cause defect of original parts.
(e.) Any cosmetic damage to the surface or exterior that has been defaced or caused by contact.
(f.) Any damage caused by external or environmental conditions such abnormal weather, accident,
earthquake and etc.
(g.) Any product received without appropriate model and frame serial number identification.
(h.) Any service is not furnished in regular shop and not kept the maintenance on schedule.
(i.) Any product used for rental, racing, or demonstration purposes.
Warranty period – under regular use, the valid term of parts warranty list:
(a) Engine parts : one year or 6000 km which arrives first
(b) Chassis parts: one year
(c) Electrical components : one year or 6000 km which arrives first
(d) Plastic parts: 6 months
(e) Consumable parts are not included in this warranty, i.e. battery, oil, rubber, spark plug, belt, air
cleaner, brake pad/lining, chain, bulbs.
ON-ROAD MOTORCYCLE EMISSION CONTROL INFORMATION
THIS VEHICLE MEETS U.S. EPA REGULATION FOR ON-ROAD HIGHWAY MOTORCYCLE. IT IS
CERTIFIED TO 0.3 G/KM HC & 4.4 G/KM CO. CALIFORNIA STANDARDS OF 1.0 G/KM HC & 12
G/KM CO HAVE BEEN MET.
WARNING
ATTEMPTING TO CHANGE OR MODIFY EMISSION CONTROL SYSTEM IS ILLEGAL AND MAY
AGAINST FEDERAL LAW.
NOTES
FOLLOW THE PERIODICAL CHECK & SERVICE SCHEDULE TO MAINTAIN
YOUR VEHICLE IN BEST PERFORMANCE.
EMMISSION CONTROLS WARRANTY COVERAGE
Hammerhead warrants each new scooter that includes as standard equipment a headlight, taillight and
stoplight:

a. is designed, built and equipped so as to conform at the time of initial retail purchase with all
applicable regulations of the United States Environmental Protection Agency (“US EPA”); and
b. is free from defects in material and workmanship which would cause such scooter to fail to conform
with applicable regulations of the US EPA, for a period of five (5) years or 12,000km (7,456 miles) for
models up to 169cc.
c. This warranty time and mileage period shall begin on the date the scooter is delivered to the initial
retail purchaser, or on the date the motorcycle is first placed in service as a demonstrator, rental, lease, or
company motorcycle prior to retail sale.
General Exclusions: Warranty defects shall be remedied during customary business hours at any
authorized Hammerhead motorcycle dealer located within the United States in compliance with the Clean
Air Act and applicable regulations of the US EPA. Any part or parts replaced under this warranty shall
become the property of Hammerhead.
OWNERS OBLIGATIONS: The following obligations must be fulfilled by the owner to maintain the
validity of the Hammerhead Emission Control Systems Warranty:
a. Owner must deliver the motorcycle to an authorized Hammerhead motorcycle dealer or equally
qualified service facility for inspection, maintenance services and adjustments according to the Periodic
Maintenance chart provided as part of or supplement to the owners guide. Optionally, the Owner may
perform this
maintenance only if it is within the scope of the Owner’s technical and practical ability, keeping in mind
some maintenance operations may require special tools or technical expertise beyond the scope of the
average Owner. In any event, the inspection, maintenance and adjustments are to be performed at the
owner’s expense.
b. Owner must present a copy of the proof of initial retail purchase date, issued at the time of purchase
to an authorized Hammerhead motorcycle dealer at the time warranty repairs are performed on the
motorcycle. You may also be required to show that you have performed the required maintenance which is
related to
the alleged defect, so you should have detailed receipts indicating that the required periodic maintenance
has been performed in accordance with the Periodic Maintenance chart in your owner’s guide.
LIMITATIONS: This Emission Control Systems Warranty shall not cover any of the following:
a. Repair or replacement required as a result of
i. accident,
ii. misuse or neglect,
iii. lack of reasonable and proper maintenance,
iv. repairs improperly performed or replacements improperly installed,
v. use of replacement parts or accessories not conforming to Hammerhead specifications which
adversely affect performance and/or durability,
vi. alterations or modifications not recommended or approved in writing by Hammerhead and/or
vii. Used in competitive racing or related events.
b. Replacement of parts and other services and adjustments required for routine maintenance.

c. Any motorcycle on which odometer mileage has been changed so that the actual mileage cannot be
determined.
LIMITED LIABILITY: The liability of Hammerhead under this Emission Control Systems Warranty is
limited solely to the remedying of defects in materials or workmanship by any authorized Hammerhead
motorcycle dealer at its place of business during customary business hours. Please refer to Hammerheads
website: http://www.hammerheadoffroad.com/onRoadModels.html
This warranty does not cover inconvenience or loss of use of the motorcycle, or transportation of the
motorcycle to or from the Hammerhead dealer.
HAMMERHEAD SHALL NOT BE LIABLE FOR ANY OTHER EXPENSE, LOSS OR DAMAGE,
WHETHER DIRECT, INCIDENTAL, CONSEQUENTIAL OR EXEMPLARY ARISING IN
CONNECTION WITH THE SALE OR USE OF OR INABILITY TO USE THE HAMMERHEAD
MOTORCYCLE FOR ANY PURPOSE. SOME STATES DO NOT ALLOW THE EXCLUSION OR
LIMITATION OF ANY INCIDENTAL OR CONSEQUENTIAL DAMAGES, SO THE ABOVE
LIMITATION OR EXCLUSION MAY NOT APPLY TO YOU.
CALIFORNIA EMMISSION CONTROLS WARRANTY COVERAGE
In the State of California only, emission related warranted parts are specifically defined by the state’s
Emission Warranty Parts List. These warranted parts are: intake manifold; fuel tank; fuel injection system;
spark advance mechanism; crankcase breather; air cutoff valves; fuel tank cap for evaporative emission
controlled vehicles; oil filler cap; pressure control valve; fuel/vapor separator; canister; igniters; breaker
governors; ignition coils; ignition wires; and spark plugs if failure occurs prior to the first scheduled
replacement; and hoses, clamps fittings and tubing used directly in these parts. Since emission related
parts may vary from model to model, certain models may not contain all of these parts and certain models
may contain functionally equivalent parts.
MOTORCYCLE NOISE EMISSION CONTROL INFORMATION
THIS La Vita 150 MEETS EPA NOISE EMISSION REQUIREMENTS OF 80 dB(A) AT 4000 RPM BY
THE FEDERAL TEST PROCEDURE. MODIFICATIONS WHICH CAUSE THIS MOTORCYCLE TO
EXCEED FEDERAL NOISE STANDARDS ARE PROHIBITED BY FEDERAL LAW.
This product is imported and distributed by:
Geason Powersports,LLC dba Hammerhead
1200 Lakeside Parkway, Suite 325
Flower Mound ,Texas 75028
For information contact: mail@hammerheadoffroad.com
214-513-1700 ext. 230

Contents
Owner’s Manual ...................................................................................................................................... 2
IMPORTANT INFORMATION ..................................................................................................... 7
SAFETY INFORMATION ............................................................................................................. 8
Descriptions .................................................................................................................................... 9
Instrument Panel ........................................................................................................................... 10
Instrument Control ........................................................................................................................ 11
Handlebar Switches ....................................................................................................................... 12
Fuel Tank Cap ............................................................................................................................... 13
Seat Lock ...................................................................................................................................... 13
Brake System ................................................................................................................................ 14
Side Stand Kill Switch .................................................................................................................. 15
Pre-Operation Check ..................................................................................................................... 16
OPERATION ................................................................................................................................ 21
Engine Break-In Period ................................................................................................................. 23
Periodic Maintenance and Minor Repair ...................................................................................... 24
Periodic Maintenance Chart .................................................................................................. 25
Engine Oil ............................................................................................................................. 26
Gear Oil Replacement ........................................................................................................... 27
Spark Plug Inspection ........................................................................................................... 28
Brake Lever Free Play Adjustment ....................................................................................... 29
Inspection of Brake Fluid Level ............................................................................................ 29
Brake Fluid Replacement ...................................................................................................... 30
Brake Lever Lubrication ....................................................................................................... 30
Center and Side Stand Lubrication ........................................................................................ 30
Front Fork Inspection ............................................................................................................ 31
Steering Inspection ................................................................................................................ 32
Wheel Bearings ..................................................................................................................... 32
Battery ................................................................................................................................... 33
Major Technical Parameters .................................................................................................. 34
Maintenance Records ............................................................................................................ 35
LIMITED WARRANTY ............................................................................................................... 36

IMPORTANT INFORMATION
1. Operation and Passenger
This scooter is designed to carry one operator and one passenger. Never exceeds the
manufacturer’s recommended maximum weight capacity as shown on the loading label.
2. On-Road Use Only
This scooter is designed to be used only on paved roads.
3. Read this Owner’s Manual Carefully
Pay special attention to safety messages that appear throughout this manual. This manual should
be considered a permanent part of your scooter and should remain with this scooter when resold
to subsequent owners.

SAFETY INFORMATION
Important Safety Information
Understanding the challenges that you will face when operating a scooter will greatly improve your
safety on the roads. There are many things you can do to protect yourself when riding. You will
find many helpful recommendations throughout this manual. Following are a few safety items we
consider to be the most important.
Always Wear Protective Gear
It is a proven fact; helmets significantly reduce the number and severity of head injuries. Always
wear a helmet, eye protection, sturdy boots, gloves and other protective gear when riding.
Make Yourself Visible
Some drivers do not see scooters because they do not look for them. To make yourself more visible:
- Wear bright reflective clothing while riding
- Position yourself in the traffic lane so other drivers can see you
- Signal before turning or changing lanes.
- Use your horn to alert others on road.
- Always use headlights while riding, even during daytime.
Ride within your limit
Pushing the limits is a common cause of scooter accidents. Never ride beyond your personal abilities
or faster than conditions warrant. Remember that alcohol, drugs, fatigue and inattention can
significantly reduce your ability to make good judgments and ride safely.
Keep your scooter in Safe condition
For safe riding, it is important to inspect your scooter before every ride and perform recommended
maintenance in a timely manner.
Loading limit Guidelines
Your scooter has been designed to carry you and one passenger. When you carry a passenger, you
may notice some changes in acceleration and braking. However, as long as you keep your scooter
well maintained with good brakes, you can safely carry loads within manufacturers recommended
weight limit. Exceeding the weight limit or carrying an unbalanced load can seriously affect your
scooter’s handling, braking and stability. Improper modifications and poor maintenance can also
reduce your safety.

Descriptions
1. Left and Right rear Mirror
2. Left and Right Brake
3. Front storage compartment (option)
4. Speedometer/ Digital Gauge
5. Main Switch
6. Battery
7. Air Cleaner
8. Seat Lock
9. Rear Light Assembly
10. Left and Right Rear turn Lights
11. Fuel Tank
12. Center Stand
13. Kick Start
14. Side Stand
15. Muffler
16. Left and Right Turn Lights
17. Head Lights
18. Rear Reflector

Instrument Panel
Speedometer
Riding speed is indicated by KM/H and MPH.
Odometer
The total riding distance is in KM and Miles.
The black figures in black background indicate total miles traveled.
Indicating lamp or turning light
It flashes when turning light is in use.
Fuel Gauge
Fuel Gauge indicates the remaining fuel in the fuel tank (the gauge does not work when main switch is
in the “OFF” position). The gauge moves from “F”(full) to “E” (empty) as fuel decreases in the fuel
tank. Fill the tank with 90 Octane or higher gasoline when the needle is approaching the “E”
position. There is no reserve tank.
Indicating Lamp of High beam
It indicates high beam is in use.
Note: apply low beam to avoid obstructing the view of oncoming drivers and drivers ahead.
1. Speedometer
2. Odometer
3. Left turn signal indicator
4. Right turn signal indicator
5. High beam indicator
6. Fault signal indicator
7. Battery Gauge
8. Fuel Gauge

Instrument Control
Main Switch NOTE:
- Do not leave the main switch in “ON”
position for an extended period of time when
the engine is stopped. The battery may
drain itself empty.
- Lock the steering and remove the key after
park to avoid theft.
“ON” Position:
Electric Circuits are switched on. The engine can now be started. The key can not be removed in
this position.
“OFF” Position:
All electrical circuits are switched off. The engine stops. The key can be removed in this position.
“LOCK” Position:
The steering is locked when in this position. The key can be removed.
Steering Lock
Turn the handle bar fully to the left to lock the steering to prevent theft. Push the key in when it is in
“OFF” position and while pushing the key in, turn the switch to “LOCK” position to lock the steering.
Pull the key out once you are done.

Handlebar Switches
1. Dimmer Switch
When light switch is in the “ON” position
Push in to turn on the high beam.
Push out to turn on the low beam
2. Turning Light Switch
To use the turning light while making a turn or changing traffic lane, press the directional switch,
press toward the left arrow to turn on the left turn signal, press toward the right arrow to turn on
the right turn signal. The turn signal doesn’t go off automatically, once you completed your turn,
push the switch to the middle position to turn off the signal lights.
3. Horn button
Press the horn button to sound the horn.
4. Light Switch
Push up to turn all on the headlights.
Push toward the bottom to turn off all lights.
5. Starter Switch
Push this button to use the electric start function. Brake must be engaged and side stand up to
complete circuit.
6. Engine turn “ON/OFF” Switch
Push toward the top to shut the engine off.
Push toward the bottom to set the engine to ready to start position. You will either use the
electric start button or use the kick start to start the engine.
NOTE: When you use the electric start button to start the engine, always release the starter switch
immediately after the engine has started. Do not push the starter switch again once the engine is
running. NEVER exceed 4 seconds when using starter switch each time or it will drain down
the scooter battery.

Fuel Tank Cap
Follow the steps below to OPEN and CLOSE the fuel tank cap.
To Open
Insert the key into the key slot; turn clockwise to open the access panel. Give fuel cap 1/4 of full
turn, and then pull out the fuel cap.
To Close
Align the keyways of your fuel cap with the tank, press the fuel cap down and then turn counter
clockwise 1/4 turn, remove the key to close the fuel cap.
NOTE: The key cannot be removed if the fuel cap is not locked properly.
Seat Lock
To open the seat, insert the key into the lock and turn as shown below. Return the seat to its original
position and press down to lock up. Pull up the seat slightly to ensure it is fully locked.


Pre-Operation Check
Pre-operation checks should be made each time before using the scooter. Such an inspection can be
accomplished in a very short time. The added safety it insures is worth more than the time involved.
Before using this scooter, check the following points:
NO. ITEM ROUTINE PAGE(S
)
1 Front Brake Check operation, free play, fluid level and fluid
leakage. Top off with DOT3 brake fluid if
necessary.
2 Rear Brake Check operation, free play, fluid level and fluid
leakage. Top off with DOT3 brake fluid if
necessary.
3 Throttle Check for smooth operation. Adjust if necessary.
4 Engine Oil Check engine oil level, add oil if necessary.
5 Tire/Wheels Check tire pressure, wear and damage.22/29 psi
6 Fitting/Fasteners Check all chassis fitting and fasteners, tighten or
adjust if necessary.
7 Lights/Signals/Switches Check operation and make sure they are all in
working condition.
8 Fuel Check fuel level, add fuel if necessary.

Pre-Operation Checks – Brakes
Brake Levers
Check for correct free play in the brake levers and correct them if necessary. Make sure the brakes
are working properly by checking at low speed shortly after starting out.
The free play range, it should be within 10-20mm.
NOTE: A soft, spongy feel in the brake lever indicates a failure in the brake system. Do not
operation this scooter until the failure in the brake system has been corrected. Ask an authorized
dealer for immediate repairs if brake system is not working.
Brake Fluid 1. Minimum Level
Check the brake fluid level, Add fluid if necessary. The recommended brake fluid is DOT3.
Brake fluid Leakage.
Apply the brake a few times; check to see if any brake fluid leaks out from the pipe joints or the
master cylinder.
NOTE: Brake fluid may deteriorate painted surfaces or plastic parts. If spilled, clean it up quickly.
If brake fluid leakage if found, ask an authorized dealer for immediate repairs. Such leakage can
jeopardize safe riding conditions.

Pre-Operation Check – Throttle Grip
Turn the throttle grip and check for free play to see if it operates properly. Make sure the grip returns
to the original position by the spring force when released. Ask your authorized dealer to make any
necessary adjustments.
Pre-Operation Check – Engine Oil
1. Maximum Level.
2. Minimum Level.
Pull the dipstick out of the engine side to check for the engine oil level currently in the engine. Make
sure the engine oil level is within the specified level range. Fill with four stroke engine oil if
necessary.
Recommended Engine Oil
Four stroke engine oil: SAE 15W 40 SF.

Pre-Operation Check – Tires
To ensure the maximum performance, longer durability and safe operation, always check and adjust
the tire pressure before operating your scooter. 22 psi front, 29 psi rear, add 5 psi to rear with load.
NOTE:
Tire pressure should be checked and adjusted when tire temperature equals the ambient air
temperature. Tire pressure must be adjusted according to the total weight of cargo, rider, passenger,
accessories, and vehicle travel speed. Refer to the tire side walls for proper inflation pressure
information. Make sure the total weight of the cargo, rider and passenger does not exceed the
maximum load limit of your scooter. Operating an overloaded scooter could cause the tire to rupture,
accidents and injuries.
Proper loading affects several characteristics of your scooter, such as handling, braking, acceleration,
and safety. Do not carry loosely packed items that can shift during travel. Securely pack your
heaviest items close to the center of your scooter and distribute the weight evenly from side to side.
Properly adjust the suspension to your load and check the condition and pressure of your tires.
Tire Inspection
Always check the tires before operating your scooter. Contact an authorized dealer if the center tread
depth reaches the limit as shown below. If the tire has a nail or glass fragments in it or if the sidewall
is cracked, have the tire replaced immediately.
Minimum Tire Tread Depth:
FRONT: 1.5 mm
Rear: 2.0 mm

Pre-Operation Check – Fittings and Fasteners
Always check the tightness of chassis fittings and fasteners before every ride. Take your scooter to
an authorized dealer to correct all fittings and fasteners to proper torque if needed.
Pre-Operation Check – Head Lights, Signal Lights and Switches
Check all the headlight, signal lights and switches to ensure they are working properly. Check the
operation of the handle bar switches and main switch to make sure all the buttons are operating
correctly.
Pre-Operation Check – Fuel
Recommended fuel is 90 octane or higher, UNLEADED gasoline only. The fuel tank capacity is 1.5
Gallons.
NOTE: Do not fill the fuel tank above the bottom of the filler tube as shown below. Fuel tank may
overflow when the fuel heats up and expands.
Always wipe off over spills immediately with a dry and clean soft cloth. Fuel may deteriorate
painted surfaces or plastic parts.
/