Kucht KRH4821A Installation guide

Type
Installation guide

This manual is also suitable for

WALL MOUNTED HOOD
www.kucht.com
APPLICABLE MODEL: KRH3010A , KRH3610A, KRH4810A, KRH3011A, KRH3611A.
INSTALLATION GUIDE AND USER MANUAL
BE A PRO IN YOUR KITCHEN
FOR MORE DETAILS AND INFORMATION, PLEASE VISIT OUR WEBSITE WWW.KUCHT.COM
INSTALLATION GUIDE AND USER MANUAL
USE, CARE, AND INSTALLTION GUIDE
Please read all manual carefully before installing and operating this appliance.
CONTENTS
1. Product introduction
2. Installation
3. Technical parameters
4. Maintenance
5. Cautions
Model KRH3010A – 30” Wall Mounted Hood
Model KRH3610A – 36” Wall Mounted Hood
Model KRH4810A – 48” Wall Mounted Hood
Model KRH3011A – 30” Wall Mounted Hood
Model KRH3611A – 36” Wall Mounted Hood
FOR MORE DETAILS AND INFORMATION, PLEASE VISIT OUR WEBSITE WWW.KUCHT.COM
INSTALLATION GUIDE AND USER MANUAL
1. Product introduction
Thank you very much for choosing our range hood. KUCHT has developed a series of range hoods based on assimi-
lating the advantages of high volume of air, lower noise and elegant appearance.
1. Product introduction
Thank you very much for choosing our range hood. KUCHT has developed a series of range hoods based on assimi-
lating the advantages of high volume of air, lower noise and elegant appearance.
2. Installation and Operation
1) Position the range hood on the center of cooking stove wall. For best results, the mounting height of the range
hood should be 25”-30” (65-75cm) above the top of the range. Mark the position of the holes, which need to be drilled
to mount the range hood.
Product Configuration
1
Exhaust pipe
4
One-way valve
7
Lamps
2
Decorative cover
5
Aluminum filters
3
Machine body
6
Bracket for decorative tube
FOR MORE DETAILS AND INFORMATION, PLEASE VISIT OUR WEBSITE WWW.KUCHT.COM
INSTALLATION GUIDE AND USER MANUAL
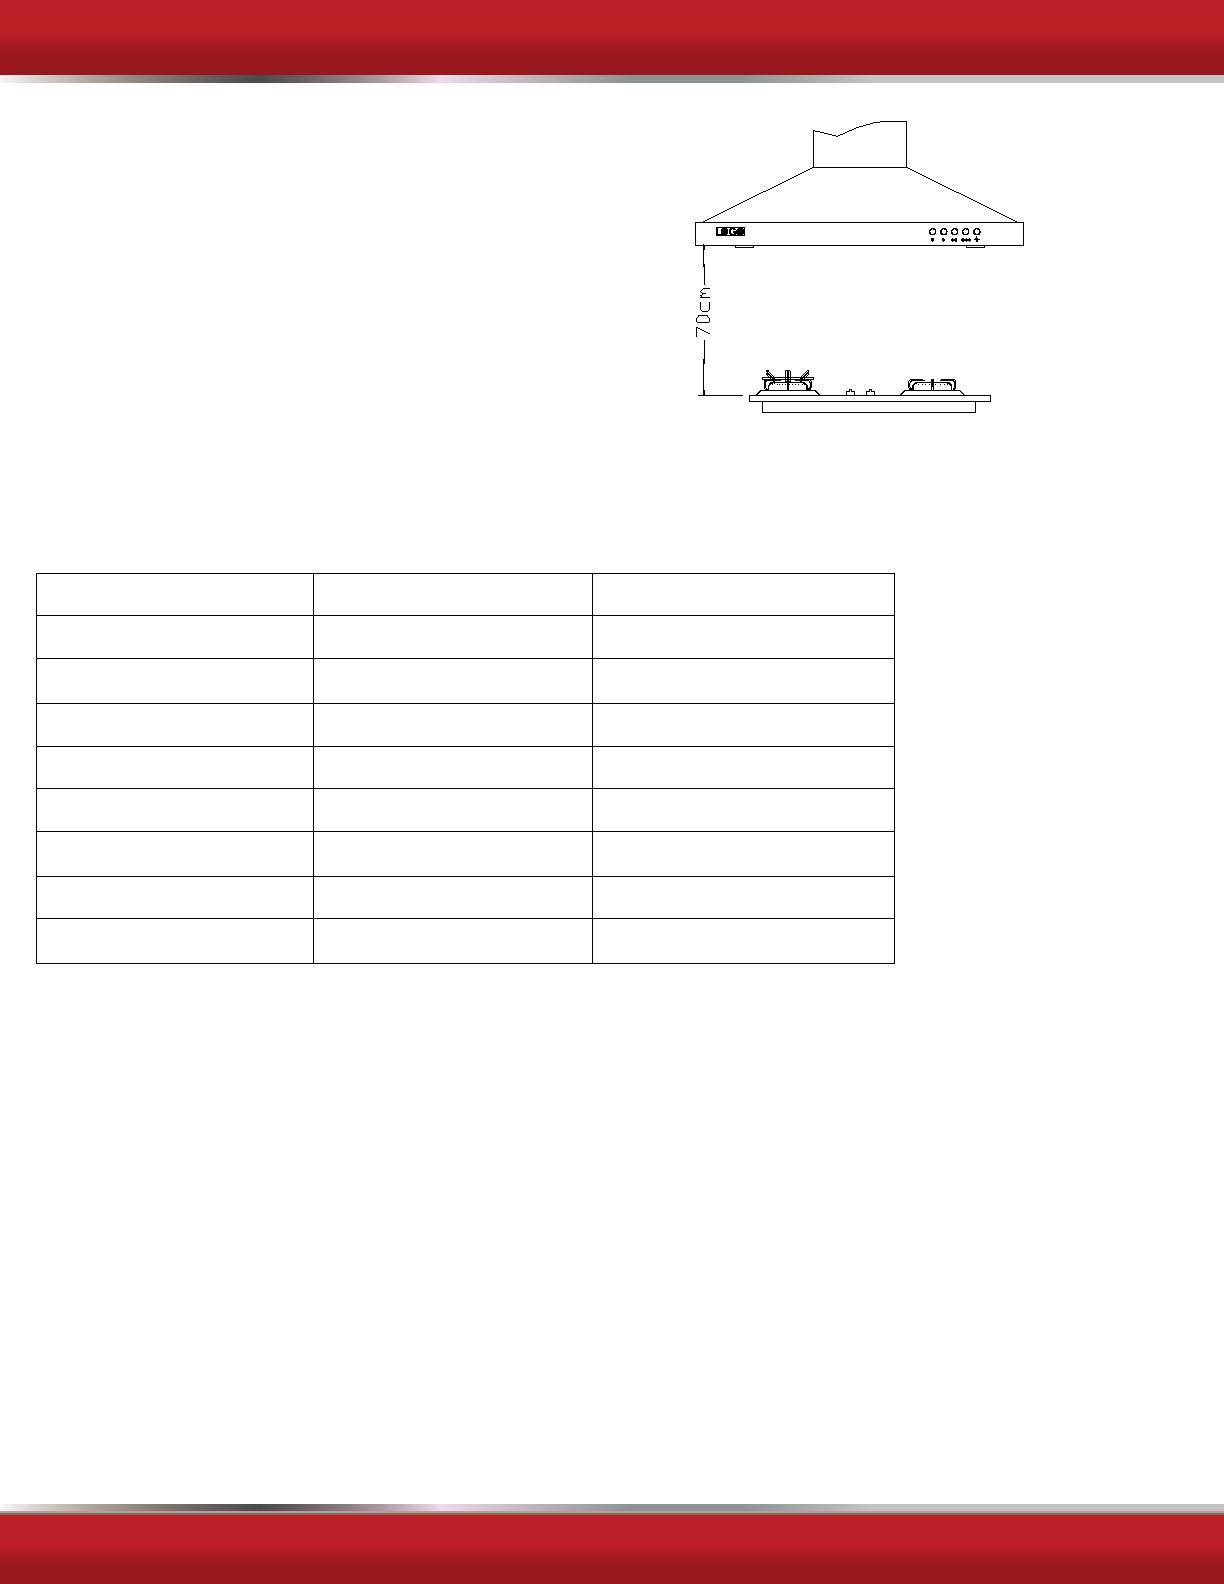
2) According to marks, drill two holes appropriate for heavy duty
wall anchors and screws not included. Mount the range hood
on the wall with the two screws and anchors and tighten.
3) Install the one-way valve on top of the range hood and
assemble the exhaust pipe and decorative cover.
4) Affix the decorative cover with two M4 tapping screws on the
hood body.
5) Make sure all switches are off and then insert the electrical plug into an outlet.
3. Technical parameters
4. Maintenance
1) Make sure to pull out the plug and cut off the power before maintenance to ensure your safety.
2) Clean the inside and outside of the range hood with warm water containing neutral detergent, then dry them with a
piece of dry cloth. Do not scrub them with rough materials such as cleansing ball to avoid damages to the surface.
Put on gloves to avoid injuring your hands when cleaning the inside. The cleaning can be done once half a month to
a month.
3) Do not crush the wind wheel when cleaning the inside of the wind track of the wind wheel to avoid the deformation
of the wind wheel. Otherwise the movement will be increased, which will result in more noise and influence the effect
of absorbing the oil-smoke.
4) Frequent cleaning of the filter shall be done. First press the spring on the edge of the filter to dismantle the filter,
dip it into strong detergent and brush its surface with soft brush; then hold the filter with both hands and move it up
and down in the detergent, clean it with clean water, after which dry it by airing and install it as what it is as before.
The cleaning can be done once a week. Do not clean it with combustible detergent such as banana oil and gasoline.
ITEM unit parameter
Rated Voltage V 110
Rated frequency Hz 60
Motor input power W 198
Lamp power W 2X20
Air volume m3/min 9.5~15
Air pressure Pa >160
Noise level dB(A) <70
Air output diameter mm 150
FOR MORE DETAILS AND INFORMATION, PLEASE VISIT OUR WEBSITE WWW.KUCHT.COM
INSTALLATION GUIDE AND USER MANUAL
5. Cautions
1) Do not attempt to install this appliance yourself without appropriate electrical and technical background.
2) When maintaining this range hood or changing a light bulb, please be sure that all power switches are in the off
position.
3) Do not let the detergent flow into the electric appliance box and the switches when cleaning the inside of the range
hood to avoid leaking electricity.
4) Do not flambé under the range hood.
5) There is a fire risk if cleaning is not carried out according to the instructions.
6) Cut off all the circuits with power before approaching the connection ends.
7) This appliance is not intended for use by young children and infirm persons unless they have been adequately
supervised by a responsible person to ensure that they can use the appliance safely
8) Young children should be supervised to ensure that they do not play with the
9) There should be adequate ventilation of the room when the range hood is used at the same time as appliance
burning gas or other fuels.
10) The air must not be discharged into a flue that is used for exhausting fumes from appliances burning gas and
other fuels.
12) The minimum distance between the supporting surface for the cooking vessels on the hob and the lowest part of
the range hood, when the range hood is located above a gas appliance. This distance should be at least 25”. If the
instructions for installation for the gas hob specify a greater distance this must be considered.
13) Regulations concerning the discharge of air must be fulfilled.
14) Warning If the supply cord is damaged, it must be replaced by the manufacturer, its service agent or a similarly
qualified person to avoid a hazard.
FOR MORE DETAILS AND INFORMATION, PLEASE VISIT OUR WEBSITE WWW.KUCHT.COM
WE TRANSFORM A SIMPLE KITCHEN INTO A PRO ONE.
THIS IS WHY WE CARE ABOUT MAKING VERY HIGH PERFORMANCE
RANGES AND HOODS, TO MAKE YOU FEEL LIKE A PRO AND STYLISH COOKER.
DESIGN: LONDON DC - WWW.LONDON-DC.COM
  • Page 1 1
  • Page 2 2
  • Page 3 3
  • Page 4 4
  • Page 5 5
  • Page 6 6

Kucht KRH4821A Installation guide

Type
Installation guide
This manual is also suitable for

Ask a question and I''ll find the answer in the document

Finding information in a document is now easier with AI