Page is loading ...

80-2900-03
Rev. 8.5
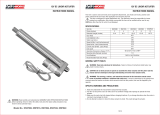
INSTRUCTION MANUAL
MODEL GROUP 29
R
ELECTRIC ACTUATORS FOR INDUSTRIAL PROCESS CONTROL
For actuators equipped with the
DCM-3 (built after July 2016)

2
80-2900-03, Rev. 8.5
This manual contains the information needed
to install, operate, and maintain Beck Model
Group 29 Electric Actuators, manufactured
by Harold Beck & Sons, Inc. of Newtown,
Pennsylvania.
The Group 29 linear actuator is a powerful control
package designed to provide precise position
control of valves and other devices requiring up
to 6,100 lb (27 134 N) of thrust.
NOTICE: This manual includes information that will
make installation simple, ecient, and trouble free.
Please read and understand the appropriate sections
in this manual before attempting to install or operate
your actuator.
INTRODUCTION

3
80-2900-03, Rev. 8.5
Product Description .................................................................................................................................... 4
General Specications ............................................................................................................................. 6
Outline Dimension Drawings ...................................................................................................................... 8
Installation .................................................................................................................................................. 10
General .................................................................................................................................................. 10
Wiring ..................................................................................................................................................... 12
Start-up .................................................................................................................................................. 16
Conguration & Setup .............................................................................................................................. 17
Switches ................................................................................................................................................. 18
Digital Control Module (DCM‑3) ............................................................................................................... 20
HART® Interface ................................................................................................................................... 21
Conguration & Setup .................................................................................................................. 21
Calibration ...................................................................................................................................... 26
Communication ............................................................................................................................. 29
Alarm Messages ............................................................................................................................ 39
Local Interface ...................................................................................................................................... 42
Conguration & Setup .................................................................................................................. 42
Calibration Demand ....................................................................................................................... 45
Calibration Position ........................................................................................................................ 47
Calibration Direction Change ......................................................................................................... 48
Serial Interface ..................................................................................................................................... 49
Conguration & Setup .................................................................................................................. 49
Commands ..................................................................................................................................... 51
Maintenance .............................................................................................................................................. 57
Services ..................................................................................................................................................... 59
TABLE OF CONTENTS

4
80-2900-03, Rev. 8.5
The Beck Group 29 linear valve actuator is
engineered to provide precise, reliable control of
all types of modulating globe valves. The Group 29
is available with microprocessor-based electronics
to support advanced control features and exibility.
The Group 29 is also available in a model for open/
close operation through direct AC control.
Ideally suited for process control applications in
even the harshest environments, the Group 29 is
easily mounted on most valves and handles valve
thrust requirements up to 6,100 lb (27 134 N).
The Beck control motor is specially designed
to work with the actuator’s on-board control
electronics. The motor will not coast or over-shoot,
and will not overheat, even under continuous
modulation. Beck motors have grease-sealed
bearings and require no maintenance.
A ball screw design, along with an advanced
actuator control algorithm and Beck motor, ensures
repeatable modulation as precise as 0.1% of span.
An easy to turn, spoke-free Handwheel is
incorporated into the design of Group 29 actuators
to allow manual operation during installation or
power outages. The Handwheel can be used
to easily operate valves even under full load
conditions.
Valves may also be operated at their individual
locations with a built-in electric Handswitch.
Beck's Digital Control Module (DCM-3)
provides precise actuator control in response to a
modulating Demand input signal. It also provides
intelligent calibration, easy setup changes, and
diagnostic information. A HART® communications
interface allows remote access of all features
and information. A local interface provides quick
pushbutton setup and diagnostics without the need
for a handheld or remote device. A serial interface
also allows for actuator conguration changes,
actuator information reporting and to assist in
troubleshooting.
Beck's CPS-4 Contactless Position Sensor
provides accurate position measurement in
demanding environmental conditions, with
no contacting or wiping surfaces to wear or
intermittently lose contact.
All Beck electric actuators have individual
weatherproof enclosures to protect the main
components. Group 29 actuators are also
available for use in hazardous locations.
PRODUCT DESCRIPTION
MODEL GROUP 29 COMPONENTS
Adjustable Mechanical Stop
Over-travel limit switches
Digital Control
Module (DCM-3)
Wiring Terminals
Handswitch
Motor Housing
Handwheel
Non-dedicated
Switches
Posion Sensing
Device (CPS-4) &
Control End
Assembly

5
80-2900-03, Rev. 8.5
HAZARDOUS LOCATION
ACTUATORS FOR GAS AND
DUST AREA CLASSIFICATIONS
(OPTIONAL)
Group 29 actuators are available approved for
the following Protection Methods and Protection
Concepts:
CSA (USA/Canada)
Class I, Division 1 & 2, Groups C & D T4A
Class II, Division 1, Groups E, F & G T4A
Class II, Division 2, Groups F & G T4A
Class III, Division 1 & 2 T4A
Temperature codes based on an ambient
temperature of –40º to 40°C per NEC 500
Type 4X; IP66/IP68 (3 m/48 hrs.)
CE‑ATEX (Europe)
CE II 3 G Ex nCc IIB 140ºC (T3)
CE II 3 D Ex tc IIIC T140ºC
Tamb = -40°C to 60°C; IP66/IP68 (3 m/48 hrs.)
per ATEX Directive 94/9/EC
CONTROL & OPERATING
FEATURES
In addition to actuator control, the
microprocessor-based electronics provide a host
of features and functions. Some of the advanced
features include:
• Compatible with common asset management
systems.
• Two-way digital communications via HART
protocol or DB9 serial connection.
• Simplied calibration without any mechanical
or electrical adjustment.
• Actuator diagnostics and operating statistics
available locally or remotely.
• Easy conguration, setup and documentation
of actuator operating parameters.
• Live thrust measurement and protection
against excessive thrust.
• Stall protection with congurable stall time
setting.
• The choice of linear, square or 20-segment
custom input signal characterization.
• All operating parameters including internal
temperature can be displayed via HART.
• Congurable action on loss of demand input
signal.
• Read/write parameters including tag and
descriptor information, last calibration date,
and model and serial numbers are saved on
board.
• Ability to restore all actuator calibration and
setup information to the factory “as-built”
conguration.

6
80-2900-03, Rev. 8.5
Actuator Power 120 V ac single-phase, 50 or 60 Hz
240 V ac single-phase, 50 or 60 Hz
Allowable Tolerance +10% / –15%
Max. Current and Power 29-100 -- .65A, 78W @ 120 V ac; .33A, 78W @ 240 V ac
29-250 -- 1.4A, 170W @ 120 V ac; .70A, 170W @ 240 V ac
29-600 -- 3.3A, 400W @ 120 V ac; 1.65A, 400W @ 240 V ac
Operating Conditions -40° to 185°F (-40° to 85°C)
0 to 100% relative humidity, non-condensing
Actuators designed for hazardous locations are available.
Communication Interface* HART protocol, local pushbutton/LEDs and DB9 Serial commands.
Demand Input Signal Range 4–20 mA, 1–5 V dc
(DCM-3)*
Minimum Step* 0.1% typical
Linearity* ±1% of span, max. independent linearity
Hysteresis* 0.25% of span at any point
Demand Input Signal Linear (actuator output shaft moves proportionally to input signal).
Characterization* Square (actuator output shaft moves proportionally to square of input
signal).
Twenty segment custom input signal characterization.
Position Feedback Signal* 4–20 mA or 1–5 V dc
Isolation* Demand input and position Feedback signals are isolated from ground
and the ac power line. Signal buering provides 24 V dc isolation between
the Demand and Feedback signals.
Output Thrust and Timing
Model No.* Thrust (lbs.) [N]
Stroke Timing**
(sec./in.)[sec./cm]
Minimum Stroke
Length (in.)[mm]
Maximum Stroke
Length (in.)[mm]
29-10_ 1000 [4 450] 10 [3.9] 0.50 [13] 2 [51]
29-25_ 1700 [7 565] 10 [3.9] 0.50 [13] 2 [51]
29-25_ 2100 [9 345] 12.4 [4.9] 0.50 [13] 2 [51]
29-25_ 2700 [12 015] 15 [5.9] 0.50 [13] 2 [51]
29-60_ 2100 [9 345] 9.4 [3.7] 0.75 [19] 4 [102]
29-60_ 2600 [11 570] 11.6 [4.6] 0.75 [19] 4 [102]
29-60_ 3200 [14 240] 14 [5.5] 0.75 [19] 4 [102]
29-60_ 4100 [18 245] 9.4 [3.7] 0.75 [19] 4 [102]
29-60_ 5000 [22 250] 11.6 [4.6] 0.75 [19] 4 [102]
29-60_ 6100 [27 145] 14 [5.5] 0.75 [19] 4 [102]
* "X" designates control options 3 or 9.
** Timings based on 60Hz power; 50Hz timing = 1.2 x 60Hz timing.
GENERAL SPECIFICATIONS

7
80-2900-03, Rev. 8.5
Action on Loss of Power Output shaft stays in last position.
Action on Loss of Input Stays in place or runs to any preset position (congurable).
Signal (Power on)*
Excessive thrust Protection If the output thrust of the actuator exceeds 150% of the actuator rating,
the
(Optional)* motor will shut o (confgurable from 25% to 150%).
Stall Protection* If the motor tries to run in one direction for more than 300 seconds
(congurable from 30 to 300 seconds), the motor will shut o.
Over-travel Limit Two Form C (Retract and Extend) provide over-travel protection.
Switches
Auxiliary Switches Two Form C and two Form A, rated for 1 A, 250 V ac.
(Field adjustable)
Customer Wiring Terminals accommodate up to 12 AWG (3.31 mm2).
Handswitch Permits local electrical operation, independent of Demand Input signal.
Handwheel Provides manual operation without electrical power.
Motor Does not coast or overshoot and will not overheat, even under
continuous modulation.
Gear Train High eciency, precision-cut, heat-treated alloy steel and ductile iron
spur gears.
Mechanical Stops One xed and one adjustable mechanical stop prevent over-travel during
automatic or manual operation.
Enclosure Precision-machined aluminum alloy casting, painted with corrosion-
resistant polyurethane paint, provides a rugged, dust-tight, weatherproof
enclosure. IP66/IP68 (3 m/48 hrs.); Type 4X¹ enclosure. Actuators
designed for hazardous locations are also available.
»Internal water damage is not covered by warranty.
¹Contact Beck at 215-968-4600 for model specic ratings.
Mounting Orientation Any orientation—no limitations.
Standards** CSA listed
CE compliant
* Applicable to Option 9 model only.
** NOTE: For specic standards, please call Beck for more information at 215-968-4600.

8
80-2900-03, Rev. 8.5
MODEL 29‑100
MODEL 29‑250
OUTLINE DIMENSION DRAWINGS
ALLOW 6 1/4” [159] MIN. FOR
COVER REMOVAL
5 3/16”
[132]
16 9/32”
[414]
VALVE BONNET
MATCH LINE
VALVE STEM
COUPLING
3/4-16 UNF THREAD
x 11/16” [17] DEEP
(ADAPTOR BUSHINGS
FOR SMALLER
THREADS)
8 3/4”
[222]
6 5/32”
[156]
*
4 7/8”
[124]
EXTENDED
DIMENSION
*
5 3/16”
[132]
9 1/16”
[230]
COVER
WIRING TERMINALS
POSITION SENSING DEVICE
DIGITAL CONTROL MODULE
STROKE ADJUSTMENT
HANDSWITCH
NAMEPLATE
#10-32 EXTERNAL
GROUND SCREW
5/8”
[16]
8 13/32”
[214]
2 7/8”
[73]
1” N.P.T. CONDUIT
POWER CONNECTION
1” N.P.T.
CONDUIT
SIGNAL
CONNECTION
HANDWHEEL
HANDWHEEL
ALLOW 6 3/4” [171] MIN. FOR
COVER REMOVAL
6 1/8”
[156]
18 3/4”
[476]
INTEGRAL
TIGHTSEATER
VALVE STEM COUPLING
3/4”-16 UNF THREAD x 11/16” [17]
DEEP (ADAPTOR BUSHINGS
FOR SMALLER THREADS)
7 1/8”
[181]
8 3/4”
[222]
VALVE BONNET
MATCH LINE
*
5 1/8”
[130]
EXTENDED
DIMENSION
*
6 1/2”
[165]
COVER
WIRING TERMINALS
POSITION SENSING DEVICE
DIGITAL CONTROL MODULE
STROKE ADJUSTMENT
HANDSWITCH
#10-32 EXTERNAL
GROUND SCREW
NAMEPLATE
13”
[330]
3/4”
[19]
2 7/8”
[73]
10 3/8”
[264]
1” N.P.T.
CONDUIT
POWER
CONNECTION
1” N.P.T.
CONDUIT
SIGNAL
CONNECTION
HANDWHEEL

9
80-2900-03, Rev. 8.5
MODEL 29‑600
ALL DIMENSIONS ARE IN INCHES AND [MM]
ALL DIMENSIONS ARE SUBJECT TO CHANGE
THE ORIENTATION BETWEEN THE ACTUATOR AND MOUNTING YOKE MAY NOT BE ROTATED
TYPICAL MOUNTING FEATURE -- MAY VARY PER APPLICATION
ACTUATOR INFORMATION & FASTENER GUIDE
BECK
ACTUATOR
MODEL NO.
ACTUATOR
SHAFT
TRAVEL RANGE
IN. [MM]
APPROX.
WEIGHT
LBS. [KGS.] FASTENER SIZE (IN.)
TORQUE
LB‑FT [N•M]
29-100 1/2–2
[13–51] 94 [43] Cover Screws 5/16-18 14 [19]
Motor Screws 11 [15]
29-250 1/2–2
[13–51] 152 [69] Cover Screws 3/8-16 30 [41]
Motor Screws 15 [20]
29-600 3/4–4 1/2
[19–114] 220 [100] Cover Screws 3/8-16 30 [41]
Motor Screws 15 [20]
6 1/8”
[156]
27 5/8”
[702]
1 5/8”-18 UNF THREAD
x 1 5/16” [33] DEEP
(ADAPTOR BUSHINGS FOR
SMALLER THREADS)
VALVE BONNET
MATCH LINE
7 1/4”
[187]
15 3/4”
[400] *
7 5/8”
[194]
EXTENDED
DIMENSION
ALLOW 7” [178] MIN. FOR
COVER REMOVAL
*
7 3/8”
[187]
COVER
WIRING TERMINALS
POSITION SENSING DEVICE
DIGITAL CONTROL MODULE
STROKE ADJUSTMENT
HANDSWITCH
NAMEPLATE
#10-32 EXTERNAL
GROUND SCREW
13”
[330]
3/4”
[19]
15 1/2”
[394]
1” N.P.T. CONDUIT
POWER CONNECTION
1” N.P.T. CONDUIT
SIGNAL CONNECTION
HANDWHEEL
VALVE STEM COUPLING
INTEGRAL TIGHTSEATER
2 13/16”
[71]

10
80-2900-03, Rev. 8.5
STORAGE INFORMATION
The actuator should be stored in its shipping
carton in a clean, dry area.
If it is necessary to store the actuator
outdoors for a long period of time, it should be
removed from its shipping carton and stored
above ground. A waterproof cover should be
securely fastened over the actuator. Do not
stack actuators on top of one another. Stored
actuators should be periodically checked to make
sure no condensation has formed in the control
compartments. Damage due to moisture while in
storage is not covered by warranty.
UNPACKING
Group 29 actuators are shipped in
standardized shipping containers. Actuators
mounted on valves may be packed in cardboard
containers or strapped to a skid and crated,
depending on size. After unpacking, the wooden
platform may be used to transport the actuator to
the installation site.
WARNINGWARNING
Installation and service instructions
are for use by qualied personnel
only. To avoid injury and electric
shock, do not perform any servicing
other than that contained in this
manual. Please read and understand
the appropriate sections in this
manual before attempting to install
or operate your actuator.
CAUTION
Hot surfaces! Surfaces of equipment
may be at an elevated temperature
depending on operating conditions
and environment. Allow to cool
before servicing.
INSTALLATION—MECHANICAL
Beck actuators can be furnished with valves
mounted as unitized assemblies ready for
pipeline installation.
CAUTION
Whenever an actuator is being
mounted on a valve, it is good
practice to remove the valve from
service. Observe the following
precautions:
• Know what uid is in the line
• Wear the proper protective
equipment
• Disconnect electrical power
• Depressurize the pipeline
• Refer to the valve maintenance
manual for specific
instructions
Installing the Actuator on a
Valve or Removing the Actuator
from a Valve
Consult the Beck Valve Mounting Specication
sheet that was shipped with the actuator for
detailed instructions.
Installing the Valve / Actuator
Assembly
The Beck actuator can be mounted in
any convenient orientation. There is no
preferred operating position. See pages 8 and
9 for dimensions and cover removal clearance
requirements.
Inspect the valve and pipe anges to be sure
they are clean. Be certain that other pipelines in
the area are free from pipe scale or welding slag
that could damage the gasket surfaces.
Carefully lift the assembly and position the
valve in pipeline. Install and tighten flange
bolts according to the valve and / or gasket
manufacturer’s instructions.
NOTE: The valve may have undergone
temperature variations in shipment. This
could result in seepage past the stem seals.
Refer to the valve manufacturer’s maintenance
instructions for packing adjustments.
INSTALLATION General

11
80-2900-03, Rev. 8.5
INSTALLATION—ELECTRICAL
NOTE: All Beck actuators are shipped from
the factory ready for installation; no electrical
adjustments are required before placing them
in operation. Each actuator is set up and
calibrated to the customer’s specications
that were written into the equipment order.
Two 1" N.P.T. conduit entrances are provided
for power and signal wiring to the actuator.
Temporary plugs are installed in the conduit
entrances at the factory for shipping only and are
not intended for permanent use. Prior to actuator
operation, all conduit entrances must be properly
sealed in accordance with National Standards or
Regulatory Authorities.
Wiring should be routed from below the actuator
so that condensation and other contaminants flow
away from the conduit entrances. Prior to actuator
operation, all conduit entrances must be properly
sealed in accordance with National Standards or
Regulatory Authorities.
Terminal locations and connections for Option
9 actuators are described beginning on page
12 and a typical wiring schematic is provided
on page 14 (Option 3 actuators have different
terminal connections; see page 15 for typical wiring
schematic).
Power and signal wires must be routed to the
actuator separately and be either shielded cables
or installed in conductive conduit and/or cable trays.
A large, clearly labeled terminal block is located
under the actuator cover. Terminals are designed
to accommodate one wire. Redundancy of the
terminals (i.e., 1A, 2A, 3A, etc.) is provided for
additional wiring connections, if necessary. See
page 13 for terminal block detail.
CAUTION
Always close the cover immediately
after installation or service to prevent
moisture or other foreign matter
from entering the actuator.
Refer to the wiring diagram furnished with your
Beck actuator for proper AC power and signal
connections. It is advisable to provide normal short
circuit protection on the AC power line. A copy of
the wiring diagram is shipped with each actuator
and attached to the inside of the cover. If there
is no wiring diagram available, you may obtain a
copy from Beck by providing the serial number of
your actuator.
Your Beck actuator has been supplied for 4–20
mA operation unless otherwise specied as 1–5
V dc operation at the time of order. To convert to
1–5 V dc operation, remove resistor R11 from the
DCM-3 board (see illustration below). To convert
to 4–20 mA operation, add a 250 ohm resistor to the
DCM-3 board in the R11 location (shown below).
For maximum safety, the Beck actuator body
should be grounded. Use the power and signal
grounding terminals in the wiring compartment of
the actuator.
DCM‑3
R11
(located between
TP2 & TP3)

12
80-2900-03, Rev. 8.5
TERMINAL CONNECTIONS
Capacity: #12 AWG (3.31 mm2) wire
(see page 13)
Input Power
Terminals 1 and 2
Group 29 actuators are available congured
for either 120 or 240 Vac, single-phase (refer to
actuator nameplate for specic voltage rating).
Input power connects to terminals 1 and 2; ground
connects to an enclosure ground screw.
Form C Non‑dedicated Switches
Terminals 3 through 8
Group 29 actuators include two Form C
“auxiliary” switches which are actuated by cams
on the control shaft. These switches are useful
for indicating actuator shaft position information
to the plant control system. Connections to the
switches are at terminals 3 through 8. The switch
contacts are rated 250 Vac, 1 A.
System Alarm
Terminals 9, 10 and 11
The alarm relay is 250 Vac, 1A with Form C
contacts (terminal 10 is common). Terminals
10 and 11 should be used if the contacts are to
open during alarm conditions and stay closed
during normal operation. Terminals 9 and 10
should be used if the contacts are to close during
alarm conditions and stay open during normal
operation.
Handswitch Auto Indication
Terminals 12 and 13
Indication for the position of the Handswitch
is available at terminals 12 and 13. The switch
contacts are Form A. When the Handswitch is
in AUTO, the contacts are closed; and when the
Handswitch is not in AUTO, the contacts are
open. The contacts are rated 250 Vac, 1 A.
Form A Non‑dedicated Switches
Terminals 14 through 17
Group 29 actuators include two Form A
“auxiliary” switches which are actuated by cams
on the control shaft. These switches are useful
for indicating actuator shaft position information
to the plant control system. Connections to the
switches are at terminals 14 through 17. The
switch contacts are rated 250 Vac, 1 A.
Demand Signal
Terminals 18 and 19
The DCM-3 monitors the signal at terminals
18 (–) and 19 (+), and changes the output shaft
position to match the signal at these terminals.
Feedback Signal
Terminals 20 and 21
The Feedback module transmits a signal on
terminals 20 (–) and 21 (+) that is proportional to
the actuator output shaft position.
Control Override Inputs
Terminals 22 through 25
The override terminals are provided to
override the standard analog demand input
signal by means of relay logic input signals.
CAUTION
Do not connect an external voltage
source to override terminals 22–25;
an external voltage source may
damage the DCM‑3 circuitry.
Connecting terminal 23 (RET) to terminal 22
(COM) will cause the actuator shaft to retract.
Similarly, the actuator shaft will extend when
terminal 24 (EXT) is connected to terminal 22
(COM). The actuator will stop regardless of
other input signals when terminal 25 (STOP) is
connected to terminal 22 (COM).
The connection to terminal 22 is designed
to be made through relay contacts or through a
solid state switch capable of sinking at least 5 mA
dc. When the circuit is open, terminals 23, 24,
and 25 are 5 V dc with respect to terminal 22.
INSTALLATION Wiring

13
80-2900-03, Rev. 8.5
8A
3
2A
2
1A
1
3A
4
4A
5
5A
6
6A
7
7A
8
17A
9
9A
10
10A
11
11A
12
12A
13
13A
14
14A
15
15A
16
16A
17
25
18
18A
19
19A
20
20A
21
22
23
24
POWER
GROUND
SIGNAL
GROUND
TERMINAL CONNECTIONS

14
80-2900-03, Rev. 8.5
TYPICAL OPTION 9 WIRING SCHEMATIC
NOTE: A wiring schematic specic to each actuator is located under the wiring terminal cover.
BRN
ISOLATOR
TBJ9-1
240 VAC
LINE 2
LINE 1
WHT
RED
TBJ7-5
TBJ7-3
2A
1A
2
1TBJ7-1
BLK
OPTIONAL 240 VAC WIRING DETAIL
INSTALLATION Wiring

15
80-2900-03, Rev. 8.5
TYPICAL OPTION 3 WIRING SCHEMATIC
NOTE: A wiring schematic specic to each actuator is located under the wiring terminal cover.
240 VAC
LINE 2
LINE 1
WHT
RED
TBJ7-5
TBJ7-3
2A
1A
2
1TBJ7-1
BLK
9
JA
TBJ6-3
OPTIONAL 240 VAC WIRING DETAIL

16
80-2900-03, Rev. 8.5
BEFORE START‑UP
NOTE: All Beck actuators are shipped from
the factory ready for installation; no electrical
adjustments are required before placing them
in operation. Each actuator is set up and
calibrated to the customer’s specications
that were written into the equipment order.
If your requirements have changed since
the time of order, the following sections
will provide the instruction necessary to
recongure your actuator.
Conrm that the proper input power voltage
is available. Check the actuator conguration to
make certain the actuator matches the power and
control system specications (refer to the actuator
nameplate). Inspect the actuator shaft-to-valve
stem connection and actuator-to-valve mounting
fasteners for correct installation and torque value.
AFTER POWER IS APPLIED
Using the Handswitch (see Outline Dimension
Drawings, pages 8–9), run the actuator in the
RETRACT and EXTEND direction. The actuator
should run smoothly to each end of travel. If the
actuator does not run smoothly, switch o power
to the actuator and recheck the installation wiring.
If the above checks are satisfactory, move the
Handswitch to AUTO and control the actuator with
the Demand signal.
CAUTION
The actuator output shaft will
reposition.
Vary the signal and ensure the actuator
responds appropriately. If applicable, check
the feedback signal to see if it is realistic for the
actuator output shaft position. If the actuator
does not respond as expected, check for alarm
indications on the LEDs of the DCM-3 board or
use a HART compatible communicator to check
for error messages. Actuator status may also be
viewed using the DB9 connector (see page 49 for
details).
INSTALLATION Start‑up

17
80-2900-03, Rev. 8.5
All Beck actuators are shipped completely
calibrated to customer specications, and are
ready to be installed. If the need arises to
change the actuator calibration, confirm that
the actuator is installed correctly and operating
properly before proceeding with the change. It is
also helpful to verify the actuator conguration.
Calibration is performed using the DCM-3
HART interface, the DCM-3 pushbutton
local interface, or the DCM-3 serial interface
(via the DB9 connector for direct computer
communication—see page 49 for details).
If using the HART interface and you are
unfamiliar with the HART communicator, please
review the Communications section of this
manual before continuing.
There are four standard attributes that can
be calibrated using the HART interface and
communications tool or the serial interface:
Position, Demand, Feedback, and Thrust. The
local interface allows Position and Demand
calibration.
Any actuator calibration changes made
using any method can be reversed by using
the “Restore to Factory” feature in the HART
communicator menu. This feature restores
all calibration and setup information to the "as
shipped" values. Commands are also available
to restore individual parameters.
CONFIGURATION PRIORITY
Group 29 actuators are equipped with one
fixed mechanical stop and one adjustable
mechanical stop with integral over-travel limit
switches. All output shaft travel occurs within
these stops, which are outside the electrical
range of travel.
The over-travel protection switches are used
to limit the electrical control range of the actuator
and are factory-set for 101% of travel (unless
otherwise specified at time of order). These
switches are activated directly by actuator travel
and are set 1/64" (.4 mm) before the mechanical
stops. The switches are positioned to provide an
electrical over-travel protection without opening
in the normal operating range.
If there is a need to change the factory
calibration and conguration of the actuator, it
should be done in a priority sequence as follows:
1. If required, use the adjustment knob to
simultaneously adjust the over-travel limit
switch and mechanical stop at the RETRACT
end of travel.
2. Make any required operating changes such
as changing the direction of travel, action
upon loss of signal, minimum actuator step
size, etc.
3. If required, perform a actuator position
calibration.
4. If required, perform a actuator demand
calibration.
5. Verify that the actuator operates as desired.
For example, if the actuator is short-stroked
(i.e., the full travel from 0–100% is reduced to
less than the standard 100% travel—see the
Short-stroking instructions in the appropriate
DCM-3 section that follows), the adjustable over-
travel protection switch (RETRACT) should be
reset. Because the over-travel protection switch
denes the actuator’s maximum range, if it is to
be reset, it should be adjusted before performing
DCM-3 calibration procedures. Calibration
procedures for these switches are the same
regardless of the DCM-3 interface (i.e., HART,
local or serial) utilized.
The auxiliary switches are cam operated and
have no eect on DCM-3 operation; therefore,
they can be adjusted at any time without aecting
performance or calibration.
CONFIGURATION & SETUP

18
80-2900-03, Rev. 8.5
SWITCH CALIBRATION
NOTE: Your Beck actuator was shipped from
the factory ready for installation; no electri‑
cal adjustments are required before placing
it in operation. Each actuator is set up and
calibrated to the customer’s specications
that were written into the equipment order.
Under normal operating conditions there is
no need to recalibrate the actuator. However,
if the application requirements change or are
dierent than specied on the equipment order,
the actuator should be recalibrated beginning
with the switches, according to the following
procedures.
Over‑travel Limit Switch
Adjustments
All Group 29 actuators are shipped with two
over-travel limit switches. In Option 9 actuators,
the switches provide electrical over-travel
protection. In Option 3 actuators, the switches
establish the actuator travel limits. The switches
are set inside the range of the mechanical stops.
The switches can be reset to provide over-travel
protection (or limit travel) down to a minimum of
approximately 45%.
Over-travel switches are triggered by
adjustable screws that move with the output
shaft. These over-travel limit switches are set at
the factory relative to their respective mechanical
stop. If a need exists to modify actuator travel,
this may be accomplished through adjustment of
the RETRACT limit switch by simply rotating the
adjustment knob (see illustration below). Because
the limit switch is integral to the mechanical stop,
rotating the adjustment knob will also adjust the
mechanical stop.
RET
EXT
CONTACTS CLOSED
CONTACTS OPEN
S1
S3
S4
S2
OVER-TRAVEL
LIMIT SWITCHES
RATED TRAVEL +.02"
2 FORM C
AUXILIARY
SWITCHES
2 FORM A
AUXILIARY
SWITCHES
FULLY
EXTENDED
FULLY
RETRACTED
4
7
5
3
6
8
14
16
15
17
Standard Over-travel Limit and
Auxiliary Switch Settings
2%
2%2%
2%
LOCATION OF ADJUSTMENT KNOB
CONFIGURATION & SETUP Switches
Adjustment
Knob

19
80-2900-03, Rev. 8.5
Setting Auxiliary Switches
Standard switch settings for the 4 auxiliary
switches are shown on the diagram on the preceding
page. The operating point of auxiliary switches is
dened as a percentage of output shaft travel.
100% is dened as the limit of shaft travel in the
"RETRACT" direction. The heavy line indicates a
closed circuit. Auxiliary switches are operated by
cams which are clamped onto the control shaft.
Use the following instructions to change the trigger
point of auxiliary switches:
NOTE: In the following procedure, it is
assumed that switch settings are to be
adjusted so that contacts are open when the
desired position is achieved.
1. Remove the cover (see outline dimensions
beginning on page 8).
2. Move the output shaft to the desired position
(the Handwheel may be used to make fine
adjustments to the position of the output shaft).
3. Turn the Handswitch to the STOP position.
4. Disconnect power from the actuator and switch
terminals.
5. Connect a continuity meter across the
appropriate terminals as depicted in the
diagram on page 18.
6. Rotate the appropriate cam using a 3/32”
(2,38 mm) hex wrench in one of the cam
adjustment slots (see drawing on this page
for location of slots) until the meter shows
continuity (the switch clicks audibly when the
switch contact closes).
7. Disconnect the meter and reconnect power.
8. Move the actuator’s output shaft in the desired
direction so that the cam lobe moves away from
the switch lever. If not correct, return to step 2
and reset the cam to the proper orientation.
9. Replace cover and tighten cover bolts to
appropriate torque (see fastener guides
beginning on page 9).
CONTROL END / CONTACTLESS POSITION SENSOR
CAM DETAIL
Pin
Connectors
Auxiliary
Switches
Coupling
(do not adjust
set screws)
Cams
Cam
Adjustment
Slots

20
80-2900-03, Rev. 8.5
All actuators are shipped congured to the
customer’s specifications and are ready to
be installed. If the need arises to change the
conguration of the actuator (i.e., change one or
more of the setup parameters that dene how the
actuator operates), this is easily accomplished
using one of the three following methods:
1. The HART interface and a communications
tool (such as the 475 HART Communicator) as
described in the Communications section (see
page 29). The following section (beginning on
page 21) explains how the actuator is congured
using the HART interface and provides
instructions for changing each particular setup
parameter available. This section is intended to
build upon the Communications section, which
provides a detailed description of the HART
Menu structure and denes all the parameters
and commands.
If unfamiliar with the HART communicator
and Beck actuators, please review the
Communications section (beginning on
page 29) before proceeding.
2. The local interface (using the pushbuttons
located on the DCM-3). This method does
not use HART protocol; therefore, to facilitate
configuration modifications, the board has
pushbuttons that allow basic conguration and
diagnostic functions to be performed local to the
actuator. Actuator direction of travel, span of
travel and demand signal response can all be
easily modied using this interface. Operating
parameters less commonly modied can only be
changed using the HART (aforementioned) or
serial communications (described below).
3. The serial interface (using the DB9
connector on the DCM-3 for direct computer
communication—see page 49 for details).
The serial interface may be used for actuator
configuration changes, actuator information
reporting and to assist in troubleshooting.
If the HART interface is typically used, serial
communications are simply an alternative to using
the HART conguration. If the local interface is
typically used, serial communications not only
provide an alternate conguration method, but
also provide access to parameters that cannot be
changed using the local pushbuttons.
A number of conguration setup parameters
can be changed to tailor the actuator’s operation
to the application needs. The following section
provides instructions for changing these
parameters using the HART interface via a HART
Communicator connected to the actuator’s HART
communication port (see page 4 for location).
Reference the copy of the HART Menu structure
(see page 30) when following these instructions.
To change these parameters using the Serial
Interface, see instructions beginning of page 49.
The DCM-3 default values for both the HART
and Serial Interface are listed in the chart below.
If not otherwise specied at the time of order,
these are the values set in the DCM-3.
NOTE: The instructions on pages 21–41 are
applicable to the HART interface only. The
instructions on pages 42–48 are applicable
to the local interface only.
CAUTION
Throughout the following
instructions, some configuration
changes will cause the actuator
to reposition—this can adversely
affect the process and cause
potentially dangerous conditions.
DCM‑3 HART and SERIAL INTERFACE
DEFAULT VALUES
OPERATING
PARAMETERS
HART INTERFACE SERIAL INTERFACE
Variable
Name
Default
Value Command Default
Value
Actuator Direction
(Increasing Signal) Actuator Dir RET drvdir 0 (RET)
Operation Mode Op Mode Follow opmode 0 (Follow)
Thrust Zero Thrust Null * thrust0k *
Thrust Constant Thrust Const * thrustconst *
CPS Volts at 0% CPS Zero 0.900 cpsvatzero 0.900
CPS Volts per 100% CPS Span 3.000 cpsvspanab 3.000
Percent Travel Deg Rot 100.00 travel 100.00
Demand LOS
Threshold (mA) DemLimLwr 3.20 demlos 3.20
Demand LOS Mode LOS Mode Stay demlos sip
Demand LOS
Go To Position (%) LOS Pos 50.00 demlosgtp 50.00
0% Demand (mA) DemRngLwr 4.00 dem0pctma 4.00
100% Demand (mA) DemRngUpr 20.00 dem100pctma 20.00
Stall Protection -- -- Stallprot 1 (enabled)
Stall Time (Sec) Stall Time 300 stalltime 300
Demand Function Dem Curve Linear demfunc linear
Step Size Step Size 0.15 stepsize 0.15
IO Mode Feedback Enabled iomode 1 (fdbk)
0% Feedback (mA) FB RngLwr 4.00 fdbk0pctma 4.00
100% Feedback (mA) FB RngUpr 20.00 fdbk100pctma 20.00
Thrust Enable Thrust Snsr Enabled thrustenable 1 (enabled)
Over Thrust Protection Ovt Prot Enabled ovtstop 0 (go)
Shut Down Thrust ShutDwn Thrust 150 ovtstoplevel 150
Polling Address Poll Addr 0 polladdr 0
Limit Alarm LimitSwitch Accept limitalarm 0
Actuator Model Model 29-109 drvmodel 15 (29-109)
*The specic numbers for these values are unique to each actuator and are
determined during manufacture. These numbers are noted on a tag axed
under the cover within the control area.
DIGITAL CONTROL MODULE (DCM-3)
/