Page is loading ...

User Manual
65QLEDSM20

2
Welcome
Congratulations on your purchase!
This manual tells you all you need to know about using your new Hitachi product.
Please take special note of any important safety and usage information presented with the symbol.
All products brought to you by Hitachi are manufactured to the highest standards of performance and safety and, as part
of our philosophy of customer service and satisfaction, are backed by our comprehensive 3 Year Warranty.
We hope you will enjoy using your purchase for many years to come.

3
Contents
Welcome 2
Contents 3
Unpack and Prepare 4
What's in the box 4
Important Tips 5
Attaching the stand 6
Wall-mounting the TV 7
Connect to power 8
Connect your antenna 8
Controls and Connections 9
Get to know your TV 9
Control joystick on the TV 9
Ports on the TV 10
Remote Control 12
Setup 12
Using the Remote Control 13
Remote Pairing 13
Remote Overview 14
On-Screen Set Up 16
How to access other devices
connected to the TV 17
How to turn on/o subtitles in
live TV mode 17
How to play personal videos,
photos and music 17
Smart TV 18
Download or Delete Apps 19
Stream using Chromecast-
enabled Apps 20
Using Voice Interaction 21
Connect To Google Home 21
TV Setting Menus 22
Picture 24
Sound 26
Channel 27
Network & Internet 28
Accounts and Sign-in 30
Google Assistant 30
Apps 31
Retail Mode 31
About 32
Date & Time 33
Inputs 34
Power 35
Screen Saver 36
Location 36
Accessibility 37
Reset 37
Remotes & accessories 38
High Dynamic Range (HDR) 39
TV Guide 40
Recording 41
Recording Live TV 42
Scheduled Recording 42
Playback 42
Pause Live TV (Time-shift) 43
Troubleshooting 44
Specifications 47
Compliance and
Responsible Disposal 48

4 | UNPACK AND PREPARE
See the top box flap for
how to handle the TV
without damaging it!
Unpack and Prepare
What's in the box
Before installing your new TV, check you have everything
needed.
In the box you will find:
A. 65" Ultra HD Android TV
B. Remote Control
C. AAA Batteries
D. Mini AV Adaptor
E. TV Stands
F. Screws for the TV Stand
G. Warning Sheet
H. TV Toppling Safety Message
I. Quick Start Guide
J. Warranty Certificate
K. General Safety Warnings
L. User Manual
You will need:
• Phillips-head screwdriver (for stand installation)
• Someone to help you lift and install your TV
• Google account
• Internet connection (to access Smart TV apps and
functionality)
• Antenna cable (to watch live TV)
D
F
G
H
I
J
K
L
E

UNPACK AND PREPARE | 5
Important Tips
• Place the TV on a level surface.
• Place the TV away from any source that may generate heat or vibrations.
• Make sure there is enough space around vents for airflow.
• The remote control works up to 5 metres away from the TV.
• Unplug the TV before cleaning it.
• Clean using a dry cloth only - do not use water or chemicals.
• Use only the power supply provided.
• It is highly recommended to use safety straps for securing the TV in place.
• Keep liquid, children and pets away from the TV at all times.

6 | UNPACK AND PREPARE
Unless you are wall-mounting the TV, you will need to
attach its stand/legs.
1. Lay the TV face-down on a soft, flat surface (like the
sofa, or a towel on a table) larger than the TV itself.
2. Match the stands to the installation points on the
underside of the TV.
3. Attach the stands to the TV at the installation points
using the screws provided. (Grab a screwdriver for
this bit).
Attaching the stand
• This TV is heavy! We recommend asking someone
to help you lift it.
• Unplug the TV from the power outlet before
installing or removing the stand.
• DO NOT place the TV standing upright without
its stand attached; it could damage the remote
sensor at the bottom of the TV.
• Only touch the frame, not the screen.
• It is highly recommended to use safety straps for
securing the TV.
CAUTION!
Do not apply
excessive force as
you might damage
the screw holes.
1
2
3

UNPACK AND PREPARE | 7
400mm
Back of the TV
200mm
Wall-mounting the TV
The TV comes with holes on the back panel for use with
wall-mounting brackets (bracket not included).
Use four standard M6*12mm screws (or longer, depending
on the mounting bracket) to wall-mount this TV (screws are
not included).
• Unplug the TV from the power outlet before
wall-mounting.
• Contact a professional for assistance with
wall-mounting the TV.
Required
• VESA Mounting
Bracket
• 4 x M6*12mm
screws (or longer
as required)
The screws in the package are for securing the TV stand
only. If you are wall-mounting the TV, consult a qualified
installer for advice on bracket support and wall support.

8 | UNPACK AND PREPARE
Free-to-air TV in HD (High Definition)
High Definition (HD) channels
provide the best viewing quality and
are available with a digital antenna
connection.
TV channels in Ultra HD resolution are not
currently available in Australia. Therefore
when you watch HD broadcast signals on
an Ultra HD TV, the picture can appear 'soft'
and lacks the detail you see when watching
the same content on an HD TV.
Connect to power
Make sure the TV is switched off at the power outlet
until you have finished connecting your cables.
Connect your antenna
Antenna cable not included.
ABC HD
SBS ONE HD
7HD
9HD
10 HD
PRIME7 HD
WIN HD
Example
HD Channels
Don't forget to plug in the TV
to the power outlet. Leave
the power switched off until
installation is finished.

CONTROLS AND CONNECTIONS | 9
1. : Select the next channel or move up.
2. + : Increase the volume level or move right.
3. - : Decrease the volume level or move left.
4. : • When TV is on standby, press to turn on.
5. : Select the previous channel or move down.
See next page for more info on the connections.
Controls and Connections
Control joystick on the TV
Get to know your TV
1
2
3
4
5
On/Standby light and
Remote sensor
Bottom View
• When TV is on, press to enter the menu.
Use the joystick to navigate around the interface
and press to enter the highlighted item.
• When TV is on, press and hold to put TV on
standby.

10 | CONTROLS AND CONNECTIONS
1
USB
STORAGE
• Plug in a USB stick to PVR record and pause live TV.
• Play media files stored on your USB storage device (supported file codecs and
extensions may vary).
• Update the TV software via USB.
2
HDMI IN
Use a high-speed
HDMI cable for
best picture and
sound quality.
SOUND
PICTURE
COMPUTER
All-digital connection between the TV and any HDMI device. Supports Ultra HD
resolution. Requires a high-speed HDMI cable (not included).
3
Headphone
Jack
SOUND
Connect to your headphones, amplifier, soundbar or audio device, using an AUX
cable (not included).
Ports on the TV
1
2 3
USB 2.0
(5V 500mA)
HDMI IN
1

CONTROLS AND CONNECTIONS | 11
4
LAN
INTERNET
Connect to your broadband modem using a network cable (not included) for best
steaming experience. However, the TV also has built-in wifi.
5
OPTICAL
SOUND
Connect an external digital audio device. Use an Optical cable (not included) to
connect the unit with an amplifier, soundbar or other audio decoding device for
digital audio signal output.
6
AV IN
SOUND
PICTURE
Connect the mini AV adaptor (included) and standard AV cable (not included) to
connect your DVD player. Supports Standard Definition (SD) resolution and audio
connections.
7
ANTENNA
FREE-TO-AIR
TV
Connect your antenna for live TV. (Antenna cable not included.)
4
5
1 6 7
2
OPTICAL
AV IN
USB 2.0
HDMI IN
4 3 2
LAN
ANTENNA
(5V 500mA)

12 | REMOTE CONTROL
2
3
1
Setup
Insert two AAA size batteries according to the polarity
markings (+ / -) inside the compartment. Make sure the
batteries are correctly aligned and properly pushed into
place.
Precautions When Using Batteries
• Do not use old and new batteries together.
• Do not use different types of batteries (e.g.
Manganese and Alkaline batteries) together.
• Remove the batteries from the remote if you do not
intend to use it for a long time.
• When discarding used batteries, follow any guidelines
for recycling and disposal of batteries that apply in
your local area.
• Keep batteries away from children and pets.
• Never throw batteries into a fire or expose them to
extreme heat.
Remote Control
AAA size
batteries
included
Image is for illustration purposes only.
Position of battery cover/clip and polarities of batteries on your
remote control may vary.
3

REMOTE CONTROL | 13
Using the Remote Control
To use the remote, point it towards the remote sensor at
the front of the TV. The remote will not operate if its path is
blocked.
The remote has a range of up to about 5 metres from the
TV at an angle of up to 30 degrees to either side of the
sensor, as illustrated below.
Image is an example only.
Remote sensor location on your TV may vary.
Remote Pairing
This remote control uses both Bluetooth
®
and IR (infrared)
to send its commands to the TV.
• You can use this remote control via IR for most
operations.
• To use advanced operations like voice search, you
need to pair the TV with the remote control. During
the First Time Setup process, follow the on-screen
instructions to pair the remote. Alternatively, go to
Settings > Remotes & Accessories and follow the on-
screen instructions to pair the remote.
5m
Remote Hints and Tips
• Do not drop, step on or otherwise
impact the remote control. This
may damage the parts or lead to
malfunction.
• Do not place objects between the
remote control and the remote sensor.
• Do not use this remote control while
simultaneously operating a remote
control for other devices.

14 | REMOTE CONTROL
Microphone (lights up when active)
: Switch between input signal
sources
: Enter ( ) character
: Launch the YouTube app
S.MODE: Switch between preset
Sound Modes
MENU: Enter on-screen menu
/ APPS LIST: Access installed apps
list
Remote Overview
(ON): Switch the TV to On or
Standby
NUMBER BUTTONS (0-9): Press to
select a TV channel directly when
watching TV
: Jump to last viewed channel
: Launch the Netflix app
P.MODE: Switch between preset
Picture Modes
: Android TV home screen
/ / / : Press the UP/DOWN/
LEFT/RIGHT buttons to navigate
OK: Confirm your selection; access live
TV Channel list
/ BACK: Return to the previous
screen

REMOTE CONTROL | 15
CLE - 1042
CH : Go to the next or
previous channel
(MUTE): Mute or restore sound
: Fast forward
: Pause
: Stop
SUBTITLE : Display or hide subtitles
MTS : Press to select Mono, Nicam,
Stereo for ATV channels and Audio
language for DTV channels
/ / / RED/
GREEN/YELLOW/BLUE BUTTONS:
Functions are according to the
on-screen display
VOL : Turn the volume up or down
(Google Assistant) : Summon the
Google Assistant
: Display additional information
GUIDE: Launch the TV Guide
: Rewind
/REC: Record a TV program
: Play
TEXT: Teletext (not available in Australia)
ASPECT: Change picture aspect ratio
REC

16 | ON-SCREEN SET UP
First Time Setup Menu
When you turn the TV on for the first time, the First Time Setup Menu will
appear.
Follow the prompts using the / / / / OK buttons to select your
preferences. You will be guided through:
1. Remote Pairing
6. Location
12. TV Mode
8. Google Assistant
13. Chromecast built-in always available 14. Channel Scan
7. Help Improve Android 9. Country 10. Password
11. Timezone
5. Terms Of Service2. Language 3. Quick Setup 4. WiFi Setup
If you make an error, you can update your preferences in the settings
menu later.
On-Screen Set Up
Make sure equipment is properly connected (as shown on page
10-11) before connecting the TV to power.
On/Standby light is RED in
standby mode.
On/Standby light is OFF
when the TV is on.
NOTE: To use your Android TV, you will need a Google Account.
There are 3 options to set up your TV:
1. Quick Start using an Android phone: Your Android TV will
automatically connect to the Wi-Fi network and Google
account that the Android phone is connected to.
2. Set up with your remote: Use the remote to manually enter
Google account and connect to Wi-Fi.
3. Set up with a phone or computer: Make sure your phone
or computer is on the same Wi-Fi network as the TV is
connecting to.
3. Quick Setup
1. Press and hold the MENU and LEFT buttons at the same time
for 5 seconds and let go.
2. When "SmartTV-RC" appears on the top-right corner of the
screen, press the OK button to initiate pairing. Once paired,
screen will automatically go to the next step.
3. If pairing was unsuccessful, wait 30 seconds and try again.
Note: Don't worry if you fail to pair the remote, you can still go through the
setup process and pair the remote later by going to Settings > Remotes &
Accessories.
5s

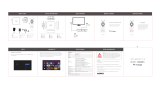
ON-SCREEN SET UP | 17
How to access other devices connected to the TV
1. Press the button on the remote control, select your desired input sources and press OK.
2. (OR) select the icon from the Android TV home screen.
You can rename the inputs to easily identify the device connected to it by going to:
Settings > Device Preferences > Inputs
How to turn on/o subtitles in live TV mode
1. To turn off subtitles, press the SUBTITLE button on the remote, select Digital Subtitle Language Setting and set the
option to 'Off.'
2. To turn on subtitles, press the SUBTITLE button on the remote, select Digital Subtitle Language Setting and set the
option to 'English.'
How to play personal videos, photos and music
You can view your photos or play your music and videos from a connected USB flash drive.
1. Plug in a USB flash drive to one of the USB connections.
2. Press the button and select the MMP (Multi-Media Player) app from the favourite apps list and press OK.
Alternatively, you may use other apps available on the Google Play Store.

18 | SMART TV
Smart TV
Before you start using apps, your TV must be
connected to the internet.
The speed of your internet connection determines
the quality of your audio/video experience when you
watch streaming content.
Accessing internet content may count towards your
download limit and may incur fees from third parties
such as your internet service provider (ISP).
Function Remote Button
Display the Android TV home
screen
Change the order of apps /
remove an app from favourites
Press and hold
Open your desired App
Netflix is a streaming service that offers unlimited viewing
of a wide variety of award-winning TV shows, movies and
documentaries.
A paid subscription is required.
This TV can play Netflix content in 4K Ultra HD HDR
resolution, however the playback resolution may be lower
depending on your subscription level and your network
speed.
Streaming Netflix content will count towards the data
usage of your broadband plan.
NotificationsVoice search/on-
screen keyboard
Access all apps Favourite apps
Settings
Change inputs
Internet
connectivity
status

SMART TV | 19
Download or Delete Apps
You can download apps and games for your Android TV through the
Google Play Store app.
Download apps
1. From the Android TV Home screen, Select the Google Play Store app.
2. Browse or search for apps and games.
To browse: Move up or down to view different categories. When you find
a category you’re interested in, move to the right to view items.
To search: To speak your search, scroll to the top of the screen and
select the icon. To type your search, scroll to the right at the top of the
screen and select Input .
3. Select the app or game you want.
4. Select Install.
Delete an app
1. From the Android TV Home screen, select Settings.
2. Select Apps.
3. Under "Recently Opened Apps" or "See All Apps", choose the app you
want to remove.
4. Select Uninstall and then press OK.

20 | SMART TV
Stream using Chromecast-enabled Apps
With chromecast built-in, you can cast content from chromecast-enabled apps and chrome browser on your phones,
tablets or laptops to your TV. Make sure to turn "Chromecast built-in always available" to On during the first time setup
process.
1. Connect your device to the same Wi-Fi network as this TV.
2. Open the app that has the content you want to cast.
3. In the app, find and select the icon.
4. In the app, select the name of your TV.
5. When the icon changes colour, you have successfully connected.
To stop casting, select the icon on your device and select Disconnect.
/