Cameo CLQS15RGBW User manual

Category
Stroboscopes & disco lights
Type
User manual
1
USER´S MANUAL
BEDIENUNGSANLEITUNG
MANUEL D`UTILISATION
MANUAL DE USUARIO
INSTRUKCJA OBSŁUGI
MANUALE D‘ USO
Q SPOT 15 RGBW
COMPACT 15W LED SPOT RGBW
CLQS15RGBW / CLQS15RGBWWH
2
EN
You‘ve made the right choice!
We have designed this product to operate reliably over many years. Please read this User‘s Manual carefully, so that you can begin making optimum
use of your Cameo Light product quickly. Learn more about Cameo Light on our website WWW.CAMEOLIGHT.COM.
DE
Sie haben die richtige Wahl getroffen!
Dieses Gerät wurde unter hohen Qualitätsanforderungen entwickelt und gefertigt, um viele Jahre einen reibungslosen Betrieb zu gewährleisten.
Bitte lesen Sie diese Bedienungsanleitung sorgfältig, damit Sie Ihr neues Produkt von Cameo Light schnell und optimal einsetzen können.
Weitere Informationen über Cameo Light erhalten Sie auf unserer Website WWW.CAMEOLIGHT.COM.
FR
Vous avez fait le bon choix!
Cet appareil a été développé et fabriqué en appliquant des exigences de qualité très élevées: il garantit des années de fonctionnement sans prob-
lème.Veuillez lire attentivement ce Manuel Utilisateur : vous apprendrez rapidement à utiliser votre appareil Cameo Light de façon optimale.
Vous trouverez davantage d‘informations à propos de Cameo Light sur notre site Web: WWW.CAMEOLIGHT.COM.
ES
¡Gracias por elegir Cameo Light!
Este equipo está diseñado y fabricado con los estándares de calidad más exigentes, para garantizar un correcto funcionamiento durante muchos
años.Lea atentamente este manual de usuario para poder aprovechar rápidamente toda la funcionalidad de su nuevo producto de Cameo Light.
Más información sobre Cameo Light en la web WWW.CAMEOLIGHT.COM.
PL
Gratulujemy wyboru!
To urządzenie zostało zaprojektowane i wyprodukowane przy zastosowaniu najwyższych kryteriów jakościowych w celu zapewnienia wieloletniej
bezawaryjnej eksploatacji. Proszę starannie przeczytać niniejszą instrukcję obsługi, aby móc jak najszybciej zacząć użytkować ten produkt marki
Cameo Light. Więcej informacji na temat Cameo Light znajdą Państwo na naszej stronie internetowej pod adresem WWW.CAMEOLIGHT.COM.
IT
Avete fatto la scelta giusta!
Questo dispositivo è stato sviluppato e prodotto in conformità con elevati standard qualitativi che ne garantiscono il regolare funzionamento per molti
anni. Leggete attentamente questo manuale d‘uso per utilizzare al meglio il vostro nuovo prodotto Cameo Light. Per maggiori informazioni su Cameo
Light consultare la nostra pagina Web WWW.CAMEOLIGHT.COM.
EN
PREVENTIVE MEASURES
1. Please read these instructions carefully.
2. Keep all information and instructions in a safe place.
3. Follow the instructions.
4. Observe all safety warnings. Never remove safety warnings or other information from the equipment.
5. Use the equipment only in the intended manner and for the intended purpose.
6. Use only sufficiently stable and compatible stands and/or mounts (for fixed installations). Make certain that wall mounts are properly installed and secured.
Make certain that the equipment is installed securely and cannot fall down.
7. During installation, observ e the applicable safety regulations for your country.
8. Never install and operate the equipment near radiators, heat registers, ovens or other sources of heat. Make certain that the equipment is always
installed so that is cooled sufficiently and cannot overheat.
9. Never place sources of ignition, e.g., burning candles, on the equipment.
10. Ventilation slits must not be blocked.
11. This appliance is designed exclusively for indoor use, do not use this equipment in the immediate vicinity of water (does not apply to special out-
door equipment - in this case, observe the special instructions noted below). Do not expose this equipment to flammable materials, fluids or gases.
12. Make certain that dripping or splashed water cannot enter the equipment. Do not place containers filled with liquids, such as vases or drinking
vessels, on the equipment.
13. Make certain that objects cannot fall into the device.
14. Use this equipment only with the accessories recommended and intended by the manufacturer.
15. Do not open or modify this equipment.
16. After connecting the equipment, check all cables in order to prevent damage or accidents, e.g., due to tripping hazards.
17. During transport, make certain that the equipment cannot fall down and possibly cause property damage and personal injuries.
18. If your equipment is no longer functioning properly, if fluids or objects have gotten inside the equipment or if it has been damaged in anot her
way, switch it off immediately and unplug it from the mains outlet (if it is a powered device). This equipment may only be repaired by authorized,
qualified personnel.
19. Clean the equipment using a dry cloth.
20. Comply with all applicable disposal laws in your country. During disposal of packaging, please separate plastic and paper/cardboard.
21. Plastic bags must be kept out of reach of children.
FOR EQUIPMENT THAT CONNECTS TO THE POWER MAINS:
22. CAUTION: If the power cord of the device is equipped with an earthing contact, then it must be connected to an outlet with a protective ground.
Never deactivate the protective ground of a power cord.
23. If the equipment has been exposed to strong fluctuations in temperature (for example, after transport), do not switch it on immediately. Moisture
and condensation could damage the equipment. Do not switch on the equipment until it has reached room temperature.
24. Before connecting the equipment to the power outlet, first verify that the mains voltage and frequency match the values specified on the equip-
ment. If the equipment has a voltage selection switch, connect the equipment to the power outlet only if the equipment values and the mains power
values match. If the included power cord or power adapter does not fit in your wall outlet, contact your electrician.
3
25. Do not step on the power cord. Make certain that the power cable does not become kinked, especially at the mains outlet and/or power adapter
and the equipment connector.
26. When connecting the equipment, make certain that the power cord or power adapter is always freely accessible. Always disconnect the equip-
ment from the power supply if the equipment is not in use or if you want to clean the equipment. Always unplug the power cord and power adapter
from the power outlet at the plug or adapter and not by pulling on the cord. Never touch the power cord and power adapter with wet hands.
27. Whenever possible, avoid switching the equipment on and off in quick succession because otherwise this can shorten the useful life of the
equipment.
28. IMPORTANT INFORMATION: Replace fuses only with fuses of the same type and rating. If a fuse blows repeatedly, please contact an authorised
service centre.
29. To disconnect the equipment from the power mains completely, unplug the power cord or power adapter from the power outlet.
30. If your device is equipped with a Volex power connector, the mating Volex equipment connector must be unlocked before it can be removed.
However, this also means that the equipment can slide and fall down if the power cable is pulled, which can lead to personal injuries and/or other
damage. For this reason, always be careful when laying cables.
31. Unplug the power cord and power adapter from the power outlet if there is a risk of a lightning strike or before extended periods of disuse.
32. The device must only be installed in a voltage-free condition (disconnect the mains plug from the mains).
33. Dust and other debris inside the unit may cause damage. The unit should be regularly serviced or cleaned (no guarantee) depending on ambient
conditions (dust etc., nicotine, fog) by qualified personnel to prevent overheating and malfunction.
34. Please keep a distance of at least 0.5 m to any combustible materials.
35. Power cables to power multiple devices must have a cross-section of at least 1.5 mm². Within the EU, the cables must correspond to H05VV-F, or
similar. Suitable cables are offered by Adam Hall. With these cables, you can connect multiple devices via the power OUT connection to the power IN
connection of an additional device. Make sure that the total current consumption of all connected devices does not exceed the specified value on all
connected devices (label on the device). Make sure to keep power cable connections as short as possible.
CAUTION:
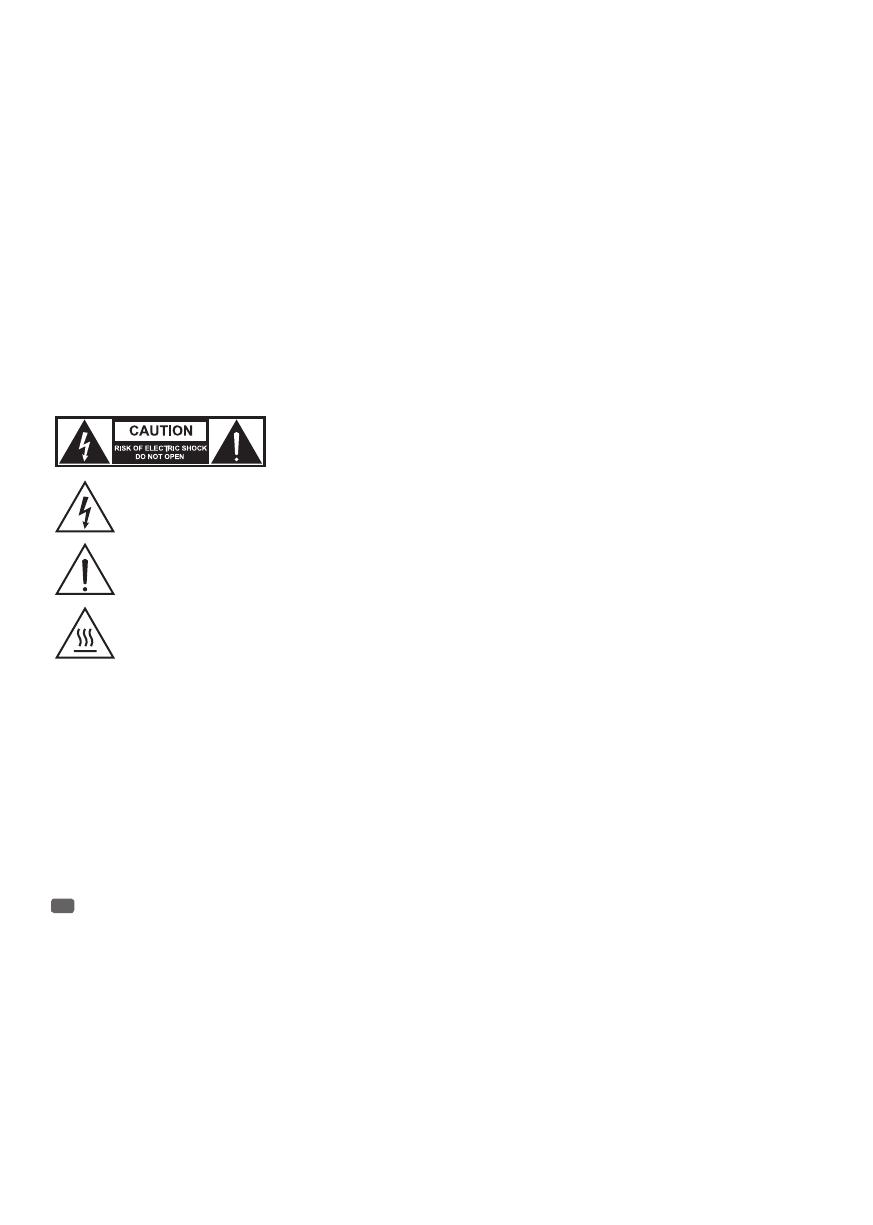
To reduce the risk of electric shock, do not remove cover (or back). There are no user serviceable parts
inside. Maintenance and repairs should be exclusively carried out by qualified service personnel.
The warning triangle with lightning symbol indicates dangerous uninsulated voltage inside the unit, which may cause an electrical
shock.
The warning triangle with exclamation mark indicates important operating and maintenance
instructions.
Warning! This symbol indicates a hot surface. Certain parts of the housing can become hot during operation. After use, wait for a
cool-down period of at least 10 minutes before handling or transporting the device.
CAUTION! HIGH VOLUMES IN AUDIO PRODUCTS!
This device is meant for professional use. Therefore, commercial use of this equipment is subject to the respectively applicable national accident
prevention rules and regulations. As a manufacturer, Adam Hall is obligated to notify you formally about the existence of potential health risks. Hea-
ring damage due to high volume and prolonged exposure: When in use, this product is capable of producing high sound-pressure levels (SPL) that
can lead to irreversible hearing damage in performers, employees, and audience members. For this reason, avoid prolonged exposure to volumes in
excess of 90 dB.
CAUTION! IMPORTANT INFORMATION ABOUT LIGHTING PRODUCTS!
1. The product has been developed for professional use in the field of event technology and is not suitable as household lighting.
2. Do not stare, even temporarily, directly into the light beam.
3. Do not look at the beam directly with optical instruments such as magnifiers.
4. Stroboscope effects may cause epileptic seizures in sensitive people! People with epilepsy should definitely avoid places where strobes are used.
DE
SICHERHEITSHINWEISE
1. Lesen Sie diese Anleitung bitte sorgfältig durch.
2. Bewahren Sie alle Informationen und Anleitungen an einem sicheren Ort auf.
3. Befolgen Sie die Anweisungen.
4. Beachten Sie alle Warnhinweise. Entfernen Sie keine Sicherheitshinweise oder andere Informationen vom Gerät.
5. Verwenden Sie das Gerät nur in der vorgesehenen Art und Weise.
6. Verwenden Sie ausschließlich stabile und passende Stative bzw. Befestigungen (bei Festinstallationen). Stellen Sie sicher, dass Wandhalterungen
ordnungsgemäß installiert und gesichert sind. Stellen Sie sicher, dass das Gerät sicher installiert ist und nicht herunterfallen kann.
7. Beachten Sie bei der Installation die für Ihr Land geltenden Sicherheitsvorschriften.
8. Installieren und betreiben Sie das Gerät nicht in der Nähe von Heizkörpern, Wärmespeichern, Öfen oder sonstigen Wärmequellen. Sorgen Sie dafür,
dass das Gerät immer so installiert ist, dass es ausreichend gekühlt wird und nicht überhitzen kann.
9. Platzieren Sie keine Zündquellen wie z.B. brennende Kerzen auf dem Gerät.
10. Lüftungsschlitze dürfen nicht blockiert werden.
11. Das Gerät wurde ausschließlich für die Verwendung in Innenräumen entwickelt, betreiben Sie das Gerät nicht in unmittelbarer Nähe von Wasser (gilt
nicht für spezielle Outdoor Geräte - beachten Sie in diesem Fall bitte die im Folgenden vermerkten Sonderhinweise). Bringen Sie das Gerät nicht mit
brennbaren Materialien, Flüssigkeiten oder Gasen in Berührung.
12. Sorgen Sie dafür, dass kein Tropf- oder Spritzwasser in das Gerät eindringen kann. Stellen Sie keine mit Flüssigkeit gefüllten Behältnisse wie
Vasen oder Trinkgefäße auf das Gerät.
11
INTRODUCTION / EINFÜHRUNG / INTRODUCTION / INTRODUCCIÓN / WPROWADZENIE /
INTRODUZIONE
EN
Introduction
COMPACT 15W LED SPOT RGBW
CLQS15RGBW (black housing)
CLQS15RGBWWH (white housing)
CONTROL FUNCTIONS
2-channel, 3-channel 1, 3-channel 2, 4-channel and 9-channel DMX control
Master / Slave mode
Standalone Function
FEATURES
Compact spot with an RGBW Quad LED, 5 DMX modes, DMX 512 control, RDM enabled, Master/Slave operation, Standalone programs, Music control,
Fast Access Feature, Safety screw eye and mounting bracket, 2 diffuser screens for different beam angles, housing in black or white, operating voltage
100 - 240 V AC / 50 - 60 Hz, power consumption 18 W.
OPERATION
The Cameo QS 15 RGBW is a DMX-512 controllable LED Spot and can be operated in Master/Slave mode and as a Standalone device. Furthermore,
the spotlight is compliant with the RDM standard (Remote Device Management). This remote management system allows the status query and config-
uration of RDM devices via an RDM enabled controller.
DE
Einführung
COMPACT 15W LED SPOT RGBW
CLQS15RGBW (schwarzes Gehäuse)
CLQS15RGBWWH (weißes Gehäuse)
STEUERUNGSFUNKTIONEN
2-Kanal, 3-Kanal 1, 3-Kanal 2, 4-Kanal, 9-Kanal DMX-Steuerung
Master / Slave Betrieb
Standalone Funktion
EIGENSCHAFTEN
Kompakter Spot mit einer RGBW Quad-LED, 5 DMX-Modi, DMX-512 Steuerung, RDM enabled, Master / Slave Betrieb, Standalone Programme, Mu-
siksteuerung, Fast Access Feature, Sicherungsöse und Montagebügel, 2 Streuscheiben für unterschiedliche Abstrahlwinkel enthalten, Gehäusefarbe
schwarz oder weiß, Betriebsspannung 100V - 240V AC / 50 - 60Hz, Leistungsaufnahme 18W.
BEDIENUNG
Das Cameo QS 15 RGBW ist ein kompakter, DMX-512-steuerbarer LED Spot und lässt sich im Master / Slave-Betrieb und als Standalone-Gerät
betreiben. Weiterhin verfügt der Scheinwerfer über den RDM-Standard (Remote Device Management). Diese Gerätefernverwaltung ermöglicht die
Statusabfrage und Konfiguration von RDM-Endgeräten über einen RDM-fähigen Controller.
FR
Introduction
SPOT LED COMPACT RGBW 15 W
CLQS15RGBW (boîtier noir)
CLQS15RGBWWH (boîtier blanc)
FONCTIONS DE PILOTAGE
Pilotage DMX sur 2 canaux, 3 canaux 1, 3 canaux 2, 4 canaux, 9 canaux
Mode Master / Slave
Fonction Standalone (mode autonome)
FONCTIONNALITÉS
Projecteur compact équipé d’une LED quadricolore RGBW, 5 modes DMX, pilotage DMX-512, compatible RDM, mode Master / Slave, programmes
autonomes, pilotage par la musique, fonction Fast Access, œillet de sécurité et support de montage, livré avec 2 diffuseurs pour angles de départ
différents, couleur boîtier noir ou blanc, tension d’alimentation 100 à 240 Volts 50/60 Hz, consommation électrique 18 W
UTILISATION
Le Cameo QS 15 RGBW est un projecteur compact pilotable DMX-512 ; il peut aussi s’utiliser en mode Master/Slave et en mode autonome. De plus,
le projecteur se conforme au protocole RDM (Remote Device Management). Ce protocole de contrôle à distance permet la configuration et le suivi des
appareils compatibles RDM, via un contrôleur compatible RDM.
13
CONNECTIONS, CONTROLS AND INDICATORS / ANSCHLÜSSE, BEDIEN- UND ANZEIGEELEMENTE /
CONNECTEURS, CONTRÔLES ET INDICATEURS / CONEXIONES, CONTROLES E INDICADORES /
PRZYŁĄCZA, ELEMENTY OBSŁUGI I WSKAŹNIKI
1
POWER IN
EN
Blue mains input socket for the power supply of the device. An appropriate power cord is included in the delivery.
DE
Blaue Netzeingangsbuchse für die Spannungsversorgung des Geräts. Ein geeignetes Netzkabel befindet sich im Lieferumfang.
FR
Embase secteur bleue, recevant la tension d’alimentation de l’appareil. Le câble secteur correspondant est livré.
ES
Conector eléctrico azul de entrada para alimentar el equipo. Se suministra con el cable eléctrico apropiado.
PL
Niebieskie wejściowe gniazdo zasilania sieciowego urządzenia. W zestawie znajduje się odpowiedni kabel sieciowy.
IT
Conector eléctrico azul de entrada para alimentar el equipo. Se suministra con el cable eléctrico apropiado.
2
POWER OUT
EN
White power output socket for supplying power to other CAMEO spotlights. Make sure that the total current consumption in amperes (A) of all
connected devices does not exceed the specified value on the device.
DE
Weiße Netzausgangsbuchse für die Netzversorgung weiterer CAMEO Scheinwerfer. Achten Sie darauf, dass die gesamte Stromaufnahme aller
angeschlossenen Geräte den auf dem Gerät in Ampere (A) angegebenen Wert nicht überschreitet.
FR
Embase de renvoi secteur blanche, pour alimentation d’autres produits CAMEO. Assurez-vous que la consommation cumulée de tous les
appareils connectés ne dépasse pas la valeur en ampères (A) indiquée sur l’appareil.
ES
Conector eléctrico blanco de salida para alimentar otros equipos de CAMEO. Asegúrese de que el consumo total de todos los equipos
conectados no supere los amperios especificados del equipo.
PL
Białe wyjściowe gniazdo zasilania sieciowego służące do zasilania innych urządzeń firmy CAMEO. Należy upewnić się, że całkowity pobór mocy
wszystkich podłączonych urządzeń nie przekracza wartości podanej w amperach (A) na urządzeniu.
IT
Conector eléctrico blanco de salida para alimentar otros equipos de CAMEO. Asegúrese de que el consumo total de todos los equipos
conectados no supere los amperios especificados del equipo.
3
DMX IN
EN
cable with a 3-pin male plug for connecting a DMX controller (e.g. DMX console).
DE
Kabel mit männlichem 3-Pol XLR-Stecker zum Anschließen eines DMX-Kontrollgeräts (z.B. DMX-Pult).
FR
Câble avec connecteur XLR 3 points mâle Neutrik X-HD, pour branchement d’un contrôleur DMX (par exemple, pupitre DMX).
ES
Cable con conector XLR macho de 3pines para conectar un equipo de control DMX (como una mesa DMX).
PL
Kabel z męską, 3-stykową wtyczką XLR do podłączenia urządzenia sterującego DMX (np. pulpitu DMX).
IT
Cable con conector XLR macho de 3pines para conectar un equipo de control DMX (como una mesa DMX).
4
DMX OUT
EN
cable with a 3-pin female plug for looping through a DMX control signal.
DE
Kabel mit weiblichem 3-Pol XLR-Stecker zum Weiterleiten des DMX-Steuersignals.
FR
Câble avec connecteur XLR 3 points femelle Neutrik X-HD, pour renvoi du signal DMX entrant.
1 : 1
016
00
YB30601-016
2016-01-03
白色
张书龙
DMX IN DMX OUT
POWER IN
100-240 V / 50-60 HZ
POWER OUT
15 A
1 2
5
6
43
7
15
OPERATION / BEDIENUNG / UTILISATION / OPERACIÓN / OBSŁUGA / UTILIZZO
EN
NOTES
When the spotlight is properly connected to the mains, “Software Update Please Wait” (only for internal purposes), “Welcome to Cameo”, the model
name and software version appear successively on the display during the start-up process. After this operation, the spotlight is ready for use and
starts in the mode that was previously selected.
• If one of the DMX operating modes is activated and there is no DMX signal at the DMX input, the display starts to flash after a few seconds.
After approximately 30 seconds of inactivity, the display will automatically show the currently active operating mode.
• Fast Access Feature: In order to simplify the menu guide, the device has an intelligent menu structure which allows menu and sub-menu items
that were last selected to be accessed directly. 1. Pressing MODE and ENTER simultaneously will take you directly to the sub-menu item that was
last edited and allows you to instantly change the corresponding value as desired (DMX start address and all operating modes). 2. Pressing MODE
will take you directly to the menu item that was last selected and edited; now press ENTER to instantly access the sub-menu item that was selected
and edited last (DMX start address and all operating modes).
SETTING THE DMX START ADDRESS
Press the MODE button repeatedly until “Menu DMX Address” or “Menu Mode” appears on the display. If necessary, using the UP and DOWN buttons,
select the “Menu DMX Address” menu item and confirm with ENTER. Using the UP and DOWN buttons, select the desired DMX start address and
confirm with ENTER. At the same time, the DMX mode is started and the last selected DMX mode is activated.
ENTER
UP/DOWN
-
ENTER
SETTING THE OPERATING MODE (Mode)
Press the MODE button repeatedly until “Menu Mode” appears on the display. If necessary, using the UP and DOWN buttons, select the “Menu Mode”
menu item and confirm with ENTER. The required DMX mode can be selected as desired by using the UP and DOWN buttons and activated by press-
ing ENTER (see tables, observe the sub-menus) You will find comprehensive DMX tables in the DMX CONTROL section of this manual.
Operating modes
Mode DMX = DMX operating modes 02CH = 2-channel mode
03CH1 = 3-channel 1 Mode
03CH2 = 3-channel 2 Mode
04CH = 4-channel mode
09CH = 9-channel mode
Mode Sound = Music control mode Sound = Spot responds to bass impulses, Microphone sensitivity can be set.
Mode Slave = Slave mode Slave = Connect the DMX IN of the slave unit to the DMX OUT of the master unit
(same model) and activate one of the standalone modes in the master unit.
Now the slave unit follows the master unit.
Mode Auto = Automatic Control Mode Fade = Colour blending with speed setting (Speed).
Program = Combination of Fade and Jump mode with speed setting (Speed).
Jump = Rapid succession colour blending with speed setting (Speed).
Mode Static = Setting a "scene" without
external controllers
Static = Master Dimmer, Dimmer Fine, Strobe (strobe function as channel 3 in
9-channel mode) and the individual colours can be set individually.
Mode Color
Macro
= Colour Macros = 15 different colour macros are available as presets.
16
ENTER
UP/DOWN
ENTER
UP/DOWN
/ /
ENTER
ENTER
/ /
ENTER
/
ENTER
/
ENTER
ENTER
UP/DOWN
ENTER
/
ENTER
/
ENTER
UP/DOWN
/ //
ENTER
UP/DOWN
/ /
ENTER - UP/ DOWN
ENTER - UP/ DOWN
/
ENTER - UP/ DOWN
ENTER
UP/DOWN
/ //
ENTER ENTER ENTER
/
ENTER
UP/DOWN
-
ENTER - UP/ DOWN
ENTER - UP/ DOWN ENTER - UP/ DOWN
ENTER
UP/DOWN
ENTER ENTER ENTER
-
ENTER - UP/ DOWN
ENTER
-
ENTER - UP/ DOWN ENTER - UP/ DOWN ENTER - UP/ DOWN
/
- -
ENTER ENTER ENTER
ENTER
UP/DOWN
/
ENTER
ENTER ENTER
/
ENTER
/
ENTER
/ /
/
ENTER
ENTER ENTER
/
ENTER
/
ENTER
/ /
/
ENTER
ENTER ENTER
/
ENTER
/
ENTER
/
SYSTEM SETTINGS (Settings)
To select the system settings, press the MODE button repeatedly until “Menu DMX Addr” or “Menu Mode” appears on the display. Using the UP and
DOWN buttons, select the “Menu Settings” menu item and confirm with ENTER. The required sub-menu can be selected as desired by using the UP
and DOWN buttons and activated by pressing ENTER (see tables, observe the sub-menus)
17
Settings
Display Rev = Rotation of the display
by 180°
Display Rev On Rotation of the display by 180° (e.g. overhead installation)
Display Rev Off Normal display
Display = automatic display
switch-off
Display On = permanently on
Display Off = automatic switch-off of the display after 1 minute of inactivity.
DMXFail = Operating status with
DMX signal interruption
Hold = last command is held
Blackout = activates Blackout
Dim.Curve = Dimmer Curve Linear = The light intensity increases linearly with the DMX value.
Exp = Adjustment of the light intensity is finer in the lower DMX value
range and coarser in the upper DMX value range.
Log = Adjustment of the light intensity is coarser in the lower DMX
value range and finer in the upper DMX value range.
S-Curve = Adjustment of the light intensity is finer in the lower and upper
DMX value ranges and coarser in the middle DMX value range.
Dimmer Resp. = Dimmer response LED = The spotlight responds abruptly to changes in the DMX value.
Halogen = The spot behaves in a manner similar to that of a halogen lamp
with gentle changes in brightness.
White Balance = White balance Red, Green, Blue, White = Individual white balance. Cross-operating mode setting of the 4
RGBW LED groups
IR Remote = enables control via
IR remote control or
switch off
On = enables control via IR remote control
Off = disables control via IR remote control
Factory Reset = Reset to factory
settings
Reset Now? ENTER = Reset to factory setting
MODE = do not perform reset
ENTER
UP/DOWN
ENTER
UP/DOWN
/
ENTER
ENTER
/
/
ENTER
UP/DOWN
/
ENTER
ENTER
/
/
ENTER
UP/DOWN
/
ENTER
UP/DOWN
/
ENTER ENTER
/
ENTER
UP/DOWN
/
ENTER ENTER
/
/
ENTER
UP/DOWN
/
ENTER ENTER
/
/
ENTER
UP/DOWN
/
ENTER
ENTER
/
/
ENTER
ENTER = Yes /
MODE = No
/
ENTER
/
ENTER
/
ENTER
/ /
ENTER
/
UP/ DOWN -ENTER UP/ DOWN -ENTER UP/ DOWN -ENTER UP/ DOWN -ENTE
/
ENTER
ENTER
/
18
Light intensity
Light intensity
Light intensity
Light intensity
DMX value
linear exponential logarithmic S-curve
DMX value DMX value DMX value
DIMMER CURVES
SYSTEM INFORMATION (System)
To obtain the system information, press the MODE button repeatedly until “Menu DMX Addr” or “Menu Mode” appears on the display. Using the UP
and DOWN buttons, select the “Menu System Info” menu item and confirm with ENTER. The required sub-menu can be selected as desired by using
the UP and DOWN buttons in order to show the corresponding information by pressing ENTER.
System Info
Firmware = Display of software version V1.xx Display the information by pressing ENTER
Temperature = Display the LED temperature in degrees
Celsius or Fahrenheit
Temperature LED Temperature display by pressing ENTER
Unit F/C
Setting the temperature measure to degrees
Celsius or Fahrenheit Confirm with ENTER
Op.Hours = Displays the operating time in hours xxxxh Display the information by pressing ENTER
ENTER
UP/DOWN
ENTER
ENTER
/
ENTER
UP/DOWN
/
ENTER ENTER-UP/ DOWN
/
/
ENTER
/
ENTER
ENTER
DE
ANMERKUNGEN
• Sobald der Scheinwerfer korrekt am Stromnetz angeschlossen ist, werden während des Startvorgangs nacheinander „Software Update Please
Wait...“ (nur für Servicezwecke), „Welcome to Cameo“, die Modellbezeichnung und die Software Version im Display angezeigt. Nach diesem Vorgang
ist der Scheinwerfer betriebsbereit und startet in der Betriebsart, die zuvor angewählt war.
• Ist eine der DMX-Betriebsarten aktiviert und es liegt kein DMX-Signal am DMX-Eingang an, beginnt das Display nach wenigen Sekunden zu
blinken.
• Nach ca. 30 Sekunden Inaktivität zeigt das Display automatisch die aktuell aktivierte Betriebsart an.
• Fast Access Feature: Um die Menüführung zu vereinfachen, verfügt das Gerät über eine intelligente Menüstruktur, die es ermöglicht, auf Menü-
punkte und Untermenüpunkte, die zuletzt ausgewählt waren, direkt zugreifen zu können. 1. Durch gleichzeitiges Drücken auf MODE und ENTER
gelangen Sie direkt zu dem Untermenüpunkt, der zuletzt editiert wurde und können den entsprechenden Wert augenblicklich nach Wunsch ändern
(DMX-Startadresse und alle Betriebsarten). 2. Durch Drücken auf MODE gelangen Sie direkt zu dem Menüpunkt, der als Letztes angewählt und
editiert wurde, drücken Sie nun auf ENTER, erreichen Sie augenblicklich den Untermenüpunkt, der zuletzt angewählt und editiert wurde (DMX-
Startadresse und alle Betriebsarten).
DMX STARTADRESSE EINSTELLEN
Drücken Sie die MODE-Taste so oft, bis im Display „Menu DMX Address“ oder „Menu Mode“ angezeigt wird. Gegebenenfalls wählen Sie nun den
Menüpunkt „Menu DMX Address“ mit Hilfe der Tasten UP und DOWN aus und drücken auf ENTER. Wählen Sie jetzt die gewünschte DMX-Startad-
resse mit Hilfe der Tasten UP und DOWN aus und bestätigen mit ENTER. Gleichzeitig wird die DMX-Betriebsart gestartet und der zuletzt ausgewählte
DMX-Modus aktiviert.
ENTER
UP/DOWN
-
ENTER
BETRIEBSART EINSTELLEN (Mode)
Drücken Sie die MODE-Taste so oft, bis im Display „Menu Mode“ angezeigt wird. Gegebenenfalls wählen Sie nun den Menüpunkt „Menu Mode“
mit Hilfe der Tasten UP und DOWN aus und drücken auf ENTER. Die gewünschte Betriebsart wählen Sie jetzt abermals mit Hilfe der Tasten UP und
DOWN aus und bestätigen mit ENTER (siehe Tabellen, Untermenüs beachten). Ausführliche DMX-Tabellen finden Sie in dieser Anleitung unter „DMX
STEUERUNG“.
36
DMX CONTROL / DMX STEUERUNG / PILOTAGE DMX / CONTROL DMX / STEROWANIE DMX /
CONTROLLO DMX
2CH Mode
Ch. Function Values Sub-Group
1 Dimmer 000 - 255 0% to 100% Dimmer
2 Colour Macro
000 - 005 Colour off
Colour Macro
006 - 013 Red
014 - 021 Amber
022 - 029 Yellow warm
030 - 037 Yellow
038 - 045 Green
046 - 053 Turquoise
054 - 061 Cyan
062 - 069 Blue
070 - 077 Lavender
078 - 085 Mauve
086 - 093 Magenta
094 - 101 Pink
102 - 109 Warm White
110 - 117 White
118 - 125 Cold White
126 - 127 Colour Jumping Stop
128 - 191 Colour Jumping Speed slow -> fast / Colour 1 -> 12
192 - 255 Colour Fading Speed slow -> fast / Colour 1 -> 12
3CH Mode 1
Ch. Function Values Sub-Group
1 Dimmer 000 - 255 0% to 100% Dimmer
2 Strobe
000 - 005 Strobe open
Strobe
006 - 255 Strobe slow -> fast <1Hz - 20Hz
3 Colour Macro
000 - 005 Colour off
Colour Macro
006 - 013 Red
014 - 021 Amber
022 - 029 Yellow warm
030 - 037 Yellow
038 - 045 Green
046 - 053 Turquoise
054 - 061 Cyan
062 - 069 Blue
070 - 077 Lavender
078 - 085 Mauve
086 - 093 Magenta
094 - 101 Pink
102 - 109 Warm White
110 - 117 White
118 - 125 Cold White
126 - 127 Colour Jumping Stop
128 - 191 Colour Jumping Speed slow -> fast / Colour 1 -> 12
192 - 255 Colour Fading Speed slow -> fast / Colour 1 -> 12
37
3CH Mode 2
Ch. Function Values Sub-Group
1 Red 000 - 255 0% to 100% Red
2 Green 000 - 255 0% to 100% Green
3 Blue 000 - 255 0% to 100% Blue
4CH Mode
Ch. Function Values Sub-Group
1 Red 000 - 255 0% to 100% Red
2 Green 000 - 255 0% to 100% Green
3 Blue 000 - 255 0% to 100% Blue
4 White 000 - 255 0% to 100% White
9CH Mode
Ch. Function Values Sub-Group
1 Dimmer 000 - 255 0% to 100%
Dimmer
2 Dimmer fine 000 - 255 0% to 100%
3 Strobe functions
000 - 005 Strobe open
multifunctional-
strobe
006 - 010 Strobe closed
011 - 033 Puls Random, slow -> fast
034 - 056 Ramp up Random, slow -> fast
057 - 079 Ramp down Random, slow -> fast
080 - 102 Random Strobe Effect, slow -> fast
103 - 127 Strobe Break Effekt, 5s…..1s (Short burst with break)
128 - 250 Strobe slow -> fast <1Hz - 20Hz
251 - 255 Strobe open
4 Red 000 - 255 0% to 100% Red
5 Green 000 - 255 0% to 100% Green
6 Blue 000 - 255 0% to 100% Blue
7 White 000 - 255 0% to 100% White
8
Colour Macro
(override RGBW)
000 - 005 Colour off
Colour Macro
006 - 013 Red
014 - 021 Amber
022 - 029 Yellow warm
030 - 037 Yellow
038 - 045 Green
046 - 053 Turquoise
054 - 061 Cyan
062 - 069 Blue
070 - 077 Lavender
078 - 085 Mauve
086 - 093 Magenta
094 - 101 Pink
102 - 109 Warm White
110 - 117 White
118 - 125 Cold White
126 - 127 Colour Jumping Stop
128 - 191 Colour Jumping Speed slow -> fast / Colour 1 -> 12
192 - 255 Colour Fading Speed slow -> fast / Colour 1 -> 12
9
Colour Tempe-
rature
(affects RGB)
000 - 005 off
Colour Tempera-
ture Correction
006 - 255
cold - warm @ Full on
affects colours too
38
IR REMOTE CONTROL / IR FERNBEDIENUNG / TÉLÉCOMMANDE INFRAROUGE / MANDO A
DISTANCIA POR INFRARROJOS / PILOT NA PODCZERWIEŃ / TELECOMANDO A INFRAROSSI
EN
In the system settings under “IR Remote”, activate the control via infrared remote control (IR Remote On). Now, point the
infrared remote control directly at the infrared sensor installed on the front of the spotlight. The maximum range is about 8 metres.
BL / ON/OFF (Blackout)
The BL button is used to switch off the spot, regardless of the mode selected. Pressing the BL button once more, re-activates the previously selected
mode.
SP / SPEED
11-level speed setting for “Auto Jump”, “Auto Fade” and “Auto Program” modes. First, press the SP button and then select the desired speed using
the + and - buttons. Level 1 makes the colour change sequence run slowly. Pressing again, activates level 2 with a faster colour change sequence,
followed by levels 3 to 10, whereby level 10 corresponds to the fastest colour change sequence.
/ BRIGHTNESS
Setting the brightness in 12 levels. First, press the
button and then select the desired brightness using the + and - buttons (Level 1 = blackout)
FL / FLASH (Strobe)
Enabling and setting the strobe effect in 14 speed levels. After pressing the FL button, select the flash frequency (14 levels) using the + and - buttons
(Level 1 = strobe disabled, Level 2 = slowest flash frequency, Level 14 = fastest flash frequency)
R / G / B / W / A / U (red, green, blue, white / A and U without function)
These 6 buttons can be used to create individual colour combinations. The 12 levels of brightness can be selected by pressing the corresponding
colour button, then using the + and - buttons, whereby, at level 1, the LEDs are switched off.
For example: If you set red and green to the respective highest level and blue and white to the lowest, i.e. off, the result will be a bright yellow colour
mixture.
PG (Auto Jump / Auto Fade)
Press the PG button and then select the desired mode “Auto Jump” or “Auto Fade” using the + and - buttons. Select the speed at which the pro-
grams are running, using the SP (Speed) and + and - buttons.
CM (Colour Macros)
15 Colour presets that can be accessed using the CM and + and - buttons.
SC (music-controlled colour change program)
To activate the sound-control mode, press SC and then use the + and - buttons as required to select the microphone sensitivity (11 levels).
AU (Auto program)
Automatic toggle between “Auto Jump” and “Auto Fade”. The program speed is adjusted using the SP, and + and - buttons.
DE
Aktivieren Sie in den Systemeinstellungen unter „IR Remote“ die Steuerung durch die Infrarot Fernbedienung (IR Remote On).
Richten Sie nun die Infrarot-Fernbedienung in Sichtverbindung direkt auf den auf der Vorderseite des Strahlers verbauten
Infrarot-Sensor. Die maximale Reichweite beträgt ca. 8 Meter.
BL / ON/OFF (Blackout)
Die BL-Taste dient dazu, den Strahler abzuschalten, unabhängig davon, welche Betriebsart aktiviert ist. Bei nochmaligem Drücken der BL-Taste wird
die zuvor ausgewählte Betriebsart wieder aktiviert.
42
DMX TECHNOLOGY / DMX-TECHNIK / TECHNIQUE DMX / TECNOLOGÍA DMX / TECHNIKA DMX /
TECNOLOGIA DMX
EN
DMX-512
DMX (Digital Multiplex) is the designation for a universal transmission protocol for communications
between corresponding devices and controllers. A DMX controller sends DMX data to the connected
DMX device(s). The DMX data is always transmitted as a serial data stream that is forwarded from
one connected device to the next via the "DMX IN" and "DMX OUT" connectors (XLR plug-type
connectors) that are found on every DMX-capable device, provided the maximum number of devices
does not exceed 32 units. The last device in the chain needs to be equipped with a terminator
(terminating resistor).
DMX CONNECTION
DMX is the common "language" via which a very wide range of types and models of equipment
from various manufacturers can be connected with one another and controlled via a central
controller, provided that all of the devices and the controller are DMX compatible. For optimum data transmission, it is necessary to keep the
connecting cables between the individual devices as short as possible. The order in which the devices are integrated in the DMX network
has no influence on the addresses. Thus the device with the DMX address 1 can be located at any position in the (serial) DMX chain: at the
beginning, at the end or somewhere in the middle. If the DMX address 1 is assigned to a device, the controller "knows" that it should send all
data allocated to address 1 to this device regardless of its position in the DMX network.
SERIAL CONNECTION OF MULTIPLE LIGHTS
1. Connect the male XLR connector (3-pin or 5-pin) of the DMX cable to the DMX output (female XLR socket) of the first DMX device (e.g.
DMX-Controller).
2. Connect the female 3-pin XLR connector of the DMX cable connected to the first projector to the DMX input (male 3-pin socket) of the next
DMX device. In the same way, connect the DMX output of this device to the DMX input of the next device and repeat until all devices have
been connected. Please note that as a rule, DMX devices are connected in series and connections cannot be shared without active splitters.
The maximum number of DMX devices in a DMX chain should not exceed 32 units.
The Adam Hall 3 STAR, 4 STAR, and 5 STAR product ranges include an extensive selection of suitable cables.
DMX CABLES
When fabricating your own cables, always observe the illustrations on this page. Never connect the shielding of the cable to the ground contact of
the plug, and always make certain that the shielding does not come into contact with the housing of the XLR plug. If the shielding is connected to the
ground, this can lead to short-circuiting and system malfunctions.
Pin Assignment
DMX cable with 3-pin XLR connectors: DMX cable with 5-pin XLR connectors (pin 4 and 5 are not used):
DMX TERMINATORS (TERMINATING RESISTORS)
To prevent system errors, the last device in a DMX chain needs to be equipped with a terminating resistor (120 ohm, 1/4 Watt).
3-pin XLR connector with a terminating resistor: K3DMXT3
5-pin XLR connector with a terminating resistor: K3DMXT5
Pin Assignment
3-pin XLR connector: 5-pin XLR connector:
DMX ADAPTER
The combination of DMX devices with 3-pin connectors and DMX devices with 5-pin connectors in a DMX chain is possible with suitable adapters.
Pin Assignment
DMX Adapter 5-pin XLR male to 3-pin XLR female: K3DGF0020
Pins 4 and 5 are not used.
Pin Assignment
DMX Adapter 3-pin XLR male to 5-pin XLR female: K3DHM0020
Pins 4 and 5 are not used.
Shield
2
3
1
2
3
1
1
2
3
4
5
1
2
3
4
5
Shield
2
3
1
1
2
3
4
5
48
DIFFUSER SCREENS / STREUSCHEIBEN / DIFFUSEURS / DIFUSORES / OSŁONY ROZPRASZAJĄCE
/ DIFUSORES
EN
Two diffuser screens with a different beam dispersion (1 x 10°, 1 x 25°) are supplied with the spot. The beam angle of the spotlight can thus be
adjusted individually to 4.5° (without diffuser), or 25°. Set the desired diffuser screen in front of the light-emitting lens and secure it with the help of
the supplied safety ring.
DE
Im Lieferumfang des Strahlers befinden sich zwei Streuscheiben, die über ein unterschiedliches Abstrahlverhalten verfügen (1x 10°, 1x 25°).
Der Abstrahlwinkel des Strahlers kann somit individuell auf 4,5° (ohne Streuscheibe), 10°, oder 25° eingestellt werden. Setzen Sie die gewünschte
Streuscheibe vor die Lichtaustrittslinse und sichern sie mit Hilfe des mitgelieferten Sicherungsrings.
FR
Le projecteur est livré avec deux diffuseurs, pour obtenir un angle de départ différent (10° ou 25°). Le projecteur permet donc d’obtenir trois
angles de départ : 4,5° (sans diffuseur), 10° (diffuseur1) ou 25° (diffuseur 2). Placez le diffuseur désiré devant la lentille de sortie, et fixez-le avec les
vis livrées.
ES
Con el foco se suministran dos difusores que ofrecen dos tipos de ángulo de haz diferentes: 10° y 25°. Así, el ángulo de dispersión del foco se
puede ajustar a 4,5° (sin difusor), a 10° o a 25°. Coloque el difusor deseado delante de la lente de salida de luz y fíjelo mediante el anillo de bloqueo
suministrado.
PL
W zestawie reflektora znajdują się dwie osłony rozpraszające, które charakteryzują się różnymi kątami wiązki światła (1 x 10°, 1 x 25°). Kąt
wiązki światła może zostać ustawiony indywidualnie na 4,5° (bez osłony), 10° lub 25°. Należy ustawić żądaną osłonę przed soczewkę wyjściową i ją
zabezpieczyć za pomocą załączonego pierścienia zabezpieczającego.
IT
Con el foco se suministran dos difusores que ofrecen dos tipos de ángulo de haz diferentes: 10° y 25°. Así, el ángulo de dispersión del foco se
puede ajustar a 4,5° (sin difusor), a 10° o a 25°. Coloque el difusor deseado delante de la lente de salida de luz y fíjelo mediante el anillo de bloqueo
suministrado.
49
SETTING UP AND MOUNTING / AUFSTELLUNG UND MONTAGE / MISE EN PLACE ET MONTAGE /
INSTALACIÓN Y MONTAJE / USTAWIENIE I MONTAŻ / INSTALLAZIONE E MONTAGGIO
EN
Thanks to the integrated double bracket, the spotlight can be placed in a suitable location on a flat surface. Mounting on a truss is performed
with the help of a suitable truss clamp (not included). Make sure that the connection to the mounting bracket is solid, and secure the device with a
suitable safety rope to the space provided (A). Important Notice: Overhead installation should only be carried out by trained personnel.
DE
Dank des integrierten Doppelbügels kann der Scheinwerfer an einer geeigneten Stelle auf eine ebene Fläche gestellt werden. Die Montage an
einer Traverse erfolgt mit Hilfe einer geeigneten Traversenklemme (nicht im Lieferumfang enthalten). Sorgen Sie für eine feste Verbindung am Monta-
gebügel und sichern Sie den Scheinwerfer mit einem geeigneten Sicherungsseil an der dafür vorgesehenen Stelle (A). Wichtiger Hinweis:
Überkopfmontage darf nur von dafür ausgebildetem Personal durchgeführt werden.
FR
Grâce à son double support intégré, le projecteur peut être posé sur une surface plane, à l’endroit désiré. Le montage sur barre ou structure
métallique s’effectue par l’intermédiaire d’une pince spécifique (non livrée). Vérifiez la solidité de la fixation du support de montage, et sécurisez
l’appareil via une élingue de sécurité passée dans l’emplacement correspondant (A). Avertissement important : Le montage en hauteur doit être
exclusivement effectué par du personnel spécialement formé.
ES
Gracias al soporte doble integrado, el foco se puede instalar perfectamente sobre una superficie plana. Para montarlo en trusses, utilice una
abrazadera adecuada (no suministrada). Para mayor seguridad, asegure el equipo introduciendo un cable de seguridad apropiado a través de la
argolla prevista para tal efecto(A). Nota importante: El montaje suspendido sólo puede realizarse por personal experimentado.
PL
Dzięki zintegrowanemu podwójnemu pałąkowi reflektor można ustawić w odpowiednim miejscu na równej płaszczyźnie. Do montażu na
trawersie służy specjalny zacisk do trawersu (nie znajduje się w zestawie). Należy zadbać o stabilne połączenie z pałąkiem montażowym i
zabezpieczyć reflektor odpowiednią liną zabezpieczającą we wskazanym miejscu (A). Ważna informacja: montaż nad głową może być wykonywany
wyłącznie przez odpowiednio przeszkolony personel.
IT
Gracias al soporte doble integrado, el foco se puede instalar perfectamente sobre una superficie plana. Para montarlo en trusses, utilice una
abrazadera adecuada (no suministrada). Para mayor seguridad, asegure el equipo introduciendo un cable de seguridad apropiado a través de la
argolla prevista para tal efecto(A). Nota importante: El montaje suspendido sólo puede realizarse por personal experimentado.
A
50
DE
Modellbezeichnung: CLQS15RGBW(WH)
Produktart: LED Spot
Typ: Compact Spot
Farbspektrum LED: RGBW
LED Anzahl: 1
LED Typ: 15W
Wiederholrate: 3600 Hz
Abstrahlwinkel: 4,5°, 10°, 25°
DMX-Eingang: Kabel mit männlichem 3-Pol XLR Stecker
DMX-Ausgang: Kabel mit weiblichem 3-Pol XLR Stecker
DMX-Modus: 2-Kanal, 3-Kanal 1, 3-Kanal 2, 4-Kanal, 9-Kanal
DMX Funktionen: Dimmer, Dimmer Fine, RGBW, Stroboskop, Farbtemperaturkorrektur, Farbmakros,
Farbwechsel, Farbüberblenden
Standalone Funktionen: Farbmischung, Farbmakros, Master/Slave-Betrieb, Farbwechsel, Farbüberblenden, Auto
Mode, Stroboskop, Dimmer Reaktion, Dimmerkurven, Weißabgleich
Steuerung: DMX512, IR Fernbedienung, RDM enabled
EN
Model Name: CLQS15RGBW(WH)
Product Type: LED spot
Type: compact spot
LED Colour Spectrum: RGBW
Number of LEDs: 1
LED Type: 15 W
Refresh Rate: 3600 Hz
Beam Angle: 4,5°, 10°, 25°
DMX Input: cable with 3-pin XLR male
DMX Output: cable with 3-pin XLR female
DMX Mode: 2-channel, 3-channel 1, 3-channel 2, 4-channel, 9-channel
DMX Functions: Dimmer, Dimmer Fine, RGBW, stroboscope, colour temperature correction, colour
macros, colour change, colour fading
Standalone Functions: Colour Mixing, Colour Macros, Master/Slave Operation, Colour Change, Colour Fading,
Auto Mode, Strobe, Dimmer Response, Dimmer Curves, White Balance
Control: DMX512, IR remote control, RDM enabled
Controls: Mode, Enter, Up, Down
Indicators: OLED Display
Operating Voltage: 100 - 240 V AC / 50 - 60 Hz
Power Consumption: 18 W
Illuminance (@ 1 m): 24,300 lx (RGBW, 4.5°)
Luminous Flux (RGBW): 365 lm
Power Connector: blue power input socket
white power output socket
Temperature (during operation): 0°C - +45°C
Relative Humidity: <85% non-condensing
Housing Material: metal
Housing Colour: black (CLQS15RGBW)
white (CLQS15RGBWWH)
Housing Cooling: convection
Dimensions (W x H x D, excluding bracket): 89 x 89 x 172 mm
Weight: 1.2 kg
Other Features: adjustable mounting or standing bracket included, safety screw eye, power cable, IR
remote control, 2 diffuser screens included
SPECIFICATIONS / TECHNISCHE DATEN / CARACTÉRISTIQUES TECHNIQUES / CARACTERÍSTICAS
TÉCNICAS / PRZYŁĄCZA, WYMIARY I MONTAŻ / DATI TECNICI
54
MANUFACTURER´S DECLARATIONS / HERSTELLERERKLÄRUNGEN / DECLARATIONS /
DECLARACIÓN DEL FABRICANTE / DEKLARACJE PRODUCENTA / DICHIARAZIONI DEL PRODUTTORE
EN
MANUFACTURER‘S WARRANTY & LIMITATIONS OF LIABILITY
You can find our current warranty conditions and limitations of liability at: http://www.adamhall.com/media/shop/downloads/documents/manufactur-
ersdeclarations.pdf. To request warranty service for a product, please contact Adam Hall GmbH, Daimler Straße 9, 61267 Neu Anspach /
Email: [email protected] / +49 (0)6081 / 9419-0. To enquire about the current declaration of conformity, please contact [email protected].
CORRECT DISPOSAL OF THIS PRODUCT
(Valid in the European Union and other European countries with a differentiated waste collection system) This symbol on the product, or on its
documents indicates that the device may not be treated as household waste. This is to avoid environmental damage or personal injury due
to uncontrolled waste disposal. Please dispose of this product separately from other waste and have it recycled to promote sustainable economic
activity. Household users should contact either the retailer where they purchased this product, or their local government office, for details on where
and how they can recycle this item in an environmentally friendly manner. Business users should contact their supplier and check the terms and
conditions of the purchase contract. This product should not be mixed with other commercial waste for disposal.
DE
HERSTELLERGARANTIE & HAFTUNGSBESCHRÄNKUNG
Unsere aktuellen Garantiebedingungen und Haftungsbeschränkung finden Sie unter: http://www.adamhall.com/media/shop/downloads/documents/
manufacturersdeclarations.pdf. Im Service Fall wenden Sie sich bitte an Adam Hall GmbH, Daimlerstraße 9, 61267 Neu Anspach / E-Mail Info@
adamhall.com / +49 (0)6081 / 9419-0. Die aktuelle Konformitätserklärung können Sie unter [email protected] anfragen.
KORREKTE ENTSORGUNG DIESES PRODUKTS
(Gültig in der Europäischen Union und anderen europäischen Ländern mit Mülltrennung) Dieses Symbol auf dem Produkt oder dazugehörigen
Dokumenten weist darauf hin, dass das Gerät am Ende der Produktlebenszeit nicht zusammen mit dem normalen Hausmüll entsorgt werden
darf, um Umwelt- oder Personenschäden durch unkontrollierte Abfallentsorgung zu vermeiden. Bitte entsorgen Sie dieses Produkt getrennt von
anderen Abfällen und führen es zur Förderung nachhaltiger Wirtschaftskreisläufe dem Recycling zu. Als Privatkunde erhalten Sie Informationen zu
umweltfreundlichen Entsorgungsmöglichkeiten über den Händler, bei dem das Produkt erworben wurde, oder über die entsprechenden regionalen
Behörden. Als gewerblicher Nutzer kontaktieren Sie bitte Ihren Lieferanten und prüfen die ggf. vertraglich vereinbarten Konditionen zur Entsorgung
der Geräte. Dieses Produkt darf nicht zusammen mit anderen gewerblichen Abfällen entsorgt werden.
FR
GARANTIE FABRICANT & LIMITATION DE RESPONSABILITÉ
Nos conditions actuelles de garantie et de limitation de responsabilité sont disponibles à l‘adresse suivante : http://www.adamhall.com/media/shop/
downloads/documents/manufacturersdeclarations.pdf. Pour les réparations, veuillez contacter Adam Hall GmbH, Daimlerstraße 9,
61267 Neu Anspach / E-Mail [email protected] / +49 (0)6081 / 9419-0. Vous pouvez nous demander la déclaration de conformité actuelle à
l’adresse [email protected].
TRI ET MISE AUX DÉCHETS CORRECTE DE CE PRODUIT
(Applicable dans l‘Union Européenne et les autres pays européens pratiquant le tri des déchets) La présence de ce symbole sur le produit ou
sur la documentation correspondante indique qu‘en fin de vie, le produit ne doit pas être jeté avec les déchets normaux, afin d‘éviter tout
dommage à l‘environnement ou aux personnes consécutive à une élimination non contrôlée des déchets. Séparez-le des autres types de déchets et
recyclez-le, afin de promouvoir la réutilisation durable des ressources naturelles. Nous conseillons aux utilisateurs non professionnels de contacter le
revendeur chez qui ils ont acheté le produit, ou un représentant gouvernemental local, pour plus de détails sur le lieu de collecte et la façon de
recycler cet appareil dans le meilleur respect de l‘environnement possible.. Nous invitons les utilisateurs professionnels à contacter leur fournisseur
et à vérifier les termes et conditions de leur contrat d‘achat. Ce produit ne doit pas être mélangé à d‘autres déchets commerciaux lors de la collecte.
ES
GARANTÍA DEL FABRICANTE Y LIMITACIÓN DE RESPONSABILIDAD
Consulte nuestras condiciones de garantía y limitaciones de responsabilidad en: http://www.adamhall.com/media/shop/downloads/documents/manufac-
turersdeclarations.pdf. En caso de necesitar servicio técnico, póngase en contacto con Adam Hall GmbH, Daimlerstraße 9, 61267 Neu Anspach (Alemania);
correo electrónico [email protected]; +49 (0)6081 / 9419-0. Puede solicitar la declaración de conformidad enviando un mensaje a [email protected].
ELIMINACIÓN CORRECTA DE ESTE PRODUCTO
(Aplicable en la Unión Europea y en los países europeos que dispongan de un sistema de recogida selectiva) El símbolo que aparece sobre el
producto o en la documentación adjunta indica que al final de la vida útil del equipo, no deberá desecharlo con los demás residuos
domésticos, con el fin de evitar posibles efectos negativos en el medio ambiente y en la salud humana debidos al vertido incontrolado de desechos.
La recogida selectiva ayuda a su posterior reciclaje y fomenta la reutilización sostenible de los componentes de este equipo. Si es un particular,
póngase en contacto con el distribuidor donde adquirió este producto, o con el ayuntamiento, para informarse sobre el reciclaje adecuado de este
equipo. Si es una empresa, póngase en contacto con su proveedor para informarse sobre los términos y condiciones de su contrato de compra-
venta. Este producto no debe mezclarse con otros residuos industriales.
56
WWW.CAMEOLIGHT.COM
Adam Hall GmbH | Daimlerstrasse 9 | 61267 Neu-Anspach | Germany
Tel. +49(0)6081/9419-0 | Fax +49(0)6081/9419-1000
web : www.adamhall.com | e-mail : [email protected] REV: 01
  • Page 1 1
  • Page 2 2
  • Page 3 3
  • Page 4 4
  • Page 5 5
  • Page 6 6
  • Page 7 7
  • Page 8 8
  • Page 9 9
  • Page 10 10
  • Page 11 11
  • Page 12 12
  • Page 13 13
  • Page 14 14
  • Page 15 15
  • Page 16 16
  • Page 17 17
  • Page 18 18
  • Page 19 19
  • Page 20 20
  • Page 21 21
  • Page 22 22
  • Page 23 23
  • Page 24 24
  • Page 25 25
  • Page 26 26
  • Page 27 27
  • Page 28 28
  • Page 29 29
  • Page 30 30
  • Page 31 31
  • Page 32 32
  • Page 33 33
  • Page 34 34
  • Page 35 35
  • Page 36 36
  • Page 37 37
  • Page 38 38
  • Page 39 39
  • Page 40 40
  • Page 41 41
  • Page 42 42
  • Page 43 43
  • Page 44 44
  • Page 45 45
  • Page 46 46
  • Page 47 47
  • Page 48 48
  • Page 49 49
  • Page 50 50
  • Page 51 51
  • Page 52 52
  • Page 53 53
  • Page 54 54
  • Page 55 55
  • Page 56 56

Cameo CLQS15RGBW User manual

Category
Stroboscopes & disco lights
Type
User manual

Ask a question and I''ll find the answer in the document

Finding information in a document is now easier with AI