Brandt DFH14118X Owner's manual
- Category
- Dishwashers
- Type
- Owner's manual
This manual is also suitable for
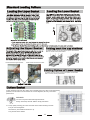
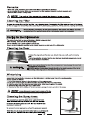
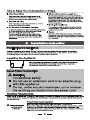
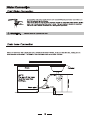
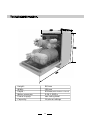
Groupe Brandt DFH14118X is a dishwasher designed for household use, featuring a range of functions to enhance your dishwashing experience. It comes with a user-friendly control panel, where you can select various washing programs to suit your needs. The dishwasher features a spacious interior with two baskets, allowing you to accommodate a significant amount of dishes. It also includes a cutlery rack for convenient placement of forks, spoons, and knives.
The Groupe Brandt DFH14118X is equipped with a water softener to prevent limescale buildup, ensuring optimal washing results. It also has a rinse aid dispenser to enhance the drying process and prevent water spots on your dishes. The dishwasher is designed with safety in mind, featuring an auto shut-off function to prevent water leakage and potential damage.


-
 1
1
-
 2
2
-
 3
3
-
 4
4
-
 5
5
-
 6
6
-
 7
7
-
 8
8
-
 9
9
-
 10
10
-
 11
11
-
 12
12
-
 13
13
-
 14
14
-
 15
15
-
 16
16
-
 17
17
-
 18
18
-
 19
19
-
 20
20
-
 21
21
-
 22
22
-
 23
23
-
 24
24
-
 25
25
-
 26
26
-
 27
27
-
 28
28
-
 29
29


Brandt DFH14118X Owner's manual
- Category
- Dishwashers
- Type
- Owner's manual
- This manual is also suitable for
Groupe Brandt DFH14118X is a dishwasher designed for household use, featuring a range of functions to enhance your dishwashing experience. It comes with a user-friendly control panel, where you can select various washing programs to suit your needs. The dishwasher features a spacious interior with two baskets, allowing you to accommodate a significant amount of dishes. It also includes a cutlery rack for convenient placement of forks, spoons, and knives.
The Groupe Brandt DFH14118X is equipped with a water softener to prevent limescale buildup, ensuring optimal washing results. It also has a rinse aid dispenser to enhance the drying process and prevent water spots on your dishes. The dishwasher is designed with safety in mind, featuring an auto shut-off function to prevent water leakage and potential damage.
Ask a question and I''ll find the answer in the document
Finding information in a document is now easier with AI
Related papers
-
Groupe Brandt DFH12218S Owner's manual
-
Groupe Brandt DFH144LX Owner's manual
-
-
-
-
-
Brandt DFS1009B User manual
-
-
-
Brandt DFH14102W User manual
Other documents
-
Proline DWP5012WA Instructions For Use Manual
-
Danby DDW1805W User manual
-
Omega ODW702W User manual
-
Omega ODW700X User manual
-
ROBINHOOD RHDW4345W RHDW4345X Installation & Operating Manual
-
White-Westinghouse WDFA14JFCWD Owner's manual
-
Omega ODW600S User manual
-
SPT SD-2224DS User manual
-
Teka LP8 810 User manual
-
ETNA VW744HM Operating instructions