Fujitsu-siemens fi-6670(A) User manual

Category
Radar detectors
Type
User manual
fi-6670
(
A
)
/fi-6770
(
A
)
/fi-6750S
Introduction....................................................................2
Regulatory Information .................................................2
Conventions...................................................................3
Precautions ....................................................................4
Safety Information .........................................................5
1 Preparation.....................................................................8
2 Installing the Scanner .................................................12
3 Connecting the Cables................................................14
4 Installing the Scanner Software .................................16
5 Test-Scanning Documents .........................................22
Thank you for purchasing a fi-6670(A) / fi-6770(A) / fi-6750S Color Scanner
series. This Getting Started is the startup guide that summarizes the preparatory
actions needed before use. Be sure to thoroughly read this manual before you
start using the scanner.
P3PC-2242-01EN
Read the Operator’s Guide (PDF) included in the SETUP DVD-ROM for
information about the scanner’s operation procedures, daily care, consumables
replacement, and troubleshooting.
Contents
2
Introduction
Thank you for purchasing our fi-6670(A)/fi-6770(A)/fi-6750S series
Color Image Scanner.
Scanner Models
This manual covers the following five scanner models, each featur-
ing as:
Manuals
The following manuals are prepared for the scanner. Read them as
needed.
Trademarks
Microsoft and Windows are registered trademarks of Microsoft
Corporation in the United States and/or other countries.
ISIS and QuickScan are trademarks or registered trademarks of
EMC Corporation in the United States.
Adobe, the Adobe logo, and Acrobat are either registered trade-
marks of Adobe Systems Incorporated in the United States and/or
other countries.
Kofax and VRS are trademarks or registered trademarks of Kofax
Image Products, Inc.
Other product names are the trademarks or registered trademarks
of the respective companies.
Manufacturer
PFU LIMITED
International Sales Dept., Imaging Business Division,
Products Group
Solid Square East Tower, 580 Horikawa-cho, Saiwai-ku,
Kawasaki-shi Kanagawa 212-8563, Japan
Phone: (81-44) 540-4538
All Rights Reserved, Copyright © PFU LIMITED 2008
Regulatory Information
FCC Declaration
This equipment has been tested and found to comply with the limits
for a Class B digital device, pursuant to Part 15 of the FCC Rules.
These limits are designed to provide reasonable protection against
harmful interference in a residential installation. This equipment
generates, uses, and can radiate radio frequency energy and, if not
installed and used in accordance with the instruction manual, may
cause harmful interference to radio communications.
However, there is no guarantee that interference will not occur in a
particular installation. If this equipment does cause harmful interfer-
ence to radio or television reception, which can be determined by
turning the equipment off and on, the user is encouraged to try to
correct the interference by one or more of the following measures:
Reorient or relocate the receiving antenna.
Increase the separation between the equipment and receiver.
Connect the equipment into an outlet on a circuit different from
that to which the receiver is located.
Consult your dealer or an experienced radio/TV technician.
FCC warning: Changes or modifications not expressly approved
by the party responsible for compliance could void the user’s
authority to operate the equipment.
Model Description
fi-6670
fi-6670A
Equipped with an automatic document
feeder (ADF) for automatic document
feeding and duplex scanning.
The fi-6670A comes with a color graphics
adapter (CGA) board as a standard feature.
It enables advanced image processing at a
high speed when used with Kofax VRS.
fi-6770
fi-6770A
Equipped with an automatic document
feeder (ADF) for automatic document
feeding and duplex scanning, and a flatbed
for scanning documents such as thin paper
or thick books.
The fi-6770A comes with a color graphics
adapter (CGA) board as a standard feature.
It enables advanced image processing at a
high speed when used with Kofax VRS.
fi-6750S Equipped with an automatic document
feeder (ADF) for automatic document
feeding and simplex scanning, and a flatbed
for scanning documents such as thin paper
or thick books.
The ADF features simplex scanning only.
Manual Description
Package Contents
List (paper)
Lists all the items contained in the scanner
package. Make sure all are included in the
package.
Getting Started
(This Manual)
(paper, PDF)
Outlines the procedures from installing up
to starting the operation of the scanner.
Read this manual first.
The PDF data is included in the SETUP
DVD-ROM.
Operator’s Guide
(PDF)
Provides detailed information on how to
operate, and maintain the scanner daily,
how to replace the consumables, and how
to troubleshoot problems.
Included in the SETUP DVD-ROM.
FUJITSU TWAIN
32 User’s Guide
(PDF)
Explains how to install and operate the
FUJITSU TWAIN 32 scanner driver.
Included in the SETUP DVD-ROM.
Image Processing
Software Option
User’s Guide
(PDF)
Explains how to install and operate the
Image Processing Software Option.
Included in the SETUP DVD-ROM.
VRS Note (PDF) Explains how to connect and install Kofax
VRS.
Included in the SETUP DVD-ROM.
Error Recovery
Guide (HTML
help)
Details the status of the scanner and
explains how to resolve problems encoun-
tered.
Contains movies that explain how to
replace the consumables.
Included in the SETUP DVD-ROM.
Help - Embedded
in scanner drivers
Explains how to use the scanner drivers,
and how to configure the settings for them.
Help - Embedded
in related applica-
tions
Explains how to use and configure the
settings for the application software. Use
help files as necessary. Can be referenced
from the applications.
3
Conventions
Canadian DOC Regulations
This digital apparatus does not exceed the Class B limit for radio
noise emissions from digital apparatus set out in the Radio interfer-
ence Regulations of the Canadian Department of Communications.
This Class B digital apparatus complies with Canadian ICES-003.
Le présent appareil numérique n'émet pas de parasites radioélec-
triques dépassant les limites applicables aux appareils numériques
de la classe B et prescrites dans le Règlement sur le brouillage
radioélectrique dictées par le Ministère des Communications du
Canada.
Cet appareil numérique de la classe B est conforme à la norme
NMB-003 du Canada.
Bescheimigung des Herstellers/
Importeurs
Für den fi-6670(A)/fi-6770(A)/fi-6750S wird folgendes bescheinigt:
In Übereinsstimmung mit den Bestimmungen der EN45014(CE)
funkentstört
Maschinenlärminformationsverordnung 3. GPSGV: Der höchste
Schalldruckpegel beträgt 70 dB (A) oder weniger, gemäß EN
ISO 7779.
Dieses Gerät wurde nicht für die Benutzung in unmittelbarer
Umgebung starker Lichtquellen (z. B. Projektoren) konzipiert.
International ENERGY
STAR
®
Program
As an ENERGY STAR
®
Partner, PFU LIMITED
has determined that this product meets the
ENERGY STAR
®
guidelines for energy
efficiency.
The International ENERGY STAR® Office Equipment Program is
an international program that promotes energy saving through the
penetration of energy efficient computers and other office equip-
ment. The program backs the development and dissemination of
products with functions that effectively reduce energy consumption.
It is an open system in which business proprietors can participate
voluntarily. The targeted products are office equipment such as
computers, monitors, printers, facsimiles, copiers, scanners, and
multifunction devices. Their standards and logos are uniform
among participating nations.
Use in High-Safety Applications
This product has been designed and manufactured on the assump-
tion that it will be used in office, personal, domestic, regular indus-
trial, and general-purpose applications.
It has not been designed and manufactured for use in applications
(simply called “high-safety applications” from here on) that directly
involve danger to life and health when a high degree of safety is
required, for example, in the control of nuclear reactions at nuclear
power facilities, automatic flight control of aircraft, air traffic control,
operation control in mass-transport systems, medical equipment for
sustaining life, and missile firing control in weapons systems, and
when provisionally the safety in question is not ensured.
The user should use this product with adopting measures for
ensuring safety in such high-safety applications. PFU LIMITED
assumes no liability whatsoever for damages arising from use of
this product by the user in high-safety applications, and for any
claims or compensation for damages by the user or a third party.
Conventions
Symbols Used In This Manual
For notational conventions, the following symbols are used in this
manual.
Naming Conventions in This Manual
Scanners
The scanners are indicated as follows:
The explanation in this manual bases on the following models:
•ADF type: fi-6670
•Flatbed type: fi-6770
Operating Systems and Software Products
The OSs and products in this manual are indicated as follows:
The use of a shielded interface cable is required to
comply with the Class B limits of Part 15 of FCC rules.
The length of the Power cable must be 3 meters (10
feet) or less.
This symbol alerts operators to particularly important
information. Be sure to read this information.
This symbol alerts operators to helpful advice regard-
ing operation.
Model Indication
fi-6670/fi-6670A ADF type Scanner
fi-6770/fi-6770A/fi-6750S Flatbed type
Product Indication
Microsoft
®
Windows
®
2000 Professional
operating system
Windows
2000
Windows
*
1
Microsoft
®
Windows
®
XP
Professional operating system (32/64-bit)
Microsoft
®
Windows
®
XP
Home Edition operating system
Windows
XP
Microsoft
®
Windows Server™ 2003
Standard Edition operating system
(32/64-bit)
Windows
Server
2003
Microsoft
®
Windows Vista
®
Home Basic operating system (32/64-bit)
Microsoft
®
Windows Vista
®
Home Premium operating system
(32/64-bit)
Microsoft
®
Windows Vista
®
Business operating system (32/64-bit)
Microsoft
®
Windows Vista
®
Enterprise operating system (32/64-bit)
Microsoft
®
Windows Vista
®
Ultimate operating system (32/64-bit)
Windows
Vista
Microsoft
®
Office SharePoint™ Portal
Server 2003
Microsoft Share-
Point Server
Microsoft
®
Office SharePoint™ Server
2007
Adobe
®
Acrobat
®
Adobe Acrobat*
2
4
*1) Where there is no distinction between the different versions of the above
operating system, the general term "Windows" is used.
*2) All the descriptions in this manual assume the usage of Adobe Acrobat
bundled with this product. However, Adobe Acrobat may be upgraded
without notice. If the descriptions differ from the screens actually
displayed, refer to the Adobe Acrobat Help.
Arrow Symbols in This Manual
Right-arrow symbols (D) are used to separate icons or menu
options you should select in succession.
Example: Select [Tool]
D [Scan Setting].
Screen Examples in This Manual
The screen examples in this manual are subject to change without
notice in the interest of product improvement.
If the actual displayed screen differs from the screen examples in
this manual, operate by following the actual displayed screen while
referring to the user's manual of the scanner application you are
using.
The screen examples used in this manual are of FUJITSU TWAIN
32 scanner driver, FUJITSU ISIS scanner driver, ScandAll PRO
and QuickScan Pro
TM
(which are image capturing software), and
Adobe Acrobat.
Precautions
Liability Note
READ ALL OF THIS MANUAL CAREFULLY BEFORE USING
THIS PRODUCT. IF THIS PRODUCT IS NOT USED
CORRECTLY, UNEXPECTED INJURY MAY BE CAUSED TO
USERS OR BYSTANDERS.
Also, keep this manual in a safe place so that it can be easily
referred to during use of this product.
While all efforts have been made to ensure the accuracy of all infor-
mation in this manual, PFU assumes no liability to any party for any
damage caused by errors or omissions or by statements of any
kind in this manual, its updates or supplements, whether such
errors are omissions or statements resulting from negligence,
accidents, or any other cause. PFU further assumes no liability
arising from the application or use of any product or system
described herein; nor any liability for incidental or consequential
damages arising from the use of this manual. PFU disclaims all
warranties regarding the information contained herein, whether
expressed, implied, or statutory.
Use of Mercury
To avoid unexpected injuries:
Do not put the substance contained in the lamp in your mouth
as it has mercury.
Do not breathe the chemical liquid contained in the scanner
lamps.
Do not incinerate, crush, or shred the lamps or scanner parts.
Maintenance
The user must not perform repairs on this scanner.
Contact the store where you purchased the scanner or an autho-
rized FUJITSU Image Scanner service provider to make repairs to
this product.
Warning Label
HOT warning label:
The glass surface inside the ADF becomes hot during
the operation. Be careful not to touch glass surfaces
inside the ADF.
To avoid burns, never touch around the area
indicated by this label.
Take care not to pinch your fingers while turning the ADF.
Lamp(s) inside this product contain mercury and
must be recycled or disposed of according to local,
state, or federal laws.
H
g
You must NOT remove this warning label from your
scanner. When it gets old or unreadable by staining or
scratches, contact the store where you purchased the
scanner or an authorized FUJITSU scanner service
provider.
5
Safety Information
Safety Information
Warning Indications Used In This
Manual
The following indications are used in this manual to obviate any
change of accident or damage to you and/or the equipment.
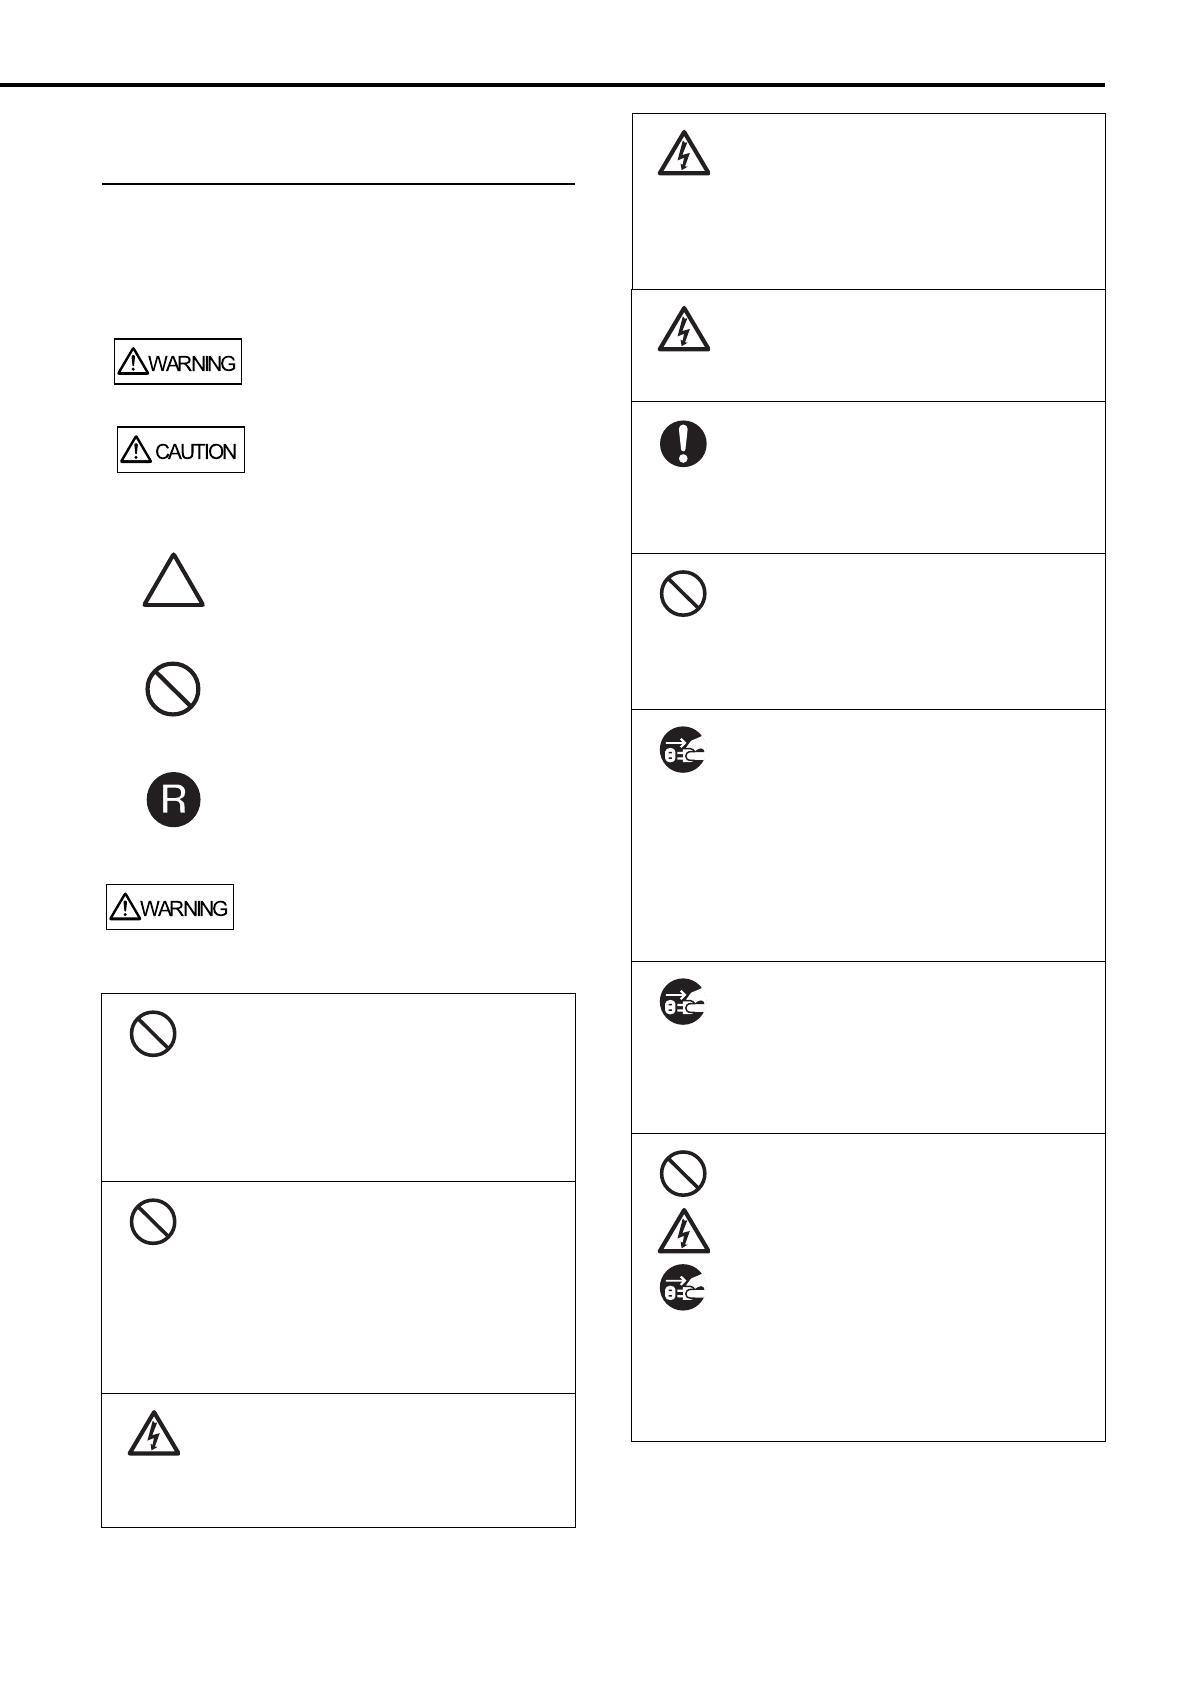
The following are important warnings described in this manual.
This indication alerts operators to an opera-
tion that, if not strictly observed, may result in
severe injury or death.
This indication alerts operators to an opera-
tion that, if not strictly observed, may result in
safety hazards to personnel or damage to
equipment.
A TRIANGLE symbol indicates that special
care and attention is required.
The drawing inside the triangle shows the
specific caution.
A CIRCLE with a diagonal line inside shows
action which users may not perform.
The drawing inside or under the circle
shows the specific action that is not allowed.
Outline characters on a colored background
show instructions users should follow.
It may also include the drawing that shows
the specific instruction.
Do not damage the Power cable.
A damaged Power cable may cause fire or electric
shock. Do not place heavy objects on Power
cables, or pull, bend, twist, heat, damage or modify
Power cables.
Do not use damaged Power cables or power
plugs, or install any cables or power plugs to loose
wall sockets.
Use only specified Power cables and
interface cables.
Use only specified Power cables and interface
cables. Failure to use the correct cables might
cause electric shock and/or equipment failure.
Do not use the Power cable provided with the
scanner for other devices, since this might cause
equipment failure and other troubles or an electric
shock.
Make sure to ground the scanner.
Make sure to ground to avoid electric shock. Be
sure to ground before plugging into a Power outlet.
Unplug from the outlet before removing the ground
connection.
Use the scanner only at the indicated
power voltage. Do not connect to
multiple-power strips.
Use the scanner only at the indicated power
voltage and current. Improper power voltage or
current might cause fire or electric shock. Do not
connect to multiple-power strips.
Do not touch the Power cable with
wet hands.
Do not touch the power plug with wet hands. Doing
so might cause electric shock.
Wipe off any dust from the power
plug.
Wipe off any dust from the metal parts on the
power plug or metal fittings with a soft, dry cloth.
Accumulated dust might cause fire or electric
shock.
Do not install the scanner in a
location that has oil smoke, steam,
humidity, and dust.
Do not install the scanner in a location subject to
oil smoke, steam, humidity, and dust. Doing so
might cause a fire or electric shock.
Do not use the scanner if there is a
strange odor.
If you detect excessive heat coming from the
scanner or detect smoke, strange smells or noises
during the operation, immediately disconnect the
power plug from the Power outlet. Before contact-
ing the store where you bought the scanner or an
authorized FUJITSU scanner service provider,
make sure that any smoke coming from it has
completely stopped. Never try fixing such
problems by yourself. Doing so is dangerous.
Disconnect the power if the scanner
is damaged.
If the scanner is damaged for any reason, immedi-
ately disconnect the power plug from the Power
outlet. Then, contact the store where you bought
the scanner or an authorized FUJITSU scanner
service provider.
Do not put liquids inside the scanner.
Do not insert or drop any metal objects into the
ADF slot or ventilation ports on the scanner.
Do not scan any wet documents or documents with
paper clips or staples attached.
Do not splash or allow the scanner to get wet.
If foreign objects (water, small metal objects,
liquids, etc.) get inside the scanner, immediately
disconnect the power plug from the Power outlet.
Then, contact the store where you bought the
scanner or an authorized FUJITSU scanner
service provider. Pay particular attention to this
warning in households where there are small
children.
6
The following are important cautions described in this manual
Unplug the scanner when a trouble
occurs.
Immediately unplug the scanner when a trouble
occurs.
Never cut the ground connection until the scanner
is unplugged from the Power outlet.
Do not disassemble the scanner.
Do not take apart or modify the scanner. The
inside of the scanner contains high-voltage compo-
nents.
Touching these components might cause electric
shock or fire.
Do not use aerosol or alcohol sprays
near the scanner.
Do not use any flammable substance or alcohol
based cleaning sprays (such as aerosol sprays) to
clean the scanner.
Sparks, caused by static electricity, generated
when blowing off dust and dirt from the outside of
the scanner, may cause a fire.
Do not place the scanner within the
reach of small children.
To avoid injuries, do not place the scanner in an
area where small children may be able to reach.
Do not touch the heated section for a
long time.
Do not touch the heated section such as the
bottom of the scanner for a long time.
Doing so may cause a low-temperature burn on
your skin.
Do not cover the scanner with
something during its operation.
Do not use the scanner while covered with a
blanket, etc. Doing so may raise the temperature
inside and cause a fire.
Do not use the scanner where it gets
wet.
Do not use the scanner at a place such as a
bathroom, shower room, or swimming pool where
it may easily get wet. Doing so might cause electric
shock or fire.
Do not install the scanner on an
unstable work table.
When installing the scanner on a work table, make
sure that the table is flat and level. Place the
scanner so that none of its parts extend beyond
the edge of the table.
Also, it must be strong enough to support the
weights of the scanner and other devices.
Firmly insert the power plug.
Firmly insert the power plug into the Power outlet
as far it can go.
Do not block the ventilation ports.
Do not block the ventilation ports. Blocking the
ventilation ports generates heat inside of the
scanner, which may result in fire or scanner
failure.
Do not place heavy objects or stand
on the top of the scanner.
Do not place heavy objects on the scanner or
stand on its top to perform other work.
Doing so might cause injuries and equipment
failure.
Do not use the scanner immediately
after moving it from a cold place into
a warm room.
Do not use the scanner immediately after moving it
from a cold place into a warm room.
Condensation may occur, which might lead to
scanning errors. Let the scanner dry for one or two
hours before you use it.
Before moving the scanner, discon-
nect the power plug from the Power
outlet.
Do not move the scanner with the power and inter-
face cables connected as this can damage the
cables, which can later cause fire, electric shock
as well as injuries.
Before moving the scanner, be sure to disconnect
the power plug from the Power outlet, and all other
interface cables. Make sure that the floor is free of
any obstructions.
Protect the scanner from static
electricity.
Install the scanner away from strong magnetic
fields and other sources of electronic noise. Also,
protect the scanner against any static electricity,
which can cause the scanner to malfunc-
tion.Choose a static-free place to install the
scanner.
Avoid any contact when scanner is in
use.
Avoid getting a sleeve, necktie, or hair caught up
in any scanner mechanism during scanning since
this may cause injuries.
7
Safety Information
Disconnect the power plug from the
Power outlet when the scanner is not
in use for a long period of time.
When the scanner is not going to be used for a
long period of time, be sure to disconnect the
power plug from the Power outlet.
Do not install the scanner in direct
sunlight.
Do not install the scanner under direct sunlight or
near heating apparatus. Doing so might cause
excessive heat to build up inside the scanner,
which can cause scanner trouble or even fire.
Install the scanner in a well-ventilated location.
Do not try to move or lift the scanner
alone.
When transporting the scanner, never carry it
alone. The scanner is heavy.
Before moving the scanner, make
sure the transport lock is locked.
(Flatbed type)
When moving the scanner, be sure to lock the
transport lock and the ADF transport lock in order
to prevent damage to the scanner.
Handle documents carefully.
When handling documents, be careful not to cut
your fingers with them.
Do not make the scanner wet while
carrying it outside.
When carrying the scanner outside while it is
raining or snowing, pay special attention so the
scanner does not get wet.
8
1 Preparation
Contents of the Scanner Package
When you open the scanner package, handle the main unit and its attachments carefully.
Make sure the scanner package contains all the parts listed in the package contents list that is included
in the package box.
If any parts are missing or defective, contact your FUJITSU scanner dealer or an authorized FUJITSU
scanner service provider.
Part Names and Functions
This section describes the scanner parts and their functions.
For information on the function of each part, refer to “Section 1.2 Scanner Parts and Their Functions” in
the Operator’s Guide.
fi-6670/fi-6670A (ADF type)
ADF (automatic document feeder)
Stacker
Stacker Extension
Stopper
EXT Connector
Paper Chute
Extension
Side Guide
Side Guide Button
ADF Paper Chute
Operator Panel
Chute Roller Cover
Power Connector
Main Power Switch
Ventilation
Port
CGA Board Slot
SCSI Connector 2
SCSI ID Switch
ADF Open Button
Cable Cover
CGA Board
USB Connector 1
SCSI Connector 1
USB Connector 2
fi-6670
fi-6670A
1 Preparation
9
fi-6770/fi-6770A/fi-6750S (Flatbed type)
Stacker
Stacker Extension
Stopper
Chute Roller Cover
Paper Chute
Extension
Side Guide
Side Guide Button
ADF Paper Chute
Operator Panel
Transport Lock
Flatbed
ADF (automatic document feeder)
ADF Lock Screw
Lock Screw Storage Hole
Document Bed
Document Cover
Document Holding
Pad
Handle
Main Power Switch
Power Connector
SCSI Connector 1
Ventilation Port
fi-6770
fi-6770A
fi-6750S
CGA Board Slot
SCSI ID Switch
USB Connector 1
USB Connector 1
SCSI Connector 2
USB Connector 2
CGA Board
ADF Open Button
10
Model-Common Parts
Functions of the Operator Panel
The Operator Panel is comprised of a Function Number Display, buttons, and LEDs, which are used to
operate the scanner and to check the scanner status.
For information on how to configure settings for scanning using the [Scan/Stop] or [Send to] button,
refer to the help topics the FUJITSU TWAIN 32 scanner driver contained in the SETUP DVD-ROM, or
the section “Using the Scanner Buttons to Start A Scan Quickly” in the Operator’s Guide.
ADF type
Two Operator Panels are mounted on the scanner; one each on each side. You can use
whichever is convenient for you.They can be folded back in place when they are not used. The
scanner status can be checked while the Operator Panels are folded back in place.
Ultrasonic Sensor (x2)
(for multifile detection)
Sheet Guide (x2)
Glass (x2)
Pick Arm (x1)
Feed Roller (x4)
Plastic Roller (x4)
Chute Roller (x1)
(Usually covered with a hood)
Brake Roller (x1) (consumable)
Pick Roller (1 x 2 types) (consumable)
Brake Roller Holder (x1)
Pick Roller Cover (x1)
Check
Function
Send to
Scan / Stop
Power
Check LED
Function Number Display
[Function] button
[Power] button/Power LED
[Scan/Stop] button
[Send to] button
When the Operator Panel
is folded back in place
LED
Lights in green when the scanner is ON.
Lights in orange when an error occurs.
1 Preparation
11
Flatbed type
Indications on the Function Number Display
Name Description
Check LED
Lights (in orange) when an error occurs.
Function Number Display
Indicates the scanner status.
[Function] button
Switches the function activated by the [Send to] button.
[Send to] button
Launches linked application software for scanning.
Resets an error indication.
[Scan/Stop] button
Launches linked application software for scanning.
Resets an error indication.
Cancels ongoing scanning.
[Power] button/Power LED
Turns the scanner ON and OFF.
Lights (in green) when the scanner is turned ON.
Indication Function
8
Blinks only one time upon turning on the scanner.
P
Indicates that the scanner has been turned ON and is being initialized.
1
Indicates that the scanner is ready for scanning.
This means initialization has ended successfully after power-on. This status is called “Ready
Status.
J
U
Indicates that a recoverable error occurred during scanning with the scanner.
“J” or “U” and an “error number” are displayed alternately.
For details of the errors, refer to “Temporary Errors“ in the Operator’s Guide.
After the error has been resolved, you can return to the Ready Status (see “1” above) by
pressing the [Scan/Stop] or [Send to] button.
E
F
C
H
A
L
Indicates that an abnormality (device error) occurred in the scanner during its initialization or
during scanning documents.
“E”, “F”, “C”, “H”, “A”, or “L” and an “error number” are displayed alternately. When the error
number is displayed, turn the Main Power Switch OFF and then ON again. If the error persists
after this, contact the dealer where you purchased the scanner or an authorized FUJITSU
scanner service provider.
Check
Function
Send to
Power
Scan / Stop
Check LED
Function Number Display
[Function] button
[Power] button/Power LED
[Scan/Stop] button
[Send to] button
12
2 Installing the Scanner
The following describes how to install the scanner.
1 Place the scanner at its installation site.
The outer dimensions and the spaces required for installing the respective scanner types are as
follows:
2 Unlock the Transport Lock (Flatbed type only).
Using a coin or similar, rotate the Transport Lock counterclockwise by 90 degree to unlock it.
3 Adjust the position of the ADF (Flatbed type only).
1)
Holding the handle, lift open the Document Cover.
2) Remove the ADF Lock Screws, and then set them to the Lock Screw Storage Holes.
(13.0)
(19.6)
(13.4)
329
1179
690 (27.1)
432 (17.0)
686
500
700
342
1030 (40.5)
300 (11.8)
640 (25.1)
390 (15.3)
(27.0)
(46.4)
(27.5)
(Unit: mm/inches)
Flatbed typeADF type
Installation space
Outer dimensions
2 Installing the Scanner
13
3) Gently close the Document Cover.
4) Change the position of the ADF.
The ADF can be set to any of the following three positions:
After repositioning the ADF, be sure that the ADF is firmly locked to the new position.
Traditional (Factory default)
Standard (Space-saving type and for right-handed
operators)
Slide the ADF toward the center of the scanner.
Note the following explanation in this manual is based upon
this standard type of the scanner.
Reversed (Space-saving type and for left-handed
operators)
Slide the ADF toward the center of the scanner, and then
rotate it counterclockwise by 180 degree.
4 Attach the Stacker and the ADF Paper Chute to the scanner.
1)
Insert the hooks of the ADF Paper Chute into their corresponding holes on the scanner.
2) Fit the protruding sections of the Stacker into their corresponding slots on the scanner.
• Be careful not to pinch your fingers when moving the ADF.
• Never rotate the ADF by more than 180 degree. Doing so may damage the ADF.
Protruding section
Hook
14
3 Connecting the Cables
The following describes how to connect the cables between the scanner and your computer.
The type of the connector for the cable depends on the scanner model you use. Confirm the scanner model
and use the correct cable.
1
1
5
4
4
2
3
3
SCSI ID
SCSI ID
ADF type
Flatbed type
USB cable
SCSI cable
USB or SCSI connection
fi-6670
fi-6670A
fi-6770
fi-6770A
fi-6750S
USB cable
SCSI cable
USB or SCSI connection
(when Kofax VRS is used)
USB or SCSI connection
USB connection
USB or SCSI connection
(when Kofax VRS is used)
3 Connecting the Cables
15
1 Make sure that the computer is turned OFF.
2 Open the Cable Cover (ADF type only).
3 Connect the scanner to your computer either with a USB or SCSI cable.
The following describes the requirements for connecting with the respective cables.
USB cable
• Be sure to use the USB cable which comes as an accessory with this scanner.
• When connecting to an USB hub, use the first stage USB hub that is closest to the computer. If you use the
second or later hub stages, the scanner may not operate correctly.
• If you connect the scanner with USB 2.0, it is required that the USB port and the Hub be compliant with USB
2.0. The scanning speed slows down when you connect the scanner with USB 1.1.
SCSI cable
• When using the scanner with a SCSI interface, the following types of SCSI cable and SCSI card must be
purchased.
• SCSI cable:
Use a SCSI cable whose connector on the computer side mates to the connector on the SCSI card installed on
your computer.
On the scanner side, use either of the following SCSI cable types depending on the connector (1 or 2) used:
SCSI Connector 1: 50-pin high-density type
SCSI Connector 2: 68-pin high-density type
• SCSI card:
Find the recommended SCSI card information on the Fujitsu website (FAQ):
http://www.fujitsu.com/global/support/computing/peripheral/scanners/scsi/
• In a SCSI daisy chain formation, connect the scanner so that it is the terminated device.
• The SCSI ID initially set at the factory is [5]. If the SCSI ID of another SCSI device is set to the same ID, change
the scanner's SCSI ID to [0] through [7].
4 Connect the Power cable to the Power Connector of your scanner and to the
power outlet.
5 Close the Cable Cover (ADF type only).
Let the cables out from the side slots of the scanner.
You cannot make both USB and SCSI cable connections at the same time.
You cannot connect multiple computers to the scanner at the same time.
If Kofax VRS is not used on the fi-6670A or fi-6770A, connect the cable to USB Connector 1 or SCSI
Connector 1 on the scanner.
Turn off the scanner and your computer first when you switch the interface cable.
Be careful not to damage any pins of the SCSI connector when connecting the scanner to your
computer.
Be sure to use the supplied power cable. Use of other power cables may cause electri-
cal shock or malfunction.
Do not use the supplied power cable for other products. Doing so may cause electrical
shock or malfunction.
16
4 Installing the Scanner Software
Brief Information on the Bundled Software
To scan documents with this scanner, you must install a scanner driver for operating the scanner as well
as scanning software (hereinafter called the "application") for launching the driver and performing a
scan.
The scanner drivers and applications provided with the scanner are as follows:
FUJITSU TWAIN 32 [TWAIN Driver] (*1)
Conforms to the TWAIN standard. Used when you operate the scanner using TWAIN-compliant
applications.
FUJITSU ISIS [ISIS Driver] (*1)
Conforms to the ISIS standard. Used when you operate the scanner using ISIS-compliant
applications.
Software Operation Panel
Configures settings for scanning behavior and consumable management. Installed together with
the scanner drivers (FUJITSU TWAIN 32/FUJITSU ISIS).
Error Recovery Guide
Shows the error status and the action to take when an error occurs. Can be installed together with
the scanner drivers (FUJITSU TWAIN 32/FUJITSU ISIS). Note this manual will not work if you use
Kofax VRS on the fi-6670A or fi-6770A.
Image Processing Software Option
A software option featuring advanced binarization of scanned images. Can be installed together
with the scanner drivers (FUJITSU TWAIN 32/FUJITSU ISIS). Note this manual does not appear
when Kofax VRS is used on the fi-6670A or fi-6770A.
Kofax VRS [VRS(scanner model names)] (*1)
A software program that allows you to generate high-quality images with a simple operation.
Senses for any documents skewed during scanning, checks for any characters blurred during
coloring or shading, and then corrects them automatically. Not available with the fi-6750S.
ScandAll PRO
A TWAIN/ISIS-compliant image scanning software (recommended). Using the FUJITSU TWAIN
32 or FUJITSU ISIS scanner driver or Kofax VRS’s ISIS interface, ScandAll PRO reads scanned
documents as images from the scanner.
Scan to Microsoft SharePoint
A software program that allows you to upload your files easily from ScandAll PRO to a SharePoint
site. Can be installed together with ScandAll PRO. There is no need to install this software unless
linked with SharePoint sites.
QuickScan Pro
TM
(trial) [QuickScan Pro (Trial)] (*1)
Conforms to the ISIS standard. By using the FUJITSU ISIS scanner driver together with
QuickScan Pro
TM
, you can read scanned documents and create their images. This bundled
QuickScan Pro
TM
is a trial version, and can be executed 30 times before it is disabled. You will
need to purchase the full product version if you wish to continue using it.
Manuals
Include the Getting Started, Operator’s Guide, FUJITSU TWAIN 32 User’s Guide, Image
Processing Software Option User’s Guide, and VRS Note.
4 Installing the Scanner Software
17
Adobe Acrobat 8.1 Standard
A de-facto standard application used for creating, editing, managing, and making use of digitalized
documents in PDF format.
*1: The product ID used for its installation differs from the official product name. It is shown in [ ].
The software programs and their supported OSs are as follows:
Yes: Supported No: Out of guarantee or not supported
*1: Kofax VRS supports the following Windows Vista versions:
Windows Vista Business
Windows Vista Enterprise
Does not support the Windows 64-bit version if installed on the fi-6670 or fi-6770.
*2: Does not support the Windows 64-bit versions.
Windows 2000
Professional
Windows XP
Home Edition
(32-bit)
Windows XP
Professional
(32/64-bit)
Windows Server
2003
(32/64-bit)
Windows
Vista
(32/64-bit)
FUJITSU TWAIN32 Yes Yes Yes Yes Yes
FUJITSU ISIS Yes Yes Yes Yes Yes
Software Operation
Panel
YesYesYesYesYes
Error Recovery Guide Yes Yes Yes Yes Yes
Image Processing
Software Option
YesYesYesYesYes
Kofax VRS Yes No Yes (*2) No Yes (*1)
ScandAll PRO Yes Yes Yes Yes Yes
Scan to Microsoft
SharePoint
YesYesYesYesYes
QuickScan Pro
TM
(trial)
Yes Yes Yes (*2) Yes (*2) Yes (*2)
Manual Yes Yes Yes Yes Yes
Adobe Acrobat 8.1
Standard
YesYesYesYesYes
18
Installing the Bundled Software
The following describes how to install the bundled software from the “SETUP DVD-ROM” contained in
the scanner package.
You can select either the [INSTALL (Recommended)] or [INSTALL (Custom)] menu when installing the
SETUP DVD-ROM.
The former installs all the software programs needed to operate the scanner; the latter installs the
selected software programs one by one.
For how to install Adobe Acrobat, refer to "Installing Adobe Acrobat" (on page 21) in the next section.
The software programs to be installed differ depending on the scanner model to use.
The scanner models and their installable software programs are as follows:
Yes: Installed No: Not installed
The following describes how to install the software.
1 Confirm that the scanner is not turned ON.
2 Turn on your computer and log onto Windows.
3 Insert the SETUP DVD-ROM into your DVD drive.
D
The [FUJITSU Image Scanner Setup] screen appears.
INSTALL (Recommended)
fi-6670/fi-6670A/fi-6770/fi-6770A fi-6750S
FUJITSU TWAIN 32 Yes Yes
FUJITSU ISIS No No
Software Operation Panel Yes Yes
Error Recovery Guide Yes Yes
Image Processing Software Option Yes Yes
Kofax VRS Yes No
ScandAll PRO Yes Yes
Scan to Microsoft SharePoint Yes Yes
Quick ScanPro
TM
(trial)
No No
Manual Yes Yes
If an old version of the software is installed already, uninstall it first.
For how to uninstall each of the software, refer to “Appendix 5 Uninstalling the Software” in the Operator’s
Guide.
Be sure to log on as a user with "Administrator" privileges.
If this screen does not appear, find "Install.exe" in the DVD-ROM using "Windows Explorer" or
"Computer" and execute it directly.
4 Installing the Scanner Software
19
4 Click the [INSTALL (Recommended)] button.
D
The list of scanners appears.
5 Select the scanner model name you will be using.
Then, click the [Next] button.
6 Install the software, following the on-screen instructions.
This menu lets you select and install the required software programs one by one.
The procedure for custom-installing the required software is as follows:
1 Confirm that the scanner is not turned ON.
2 Turn on your computer and log onto Windows.
INSTALL (Custom)
If an old version of the software is installed already, uninstall it first.
For how to uninstall each of the software, refer to “Appendix 5 Uninstalling the Software” in the Operator’s
Guide.
Be sure to log on as a user with "Administrator" privileges.
20
3 Insert the SETUP DVD-ROM into your DVD drive.
D
The [FUJITSU Image Scanner Setup] screen appears.
4 Click the [INSTALL (Custom)] button.
D
The [INSTALL PRODUCTS] screen appears.
5 Click the button for the software to be installed.
6 Install the software, following the on-screen instructions.
Repeat Steps 5 and 6 to install other software program(s) here.
If this screen does not appear, find "Install.exe" in the DVD-ROM using "Windows Explorer" or
"Computer" and execute it directly.
For how to install Kofax VRS, refer to “VRS NOTE“ included in the SETUP DVD-ROM.
  • Page 1 1
  • Page 2 2
  • Page 3 3
  • Page 4 4
  • Page 5 5
  • Page 6 6
  • Page 7 7
  • Page 8 8
  • Page 9 9
  • Page 10 10
  • Page 11 11
  • Page 12 12
  • Page 13 13
  • Page 14 14
  • Page 15 15
  • Page 16 16
  • Page 17 17
  • Page 18 18
  • Page 19 19
  • Page 20 20
  • Page 21 21
  • Page 22 22
  • Page 23 23
  • Page 24 24
  • Page 25 25
  • Page 26 26

Fujitsu-siemens fi-6670(A) User manual

Category
Radar detectors
Type
User manual

Ask a question and I''ll find the answer in the document

Finding information in a document is now easier with AI