Page is loading ...

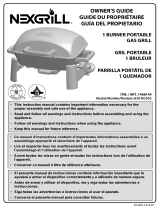
Use and Care Guide
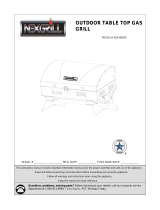
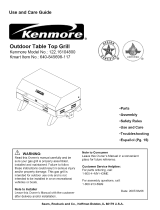
Outdoor Table Top Grill
Model No.: 820-0012
SKU No.: 499864
-Parts
-Assembly
•Safety Rules
•Use and Care
-Troubleshooting
Z_ WARNING:
Read this Owner's manual carefully and be
sure your gas grill is properly assembled,
installed and maintained. Failure to follow
these instructions could result in serious injury
and/or property damage. This gas grill is
intended for outdoor use only and is not
intended to be installed in or on recreational
vehicles or boats.
Note to Installer
Leave this Owner's Manual with the customer
after delivery and/or installation.
Note to Consumer
Leave this Owner's Manual in a convenient
place for future reference.
Customer Service Helpline:
For parts ordering, call:
1-800-913-8999
For assembly questions, call:
1-800-913-8999
D09Y07P-03

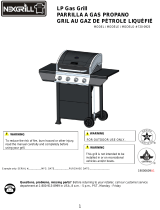
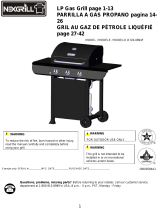
Safety Precautions- 2~5
Package Contents List............................... 5
Parts Diagram 6
Parts List................................................ 6
Assembly Instructions- 7
Operation Instructions- 8-9
Care and Maintenance ............................. 10
Troubleshooting 11
Cooking Instruction 12
Cooking Chart 13
Warranty 14
i_,WARNING
Combustion by products produced when using
this product contain chemicals known to the
State of California to cause cancer, birth defects,
or other reproductive harm.
z_WARNING
Failure to comply with these instructions could
result in a fire or explosion that could cause
serious bodily injury, death, or property damage.
z_WARNING
Your grill will get very hot. Never lean over the
cooking area while using your grill. Do not touch
cooking surfaces, grill housing, lid or any other
grill parts while the grill is in operation, or until
the gas grill has cooled down after use.
Failure to comply with these instructions may
result in serious bodily injury.
z_ WARNING
Do not store or use gasoline or other
flammable material and liquids in the
vicinity of this or any other appliance.
2. A LP cylinder not connected for use must
not be stored in the vicinity of this or any
other appliance.
/IX DANGER
If you smell gas:
1. Shut off gas to the appliance.
2. Extinguish any open flame.
3. Open Lid.
4. If odor continues, keep away from the
appliance and immediately call your gas
supplier or your fire department.
Grill Installation Codes
The installation must conform with local codes or,
in the absence of local codes, with either the
national fuel gas code, ANSIZ 223.1/NFPA $4,
Natural gas and propane installation code, CSA
B149.1, or propane storage and handling code,
B149.2, or the standard for Recreational vehicles,
ANSI A 119.2, and CSA Z240 RV series
recreational vehicle code, as applicable.
LP gas grill models are designed for use with a
standard 20 lb. Liquid Propane Gas tank, not
included with grill. Never connect your gas grill to
an LP gas tank that exceeds this capacity.
2

1. The installation must conform with local codes or, in the
absence of local codes, with the National Fuel Gas
Codes, with the National Fuel Gas Code, ANSI
Z223.1/NFPA 54, Storage and Handling of Liquefied
Petroleum Gases, ANSI/NFPA 58, or the Standard for
Recreational Vehicles, ANSI A119.2/NFPA 1192, and the
Recreational Vehicle Code, CSA Z240 RV, as applicable.
2. Table top grill is for outdoor use only. Grill should be
operated in a well-ventilated space. Never operate in an
enclosed space, garage or building. Your grill is not
intended to be installed in or on recreational vehicles and
/ or boats.
3. Heated liquids remain at scalding temperatures long after
the cooking process. Do not touch the cooking appliance
until liquids have cooled to 115F (45C) or less.
4. Do not install or use grill within 36" (10ft recommended)
of combustiblematerials from back and sides of grill. Grill
shall not be located under overhead surfaces (closed
carport, garage, porch, patio) that can catch fire.
5. Never attempt to attach this grill to the self-contained LP
gas system of a camper trailer or motor home.
6. It is the responsibility of the assembler/owner to
assemble, install and maintain gas grill. Do not let
children and pets operate or play near your table top grill.
Failure to follow these instructions could result in serious
personal injury and/or property damage.
7. Remove lid before lighting grill. When grill is not in use,
turn off control knob on regulator.
8. Carefully follow instructions in this manual for proper
assembly and leak testing of your grill. Do not use grill
until leak checked. If leak is detected at any time, it must
be stopped and corrected before using grill further.
9. Appliance area should be kept clear and free from
combustible materials, gasoline, bottled gas in any from
and other flammable vapors and liquids. Do not obstruct
flow of combustion and ventilation air.
10. Ensure proper bottle position prior to lighting your grill.
Bottle should be vertical.
11. Never try to light grill with lid closed! Buildup of gases is
very dangerous and could cause an explosion.
12. Keep any electrical cord of fuel supply hose away from
any heated surfaces.
13. Propane is a flammable gas and improper handling may
result in explosion and/or fire and serious accident or
injury.
14. Do not allow oil or grease to get hotter than 400F (200 C)
or if oil begins to smoke, immediately turn the burner or
gas supply "OFF" and wait for the temperature to
decrease to less than 350F (175C).
13.This appliance will be during and after use. Use
insulated oven mitts or gloves for protection from hot
surfaces or splatter from cooking liquids.
14. Do not leave your grill unattended while in operation.
15. Do not use while under the influence of drugs or alcohol.
16. Do not store any spare LP (propane) cylinder, full or
empty, under or near your grill.
17. Appliance is not intended for commercial use or rental.
18.The cylinder must be disconnected when the appliance
is not in use.
19. This instructions manual contains important information
necessary for the proper assembly and safe use of the
appliance.
20. Read and follow all warnings and instructions before
assembling and using the appliance.
21. Follow all warnings and instructions when using the
appliance.
22. Keep this manual for future reference.
CAUTION: Spiders and small insects occasionally spin
webs or make nests in the grill burner tubes during transit
and warehousing. These webs can lead to gas flow
obstruction which could result in a fire in and around burner
tubes. This type of fire is known as "FLASH-BACK" and
can cause serious damage to your grill and create an
unsafe operating condition for the user.
Although an obstructed burner tube is not the only cause of
"FLASH-BACK", it is the most common cause.
To reduce the chance of "FLASH-BACK", you must clean
the burner tubes before assembling your grill, and at least
once a month in late summer or early fall when spiders are
most active. Also perform this burner tube cleaning
procedure if your grill has not been used for an extended
period of time.
See instructions on cleaning burner tube on page 10

The Fuel System
Gas grills are used safely by millions of people when
following simple safety precautions.
The items in the fuel system are designed for
operation with this Nexgrill grill. They must not be
replaced with any other brand. (See parts list for
replacement items.)
GAS BURNER: The gas burner is constructed of
tubular stainless steel and should not require
maintenance other than inspection for insects/nests
inside the air intake slots.
BURNER VALVE/REGULATOR: The burner
control is actually a regulator/valve assembly. The
regulator attaches directly to the end of the burner,
which extends out of the right end of the grill by, a 1-
pound propane cylinder threads into the regulator.
Only a factory supplied gas valve/regulator must
be used. (See parts list for replacement items.)
LP GAS REGULATOR CAUTION
The gas pressure regulator provided with this
appliance must be used. This regulator is equipped
with the required orifice and is set for the required
outlet pressure for this appliance. This combination
of orifice size and pressure regulation specifications
provides the cooking performance intended by
Nexgrill Table Top Grill. Substitution of regulator by
any other device or any other manufacturer is
dangerous and could result in serious injury.
LP GAS REGULATOR
The gas pressure regulator is shipped loose and
must be installed prior to operating your grill. This is
a "slip-fit ''~ requiring no tools. See assembly
instructions on page 7 for proper installation. The
regulator may be removed from the grill after use.
Turn the regulator control knob to the "OFF" position;
disconnect the LP cylinder and allow the grill to cool
for at least 30 minutes prior to removing regulator.
Care should be taken to store the regulator in a
clean, secure location when the grill is not in use.
The threaded cylinder connection area should be
kept clean and free of dust, dirt, sand or any
foreign materials. Clean both the regulator and
LP cylinder threaded areas prior to connecting
cylinder to regulator.
PROPANE FUEL: WARNING - propane is a
flammable gas. Improper handling may result in
an explosion and/or fire and serious accident or
injury. Your grill is designed to operate with
propane (LP) gas only and is equipped with the
proper orifice for propane gas.
WARNING: Do not connect this grill with any
gas supply other than propane. Propane gas is
heavier than air and settles in lower areas. Make
certain adequate ventilation is available when
using your grill. The gas cylinder may be stored
outside in a well-ventilated area out of the reach
of children when the grill is not in use.
LP GAS CYLINDER: This grill is designed and
intended to be used with a disposable propane
cylinder with a nominal fuel weight of 1 lb. Such
a cylinder is approximately 4" in diameter and 7"
long. The Nexgrill Table Top Grill does not
include an LP gas cylinder. This must be
purchased separately and be found at most
hardware stores. The cylinder used must be
constructed in accordance with the specifications
for LP cylinders of the U.S. Department of
Transportation (DOT) DOT-39 NRC232/290 MIIIO.
!1/
4

The LP gas cylinder shall be used only outdoors in a well-ventilated space and not in a building, garage, or
any other enclosed area. The Nexgrill Table Top Grill may be stored indoors if the LP gas cylinder is
removed and stored outdoors. The LP gas cylinder (not included) is threaded for connection directly to the
gas regulator supplied with this appliance. Care should be taken when threading the cylinder to the regulator
to engage threads correctly to achieve the proper and intended connection. When disconnecting or
connecting the gas cylinder, be careful that the regulator does not strike the grill, the ground, or any other
surfaces. Replace the protective cap over the threaded cylinder connection when removed from grill. If any
difficulty occurs when connecting or disconnecting the cylinder to the regulator assembly, contact your local
gas supplier for assistance.
When re-connecting the LP gas cylinder to the regulator, be sure to hand-tighten until snug. This connection
should be inspected for damage and leak tested after each re-connection.
To leak test, make a soap solution of one part liquid detergent and one part water. You will need a spray
bottle, brush, or rag to apply the solution to the cylinder-regulator connection. Bubbles indicate leaks.
Part Description Quantity
1 Grill 1set
2 Regulator 1 set
Before beginning assembly, installation or operation of product, make sure all parts are present.
Compare parts with package contents list and diagram above. If any part is missing or damaged,
do not attempt to assemble, install or operate the product. Contact customer service for
replacement parts at 1-800-913-8999.
• Your Nexgrill Table Top Grill is pre-assembled. The only assembly required is
to connect the gas regulator into the grill.
• Estimated Assembly Time: 5-8 minutes.
• Tools Required for Assembly: Wrench.

Part Description Part#
1 MainLid 1set
2 MainBurnerBowlAssembly 1set
3 MainLidHandle 1set
4 CookingGrid 1pc
5 FlameTamer 1pc
6 GreaseTray 1pc
7 MainBurner 1pc
8 MainLidHandleHeatInsulatingSpacer 2pc
9 Regulator,LP 1set
10 FoldableLeg 4set
11 MainIgniterGasCollector 1pc
12 Latch 1set
13 GreaseTrayStopper 1pc
14 Logo 1pc
15 FireboxHeatShield 1pc
16 Manual 1pc
17 Hardware 1pc
Forassemblyquestions,call:
1-800-913-8999
Forpartsordering,pleasecall:
1-800-913-8999
Tomakesureyouobtainthecorrectreplacement
partsforyourNexgrillgasgrill,pleaserefertothe
partnumbersonthispage.
Important:Useonlypartslistedabove.When
orderingparts,providingthefollowinginformation:
1.Model#
2.PartNumber(seePART#inchart)
3.PartDescription
4.Quantityofpartsneeded
Important:KeepthisOwner'sManualfor
Convenientreferenceandforpartreplacement.

1. Locatethegasregulator(1-1).Grasptheregulator(1-1)
withtheknob(1-2)facingdirectlyup.Lineupthecollaron
theregulator(1-1)withtheopenendoftheburnertube(1-
3)asshowninfig.1.
Fig.1
Fig. 2
2. Screw the regulator (2-1) into the open end of burner (2-2)
as shown in fig. 2.
3. Once the regulator is in as far as it will go, tighten with a
wrench. Turn the regulator so that the knob is facing
forward. Note: Always make sure the regulator is secured
facing forward in the fully lock-in position before attaching
propane cylinder.
Fig. 3
4. (3-2)Be sure the gas control knob (3-1) is in the "OFF"
position. Check to make sure threaded areas on cylinder
and regulator are clean. Screw the propane cylinder (3-2)
onto the regulator (3-3) making sure to engage threads
correctly to achieve proper connection. To remove the
propane cylinder (3-2) unthread the cylinder from the
regulator (3-3) as shown in fig.3.

BURNER VALVE / REGULATOR
The burner control operates in the following positions indicated by the pointer at the top of the
regulator as installed on the grill:
• OFF - This stops the flow of gas to the burner.
• PUSH TO TURN ON - Push "IN" on the knob to release the knob from the locked "OFF"
position.
• HIGH - This position provides the highest gas flow and the hottest cooking temperatures.
• MED - This position provides cooking temperatures between HIGH and LOW.
• LOW - This position provides the lowest cooking temperatures.
COOKING TEMPERATURE SETTINGS
• HIGH - Approximately 450 F
• MED- Approximately 400F
• LOW- Approximately 350F
Note: A disposable 1 lb. propane cylinder "NEAR EMPTY" can significantly reduce internal
pressure and may affect the regulator's capability to accurately control gas flow. As the
propane cylinder reaches empty, this may cause "hotter-than-normal" cooking temperatures
during the final minutes of use.
Note: A disposable 1 lb. propane cylinder will provide approximately 4-6 hours of cooking time
with the Perfect Flame Table Top Grill.
LIGHTING THE GRILL
1. Make sure the regulator is properly secured into the
burner end.
2. Make sure the propane cylinder is tightly treaded into
the regulator (hand tighten only).
3. Place the legs in the extended position as shown in Fig. 4.
4. Open lid. Always open lid when lighting.
5. Locate the lighting rod (4-1) on the right side of the
grill as shown in fig. 5. Insert a match through the access
hole (4-2) next to the burner tube. Keep flame next to the
burner while actuating the gas control knob on the regulator.
6. Push the gas burner control knob "IN" and turn the control knob counterclockwise to the
"lighting Position" while watching burner flame
7. If ignition does not occur in 3-5 seconds, turn the control knob "OFF". Wait 5 minutes before
attempting to re-light the grill. If the grill fails to ignite after the second attempt, call customer
service at 1-800-913-8999 for assistance
8. With burner lit, gently close the lid and allow the grill to warm up for 20-30 minutes prior to
use. Note: If the burner should go out for any reason, turn the control knob to
the "OFF" position. Wait 5 minutes before attempting to re-light.
(4-2)
Fig. 4
(4-1)
Visually check the burner flames prior to
each use. The flames should look like
this picture; if they do not ,refer to the
burner maintenance part of this manual.

TURNING THE GRILL OFF
1. Open the lid.
2. Turn the regulator control knob to the "OFF" position. CAUTION: Do not attempt to re-light the
grill without following all the lighting instructions.
3. Allow the grill body to cool at least 30 minutes before attempting to move or transport.
FLAME CHARACTERISTICS
Flames should be blue and stable with no yellow tips, excessive noise or lifting. Yellow flames
indicate insufficient air. Noisy flames or flames that lift away from the burner indicate too much air.
Also, check to see if the air shutter or burner ports are blocked by dirt, debris, spider webs, etc.
Fig. 5
Typical flame pattern and proper flame height is shown in fig. 5
To adjust for proper flame, use a Philips screwdriver to loosen the screw
(6-1) located in the main igniter gas collector. Turn the vent(6-2) clockwise
to close the air shutter, and counterclockwise to open the air shutter as
shown in fig. 6. After adjusting, tighten the screw to affix the air shutter.
Fig. 6
USING THE GRILL
1. Find a level surface to grill on.
2. Allow the grill to warm up with the lid closed for 20-30 minutes prior to cooking.
3. The Nexgrill Table Top Grill is equipped with and adjustable HIGH/MED/LOW control knob,
which allows for complete flexibility in cooking temperatures.
HIGH - Approximately 450F
MED - Approximately 400F
LOW - Approximately 350F
4. You may cook on the grill in any weather. If the temperature is extremely cold or hot, the
cooking times will be slightly increased or decreased. Keep the grill out of excessive winds
when operating.
5. The cooking times listed below are only suggestions. Cooking times vary depending on
thickness of meats and the desired degree of preparation.
GRILLING
• Steak - (T-Bone), thick cut, medium doneness: grill 10 minutes on each side on MED setting.
• Chicken - (Quarters), average size fryer: grill 30 minutes per side on MED setting. Check for
doneness.
• Pork - (Ribs/chops): grill 10-20 minutes per side on MED setting. Check for doneness.
• Fish - grill 20-30 minutes on LOW setting.
• Turkey - (Breast): grill 10 minutes per pound or until internal temperature reaches 170F on
MED setting.

Thereisverylittlecareandmaintenanceneeded.
TheNexgrillTableTopGrillisdesignedandmadeof
materialsthatwilllastmanyyearswithnormaluse.
Followingtheseinstructionswillimprovethelongevity
andqualityofcooking.Toensuresafeoperationof
yourgrill,theareaofcookingshouldalwaysbekept
freeofcombustiblematerialsofanytype,suchas
gasolineorotherflammablevaporsorliquids.
•Outside Grill Parts - This is stainless steel. It can be
cleaned easily with warm soapy water or any
stainless steel cleaner.
•Cooking Grid and Grease Tray - The cooking grid is
made of high quality stainless steel. The cooking grid
should be brushed with a steel brush immediately
after cooking, while the grill is still warm. The grease
tray is also stainless steel and can be cleaned with a
flat scraper such as a putty knife. CAUTION: The
grease tray must be kept clean and free of heavy
buildup for the grill to perform properly and to
eliminate flare-ups.
•Firebox - Use warm soapy water to clean this area.
Do not allow grease to build up.
•Drain Hole - The drain hole must be kept clear of
grease and food particles to allow drippings to drain
properly into the grease tray. This must be done to
maintain proper operation of your grill.
•Burner - Check burner air inlet openings (behind the
inlet guard on the right end of the grill body) for insect
nests or blockages. Make sure the slots in the burner
tube are clear.
•Burner Tube - Using a bent stiff wire in the shape of
a hook, air hose or a bottle brush, run it through the
burner tube and inside several times to remove any
debris.
•General - This grill, like all equipment, will look better
and last longer if kept out of the weather when not in
use. CAUTION: Do not store propane cylinders in
enclosed areas. When using a cover or moving the
grill, always wait until the grill has cooled for at least
30 minutes.
•Do not obstructing the flow of combustion and
ventilation air.
•A clogged tube can lead to a fire beneath the
appliance.
This unit must be kept in an area free from
combustible materials, gasoline and other flammable
vapors and liquids.
Make sure all openings into the grill body are free of
blockages or debris and there are no objects or
materials blocking the flow of combustion or
ventilation. Make sure the legs are in the extended
position when using the grill.
When the grill is not in use, turn the control knob to
the "OFF" position and remove the propane cylinder
from the regulator. Remove the regulator from the
burner.
For outdoor use only, if stored indoors, detach
propane cylinder and store outdoors. Propane
cylinders must be stored out of reach of children.
IMPORTANT
First-time use: It is important that the grill be lit and
allowed to heat up at least 30 minutes before any
food is placed on the cooking grid. It is normal for
some smoke to appear during the initial operation of
the grill. After initial heating, the grill is ready for use.
A cooking spray can be used on the cooking grids to
allow easier clean up.
THIS COOKING APPLIANCE IS FOR OUTDOOR
USE ONLYAND SHALL NOT BE USED IN A
BUILDING, GARAGE OR ANY OTHER ENCLOSED
AREA.
MOVING INSTRUCTIONS
CAUTION: Never move the grill with burner lit
Make sure control knob is in the "OFF" position.
Disconnect the propane cylinder from the regulator.
Remove the regulator from the grill. Be sure the grill
has completely cooled for at least 30 minutes. Close
the lid and secure the latch. Place the legs in the
down position. Use the handle to carry the grill.
Note: It is best to leave the grease tray in place
attached to the bottom of the grill. Some grease may
continue to drip from drain hole during transport.
10

_L
.! WARNING
Spiders and insects can nest inside the burners of the grill and disrupt gas flow. This very dangerous
condition could cause a fire behind the valve panel, thereby damaging the grill and making it unsafe for
operation. Inspect the grill at least twice a year.
When to Look for Spiders
You should inspect the burners at least twice a year or immediately after any of the
following conditions occur:
.
2.
3.
4.
5.
The smell of gas in conjunction with burner flames appearing yellow.
The grill does not reach temperature.
The grill heats unevenly.
The burners make popping noises.
See instructions on cleaning burner tube on page 10.
BEFORE CALLING FOR SERVICE
Problems
Grill will not light.
What To Do
oCheck to see if the liquid propane cylinder is empty.
oCheck burner ports for any blockage. Use a soft
wire brush to clear plugged ports.
oCheck the gas orifice on the burner for an
obstruction. If orifice is blocked, clean with a needle
or thin wire. NEVER USE A WOODEN
TOOTHPICK.
Burner flame is yellow or orange in conjunction with oCheck for spiders and insects
gas odor. oCall customer service at 1-800-913-8999
Low heat with the control knob on the "HI" setting. oMake sure the grill area is clear of dust.
oMake sure the burner and orifice are clean.
oCheck for spiders and insects.
ols there adequate gas supply available?
ols the grill being preheated for 15 minutes?
11

___.__.WARN NG
Do not leave the grill unattended.
Your grill will get very hot. Never lean over
the cooking area while using your grill. Do not
touch cooking surfaces, grill housing. Grill Lid
or any other grill parts while the grill is in
operation, or until the grill has cooled down
after use. Failure to comply with these
instructions may result in serious bodily injury.
Burn-off
Before cooking on your gas grill for the first time,
you will want to "burn off' the grill to eliminate any
odor or foreign matter. Just ignite the burners,
lower the Lid, and operate grill on the HIGH
setting for 3 to 5 minutes.
Cooking Temperatures
High setting: Only use this setting for fast
warm-up,searing steaks or chops and for burning
food residue off the grill after cooking is complete.
Never use the HIGH setting for extended cooking.
Medium to Low Settings: Most recipes specify
medium to low settings, including all smoking,
rotisserie cooking and for cooking lean cuts such
as fish.
NOTE: Temperature settings will vary with the
temperature and the amount of wind outside your
home.
Direct Cooking
The direct cooking method can be used with the
supplied cooking grids and food placed directly
over the lit grill Burners. Direct cooking requires
the grill lid to be up. This method is ideal for
searing and whenever you want meat, poultry or
fish to have and open-flame barbecued taste.
Deep frying and smoking are also best cooked in
this manner because they require direct heat.
Indirect Cooking
To cook indirectly, the food should be placed on
the left or right side of your grill with the burner lit
on the opposite side. Indirect cooking must be
done with the Lid down.
Flare-ups
The fats and juices dripping from grilled food can
cause flare-ups. Since flare-ups impart a
favorably,distinctive taste and color to food cooked
cover an open flame, they should be accepted up
to a point. Nevertheless, uncontrolled flaring can
result in a ruined meal.
//_ WARNING
Do not line the bottom of the grill housing with
aluminum foil, sand or any substance that will
restrict the flow of grease into the grease tray.
Failure to comply with these instructions could
result in a fire or explosion which could cause
serious bodily injury, death, or property
damage.
12

FOOD Weight or thickness Temperature Time Special instructions and tips
Slice or chop vegetables and dot with butter ol
Vegetables NA Medium 8 to 20 minutes margarine. Wrap tightly in heavy duty foil. Grill
tuming occassionally.
Potatoes Whole Medium 40 to 60 minutes Wrap indK4dually in heavy duty foil. Cook
rotating occassionally.
Pre heat grill for 15-20 minutes then sear
steaks on each side for two minutes. Next
Meat/Steaks 1/2 to 3/4 inches High-Medium 4 to 15 minutes
grill 3 to 5 minutes on each side or until
desired doneness.
Grill tuming once when juices rise to the
surface or until desired amount of doneness.
Ground Meats 1/2 to 3/4 inches Medium 8 to 15 minutes
Do not leave hamburgers unattended since a
flare-up could occur quickly.
Grill tuming occassionally. During last few
Ribs 1/2 or full rack Medium 20 to 40 minutes minutes brush with barbecue sauce, turn
several times.
Grill tuming four times. 2-4 minutes on each o
Hot dogs NA Medium 5 to 10 minutes
four sides.
Grill tuming occassionally. During last few
Poultry-Cut 1/4 to 1/2 pounds Low or Medium 20 to 40 minutes minutes brush with barbecue sauce if desired
tum several times.
Poultry Whole 2 to 3 pounds
Low or
Medium
1 to 1-1/2 hours
40 to 60 minutes
Use poultry stand and brush frequently as
desired
Use poultry stand and brush frequently as
desired
Grill tuming once to desired doneness. Brush
Fish 3/4 to 1 inch Medium 8 to 15 minutes
with melted butter, margarine or oil.
13

Nexgrill Industries warrants to the original consumer-purchaser only that this product Model #820-0012 shall be free
from defects in workmanship and materials after correct assembly and under normal and reasonable home usefor the
periods indicated below beginning on the date of purchase. The manufacturer reserves the right to require that defective
parts be returned, postage and or freight pre-paid, by the consumer, for review and examination.
- Burners: 3 year LIMITED warranty against perforation.
- Grids & Grates*, Electronic Ignition: I Year LIMITED warranty
*Does not cover dropping, chipping, scratching, or surface damage.
- Stainless Steel Parts: 1 Year LIMITED warranty against perforation.
*Does not cover cosmetic issues like surface corrosion, scratches and rust.
- All other parts: LIMITED 1 year warranty
*Does not cover chipping, scratching, cracking surface corrosion, scratches or rust.
Upon consumer supplying proof of purchase as provided herein, Manufacturer will repair or replace the parts which are
proven defective during the applicable warranty period. Parts required to complete such repair or replacement shall be
free of charge to you except for shipping costs, as long as the purchaser is within the warranty period from the original
date of purchase. The original consumer-purchaser will be responsible for all shipping charges of parts replaced
under the terms of this limited warranty. This limited warranty is applicable in the United States only, is only available
to the original owner of the product and is not transferable. Manufacturer requires reasonable proof of your date of
purchase. Therefore, you should retain your sales receipt and/or invoice. Defective or missing parts subject to this
limited warranty will not be replaced without registration or proof of purchase. This limited warranty applies to the
functionality of the product ONLY and does not cover cosmetic issues such as scratches, dents, corrosions or
discoloring by heat, abrasive and chemical cleaners or any tools used in the assembly or installation of the appliance,
surface rust, or the discoloration of stainless steel surfaces. Surface rust, corrosion, or powder paint chipping on metal
parts that does not affect the structural integrity of the product is not considered a defect in workmanship or material and
is not covered by this warranty. This limited warranty will not reimburse you for the cost of any inconvenience, food,
personal injury or property damage. If an original replacement part is not available, a comparable replacement part will
be sent. You will be responsible for all shipping charges of parts replaced under the terms of this limited warranty.
ITEMS MANUFACTURER WILL NOT PAY FOR:
1. Service calls to your home.
2. Repairs when your product is used for other than normal, single-family household or residential use.
3. Damage resulting from accident, alteration, misuse, abuse, fire, flood, acts of God, improper installation, and
installation not in accordance with electrical or plumbing codes or use of products not approved by the manufacturer.
4. Any food loss due to product failures.
5. Replacement parts or repair labor costs for units operated outside the United States or Canada.
6. Pickup and delivery of your product.
7. Repairs to parts or systems resulting from unauthorized modifications made to the product.
8. The removal and/or reinstallation of your product.
9. Shipping cost, standard or expedited, for warranty/non warranty and replacement parts.
DISCLAIMER OF IMPLIED WARRANTIES; LIMITATION OF REMEDIES
Repair or replacement of defective parts is your exclusive remedy under the terms of this limited warranty. Manufacturer
will not be responsible for any consequential or incidental damages arising from the breach of either this limited warranty
or any applicable implied warranty, or for failure or damage resulting from acts of God, improper care and maintenance,
grease fire, accident, alteration, replacement of parts by anyone other than Manufacturer, misuse, transportation,
commercial use, abuse, hostile environments (inclement weather, acts of nature, animal tampering), improper installation
or installation not in accordance with local codes or printed manufacturer instructions.
THIS LIMITED WARRANTY IS THE SOLE EXPRESS WARRANTY GIVEN BY THE MANUFACTURER. NO
PRODUCT PERFORMANCE SPECIFICATION OR DESCRIPTION WHEREVER APPEARING IS WARRANTED
BY MANUFACTURER EXCEPT TO THE EXTENT SET FORTH IN THIS LIMITED WARRANTY. ANY IMPLIED
WARRANTY PROTECTION ARISING UNDER THE LAWS OF ANY STATE, INCLUDING IMPLIED WARRANTY
OF MERCHANTABILITY OR FITNESS FOR A PARTICULAR PURPOSE OR USE, IS HEREBY LIMITED IN
DURATION TO THE DURATION OF THIS LIMITED WARRANTY.
Neither dealers nor the retail establishment selling this product has any authority to make any additional
warranties or to promise remedies in addition to or inconsistent with those stated above.
Manufacturer's maximum liability, in any event, shall not exceed the documented purchase price of the product
paid bythe original consumer. This warranty only applies to units purchased from an authorized retailer and
or re-seller.
NOTE: Some states do not allow an exclusion or limitation of incidental or consequential damages, so some of the
above limitations or exclusions may not apply to you; this limited warranty gives you specific legal rights as set for
herein. You may also have other rights which vary from state to state.
If you wish to obtain performance of any obligation under this limited warranty, you should write to:
Nexgrill Industries Customer Relations
280 Machlin Court 14
City of Industry, CA 91789
All consumer returns, parts orders, questions and troubleshooting can be acquired by calling 1-800-913-8999. Monday-Friday,
8a.m.-5.m.PST.
/