Page is loading ...


Tri-Tronics
®
Owners Manual
Warning
See the Important Safety and Product Information guide in the product box for product warnings and other important information.
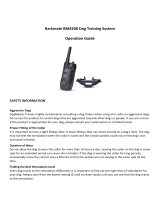
Sport, Field & Pro G3
®
Series Remote Trainers
Congratulations on your purchase!
All Tri-Tronics Remote Trainers are proudly made in the USA.
Tri-Tronics takes great pride in the design, manufacture, service and safety of all our products. We always want to hear from you,
our customer. You can contact us and get the latest information available regarding your product, our support services, training
information, or to purchase accessories, collars, or additional receivers for your Tri-Tronics Remote Trainer.
We can be reached via email at [email protected] or by calling toll free 1-800-456-4343 or visit our website at
www.tritronics.com. Thank you for choosing Tri-Tronics.
Models Covered:
Classic 70 G3
®
, Classic 70 G3
®
EXP
®
, Field 90 G3
®
EXP
®
, Flyway G3
®
EXP
®
, Upland Special G3
®
EXP
®
, Trashbreaker G3
®
EXP
®
,
Pro 100 G3
®
EXP
®
, Pro 200 G3
®
EXP
®
, Pro 500 G3
®
EXP
®
, Sport Basic G3
®
EXP
®
, Sport Combo G3
®
EXP
®
, Sport Upland
G3
®
EXP
®
, Pro 500 G3
®
, Tactical 500 G3
®
.
Printed in the USA

Product specications and features may change at any time without notice or obligation since
Tri-Tronics
®
is committed to a policy of continuous improvement.
This Class [II] digital apparatus complies with Canadian ICES-003.
Please take a moment to register your product on our website at www.tritronics.com <http://www.tritronics.com> .
When you do, you’ll be “on le” at Tri-Tronics®. This will help ensure timely warranty work should you need it.
Fourth Edition, December, 2011
Published by Tri-Tronics
®
, Inc., Tucson, Arizona
Copyright © 2011 Tri-Tronics
®
, Inc.
All rights reserved. Printed in the USA.

TABLE OF CONTENTS
MODEL GUIDE – Field & Pro G3 Series .......................................................................................................................................................... 1-18
MODEL GUIDE – Sport G3 Series ..................................................................................................................................................................19-22
SETTING UP A MULTI-DOG SYSTEM ...........................................................................................................................................................23-25
CHARGING THE BATTERIES ...........................................................................................................................................................................26-28
FITTING THE COLLAR ON THE DOG ...............................................................................................................................................................29
STIMULATION OVERVIEW.....................................................................................................................................................................................30
STIMULATION - CONTINUOUS & MOMENTARY .........................................................................................................................................31
RANGE..........................................................................................................................................................................................................................31
UPLAND G3 BEEPER ..........................................................................................................................................................................................32-40
REPLACING BATTERIES ..........................................................................................................................................................................................41
CARE AND CLEANING ...........................................................................................................................................................................................42
RADIO SIGNAL ISSUES............................................................................................................................................................................................42
FCC COMPLIANCE & RSS STANDARD(S) ..................................................................................................................................................42-43
TROUBLESHOOTING GUIDE .........................................................................................................................................................................44-48
BASIC TRAINING INTRODUCTION ..................................................................................................................................................................49
E-COLLAR BASICS .................................................................................................................................................................................................... 49
BASIC TRAINING ................................................................................................................................................................................................50-53

1
www.tritronics.com
MODEL GUIDE – Field & Pro G3
®
The following pages illustrate the detail for operation of the Field and Pro series G3
®
remote trainers. All Field
and Pro Series G3
®
EXP
®
models can grow with your needs to train multiple dogs because you can simply add
more receivers to your system (see pages 23-24). The Classic 70 standard model cannot be expanded and has no
dog selection switch but has the other appropriate features.
Permanent, non-removable One-mile range; Two miles on Trashbreaker*
*Range depends on terrain, weather, vegetation, other radio transmissions in the area, and other factors. For best range, hold the
transmitter overhead with the antenna pointed upward while transmitting and keep your ngers off the antenna.
Activates the no-stimulation signal tone of the following models: Field 90 G3
®
EXP
®
, Flyway G3
®
EXP
®
, Pro
100 G3
®
EXP
®
, Pro 200 G3
®
EXP
®
, and Pro 500 G3 EXP
®
. Switches Beeper on and off on the Upland Special
and controls the Tracer
®
light settings.
Note: Tone on the Classic 70, Trashbreaker, and Upland Special is activated by pressing any stimulation button when the intensity dial is set
on “T.”
The supplied charging adaptor is tted onto the transmitter. There will be a positive “snap”
feel when the transmitter locks into the adapter correctly.
To remove the adaptor push down on the removal tab at the back of the adaptor.
Battery Compartment Door For Replacing Battery Pack Only
(Note: Open only for changing batteries as the battery pack does not need to be removed for charging.)
(screw heads)
Screw heads must be clean to ensure proper charging.

2
www.tritronics.com
Intensity levels: 1, 2, 3, 4, 5, 6
Line up the number you select with the light on the top of the housing.
“N” (neutral) or “T” (tone) setting, depending on model.
“A” is for the Beeper and Tracer
®
accessory operation on models other than the Upland.
Battery Life Indicator (“Fuel Gauge”)
When a stimulation button is pressed, this light will be:
• Steady green when the batteries are fully charged.
• Steady amber when the batteries are partly discharged.
• Steady red when the batteries need charging very soon.
• Rapid red ashing means the batteries are completely dead and the transmitter will not operate the collar.
Intensity and Stimulation Indicator
• This light is the position indicator for the selected operational setting or intensity level. It ashes as described
above when a stimulation button is activated
Buttons vary by model. See the “Model Guide” section for detail.

3
www.tritronics.com
(“Fuel Gauge”)
Collar activation indicator:
• Indicates that the collar is switched on by ashing twice per
second with a four second gap between ash sequences.
When a stimulation button is pressed this light indicates battery
charge and will be:
• Steady green when the batteries are fully charged.
• Steady amber when the batteries are partly discharged.
• Steady red when the batteries need charging very soon.
• Rapid red ashing means the batteries are completely dead and
the unit will not function.
(Note: It takes 20 seconds after the collar is switched on for the light
to register the battery charge level.)
(“Belt Loops”)
The receiver has three belt loops for secure collar strap attachment and retention with no gap. Do not use the collar strap “belt
loops” for attaching a leash. They are not designed for this use.
Warning
Do not remove or tamper with any internal labels that are visible when the battery pack is removed. Doing so will void your
warranty. The receiver product code label is a seal that maintains waterproof integrity of the receiver.
B
C
A
B
B
B
C
C
A

4
www.tritronics.com
Remove these two screws to remove the battery pack for replacement.
Position the new pack in place and replace the screws.
These screws are also removed to install the Tracer
®
light accessory.
The Tri-Tronics patented insulated contact points ensure
consistent stimulation under all conditions.
Choose short or long points to match the dog’s coat type.
(See the section “Fitting the Collar on the Dog” on page
29.)
Press to switch the collar on. Two conrming tones will
sound and the collar light will ash periodically while the
collar is on. Press to switch the collar off. One long tone
will sound and the light will stop ashing. Switch the collar
off when not in use to conserve batteries.
Place the receiver in the supplied cradle to charge.
Discharged batteries will take only two hours to fully
recharge with the exclusive Tri-Tronics charging system.
D
E
F
F
F
E
D
D

5
www.tritronics.com
-The non-expandable Classic 70 model has one stimulation button
-6 levels of continuous stimulation
-Train up to 6 dogs
-1 black collar strap included with system
-Receiver matched at factory to black setting on dog selection switch
-“T” setting on intensity dial for tone.
Set the dial to T and press any stimulation button to produce the tone signal instead of stimulation
-“A” setting on intensity dial for Beeper or Tracer
®
accessory
Set the dial to A and press any stimulation button to activate a Tri-Tronics Beeper or Tracer
®
accessory if installed
-1 mile range on Classic 70
-2 mile range on Trashbreaker

6
www.tritronics.com
Dog selection switch (up for button color to match strap color,
down for ring color to match strap color)
Continuous stimulation black or orange strap
Continuous stimulation red or green strap
Continuous stimulation blue or yellow strap

7
www.tritronics.com
-Dedicated tone button
-6 levels of medium momentary stimulation
-6 levels of high continuous stimulation
-Train up to 3 dogs
-1 black collar strap included with system
-Receiver matched at factory to black position on dog selection switch
-“A” setting on intensity dial for Beeper or Tracer
®
accessory
Set the dial to A and press any stimulation button to activate a Tri-Tronics Beeper or Tracer
®
accessory if installed
-“N” neutral setting on intensity dial - transmitter buttons will not function

8
www.tritronics.com
Tone button
Dog selection switch (up for black strap, center for red strap,
down for blue strap)
“HIGH” continuous stimulation (red button)
“MEDIUM” momentary stimulation (black button)

9
www.tritronics.com
-Dedicated tone button
-18 levels of momentary stimulation
6 each of low, medium, and high
-6 levels of high continuous stimulation
-Train up to 3 dogs
-1 black collar strap included with system
-Receiver matched at factory to black position on dog selection switch
-“A” setting on intensity dial for Beeper and Tracer
®
Set the dial to A and press any stimulation button to activate a
Tri-Tronics Beeper or Tracer
®
if installed
-“N” neutral setting on intensity dial – transmitter buttons will not function

10
www.tritronics.com
Tone button
“HIGH” continuous stimulation (red button)
“MEDIUM” momentary stimulation (black button)
Dog selection switch (up for black strap, center for tan strap,
down for green strap)
“HIGH” momentary stimulation (both buttons pressed simultaneously)
“LOW” momentary stimulation (black button)

11
www.tritronics.com
-Dedicated tone button
-18 levels of continuous stimulation
6 each of low, medium, and high
-6 levels of momentary stimulation
-Train up to 3 dogs
-1 black collar strap included with system
-Receiver matched at factory to black position on dog selection switch
-“A” setting on intensity dial for Beeper and Tracer
®
Set the dial to A and press any stimulation button to activate a
Tri-Tronics Beeper or Tracer
®
if installed
-“N” neutral setting on intensity dial – transmitter buttons will not function

12
www.tritronics.com
“MEDIUM” momentary stimulation (black button)
Tone button
Dog selection switch (up for black strap, center for red strap,
down for blue strap)
“MEDIUM” continuous stimulation (red button)
“HIGH” continuous stimulation (both buttons pressed simultaneously)
“LOW” continuous stimulation (red button)

13
www.tritronics.com
-Dedicated tone button
-18 levels of momentary stimulation
6 each of low, medium, and high
-6 levels of high continuous stimulation
-Train up to 3 dogs
-1 black collar strap included with system
-Receiver matched at factory to black position on dog selection switch
-“A” setting on intensity dial for Beeper and Tracer
®
Set the dial to A and press any stimulation button to activate a
Tri-Tronics Beeper or Tracer
®
if installed
-“N” neutral setting on intensity dial – transmitter buttons will not function

14
www.tritronics.com
Tone button
“HIGH” continuous stimulation (red button)
Dog selection switch (up for black strap, center for red strap, and
down for blue strap)
“MEDIUM” momentary stimulation (black button)
“HIGH” momentary stimulation (both buttons pressed simultaneously)
“LOW” momentary stimulation (black button)

15
www.tritronics.com
-Dedicated tone button
-18 levels of momentary stimulation
6 each of low, medium, and high
-18 levels of high continuous stimulation
6 each of low, medium, and high
-Train up to 3 dogs
-1 black collar strap included with system
-Receiver matched at factory to black position on dog selection switch
-“A” setting on intensity dial for Beeper and Tracer
®
Set the dial to A and press any stimulation button to activate a
Tri-Tronics Beeper or Tracer
®
if installed
-“N” neutral setting on intensity dial – transmitter buttons will not function

16
www.tritronics.com
“MEDIUM” continuous or momentary stimulation (black button)
Tone button
Dog selection switch (up for black strap, center for red strap, down
for blue strap)
Mode selection switch (up for momentary, down for continuous)
“HIGH” continuous or momentary stimulation (both buttons
pressed simultaneously)
“LOW” continuous or momentary stimulation (black button)
/