Page is loading ...

8
6
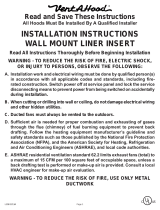
FOR WALL MOUNT VENT-A-HOODS
INSTALLATION INSTRUCTIONS
WARNING - TO REDUCE THE RISK OF FIRE, ELECTRIC SHOCK, OR INJURY TO PERSONS, OBSERVE THE FOLLOWING:
Read and Save These Instructions
- Step 1. Cut vent hole in ceiling or furrdown.
A. Model B100 Mark area to be cut as
per dimensions on sketch below. Allow
area for motor cooling vents. (Motors are
cooled from above). Special offset transition
to centerline is available.
-
Step 2. Remove wood mounting strip; Mount to wall.
B. Model B200 Mark opening to
cut out area as per dimensions on
sketch below. Motors are cooled
from above so be sure area is large
enough for motor cooling vents.
Remove wood mounting strips from channel on back side
of hood. (Wood strip attached with Phillips head screws.)
-
Step 3. Connect ducting.
Nail or screw mounting strip to wall in proper position,
attach firmly to wall studs. Hang hood canopy on wood
strip and attach with Phillips head screws provided. If
more support is needed for larger hoods, attach lower
part of canopy to wall with lag bolts or to studs. Canopy
can also be attached to side cabinets or walls if neces-
sary.
A. Model B100: 6 duct or the
Each single or dual blower in hood must be
vented and connected separately. Do not
restrict ducting anywhere including roof jacks
or wall louvers. Dont make sharp turns with
ducting. Make gradual turns or 45° angles.
B. Model B200: Transition to 8
Turn Page For More Instructions
equivalent must be round is provided. 8
duct or the equivalent
must be installed
throughout.
installed
throughout.
6 dia.
8 dia.
Blower
Minimum Round
Duct Size
Square
Inches
B100 Single 300 CFM 6 (or equivalent) 28
B200 Dual 600 CFM 8 (or equivalent)
50
19
1
2
/
21
1
2
/
5
8
/
8
A. Installation Work and Electrical Wiring Must Be Done By
Qualified Person(s) In Accordance With All Applicable
Codes And Standards, Including Fire-Rated Construction.
B. When cutting or drilling into wall or ceiling, do not
damage electrical wiring and other hidden utilities.
C. Ducted fans must always be vented to the out-
doors.
WARNING - TO REDUCE THE RISK OF FIRE, USE ONLY METAL DUCTWORK.
D. Sufficient air is needed for proper combustion and
exhausting of gases through the flue (chimney) of fuel
burning equipment to prevent back drafting. Follow the
heating equipment manufacturers guideline and safety
standards such as those published by the NationaI Fire
Protection Association (NFPA), and the American
Society for Heating, Refrigeration and Air Conditioning
Engineers (ASHRAE), and local code authorities.
All Hoods Should Be Installed By A Qualified Installer
9
3
4
/
8
5
8
/
11
1
4
/
Wiring
Motor Cooling Vents
Front
6
C
L
8
1
2
/
2
3
8
/
of exhaust collar
C
L
of mounting plate
C
L
Front
Motor Cooling
Vents
Wiring
3
3
8
/
1
8
/
5
6 dia.

- Step 4. Connect electrical.
1000 N. Greenville Ave.
=
P.O. Box 830426
=
Richardson, TX 75083
=
(972) 235-5201
Methods of Ducting Your Vent-A-Hood
Venting Configurations
Venting Materials Available from Vent-A-Hood
Caution: to reduce the risk of fire or electrical shock, do not use this fan with any solid state speed control device.
Follow label instructions and remove motor plate. Unplug motor and remove, being careful to not damage blower wheel. Connect electrical, black to
black, white to white and ground to lug provided. In cluster blower hoods (hoods with more than one dual blower) separate electrical connections are
necessary (one for each dual blower). Replace motor(s) and dont forget to plug them back in. Replace blower front and be sure it is secured properly
and blower wheel(s) turn freely. Model B100, 1.7 Amps. Model B200, 3.4 Amps. Hoods with heat lamps and/or halogen lamps, 8.0 Amps.
Observe All Governing Codes and Ordinances
Roof Jack
tape
Duct
Hood
Open area --
no screen
Outside
Wall
Straight Back
To Wall Transition
#100 MODELS 3 x 10
1
4
/
#200 MODELS 3 x 12*
1
4
/
In Wall Transition
12
12
#200 MODELS
Angle Turn
8 Round
Transition Supplied
6
1
4
/
3
6 x 8
Back Vent Ell
1
2
/
Duct
6 Round Duct
#100 MODELS
6 Adj. Ell
3
Round Vent Duct
30
6,7,8,9
Rect. Vent Duct
30
10
8
16
1
2
/
6, 3
1
4
/
Round Collar
6,7,8,9
Rect. Collar
6
8
1
2
/
Reducer
6
7
8
Back Vent Ell
6
6
16
8
1
2
/
9
1
4
/
Wall Mount Transition
8
6
6
8
1
2
/
Transition, 3 X10 to 6/7
1
4
/
6,7
12
10
3
1
4
/
Adjustable Elbow
6,7,8,9
Offset Kit
6
7
11
16
Other Transitions by Special Order
LP Roof Jack 6,7,8 (10 & 12 available)
17
17
1
2
/
6
6,7,8
5
8
/
8
Wall Louver (10
& 12 available)
Roof Jack - 6,7,8 (10 & 12 available)
18
18
16
specify
roof pitch
1
/
2
Wall Louver Venting
in 2-Story Dwelling
Hood
Floorline
(2nd floor)
Ceiling Line
(1st floor)
tape
Duct
Outside
Wall
Open
area --
no
screen
II-WM
2/25/99
/