Page is loading ...

SBB818A
Rev. 11/19
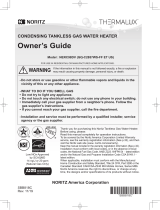
Model : NERC11DV (GQ-C3257WX-FF ET US)
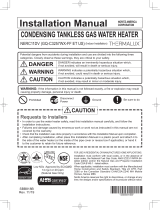
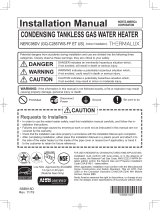
CONDENSING TANKLESS GAS WATER HEATER
Owner’s Guide
NORITZ America Corporation
-Donotstoreorusegasolineorotherammablevaporsandliquidsinthe
vicinityofthisoranyotherappliance.
- WHAT TO DO IF YOU SMELL GAS
•Donottrytolightanyappliance.
•Donottouchanyelectricalswitch;donotuseanyphoneinyourbuilding.
•Immediatelycallyourgassupplierfromaneighbor’sphone.Followthe
gassupplier’sinstructions.
•Ifyoucannotreachyourgassupplier,calltheredepartment.
-Installationandservicemustbeperformedbyaqualiedinstaller,service
agencyorthegassupplier.
If the information in this manual is not followed exactly, a re or explosion
may result causing property damage, personal injury, or death.
WARNING
FOR USE IN RESIDENTIAL OR MANUFACTURED HOME APPLICATIONS.
Thank you for purchasing this Noritz Tankless Gas Water Heater.
Before using, please:
Read this manual completely for operation instructions.
To be covered by the Noritz America Corporation Limited Warranty
service, see the warranty registration information (See p.32), and then
visit the Noritz web site (www. noritz.com/warranty).
Keep this manual included in the warranty registration information (See p.32).
Installation must conform with local codes, or in the absence of local
codes, the National Fuel Gas Code, ANSI Z223.1/NFPA 54 - latest edition
and/or the Natural Gas and Propane Installation Code CSA B149.1 -
latest edition.
When applicable, installation must conform with the Manufactured
Home Construction and Safety Standard, Title 24 CFR, Part 3280 or the
Canadian Standard CAN/CSA-Z240 MH Mobile Homes, Series M86.
Noritz America reserves the right to discontinue, or change at any
time, the designs and/or specications of its products without notice.
CERTIFIED
R
Low NOx Approved
by SCAQMD
14 ng/J or 20 ppm
(Natural Gas Only)

2
Prohibited
Don’t
touch.
Don’t
disassemble
the equipment.
Don’t touch
with a wet
hand.
No ame.
High
Temperature.
To prevent damage to property and injury to the user, the icons shown below will be used to warn of
varying levels of danger.
Every indication is critical to the safe operation of the water heater and must be understood and observed.
Potential dangers from accidents during installation and use are divided into the following four
categories. Closely observe these warnings; they are critical to your safety.
Other icons
DANGER
WARNING
CAUTION
DANGER indicates an imminently hazardous situation which,
if not avoided, will result in death or serious injury.
WARNING indicates a potentially hazardous situation which, if not
avoided, could result in death or serious injury.
CAUTION indicates a potentially hazardous situation which, if not
avoided, may result in minor or moderate injury.
CAUTION used without the safety alert symbol indicates a potentially
hazardous situation which, if not avoided, may result in property damage.
CAUTION
Be sure
to do.
Ground.
Electric
Shock.
DANGER
Iconswarningofrisklevel
ImportantSafetyInformation-1
This is the safety alert symbol. It is used to alert you to potential personal injury hazards.
Obey all safety messages that follow this symbol to avoid possible injury or death.
Vaporsfromammableliquidswillexplodeandcatchrecausingdeathorsevereburns.
Do not use or store ammable products such as gasoline, solvents or
adhesives in the same room or area near the water heater.
Prohibited
Keepammableproducts:
1.Farawayfromthewater
heater.
2.Inapprovedcontainers.
3.Tightlyclosed.
4.Outofchildren’sreach.
Vapors:
1.Cannotbeseen.
2.Vaporsareheavierthanair.
3.Goalongwayontheoor.
4.Canbecarriedfromotherrooms
tothemainburnerbyaircurrents.
HotWaterHeatertemperaturesover125°F(52°C)cancausesevereburns
instantlyordeathfromscalding.
Children, disabled and elderly are at the highest risk of being scalded.
Feel water temperature before bathing or showering.
Temperature limiting valves are available, ask professional person.
Prohibited
(Continued)

3
No ame.
(Continued)
WARNING
Be sure
to do.
Whenagasleakisnoticed:
1. Stopuseimmediately.
2. Closethegasvalve.
3. Openwindowsanddoors.
Ifyoudetectabnormalcombustion
orabnormalodors,orduringan
earthquake,tornadoorre:
1. Turnoffthehotwatersupply.
2. Turnoffthepowertothewater
heater.
3. Turnoffgasandwatersupply
valve.
4. CallthenearestNoritzagent.
Be sure
to do.
Donotallowanyonetochangethe
water temperature while hot water is
beingused.
To prevent scalding, do not change the
water temperature to a higher setting.
Prohibited
A.Thiswaterheaterdoesnothave
apilot.Itisequippedwithan
ignitiondevicethatautomatically
lightstheburner.Donottryto
lighttheburnerbyhand.
B.
BEFORE OPERATING smell all
aroundthewaterheaterareafor
evidenceofleakinggas.Besure
tosmellnexttotheoorbecause
somegasisheavierthanairand
willsettleontheoor.
WHATTODOIFYOUSMELLGAS.
•Donottrytolightany
appliance.
•Donottouchanyelectrical
switch;donotuseanyphone
inyourbuilding.
•
Immediatelycallyourgas
supplierfromaneighbor’s
phone.Followthegassupplier’s
instructions.
•
Ifyoucannotreachyourgas
supplier,calltheredepartment.
C. Useonlyyourhandtoturn
thegasvalveknob.Neveruse
tools.Iftheknobwillnotturnby
hand,don’ttrytorepairit.Call
aqualiedservicetechnician.
Forceorattemptedrepairmay
resultinareorexplosion.
D. Donotusethiswaterheaterif
anyparthasbeenunderwater.
lmmediatelycallaqualied
servicetechniciantoinspectthe
waterheaterandtoreplaceany
damagedparts.
(Continued)
Prohibited
Checkthetemperature
oftherunninghotwater
beforeenteringthe
shower.
Checkthetemperature
beforesteppinginto
thebathtub.
High
Temperature.
ExplosionHazard;
Ifthetemperatureandpressurerelief
valveisdrippingorleaking,havea
qualiedservicetechnicianreplaceit.
Donotplugorremovethevalve.
Failure to follow these instructions can re-
sult in re or explosion, and personal injury
or death.
Prohibited
Do not use the water heater
iftheintake/exhaustpipe
isdisplaced,hasholes,is
cloggedoriscorroded.
Afterthewaterheaterhasbeenoutof
useforalongtimemakesurethatyou
llthecondensatetrapwithwater.
Thisistopreventdangerous exhaust
gasesfromenteringthebuilding.
Failuretollthecondensatetrapcould
resultinseverepersonalinjuryordeath.
(Refertopage20forfurtherinstructions.)
Be sure
to do.
Be sure
to do.
[Whensupplyingcombustionair
fromtheindoors]
Checkwhetherornottheair
supplyventisblockedwith
dust,trash,atowel,orthelike.
Blocking the opening may result
in incomplete combustion.
Towel
Air supply vent

4
Donotplacetheexhaustventterminal
inanindoorenvironmentbymeansof
adding walls and ceiling
(Do not en-
closeusingcorrugatedsheets,etc.)
Carbon monoxide poisoning or re may
occur as a result.
ImportantSafetyInformation
-
2
(Continued)
Ifthisunitwillbeinstalledina
locationwherehairsprayoraerosols
willbeused,locatetheunitina
separate area that is supplied with
freshairfromoutdoors.
Prohibited
Besurethegas/power
supplied matches the
gasontheratingplate.
Ex.ForNaturalGas
(NERC11DV (GQ-C3257WS-FF ET US))
Installationandservicemustbe
performedbyaqualiedinstaller,
serviceagencyorthegassupplier.
Be sure
to do.
Be sure
to do.
(Continued)
Prohibited
Do not store or use gasoline or other
ammablevaporsandliquidsinthe
vicinityofthisoranyotherappliance.
Prohibited
Donotplaceoruseaspraycan
near
thewaterheaterortheexhaustvent
terminal.
Donotusehairsprayorspray
detergentinthevicinityofthe
heater.
Prohibited
Prohibited
Donotplaceoutdoors.
Rain may enter the unit
or the burner fire may be
blown by the wind, causing
malfunction or re as a result.
Prohibited
Outdoor
Leavetheproperclearancebetween
thewaterheaterandnearbyobjects
(trees,timber,boxeswithammable
materialsetc.).
Be sure
to do.
*
Indicates suggested clearances for maintenance.
Donotplacecombustiblessuchas
laundry,newspapers,oilsetc.nearthe
heaterortheexhaustventterminal.
Prohibited
Donotusecombustiblechemicals
suchasoil,gasoline,benzeneetc.
intheneartheheaterortheexhaust
ventterminal.
Prohibited
CarbonMonoxidePoisoningHazard.
Do not install this water heater in a
recreationalvehicleoronaboat.
Do not install this water heater
inamobilehomewhenusingSV
conversionkit(“-SV”conguration).
Prohibited
WARNING
Left side:
Min. 2" (50mm)
Right side:
Min. 2" (50mm)
Front:
Sug. 24" (600mm)
*
Sug.3" (75mm)
from vent pipe*
Upper:
Min. 12" (300mm)
Exhaust vent
terminal
Exhaust vent
terminal
Be sure
to do.
[Whensupplyingcombustionair
fromtheindoors]
Checktheairsupplyopening
fordustorobstructions.
Clogged
air supply
opening!!

5
(Continued)
Donotallowsmallchildrentoplay
unsupervisedinthebathroom.
Donotallowsmallchildrentobathunsupervised.
Do not touch the power
cordwithwethands.
Electric
Shock.
Don’t touch
with a wet
hand.
Prohibited
ContactNoritzbeforeusingwith
asolarpre-heater.
Contactaqualiedservice
technicianforanynecessary
repairs,serviceormaintenance.
ConsultthenearestNoritzagentif
the water heater location needs to
bechanged.
Don’t
disassemble
the equipment.
Be sure
to do.
Be sure
to do.
CaliforniaProposition65listschemicalsubstances
knowntothestatetocausecancer,birthdefects,
death,seriousillnessorotherreproductiveharm.
Thisproductmaycontainsuchsubstances,
betheiroriginfromfuelcombustion(gas,oil)
orcomponentsoftheproductitself.
CAUTION
Besuretoelectricallygroundthe
unit.
Keeppowercordfreeofdust.
Ground.
Be sure
to do.
Donotusethewaterheaterfor
otherthanhotwatersupply,shower
andbath.
Prohibited
Prohibited
Donotcoverthewaterheaterand
theexhaustventterminal,storetrash
ordebrisnearit,orinanywayblock
theowoffreshairtotheunit.
Donotturnoffthewaterheater
whilesomeoneisbathing.
Prohibited
Donotuseabrokenormodiedpowercord.
Donotbind,bendorstretchpowercords.
Donotscratch,modify,orsubjectthemto
impactorforce.
Donottouchtheexhaustventpipe
andexhaustventterminalduring
orimmediatelyafteroperationof
thewaterheater.
Do not install in locations where
excessivedustordebriswillbe
intheair.
Prohibited
Don’t
touch.
Prohibited
Be sure
to do.
Topreventburnsorscalding,turnoffthe
powerbuttonandwaituntiltheequipment
coolsbeforeperformingmaintenance.
Thegasconversionkitshallbeinstalledbya
qualiedserviceagencyinaccordancewith
themanufacturer’sinstructionsandall
applicablecodesandrequirementsofthe
authorityhavingjurisdiction.The
informationintheinstructionsmustbe
followedtominimizetheriskofreor
explosionortopreventpropertydamage,
personalinjury,ordeath.Thequalied
serviceagencyisresponsiblefortheproper
installationofthiskit.Theinstallationisnot
properandcompleteuntiltheoperationof
theconvertedapplianceischeckedas
speciedinthemanufacturer’sinstructions
suppliedwiththekit.
Donotusecondensate,discharged
fromthedrainpipe,fordrinkingor
forconsumptionbyanimals.
Prohibited

6
ImportantSafetyInformation
-
3
CAUTION
Donotdrinkwaterthathasbeeninsidethe
unitforanextendedperiodoftime.Donot
drinktherstuseofhotwaterfromthe
unitinthemorning.
Cleanthelteronthewaterinletas
frequentlyasrequiredbythequalityof
yourlocalwater.
Keeptheareaaroundtheunitclean.
If boxes, weeds, cobwebs, cockroaches etc. are in
the vicinity of the unit, damage or re can result.
Donotinstalltheequipmentwherethe
exhaustwillblowonwallsorwindows.
Problemsresultingfromscaleformation
arenotcoveredbythewarranty.
Thisunitisonlyapprovedforinstallation
upto4500ft.(1350m)abovesealevel.
For installations at higher elevations, contact Noritz
America for Instructions.
Checkignitionduringuseandextinction
afteruse.
Ifthewatersupplyisinexcessof12grains
pergallon (200 mg/L) ofhardness,acidic
orotherwiseimpure, treatthewaterwith
approved methods in order to ensure full
warrantycoverage.( p.23)
Preventingdamagefromfreezing(
p.18)
Damage can occur from frozen water within the
device and pipes even in warm environments.
Be sure to read below for appropriate measures.
Repairs for damage caused by freezing are not
covered by the warranty.
Takenecessarymeasurestoprevent
freezingofwaterandleakageofgaswhen
leavingtheunitunusedforlongperiodsof
time.( p.19)
Donotusepartsotherthanthosespecied
forthisequipment.
Ifitissnowing,checktheexhaustvent
terminalforblockage.
Donotdisassembletheremotecontroller.
Donotusebenzene,oilorfatdetergents
tocleantheremotecontroller.
This may cause deformation.
Donotgettheremotecontrollerwet.
Although it is water resistant, too much water can
cause damage.
Do not splash water on the remote
controller.Donotexposetheremote
controllertosteam.
Do not locate the remote controller near stoves or
ovens, this may cause damage or failure.
Do not run water through the unit when
unitisnoton.
When discharging hot water, make sure the unit is ON.
If water is run through the unit with the unit
OFF, water may condense inside the unit and cause
incomplete combustion or damage to the internal
electrical components.
For single-handle xtures, you’d turn the handle to
the left.

7
ImportantSafetyInformation....................................................................... 2
Contents......................................................................................................... 7
OverviewofCondensingTanklessGasWaterHeater.............................. 8
General Parts
Main Unit.................................................................................................... 9
Remote Controller.................................................................................... 10
Initial Operation............................................................................................ 11
How to Use
Setting and Using the Water Heater........................................................ 12
Flow Meter Alarm...................................................................................... 14
Muting the Remote Controller.................................................................. 16
AdjustingtheMaximumOutputTemperature........................................ 17
PreventingDamagefromFreezing............................................................. 18
Regular Maintenance................................................................................... 21
Troubleshooting........................................................................................... 24
Follow-upService........................................................................................ 29
Specications............................................................................................... 31
Warranty........................................................................................................ 32
Contents

8
Cold wate
r
Cold wate
r
Gas
Gas
Hot water
Hot water
Condensate
Combustion gas
About
400˚F (200˚C)
Exhaust Exhaust
About
120˚F (49˚C)
Conventional
type
Condensing
Tankless Gas
Water Heater
Water is heated
using the exhaust
gas which is about
400˚F (200˚C)
.
Primary heat exchanger
Primary heat exchanger
Secondary heat exchanger
condensate trap
Combustion gas
About
400˚F (200˚C)
About
400˚F (200˚C)
Thecondensingtanklessgaswater
heaterdischargescondensate.
When heat from the exhaust gas is collected within
the secondary heat exchanger, condensation occurs
from moisture in the exhaust gas and the resulting
water is discharged from the drain pipe (approx.
2 gallons/hour (7.5 liters/hour) maximum). It is not a
water leak. Do not plug or block the drain line as it
must always be allowed to freely ow.
Note : The condensate discharged is acidic with a pH
level of approximately 2-3.
A condensate neutralizer may be required by
local code prior to disposal.
Drain pipe
(Installation example)
OverviewofCondensingTanklessGasWaterHeater
This water heater is a high efciency, fully condensing appliance. Unlike a traditional tankless water
heater, a condensing type captures heat from the exhaust gas and uses it to preheat the incoming
cold water as it passes through the secondary heat exchanger as illustrated below.
Thecondensingtanklessgas
water heater tends to show
whitesteam.
After the exhaust gas passes through the
secondary heat exchanger, the low temperature
and high moisture content tends to produce
steam at the vent discharge terminal.
This is a normal occurrence.
Condensate
comes out from
here.
During combustion, white
steam may often be seen.
This is normal.

9
[NERC11DV(GQ-C3257WX-FFETUS)]
IndoorWallMounted,PowerVent/SealedModel
* Theaboveillustrationshowsanexampleofinstallation.
The exact installation conguration may be slightly different.
Main Unit
FrontCover
WaterSupplyValve
WaterDrainValve
(with Water Filter)
(Inside Water Inlet)
(
p.22)
PressureReliefValve
General Parts -1
IntakePipe
Flue Collar
GasSupplyValve
Drain Pipe
Discharges the
condensate.

10
RemoteController(RC-7651M)
For setting the hot
water temperature,
the ow meter alarm,
and other settings.
PowerOn/OffButton
For turning the
heater on and off.
Flow Meter Alarm Set Button
For setting the ow
meter alarm.
( p.14-15)
Setting Buttons
* Before use, remove the protective sheet from the remote controller surface.
Temperature Setting
(Ex.:110°F)
Flow Meter Setting
The display will ash
after hitting the ow
meter alarm set button.
( p.15)
Error Code
When this indicator is lit,
the hot water temperature
can be set. ( p.12)
Whatisactuallydisplayeddependsonhowthewaterheaterisset.
A number will ash if
a failure occurs.
( p.28)
PriorityIndicator
Burner On Indicator
When burning, the
indicator is lit.
( p.13and15)
Note: As shipped from the factory, the remote controller is set to display in °F and gallons.
To adjust the display to °C and liters, refer to the Installation Manual.
General Parts -2

11
Initial Operation
Before the rst use of your water heater, do the following:
Follow steps
1 through 4
.
1
Open the water supply valve.
Open a hot water xture to conrm that
water is available, and then close the
xture again.
3
Open the gas supply valve.
Hot water xture
2
Turn on the power.
CLOSED
4
OPEN
Donottouchwithwethands.

12
RemotecontrollerDisplay
Press the Power
On/OffButton.
How to Use
Setting and Using the Water Heater
Previous set
temperature
(Ex.: 110°F)
The temperature will be
displayed on the remote
control thermostat.
1
2
(Starting with the Power Off)
On
On
High Temperature
Topreventscalding:
Flashes for 10 sec
1
DANGER
HotWaterHeatertemperaturesover125°F(52°C)cancause
severeburnsinstantlyordeathfromscalding.
•
Children, disabled and elderly are at the highest risk of being scalded.
Feel water temperature before bathing or showering.
Temperature limiting valves are available, ask professional person.
• When setting the unit to 125°F (55°C in °C mode)
or higher, the
temperature display will ash for
10 seconds and emit a tone as
a high temperature warning.
•
Take caution when using the unit again after setting to 125°F
(52°C) or higher. Always check the set temperature before use.
• Do not allow anyone to change the water temperature while hot
water is running.

13
4
3
Turn on hot
water.
2
Settemperature.
Turnoffthehot
water.
Alwayscheckthe
temperature setting
beforeuse.
Hot
Cold
Check the indicator lights.
Water temperature
On Off
(
°F
:
)
The temperature settings below are examples. The temperature setting
necessary depends on the usage, the length of piping and the time of year.
*Initial factory setting is 110°F
If xtures incorporate mixing valves, set the temperature higher than usual.
*
For most residential applications, the recommended setting temperature is 120°F (50°C in °C mode) or less.
* Consult local codes for minimum operating temperatures.
100 105 110 115 120 125 130 135 140
Shower, hot water supply, etc.
Washing
dishes, etc.
High temperature
The maximum output temperature
can be
set using the remote controller. ( p.17)
(
°C (°F)
:
)
The temperature settings below are examples. The temperature setting
necessary depends on the usage, the length of piping and the time of year.
*Initial factory setting is 40°C (104°F)
Shower, hot water supply, etc.
Washing
dishes, etc.
High
temperature
37 38 39 40 41 42 43 44 45 46 47 48
50 55 60
(99)
(100) (102) (104) (106) (108) (109) (111) (113) (115) (117) (118) (122) (131) (140)
The maximum output temperature
can be set using the remote
controller. ( p.17)
When using °F mode:
When using °C mode:
(
)
Note : An error code will be displayed when this water heater detects scale build-up in the heat exchanger.
The error code may be more frequently displayed when the unit is set to a high temperature. (125°F or higher)
Noritz recommends that water temperature is set as low as possible to prevent scale build-up in
the heat exchanger.

14
How to Use
Flow Meter Alarm
3
2,3
1
2
Set temperature.
Press the Power
On/Off Button
Plug the bath drain.
Preparation
(Starting with the power off)
Always check
temperature setting
before use.
Hot
Cold
On
The temperature will be displayed
on the remote control thermostat.
Previous set temperature (example:110°F)
On
Check the indicator lights.
Water temperature
1
If the ow meter alarm is being used to
indicate when a tub is full:
• If any hot water is being used besides
what is going into the tub, the alarm
will sound before the tub is full.
•
If there was water in the tub before the
ll began, or if the water is not shut off
manually when the alarm sounds, the
tub may overow.
•
If there was water in the tub before the
ll began, the temperature in the tub
after it is full may be different from the
temperature setting.
On
Check the indicator lights.
Water temperature
Previous set temperature (example:40°C)
When the display
setting is in Celsius.
When the display
setting is in Fahrenheit.
(
)

15
An alarm will sound for ten
seconds when the ow
reaches the set level.
The water will continue to run unless
it is manually turned off.
5
Turn off the hot
water when the
alarm sounds.
4
Turn on hot
water.
3
Adjust ow meter
alarm setting.
To set the ow meter alarm:
Press the ow meter alarm set button
(the setting will ash on the display)
and adjust with the setting buttons.
Increase
Decrease
Choose the ow meter alarm setting from the following
options: 10 - 60 gallon (40 - 240L) (In 5 gallon (20L)
intervals), 70 gallon (260L), 80 gallon (300L),
90 gallon (340L), 100 gallon (380L) , 990 gallon.
Note:
The alarm will not sound if it is
set for 990 gallon.
Note:
The alarm will not sound
if it is set for 990 gallon.
On
Flow meter setting will be ashing
(ex. 45 gallon)
Off
The alarm will sound when
the set level has been
reached. Stop the water.
* The level can only be adjusted
while the indicator is ashing.
* After ten seconds, the remote
will again display the temperature.
On
Flow meter setting will be ashing (ex. 180L)
Off
* Initial factory setting: 110°F or 40°C (104°F)
Water Temperature
The temperatures settings below are only examples. The
temperature setting necessary will depend on the usage,
the length of piping and the time of year.
(
°C (°F)
:
)
Warmer HotWarm
37 38 39 40 41 42 43 44 45 46 47 48
(99) (100) (102) (104) (106) (108) (109) (111) (113) (115) (117) (118)
100 105 110 115 120
Warmer HotWarm
The temperatures settings below are only examples. The
temperature setting necessary will depend on the usage,
the length of piping and the time of year.
(
°F
:
)

16
The remote controller will emit a sound
when any button is pushed. This sound
can be muted if it is desired.
1
How to Use
Muting the Remote Controller
* Initial factory setting is with sound
Sound
Muted
No sound
after 5 sec.
1
Hold the Power On/Off
Button for ve seconds.
Tone sounds
after 5 sec.
• The ow meter alarm cannot be muted.
• The high temperature warning tone when setting the unit to 125°F / 55°C (131°F) or higher will
not emit a sound when muted.

17
How to Use
Adjusting the Maximum Output Temperature
2
3
1
3
Change the
temperature using
the setting buttons.
Press and hold the ow
meter alarm set button until
a sound is heard (2 sec.).
Up
Down
The upper limit of the hot-water supply
temperature can be changed to
(For Fahrenheit (°F))
100°F, 105°F, 110°F, 115°F, 120°F,
125°F, 130°F, 135°F or 140°F.
(For Celsius (°C))
37°C, 38°C, 39°C, 40°C, 41°C, 42°C,
43°C, 44°C, 45°C, 46°C, 47°C, 48°C,
50°C, 55°C or 60°C.
2
Turn off the
power.
Off
1
Set the Power button to ON when continuing to use
the unit as is. Otherwise, let the unit sit for 30 sec.
4
Tone sounds
after 2 sec.

18
* Damage can occur from frozen water within the device and pipes even in warm environments.
Be sure to read below for appropriate measures.
* Repairs for damage caused by freezing are not covered by the warranty.
Freezing cannot be prevented when the power plug is unplugged. Do not remove the power
plug from the wall outlet.
Freezing will be prevented regardless of whether the operation switch is ON or OFF.
Take the measures below for extremely cold temperatures*.
Outside temperature including wind chill factor less than -30°F (-35°C).
- W
hen supplying combustion air from
the indoors, the room temperature must be greater than 32°F (0°C)
to prevent freezing and the room inside must not have negative pressure.
This method can protect not only the heater, but also the water supply, water piping and mixing valves.
1. Turn off the power.
2. Close the gas supply valve.
3. Open a hot water xture, and keep a small stream of hot water
running. (0.1 gallon (400cc)/minute or about 0.2" (4mm) thick.)
* If there is a mixing valve, set it to the highest level.
* When linking multiple units, discharge water equivalent to
(0.1 gallon (400cc)/minute per unit.)
4. The ow may become unstable from time to time.
Check the ow 30 minutes later.
* In general, it is not advisable to run water through the unit when
it is OFF ( p. 6), but in this case freeze prevention is more important.
* Remember to set mixing valves and xtures to their original levels before using the unit again
to prevent scalding.
* If there is still a risk that the unit will freeze, drain the unit as shown on the next page.
Preventing Damage from Freezing-1
Freezing is prevented within the device automatically by the freeze-prevention heater.
If water will not ow because it is frozen
1. Close the gas and water valves.
2. Turn off the power button.
3. Open the water supply valve from time to time to check whether water is running.
4.
When the water is owing again, check for water leaks from the equipment and piping before using.
If the heater or the piping is frozen, do not use the heater or it may get damaged.
CAUTION
* In normal operation, freezing is prevented within the device automatically unless the outside
temperature without wind is below -30°F (-35°C).
- When supplying combustion air from the indoors, the room temperature must be greater than
32°F (0°C) to prevent freezing and the room inside must not have negative pressure.
* The freeze prevention heaters will not prevent the plumbing external to the unit from freezing.
Protect this plumbing with insulation, heat tape or electric heaters, solenoids, or pipe covers.
If there remains a freezing risk, contact the nearest Noritz agent.
0.2" (4mm)
thick
Hot Water Fixture

19
Drain Plugs
Each drain plug mignt not be visible if
insulation is installed around the piping.
If the water heater will not be used for a long period of time, drain the water.
Drain the water as follows:
To avoid burns, wait until the equipment cools down
before draining the water. The appliance will remain
hot after it is turned off.
High Temperature
CAUTION
Fully open all hot water xtures.
4
Open all drain plugs and drain the water out of
the unit.
1
Close the water supply
valve.
6
Close the gas valve and disconnect
the electrical power supplied to the unit.
2
3
Fully open all
hot water xtures.
Fixture
Drainage Using the Remote Controller
2
(1) Turn the power on/off button “On”.
(2)
Turn and leave open the
hot water xtures for more
than 2 minutes and close.
* If multiple units are being used,
drain two minutes for each unit.
* An 11 Error Code may appear on
the remote controller.
This is not a malfunction of the unit.
Do not turn Power ON/OFF Button OFF.
Manual Draining
Close the water supply valve
and disconnect the electrical
power supplied to the unit.
3
4
5
When the water is completely drained, replace
all drain plugs and close the hot water xtures.
5
Open all drain plugs and drain the
water out of the unit.
6
Close the gas valve.
1
When the water is completely drained,
replace all drain plugs and close the
hot water xtures.
Fixture
Fixture
(Ex. 120°F)
Do not touch with wet hands.
Do not touch with wet hands.
Drain water into a bucket to prevent water damage.
(1) Turn the power on/off
button “off”.
(2)
Press the ow meter alarm set
button for about two seconds
until the alarm sounds.
The maximum hot water
temperature will ash.
(3) Press the ow meter alarm
set button again.
(4) Press the setting button
marked “ “.
The display
will change from "oF" to "on"
after the button is pushed.
Preventing Damage from Freezing-2
To prevent damage from freezing, the water heater must be plugged into power at all times. If power is unplugged, drain the
water completely from the water heater. Then use an air compressor to remove all water from inside the unit's water piping.
It is recommended that Isolation Valves are installed on the water heater, otherwise the water connections will need to be
removed to drain the unit completely. Freeze damage due to not draining properly will not be covered under warranty.

20
Preventing Damage from Freezing-3
Turning the Unit Back On
1. Check that all drain plugs are inserted.
2. Check that all hot water xtures are closed.
3.
Follow the procedure on p.11 “Initial operation”, steps 1 through 4.
4. Make sure that the area around the appliance is well ventilated; open a window or a door if necessary.
Then, operate the unit and verify that condensate is coming out of the drain pipe.
(During normal use of the water heater, condensate will begin to discharge from the drain pipe within 15
minutes of use. However, depending on the season and/or installation site conditions, it may take longer.)
* If water does not appear at the end of the drain line, a qualied service technician must clean the
condensate line.
After the water heater has been out of use for a long time make sure that you ll
the condensate trap with water.
This is to prevent dangerous exhaust gases from entering the building.
Failure to ll the condensate trap could result in severe personal injury or death.
(By performing step 4 as described above, the condensate trap will automatically
ll itself with water.)
Be sure to do.
DANGER
/