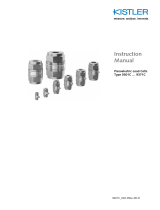
Page is loading ...

Instruction
manual
Load cells -
high impedance,
charge mode
Type 9212
9212_002-721e-07.22


Foreword
Foreword
9212_002-721e-07.22
Thank you for choosing a Kistler quality product characterized
by technical innovation, precision and long life.
Information in this document is subject to change without notice.
Kistler reserves the right to change or improve its products and
make changes to the content without obligation to notify any
person or organization of such changes or improvements.
©2000 ... 2022 Kistler Group. All rights reserved. Except as ex-
pressly provided herein, no part of this manual may be repro-
duced for any purpose without the express prior written consent
of Kistler Group.
Kistler Group
Eulachstrasse 22
8408 Winterthur
Switzerland
Tel. +41 52 224 11 11
info@kistler.com
www.kistler.com
Page 1

9212_002-721e-07.22Page 2
Load cells - high impedance, charge mode
Content
1. Introduction .......................................................................................................................................4
2. Important information ......................................................................................................................5
2.1 For your safety .......................................................................................................................5
2.2 Precautions ............................................................................................................................6
2.3 Disposal of electronic equipment ...........................................................................................6
2.4 Product Types ........................................................................................................................7
2.5 Nomenclature .........................................................................................................................7
3. Product description ..........................................................................................................................8
3.1 Supplied mounting studs ........................................................................................................8
4. Technical information, functional description ...............................................................................9
4.1 Piezoelectric measurement concept ......................................................................................9
4.2 High impedance output ..........................................................................................................9
5. Mounting and installation ..............................................................................................................10
5.1 General.................................................................................................................................10
5.2 Surface preparation ..............................................................................................................10
5.3 Mounting...............................................................................................................................10
6. Operation.........................................................................................................................................12
6.1 Charge mode load cells and charge ampliers ....................................................................12
6.1.1 The charge amplier ...............................................................................................12
6.1.2 Charge amplier operation .....................................................................................13
6.1.3 Kistler charge ampliers .........................................................................................15
6.1.4 Cable considerations ..............................................................................................15
6.1.5 Drift due to the charge amplier ..............................................................................17
6.1.6 Load cell start-up with charge amplier ..................................................................19
7. Calibration and maintenance ........................................................................................................20
7.1 General.................................................................................................................................20
7.2 Troubleshooting ....................................................................................................................20
7.3 Repairs .................................................................................................................................20
7.4 Care and cleaning ................................................................................................................21
7.5 Calibration ............................................................................................................................21

Page 39212_002-721e-07.22
Content
Total pages: 25
8. Recommended cables....................................................................................................................22
9. Storage and transit considerations ..............................................................................................23
10. Warranty ........................................................................................................................................24
11. Appendix .......................................................................................................................................25

9212_002-721e-07.22
Load cells - high impedance, charge mode
Page 4
Thank you for choosing a quality product from Kistler. Please
read through this manual thoroughly to enable you to fully
exploit the various features of your product.
To the extent permitted by law Kistler accepts no liability if
this instruction manual is not followed or products other than
those listed under Accessories are used.
These instructions describe Kistler Type 9212 high impedan-
ce, charge mode load cells.
Performance features at a glance:
High impedance, charge mode
Rugged quartz force-sensing element guarantees long-
term stability
Wide measuring ranges for compression and tension
Quasi-static response
High operating temperature range: –240 ... 150 °C
[–400 ... 300 °F]
Kistler oers a wide range of products for use in measuring
technology:
Piezoelectric sensors for measuring force, torque, strain,
pressure, acceleration, shock, vibration and acoustic
emission
Strain gage sensor systems for measuring force and
torque
Piezoresistive pressure sensors and transmitters
Signal conditioners, indicators and calibrators
Electronic control and monitoring systems, as well as
software for specic measurement applications
Data transmission modules (telemetry)
Kistler also develops and produces measuring solutions
for the application elds engines, vehicles, manufacturing,
plastics and biomechanics sectors.
Our product and application brochures, in addition to our
detailed data sheets, will provide you with an overview of our
product range. All unit measurements provided are listed in
order of meters, followed by inches [in brackets].
If you require additional assistance beyond what can be loca-
ted online or in this manual, please contact Kistler‘s extensive
support organization or visit us online at www.kistler.com.
1. Introduction

9212_002-721e-07.22
Important information
Page 5
2. Important information
Compliance with local safety regulations, which may apply to
the use of power line operated electrical and electronic equip-
ment, is strongly recommended.
It is essential for you to review the following information,
which is intended to ensure your personal safety when
working with the load cells and contribute toward a long-fault-
free service life.
2.1 For your safety

9212_002-721e-07.22
Load cells - high impedance, charge mode
Page 6
2.3 Disposal of electronic equipment
2.2 Precautions
Compliance with the following precautionary measures is
vital to ensure safe and reliable operation:
Check all equipment packaging for transporation damage.
Report any damage to the transporter and to Kistler.
The equipment should be used only under the specied ope-
rating conditions and must be protected against excessive
dust and mechanical stress (shock, vibration, etc.).
Avoid high atmospheric humidity, which can lead to conden-
sation during changes in temperature.
If there is evidence that safe operation is no longer possib-
le, the instrument must be powered o and rendered safe
against accidental start-up. Safe operation is no longer pos-
sible when the product
▪ shows visible signs of damage
▪ is no longer operating
▪ has been subjected to prolonged storage under unsuitable
conditions
Do not discard old electronic equipment in municipal trash.
For disposal at end of life, please return this product to the
nearest authorized electronic waste disposal service or
contact your Kistler sales oce for disposal instructions.

9212_002-721e-07.22
Important information
Page 7
2.4 Product Types
This instruction manual summarizes Kistler Type 9212 high
impedance, charge mode load cells. Please reference the
corresponding data sheets for each type for more detailed
specications.
Series Type 9212
Fig. 1: Series Type 9212 load cell appearance
2.5 Nomenclature
Table 1: Manual nomenclature
Throughout this manual, special designations and
nomenclature are used for terms and concepts relating to
load cells. These are identied in Table 1.
Term Definition
Fs Full-scale
pC picoCoulomb, a unit of electrical charge equivalent to
1 X 10-12 Coulomb

9212_002-721e-07.22
Load cells - high impedance, charge mode
Page 8
3. Product description
Kistler load cells are compact, sensitive and fast response
sensors for measuring dynamic and short-term static forces.
Both compression and tension forces can be measured.
Typical applications include measuring fatigue-test tension,
rocket engine thrust, clamping force and forces transmitted
by vibration exciters. In simple terms, this unit could also be
described as a force probe.
These load cells are designed for bottom surface mounting
with an upper force application surface. The units dier in
conguration by the location of the cable connector. Series
Type 9212 feature the connector positioned radially. This
latter conguration, along with a low threshold and 2 260 kg
[5 000 lb] measuring range, simplies widely conducted drop-
testing by measuring forces instead of shock levels.
A self-generating piezoelectric sensing element is used
internally to produce a charge output. As with most high
impedance, charge mode sensors, the sensitivity of these
load cells is expressed in terms of the ratio of the electrical
output to applied force (i.e. –pC/lbf or –pC/N).
Being a high impedance device, a charge amplier and low
noise cabling are required.
Charge ampliers are available in several forms. Desktop
and rack mount units usually oer extensive operator
convenience for range selection, dierent time constants
and signal ltering. Miniature in-line versions in single and
multiple channels are useful where load cells are remotely
located or in industrial environments. While the use with
Kistler charge ampliers is always preferred, other models
can be used. A typical measuring system is shown in Section
4.2, while a summary of Kistler charge ampliers is included
in Section 6.1.3.
3.1 Supplied mounting studs
The following supplied mounting studs are listed in Table 2.
Load Cell
Type No.
Item Description Qty. Kistler
Part No.
9212 Mounting stud, threading –
10-32 to 10-32 2 8402
Table 2: Supplied mounting studs

9212_002-721e-07.22
Technical information, functional description
Page 9
4. Technical information, functional description
Piezoelectric load cells convert force into an electric charge.
The charge derived by the load cell is proportional to the
force acting on the internal piezoelectric element. The
element consists of precision-cut quartz. Quartz has been
used by Kistler in instrumentation since 1954 and continues
to be the ideal choice for load cells. Like other piezoelectric
materials, quartz when subjected to a force, generates a tiny
charge. This type of element is quite unlike a strain gage
sensor, which is passive and requires a source of excitation
to function. Thus, this type of load cell is said to be active or
self-generating.
4.1 Piezoelectric measurement concept
High impedance load cells require an external charge
amplier (item 3 in Fig. 2). A low noise cable must be used
between the sensor and charge amplier (item 2 in Fig. 2).
4.2 High impedance output
Fig. 2: Diagram of a high impedance load cell system
Item 1 High impedance sensor (pC/lb or pC/N)
Item 2 Low noise coaxial cable
Item 3 Charge amplier
Item 4 Output cable
Item 5 Read-out or analysis equipment

9212_002-721e-07.22
Load cells - high impedance, charge mode
Page 10
5. Mounting and installation
5.1 General
For proper operation of load cells, care must be taken during
the installation process. Careful installation will result in opti-
mal accuracy and reliability.
5.2 Surface preparation
Surfaces on or between which a load cell is mounted must
be at. Ground or lapped mounting surfaces are desirable.
For maximum accuracy and frequency response, the rough-
ness should not exceed 4.06 X 10⁻⁴ mm [16 μin] and atness
should be 25.4 X 10⁻⁴ mm [0.0001 in]. Severe uneveness
can cause stress concentration leading to sensing element
damage.
If the load cell is to be placed between two surfaces, the two
surfaces must be parallel at all times and should not impart
more than 45 kg [100 lb] transverse load.
5.3 Mounting
Load cells are mounted with supplied studs, either one or two
depending on the type. The stud requires a mounting surfa-
ce hole tapped with a 10-32 thread for Type 9212. The hole
depth must be such that the stud will not bottom out. Table 3
indicates the Kistler order number for studs. These studs are
machined from Beryllium Copper for high strength and low
modulus of elasticity, coupled with high elastic limits. Substi-
tutions should be carefully evaluated before use.
The following stud installation guidelines should be followed:
1. Drill and tap an adequate hole to ensure a ush mount of
the load cell. Make sure the stud does not bottom out. A
chamfer should be machined at the top of the mounting
hole to ensure that the base of the load cell makes full
contact with the mounting surface.
2. Completely clean the surface prior to mounting.
3. Apply a thin coat of silicon grease to both the load cell
and mounting surface.

9212_002-721e-07.22
Mounting and installation
Page 11
4. Always use the proper sockets and a torque wrench
when installing load cells. Tighten to the torque specied
on the individually supplied calibration certicate or as
specied in Table 3. DO NOT OVER TIGHTEN.
Load Cell Type Upper/lower studs N·min-lb
9212 yes/yes 2.25/2.7 20/24
Table 3: Recommended mounting torque
The load cell may be mounted in any attitude, and generally
without regard for top or bottom orientation. Top and bottom
surfaces are indicated by the appearances of the upper and
lower mounting surfaces (bosses). The load cell Series Type
9212 top has a single ring and the bottom has two annular
rings.
It is perfectly acceptable to use a single mounting stud with
Series Type 9212. When working with very small forces, a
single stud is recommended. With small forces the mass of
the outer body and base could interfere, aecting frequen-
cy response or masking the results of impact tests. In such
cases, mount the load cell on its bottom only and apply the
force to the top.
For compression force measurement alone, the installation
can be simplied by eliminating one of the mounting studs.
Both the mounting surface and the surface that bears the
load cell must remain at and parallel.
Care should be taken in any installation to ensure that the
cable is not stressed, kinked or otherwise damaged. The
coaxial cable furnished is a special low noise variety, not to
be confused with ordinary coax cables. A very high insulation
resistance must be maintained within the circuit from the load
cell to the charge amplier. Anything that will jeopardize the
transfer of the load cell output charge to the charge amplier
will degrade load cell performance.

9212_002-721e-07.22
Load cells - high impedance, charge mode
Page 12
Load cells use piezoelectric, self-generating materials. The
quartz plates that make up the sensing elements produce an
electrical charge when stressed by the force being measured.
Piezoelectric load cells are a well established class of sensors
and are made in high impedance, charge mode styles and
low impedance, voltage mode types. These load cells are in
the charge mode family of sensors. Charge mode sensors
do not require any power supply to operate. Voltage mode
sensors contain internal electronics in addition to the sensing
element that does require a power source.
This section covers the interface, signal conditioning,
frequency response inuences and cable considerations.
6. Operation
The key characteristic of charge mode operation is the very
high impedance requirement. From the charge output of the
load cell, through the cable and to the charge amplier input
connector, the high insulation level must be maintained. If the
insulation resistance is compromised, excessive zero-drift
may occur.
Charge ampliers complement the load cell, aording a high
degree of exibility. Kistler's versatile laboratory charge ampli-
ers have sensitivity adjustment and multi-ranging capability.
6.1 Charge mode load cells and charge ampliers
6.1.1 The charge amplier
Since load cells exhibit a high impedance output in the
range of 10^13 ... 10^14 Ohm, an amplier with a high input
impedance is required. High impedance voltage ampliers
were once used but, since the introduction of the charge
amplier by Kistler, voltage ampliers are seldom used
anymore in piezoelectric applications.
Charge ampliers are associated with high impedance,
charge mode sensors. Charge ampliers should not be
confused with couplers which power and amplify signals from
low impedance, voltage mode sensors. There is also a class
of electronic units called dual mode ampliers. These are
combination units that accept both charge mode and voltage
mode sensors.

9212_002-721e-07.22
Operation
Page 13
6.1.2 Charge amplier operation
The charge amplier consists of a high-gain inverting voltage
amplier with a MOSFET or JFET at the input to achieve high
insulation resistance. As the load cell, input cable and charge
amplier are interconnected and the individual components
blend to form a single circuit.
Charge ampliers are designed in several variations to
accomplish the measurement task in the most cost-eective
manner. Charge ampliers dedicated to a particular applica-
tion often do not require user adjustment and take the form of
a sub-assembly. Such units are inline connected and may be
single or multiple channel depending on system complexity.
In contrast, a load cell used for research and development
purposes will require a full featured charge amplier for exi-
bility and convenience. Some features, such as adjustable
scaling, contribute to making the load cell more useful and
adaptable while others, such as ltering, improve the useful-
ness of the data. In any measurement situation, the charge
amplier selected should be based on the application and
load cell requirements.
Fig. 3: Circuit of a charge amplier and load cell
Location Description
CtLoad cell capacitance
CcCable capacitance
CrRange Capacitor
Rt
Range capacitor insulation – this value varies by switching
from short (109Ω), medium (1011Ω), to long (1013Ω)
RiInsulation resistance
q Charge from load cell
VoOutput voltage
A Open-loop gain

9212_002-721e-07.22
Load cells - high impedance, charge mode
Page 14
A simplied equivalent diagram of the accelerometer, input
cable and charge amplier is shown in Fig. 3.
Two circuit features of the charge amplier play key roles. Cr
is a range capacitor bridging the amplier input and output.
Rt is the insulation resistance of that capacitor. This value is
range switch selectable as indicated in Fig. 3.
Neglecting resistance momentarily, the level of output voltage
Vo is equal to the amount of charge produced by the load cell
divided by the capacitance of the feedback or range capacitor
Cr.
In actual operation, the range capacitor value in Fig. 3 is
adjusted by a charge amplier control labeled as range. For
the remainder of this discussion, the capacitor will be called
the "range capacitor."
The charge amplier essentially acts as a charge integrator,
which compensates the load cell’s charge with a charge of
equal magnitude and opposite polarity in order to ultimately
produce a voltage across the range capacitor. Resultingly,
a high impedance charge is converted to a low impedance
voltage.
As stated above, the charge integration process is aected
with a charge of the same magnitude and opposite polarity.
Thus, a negative charge at the amplier’s input is converted
to a positive output voltage. This is why charge mode sensors
are typically indicated with a negative output.
For simplicity sake, the resistive eects have not been consi-
dered. As shown in Fig. 3, the familiar capacitive-resistive
network is bridging the amplier input to the output. Due to
this network, a time constant is introduced into the discharge
rate of the range capacitor. Time constant is dened as the
discharge time of an AC coupled circuit. In a period of time
equivalent to one time constant, a step input will decay to
37 % of its original value. Therefore, the time constant (TC)
of a charge amplier is simply:
TC = Rt CT
The rst of two undesirable inuences on charge ampli-
er output is this time constant capacitor discharge rate.
The second inuence is drift. Drift, as dened here, is the
undesirable change in output signal level over time which
is not a function of the measured variable. Drift in a charge
amplier is caused by a low insulation resistance Ri at the
input or by internal leakage current of the input MOSFET or
JFET.

9212_002-721e-07.22
Operation
Page 15
Very practical measuring consequences are associated with
the duration of time constants. The longer the time constant,
the better the low frequency response and the longer the
useable measuring time.
As the operation of the load cell is closely associated with
the charge amplier, proper selection of a charge amplier is
essential. While it is always preferable to use a Kistler charge
amplier, other units may not operate with the load cell satis-
factorily.
6.1.3 Kistler charge ampliers
Kistler oers a comprehensive line of charge ampliers. If
the user is utilizing these instruments, they are designed for
compatibility with all load cell charge mode accelerometers.
The chart below provides a listing of available charge ampli-
ers. Please request data sheets on specic models.
Type Description
5010
This series of bench type single channel charge ampliers is the most versatile of the
Kistler line as it is dual mode and can accept low impedance, voltage mode sensors as well.
Push-button, keypad controls for sensitivity, range, operate/reset, time constant and select-
able ltering; also rack mountable.
5015 Universal single-channel charge amplifier with charge input, Piezotron input (option) and
remote control via RS-232C or IEEE-488.
5018 Universal analog charge amplifier, optional Piezotron input; RS-232C & USB interface;
extremely wide charge and frequency range; outstanding noise performance.
5039 This series of small single and dual range charge amplifiers is furnished with BNC/TNC con-
nectors in a choice of ranges. Enclosures are shock resistant and rated to NEMA 4X.
6.1.4 Cable considerations
As has been noted in the charge amplier discussion, the
lowering of the insulation resistance of the input circuit Ri,
indicated in Fig. 3, seriously compromises the operation of
the load cell to measure short term quasistatic events. The
main functions of the input cable are to connect the load cell
output to the charge amplier, without leakage, attenuation
or pickup of interference.

9212_002-721e-07.22
Load cells - high impedance, charge mode
Page 16
The relatively low signal and the need to maintain an ultra-
high insulation level combine to require a care level above
what is normal for low impedance, voltage mode measu-
ring systems. Maintaining the insulation level requires that
ordinary human body oils and moisture do not touch most
areas of the load cell cable connector. A high cleanliness
level is needed to keep connector surfaces absolutely clean.
The consequence of a lower than 10^12 Ohms insulation
level is a loss of output so great that measuring may not be
possible. A low insulation value could lead the user to believe
the load cell is not functioning properly.
Low noise cables should always be used when using charge-
mode. It is important that these cables be secured from
movement during operation. Cable movement can generate
triboelectric noise causing possible measurement errors.
When using load cells, the user should observe the following
precautions.
Compliance with the following precautionary measures is
vital to ensure safe and reliable operation:
▪ Make certain the uoropolymer insulator of all input
plugs are clean and not touched with the ngers. Al-
ways keep the BNC connectors clean and dry. Clean with
approved cleaners or a spray-on contact cleaner using a
paper tissue that does not shed bers.
▪ Short cables prior to connection to the input of the
charge amplier. A charge can be present on the cable's
end with sucient energy to cause damage to the input
FET amplier.
▪ Short the unit into the reset mode when connecting
the load cell to the charge amplier. Failure to do so
may result in damage to the input circuit.
▪ Connect cabling from the output BNC connector to the
appropriate read-out or recording instrumentation as
required.

9212_002-721e-07.22
Operation
Page 17
Fig. 4: Drift of the charge amplier
6.1.5 Drift due to the charge amplier
Any drift detectable at the output of the charge amplier may
be due to one (or more) of the following causes (see Fig. 4).
Cause 1 Drift due to insucient insulation resistance in
the internal charge amplier feedback loop.
Cause 2 Drift due to damaged or defective MOSFET in
input stage (positive or negative going).
Cause 3 Drift due to low insulation resistance at the input
of charge amplier.

9212_002-721e-07.22
Load cells - high impedance, charge mode
Page 18
Remedies for Fig. 4 can be obtained by trying the following
measures:
Cause 1
Distinctive sign: Exponential decreasing of the signal.
• Set the [Time Constant] to 'Long' since the [Medium] and
[Short] settings show the same drift as a low insulation
resistance in the feedback loop.
• If the trouble persists, a low insulation resistance in the
selected range capacitor is the cause.
Cause 2
Distinctive sign: Polarity of the drift does not depend on
the polarity of the zero oset at the input.
A small drift, as specied in the technical data, is normal and
given by the very nature of the charge amplier.
Cause 3
Distinctive sign: Polarity of the signal depends on the
polarity of the zero oset at the input.
Most probable cause is a low insulation resistance in the load
cell circuit. A check may be performed with the Type 5493
insulation tester.
• Clean load cell plug or replace load cell; clean load cell
cable (cable connections) or replace it.
Cause 3 is easily diagnosed by disconnecting the load cell
and its cable from the charge amplier and connecting a
charge calibrator. It may also be a result of low insulation re-
sistance of the input circuitry, which will require servicing.
/


